Transition from OpenTok to Vonage API Dashboard
Overview
This document will help a current OpenTok user transition their account and projects to the Vonage Customer Dashboard. It includes information needed by your Transition Manager, steps to migrate data from one platform to another, points that require customer intervention, and finalizing the migration.
You should follow this guide in order unless directed otherwise by your Transition Manager.
Depending on your account type and usage, a dedicated Transition Manager may not be assigned. In such cases, customers can proceed with the self-service migration steps, with support available for technical questions if needed.
Before You Start
Before you start, ensure that you:
- Have started the migration discussion with your account manager and have been assigned a Transition Manager.
- Have signed up for a Vonage Developer Account.
- Have identified internal developers who can make the needed code changes.
1. Gather Information for your Transition Manager
During your initial discussions with your account manager and Transition Manager, you will need to provide some information in terms of what you would like to transition over. For some customers, this will be straightforward, but for customers who are doing service work on behalf of other customers you may need to determine information like the following:
- OpenTok account owner email.
- OpenTok Project IDs.
- Your new Vonage Developer Account API Key.
Your Transition Manager will send you a form to fill out with all of the needed information.
2. Wait for your Transition Manager to Link your Accounts
Once all of the required information has been gathered, your Transition Manager will schedule some internal processes that will migrate your main account settings from your OpenTok account to the new Vonage Developer account. This process may take a few days to be fully resolved, and you will receive an email letting you know that your Vonage Developer account has been linked to your OpenTok account and that you can begin transferring your projects.
3. Update your Billing Information
Once your accounts are linked, you may need to enter your billing information into the Vonage Customer Dashboard. If you are using a credit card as a payment method, you can update this information on the Billing and Payments page. If you are using a different payment method, your Transition Manager will help with moving the information to the new billing system.
4. Sync your OpenTok Projects
Once your account is properly linked, you will see a banner at the top directing you to transfer your projects. You can click on the button in the banner, or navigate manually to the transition page by going to the "OpenTok Transition " menu option under "Build".
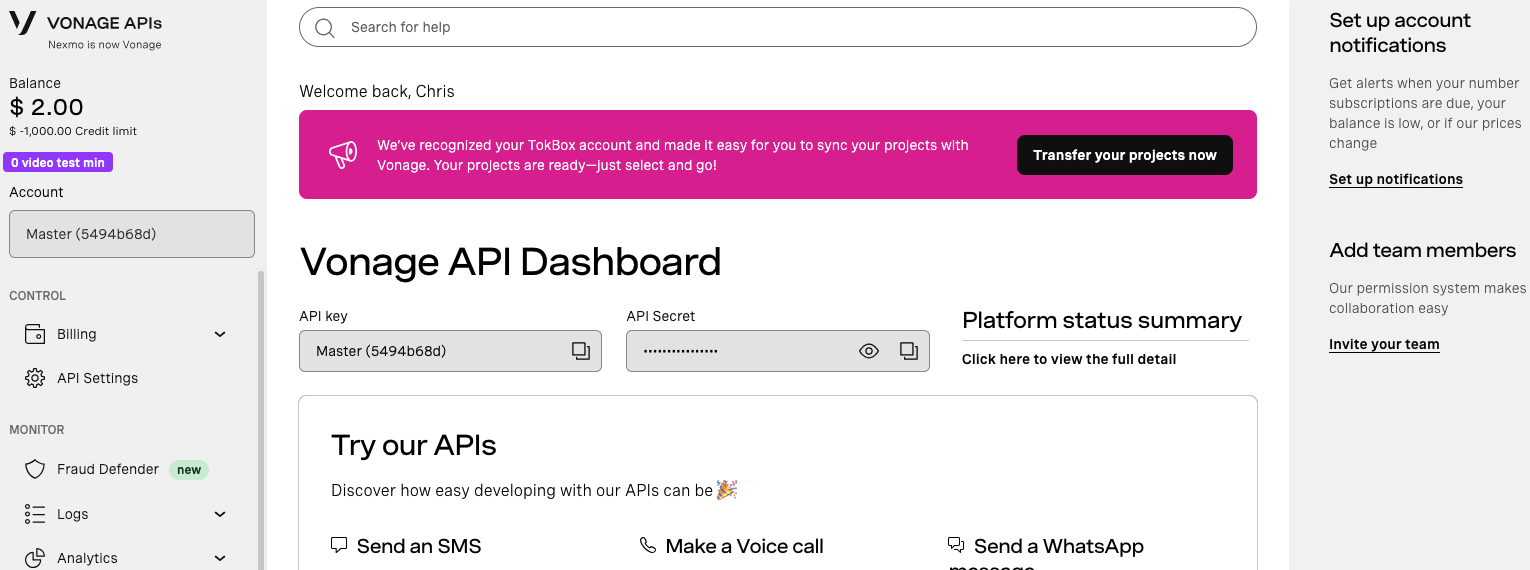
Either way will bring you to the OpenTok Transition Console. This will give you a list of your existing OpenTok projects, and you can choose which projects you would like to transfer.

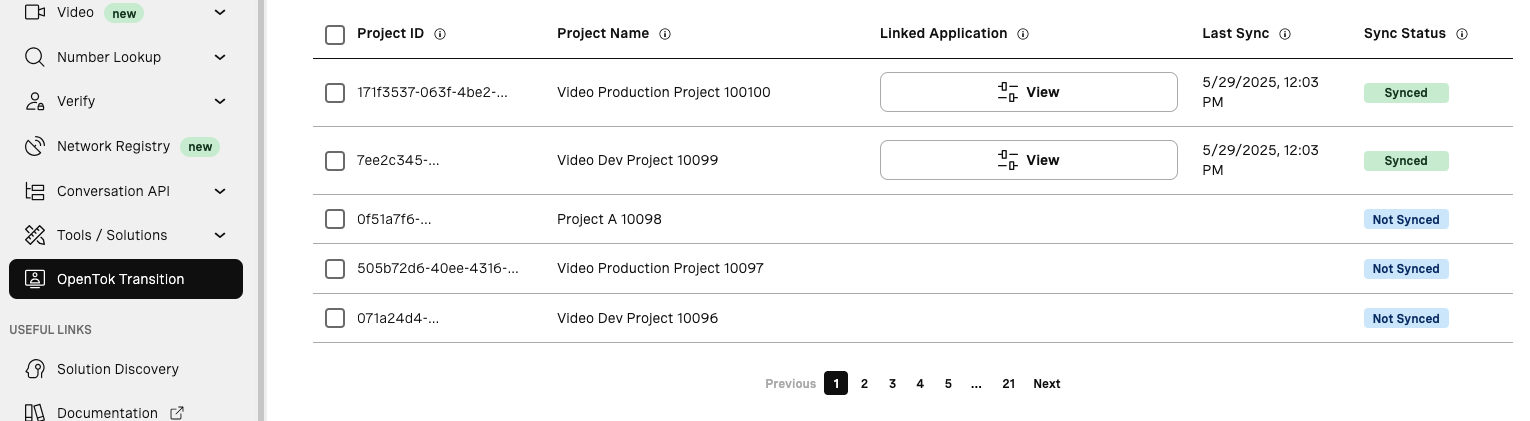
You can choose which projects you would like to transfer over. This is useful if you have some development setups that you want to test before syncing your entire list of projects. Select your projects and click "Sync Selected."

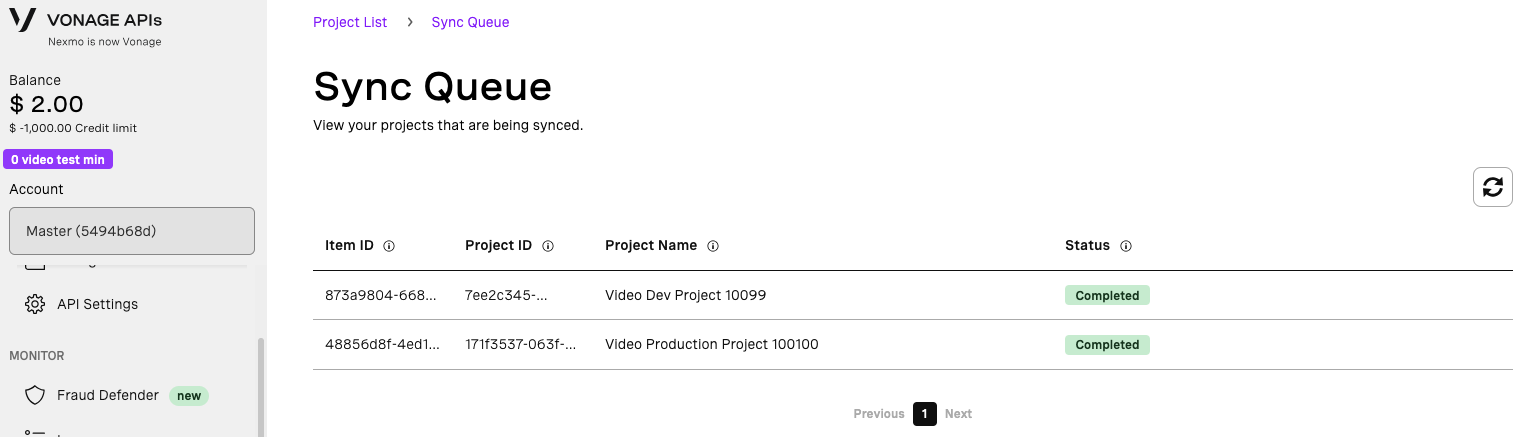
Items will be queued up, and this console will update with relevant information as your projects are synced to the Vonage Customer Dashboard.

While the process to migrate a project is fairly quick, if you have a large amount of projects that you want to sync at once it will be processed in a queue that you can check. The queue will also alert you to any issues that are encountered during the transfer.
Once projects are synced, it will add a link to view the new Vonage Application. If you click on this, it will take you directly to the Application page for the new Application. You can also reach your applications by going to "Applications" under the "Build" section of the navigation menu.
Note that this is a synchronization process, not a full transfer process. Your existing OpenTok projects will continue to function and will not be removed using this process. You can even continue to update the OpenTok project and re-sync the changes to Vonage as needed. This is a one-way process, however, so changes to the Vonage Application will not be able to be moved back.
A Vonage Application is analogous to an OpenTok Project. It contains configuration information for a specific deployment of a customer application, including authentication information.
5. Gather your new Authentication Information
Once the project is transferred to a Vonage Application, you will need to visit the Application, click on Edit, and "Generate public and private key".
While both OpenTok and Vonage have concepts of API Keys and Secrets, they are used for different things. Vonage has a variety of APIs that work at both an account level and a Vonage Application level and require different authentication mechanisms.
Vonage uses a public/private security architecture to authenticate requests to the Vonage Video APIs and through the Client SDKs, and this step will create the private key you will need for the signing. More information about how authentication works can be found in our Authentication documentation.
6. Update your Server-Side Source Code
At this point you will have two options:
- Update to the latest OpenTok Server SDKs
- Transition to the Vonage Server SDKs
6.1 Use OpenTok Server SDKs
If you have an existing application, you can update to the latest OpenTok Server SDK for your application's language. The OpenTok Server SDKs have been updated to recognize and use the Vonage Application credentials and route to the appropriate API URLs. You can change your old project API Key with the new Application ID from the dashboard, and change to pass in the Private Key instead of the API Secret.
# Existing OpenTok Credentials
const OpenTok = require("opentok");

const apiKey = '47710000';
const apiSecret = 'de449fdd7519c3a760234cf018267aaaaaaaaaaa'
const opentok = new OpenTok(apiKey, apiSecret);

# Using Vonage Application Credentials
const OpenTok = require("opentok");

const applicationId = '155e8ebc-0386-48ae-8f6e-e21e4c3c00d0';
const privateKey = fs.readFileSync('/path/to/private.key', 'utf8');
const opentok = new OpenTok(applicationId, privateKey);
6.2 Migrate to the Vonage Server SDKs
You also have the ability to start transitioning to the new Vonage Server SDKs. This will require more intervention in your back-end code, so you can plan ahead with this and continue to use the older OpenTok SDKs while you migrate.
Migration guides are available for each of our SDKs:
Note that new features may only be made available in the Vonage Server SDKs, so you should schedule your backend migration sooner rather than later. OpenTok Server SDKs will continue to be maintained for the foreseeable future in terms of maintenance and bug fixes.
7. Update your Client-Side Source Code
Your Client-side code should continue to work as normal, you will just need to make sure that you reference the new Application ID instead of the API Key and pass the newer JWT-style Client Tokens. Your application should be generating client tokens regardless of the server SDK being used, but if you are using hard-coded client tokens you will need to generate new ones and replace them in your source code. Note that this is NOT a recommended application architecture as it introduces a variety of security issues.
There are Vonage-branded client SDKs, but they are functionally the same as the OpenTok-branded Client SDKs. You should plan to move to these new packages to make sure that you can get the latest features that may only exist in the Vonage Dashboard, but there will be no code changes needed short of the authentication change.
Information about the new packages can be found at:
If at any time you run into issues, you can utilize all of the same debugging tools that you already use such as our Session Inspector. These tools are already configured to work with the Unified Dashboard and can work with your Application IDs. For a full list of debugging tools, you can check out our Developer Tools Overview page.
8. Invite Additional Users
At this point, you can invite any additional users to the Vonage Dashboard. Rather than using a role-based access system, Vonage uses a permissions-based system. Use the following chart to help determine which permissions are needed to replicate the OpenTok roles:
| Functionality | TokBox: Admin | TokBox: Developer | TokBox: Viewer |
|---|---|---|---|
| Manage API Settings | Yes | No | No |
| Manage Team Members | Yes | No | No |
| Manage Make payments and view payment history | Yes | No | No |
| View Pricing and Cost Information | Yes | No | No |
| Create and Manage Applications | Yes | Yes | No |
| Restrict payments & history | - | - | - |
| Manage team members | - | - | - |
| Manage third-party connections | - | - | - |
| Search messages/calls/requests | - | - | - |
| Manage numbers | - | - | - |
9. Test, Test, Test
Your account should now be running on the Vonage Video platform and managed by the Vonage Customer Dashboard. You are free to run any testing needed to find any issues during the migration and sync process. If you run into any issues, please reach out to your Transition Manager or support.
10. Cancel your OpenTok Account
Once everything has been migrated and you know that you no longer need access to your OpenTok account, you can work with your Transition Manager to fully cancel out your OpenTok account.