Getting Started with the Vonage Video API
Use this guide to get your first Vonage Video session running quickly — set up your account and application, then follow the quickstart to connect and stream.
Prerequisites
- Create a Vonage account.
- Create an application to obtain your Application ID and private key.
Create a Vonage Account
Register for a free Vonage account. After registering, you will be directed to the Vonage dashboard in order to create a new application.
Create an Application
After logging into your Vonage dashboard, create an application for your Vonage video project.
- From the left-hand navigation click on Applications.
- From the Applications page, click on Create a new application to create a new application.
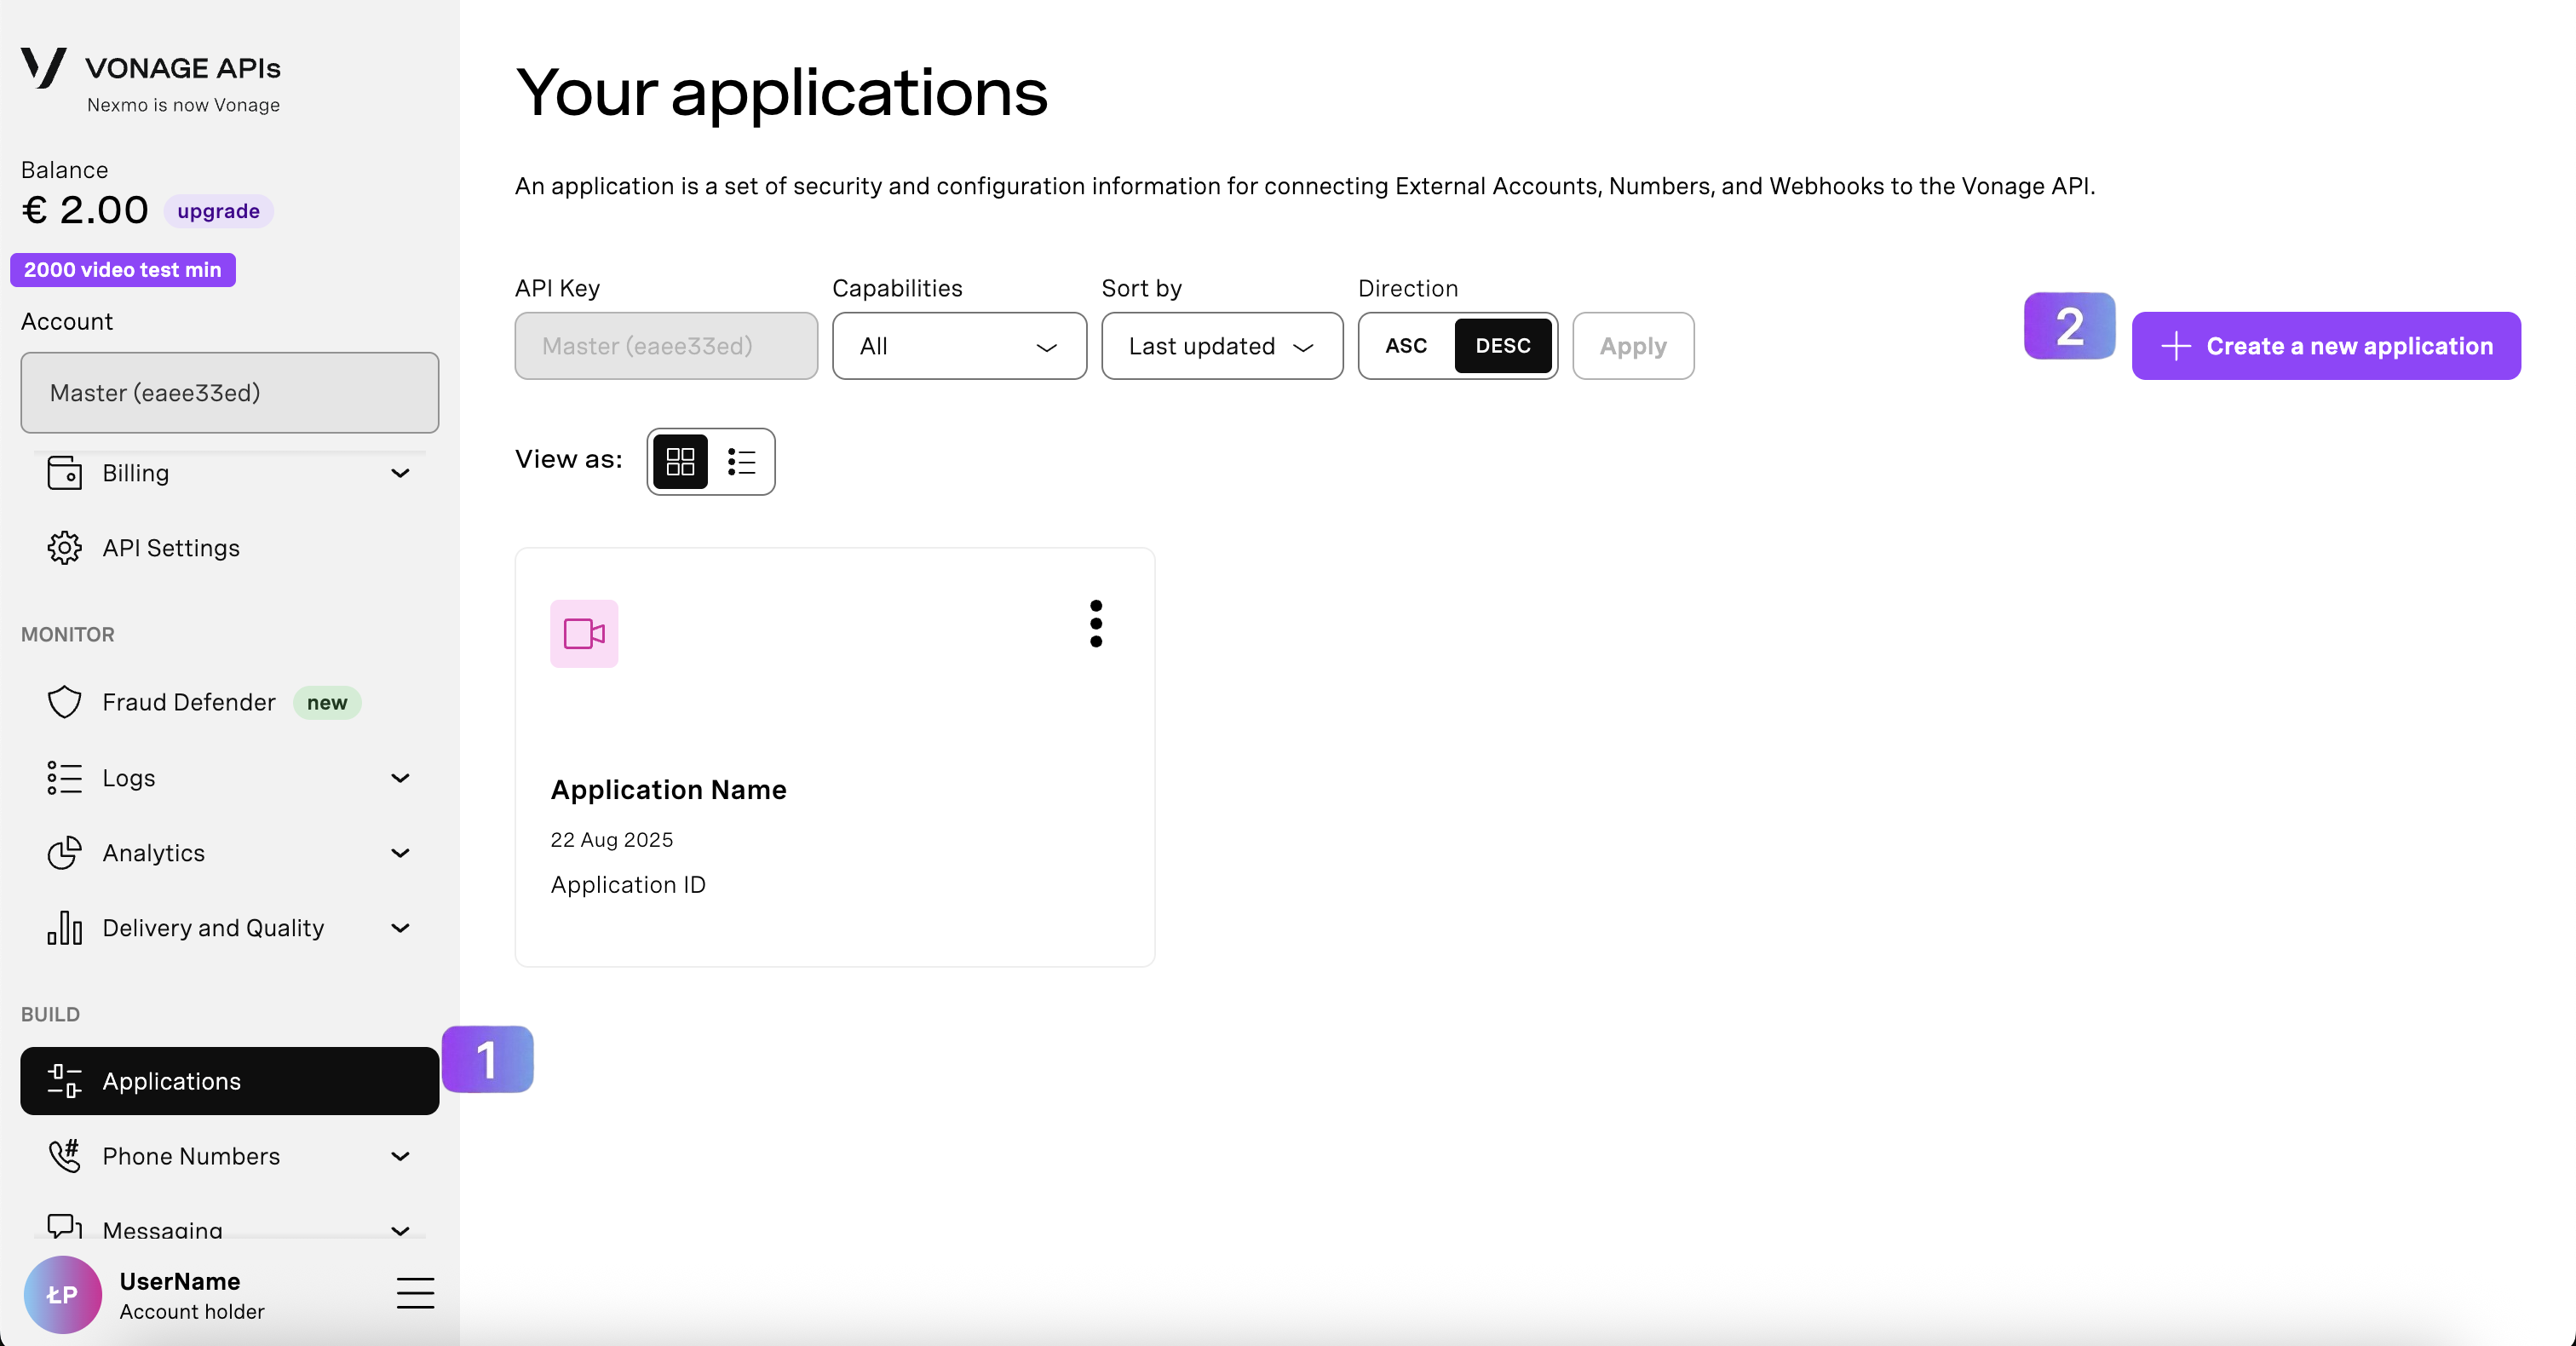
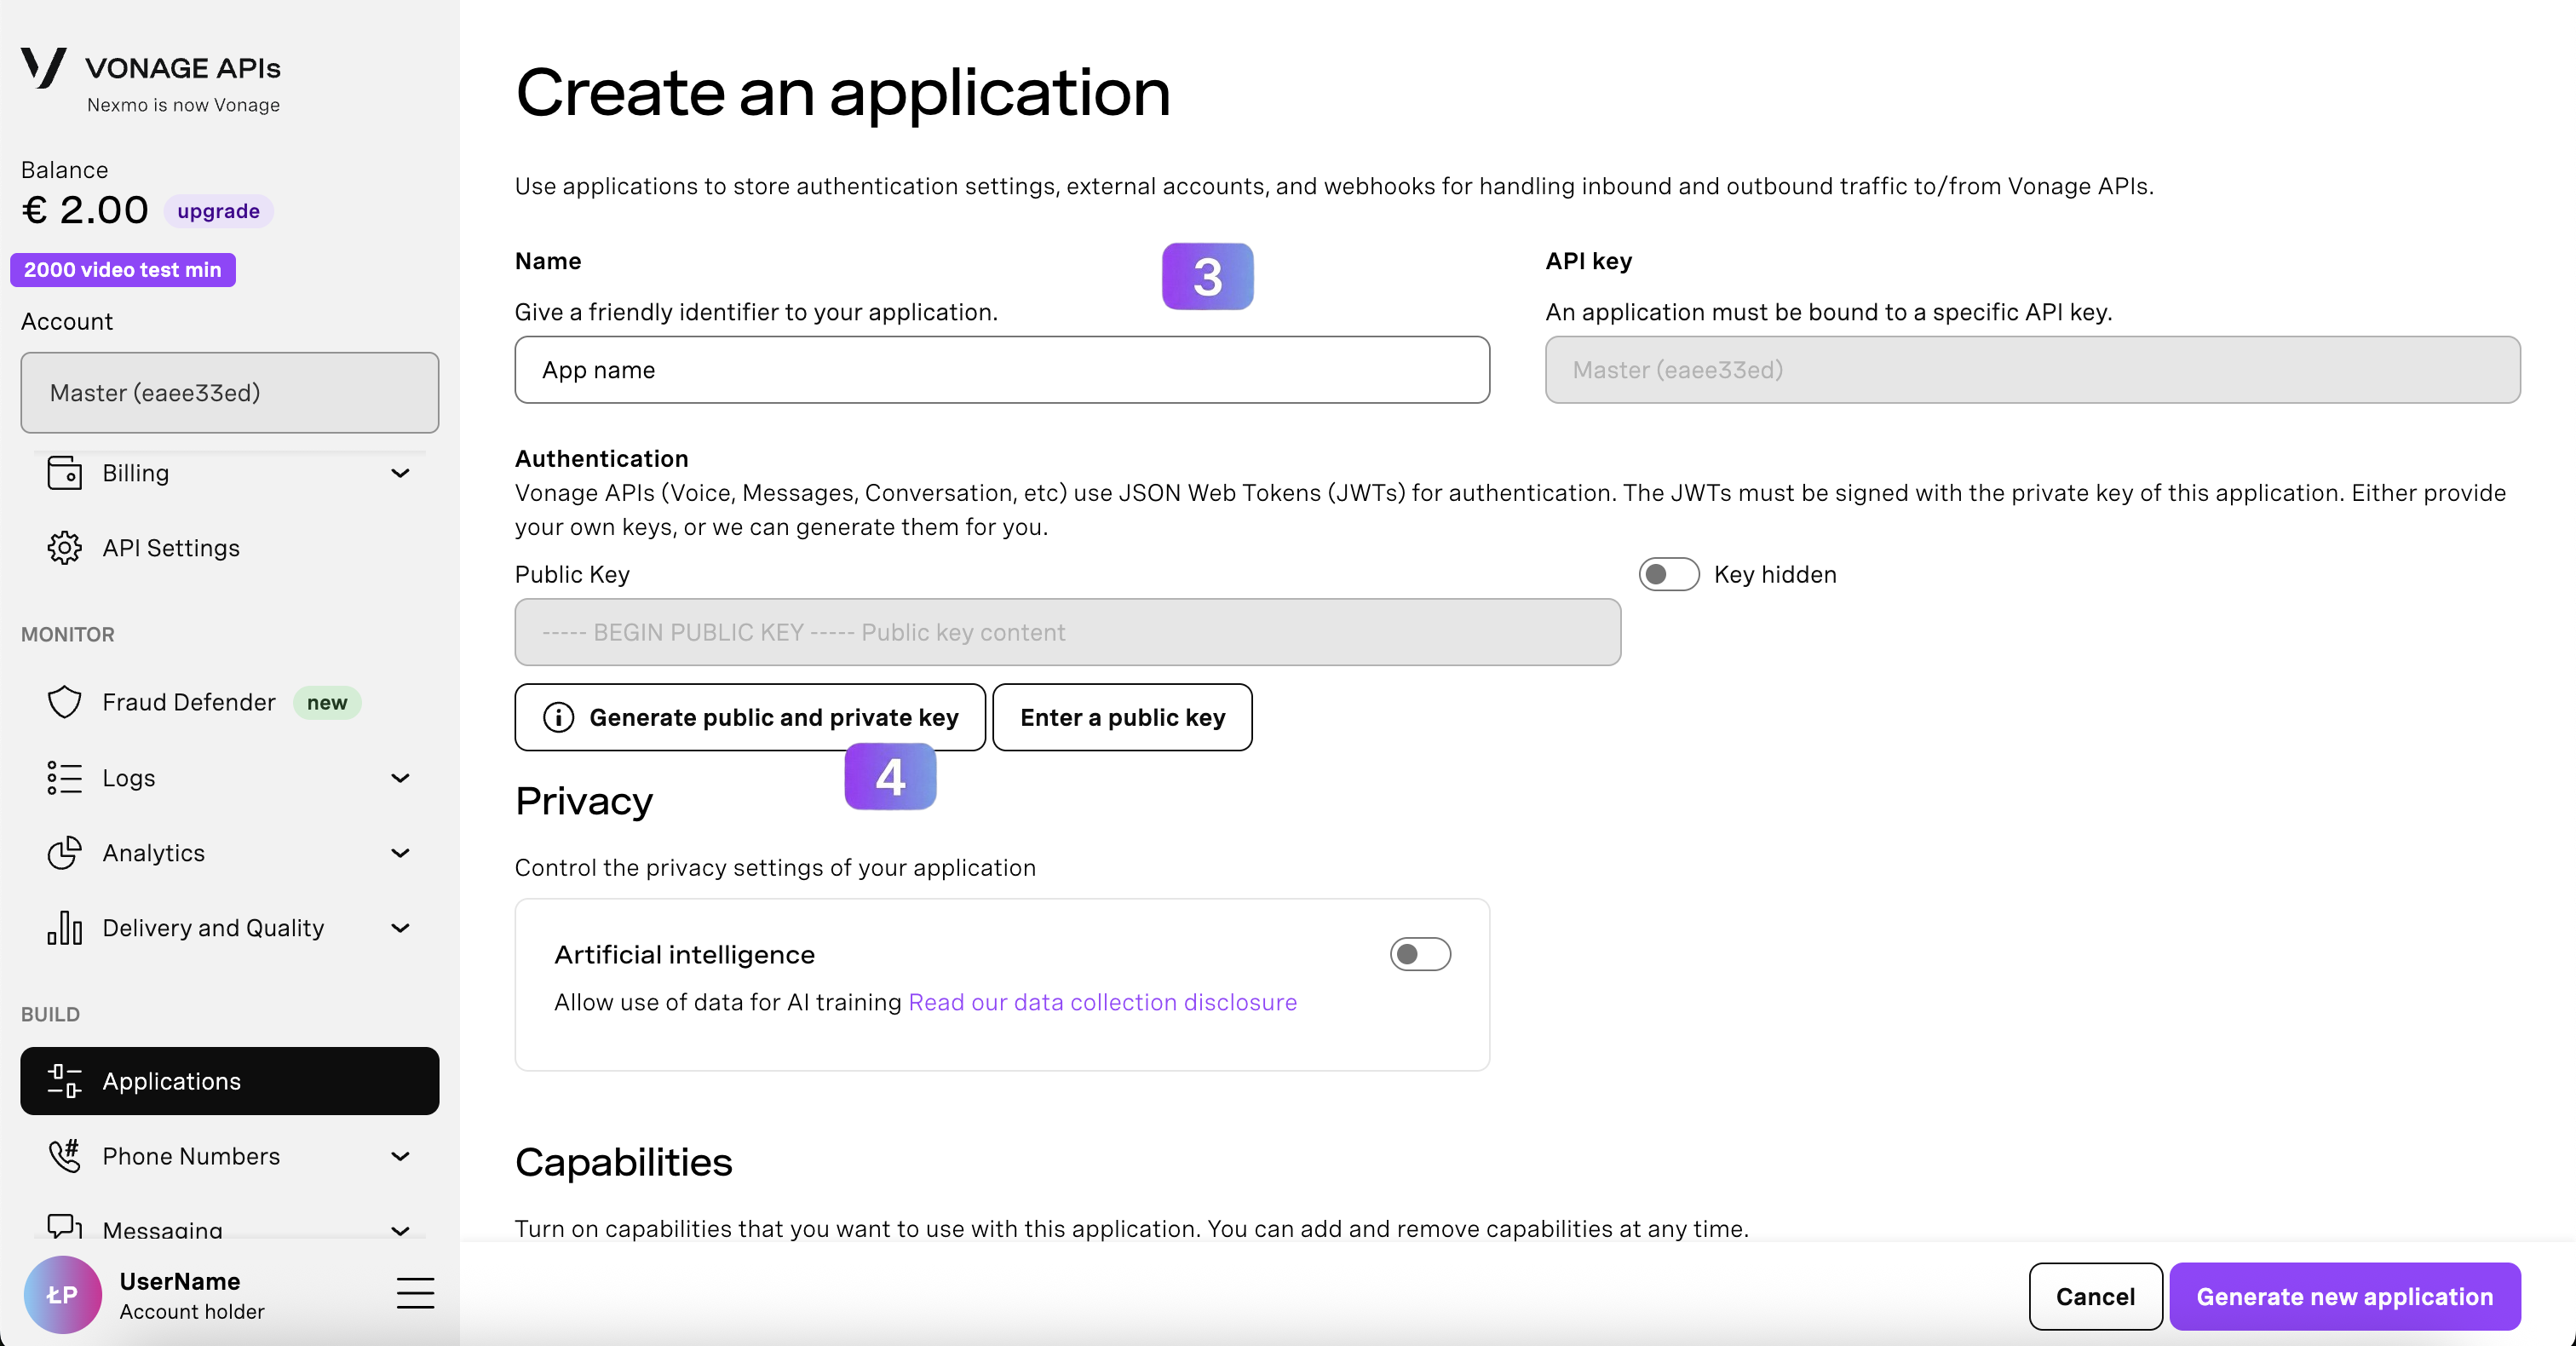
- Provide a name for your project.
- Click on Generate public and private key. You will generate a file containing your private key. Download and keep it safe, you will need it later.
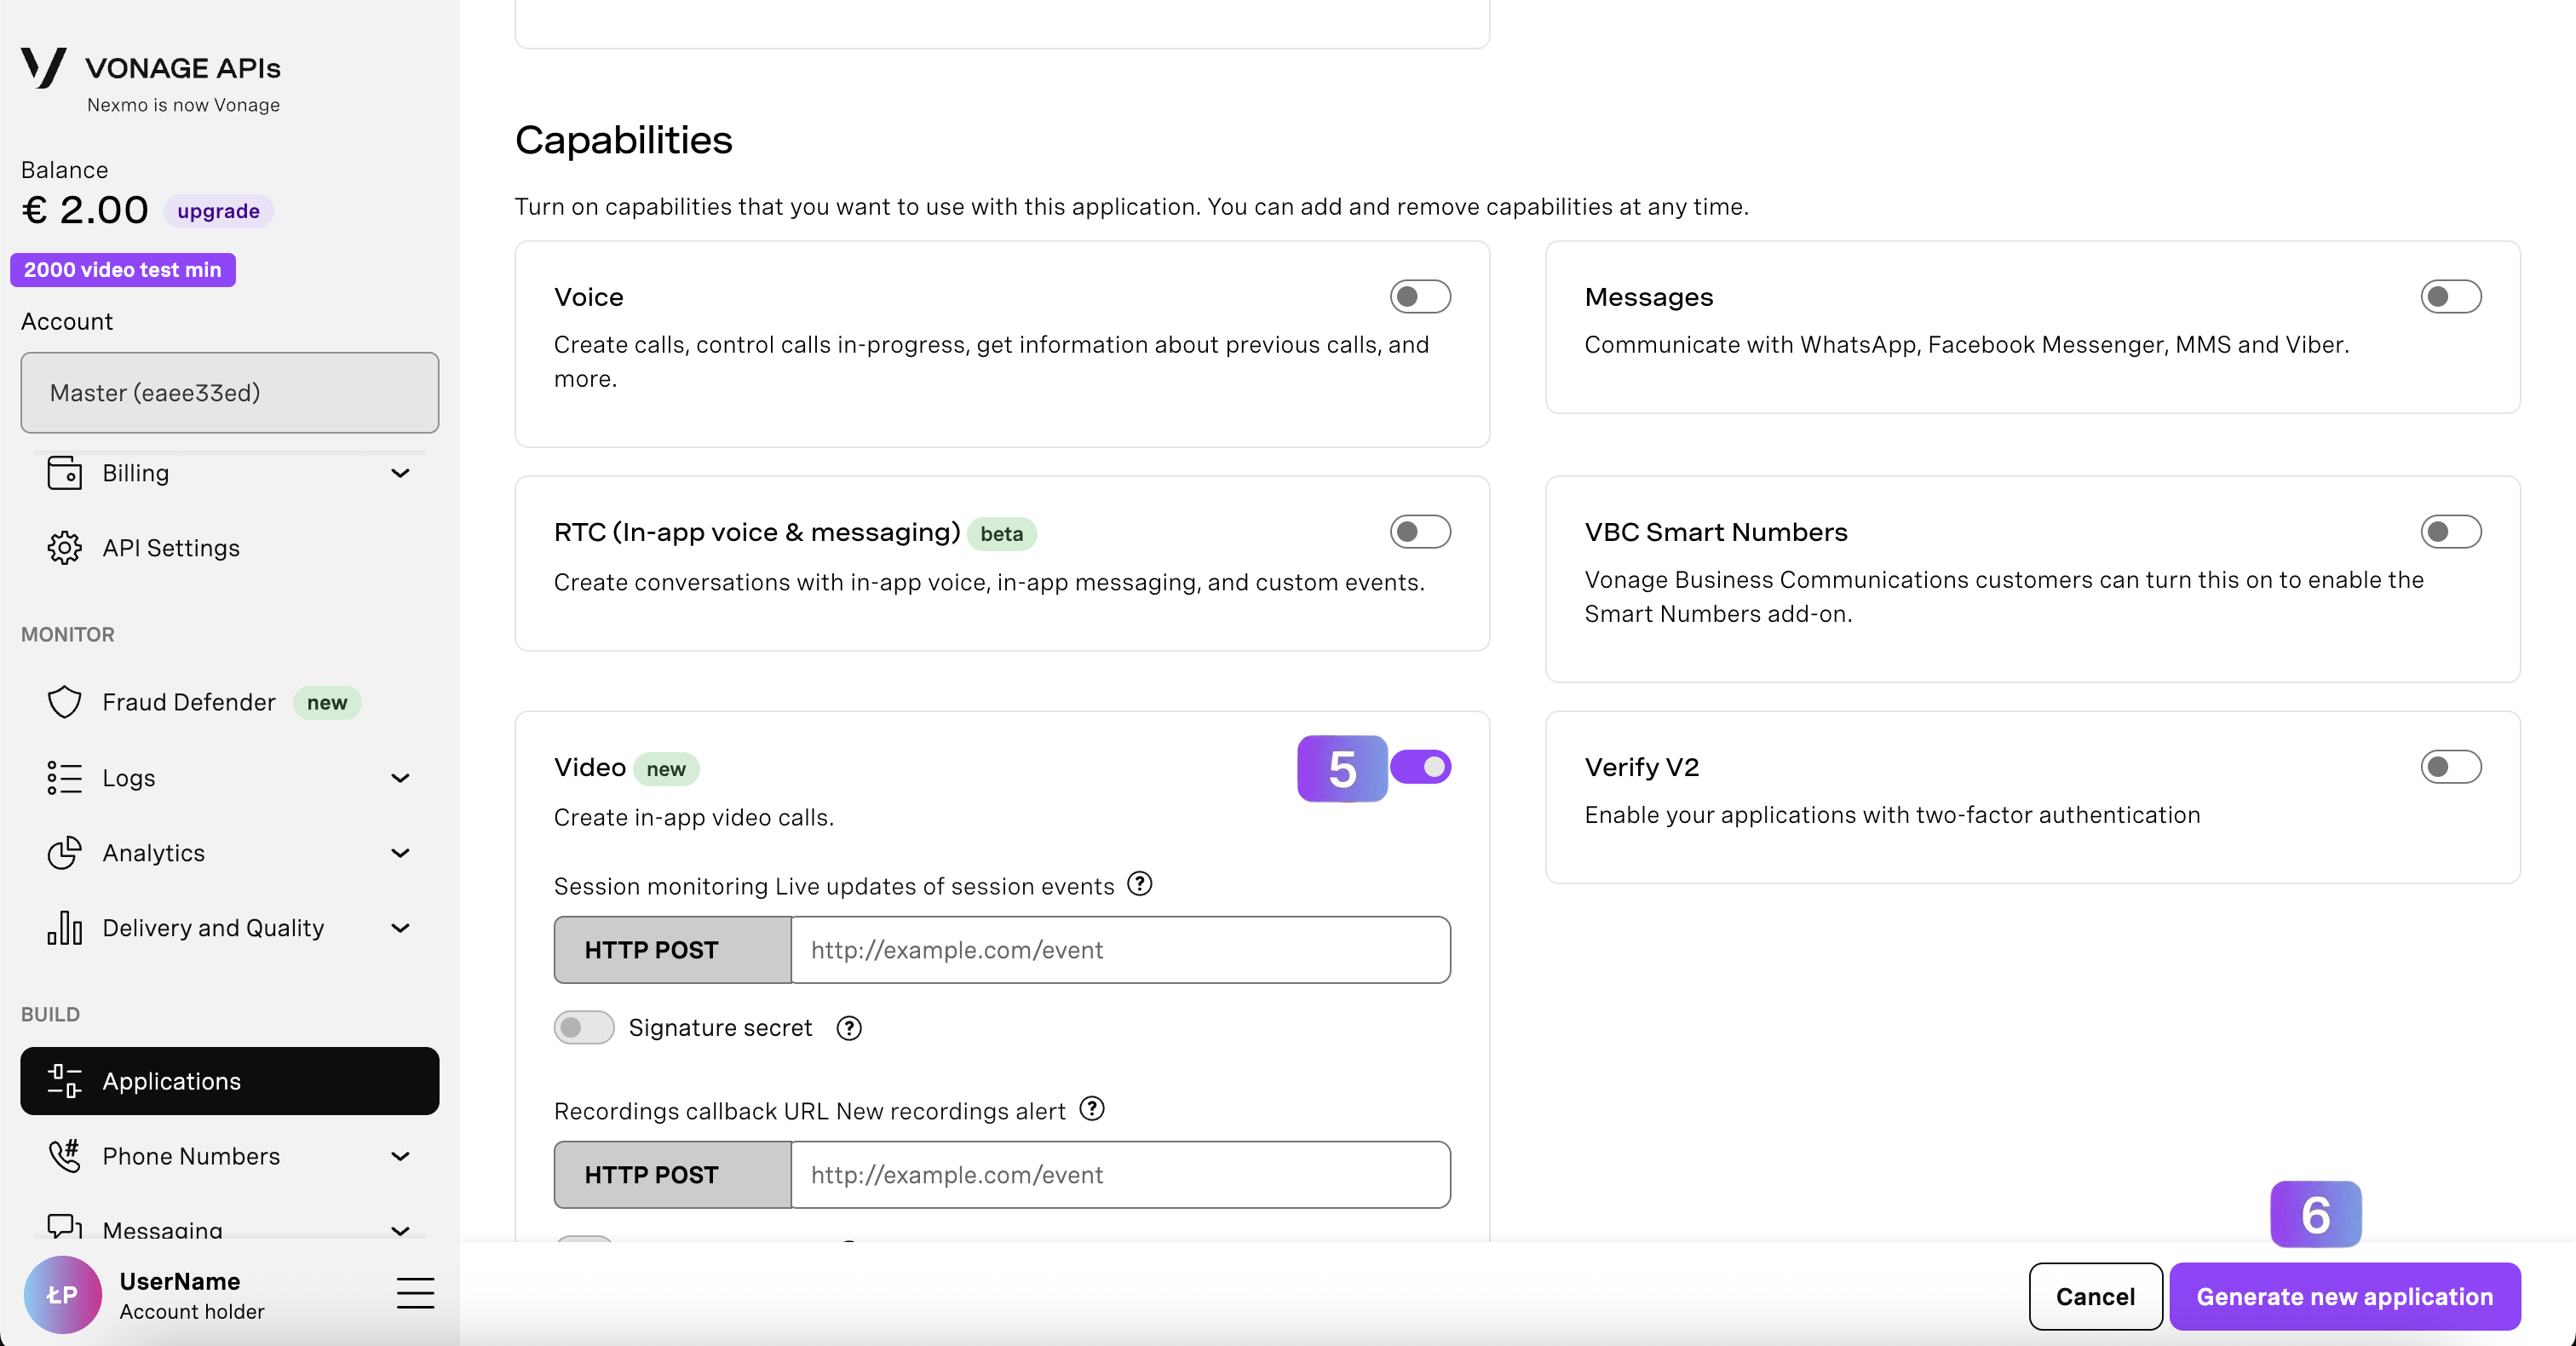
- Scroll down, to the Capabilities list. Toggle the Video capability on.
- Click on Generate new application button.
Authentication
After your application is generated, you should be able to view multiple credentials. For now you need only two of them:
- Application ID: This is a unique alphanumeric identifier for your video application.
- Private key: This key is used for JWT-based authentication. Please ensure it is kept in a secure location.
You will need them to authenticate your application.
Step-by-step: Build a Basic Video Chat
The fastest way to see the Vonage Video API in action is to build a simple one-to-one video app. The basic video chat tutorial is a step-by-step hello world that gets you connecting, publishing, and subscribing to a live session in a matter of minutes.
Follow the basic video chat tutorial to build your first working video app by picking the one that matches your client platform:
Build Your Video App
Every Video API app needs both a client and a server component. To connect your client to a session, you need:
- Application ID and private key — generated when you create the application; used for JWT-based authentication.
- Session ID — identifies the session ("room"). See the sessions guide.
- Token — short-lived credential that grants access and defines the client's role.
First, install the Video SDK of your choice, then work through the Quickstart below to generate the Session ID and Token using the Server SDKs, return them to the client, then initialize the client and connect. See joining sessions for background.
Install the SDK
Pick the SDK that matches your client platform and follow its installation guide:
- Web: Install OpenTok.js
- Android: Install the Video Android SDK
- iOS: Install the iOS SDK
- React Native: Install the React Native SDK
- Linux: Install the Linux SDK
- Windows: Install the Windows SDK
Quickstart
Follow these steps to go from backend credentials to a client that publishes and subscribes in a live session:
- Create a session — create a unique room on your server for clients to join.
- Generate a token — issue a short-lived credential (role/TTL) for each participant.
- Initialize a session and connect — set up the SDK with your Application ID + session ID, then connect using the token.
- Publish a stream — capture camera/microphone and send media to the session.
- Subscribe to streams — attach remote media to your UI and listen for stream events.
No backend yet? Try the Video API Playground to generate sessions and tokens and experiment without writing server code.
Learning Center
Discover the interactive learning paths to help you get started with the Video API. Here are a few of the courses available for the Video API — for the full list, visit the Learning Center:
| Course | Client Platform |
|---|---|
| One-on-One Video Session | Web (JavaScript) |
| Multiparty Video Session | Web (JavaScript) |
| Advanced Video Core API Features | Web (JavaScript) |
What's Next
Once your first app is running, explore these guides to add more capabilities:
- Recording videos: Learn how to capture, store, and retrieve sessions using automatic or on-demand archiving.
- Verifying webhooks: Secure your callbacks with signature secrets so you can trust every event your app receives.
- Video moderation: Enforce roles, force-disconnect, and mute participants to keep sessions under control.
- Publisher settings: Tune camera, audio, and frame-rate properties for optimal quality per device.
- Subscriber settings: Manage subscribers, respond to stream events, and customize the viewer experience.