Basic Video application with Angular and Web Components
In this tutorial, you will learn how to integrate basic video functionality into an Angular application using the Vonage Video API Web Components.
With the application, you will be able to publish your audio and video into a video call while subscribing to the audio and video of other participants.
If you would like to follow along without building the app yourself, the completed project is available on GitHub.
Overview
This quickstart guides you through:
- Importing CUSTOM_ELEMENTS_SCHEMA
- Including the Vonage Video Client SDK in your project
- Installing the Web Components
- Placing the Web Components
- Getting References to the Web Components
- Generating credentials
- Creating a Session
- (Optional) Setting Properties
Before you start
Before starting this tutorial, complete the following prerequisite if not already completed:
Part 1: Importing CUSTOM_ELEMENTS_SCHEMA
This schema allows the Angular compiler to allow Web Components in your application instead of throwing an error whenever it encounters an unrecognized HTML element.
import { CUSTOM_ELEMENTS_SCHEMA } from '@angular/core';
include in @Component
schemas: [CUSTOM_ELEMENTS_SCHEMA];
Part 2: Including the Vonage Video Client SDK in your project
The Vonage Video Client SDK allows your application to communicate with the Vonage Video API and infrastructure.
Place into your index.html
<script src="https://cdn.jsdelivr.net/npm/@vonage/client-sdk-video@latest/dist/js/opentok.min.js"></script>
OR if you install the library using npm install --save @vonage/client-sdk-video
<script src="node_modules/@vonage/client-sdk-video/dist/js/opentok.min.js"></script>
Part 3: Installing the Web Components
In this tutorial, two Web Components will be used: <video-publisher> and <video-subscribers>. <video-publisher> publishes your video and audio into the video call, where <video-subscribers> subscribes to the video and audio of any other participants and displays them in your application.
Install into your project
npm i @vonage/video-publisher

npm i @vonage/video-subscribers
Then import into your main.ts project file
import '@vonage/video-publisher/video-publisher.js';
import '@vonage/video-subscribers/video-subscribers.js';
OR use a CDN and place in your index.html file
<script type="module" src="https://cdn.jsdelivr.net/npm/@vonage/video-publisher@latest/video-publisher.js/+esm"></script>
<script type="module" src="https://cdn.jsdelivr.net/npm/@vonage/video-subscribers@latest/video-subscribers.js/+esm"></script>
Part 4: Placing the Web Components
Now, place the Web Components in your markup where you would like them to show up in your application.
For example:
<video-publisher #publisher [session]="session" [token]="token" [properties]="pubProperties"></video-publisher>
<video-subscribers #subscribers [session]="session" [token]="token" [properties]="subsProperties"></video-subscribers>
Part 5: Getting References to the Web Components
So that your application can set properties on the Web Components, you’ll need to get references to them.
@ViewChild('publisher') publisherComponent: ElementRef;
@ViewChild('subscribers') subscribersComponent: ElementRef;
Part 6: Generating credentials
- Sign up for or Log into your account.
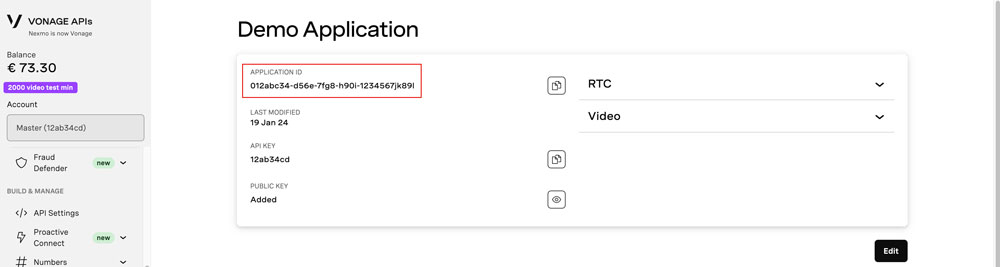
- In the left-side menu of the dashboard, click
Applicationsand select a previous application or create a new one to view the Application ID.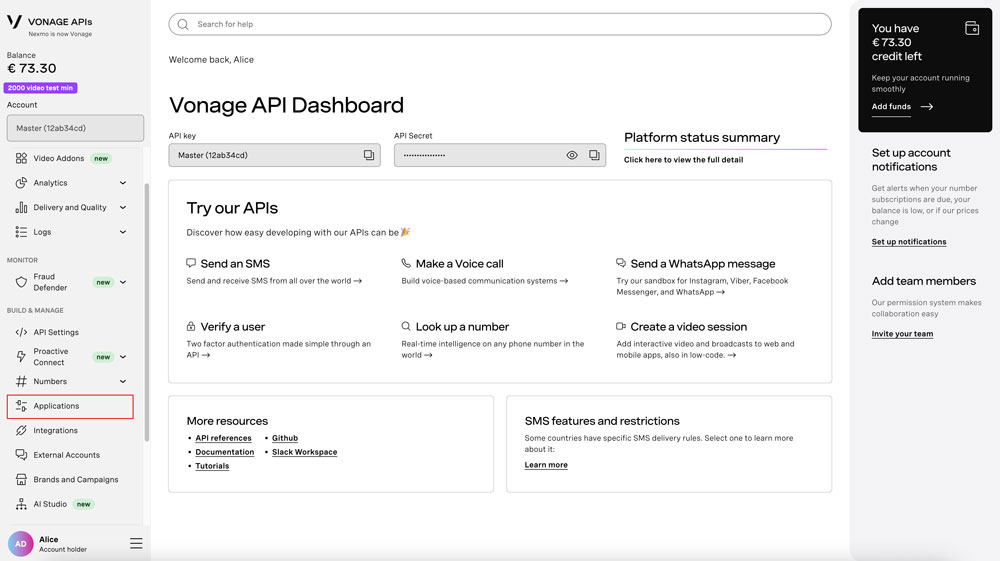
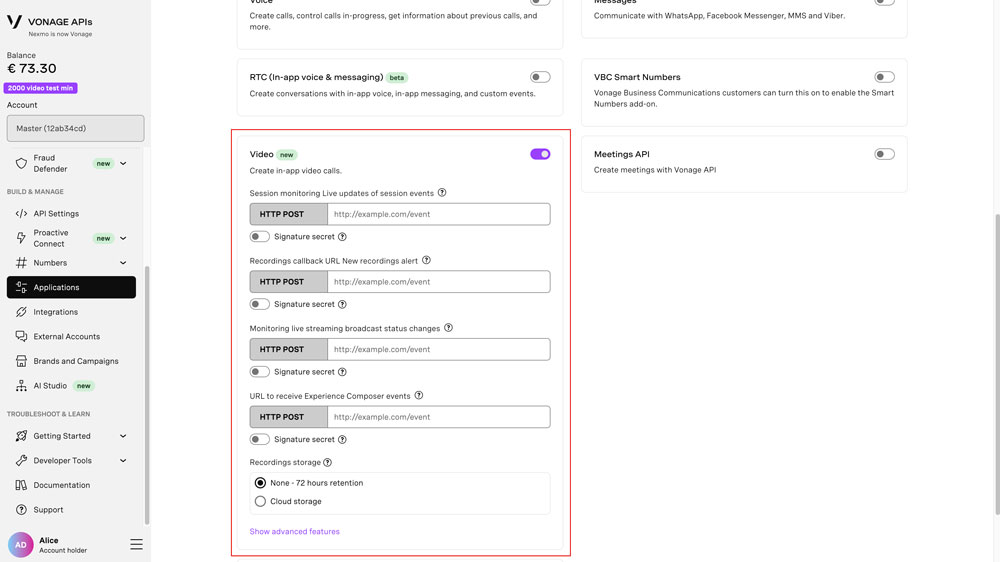
- Make sure that Video is activated
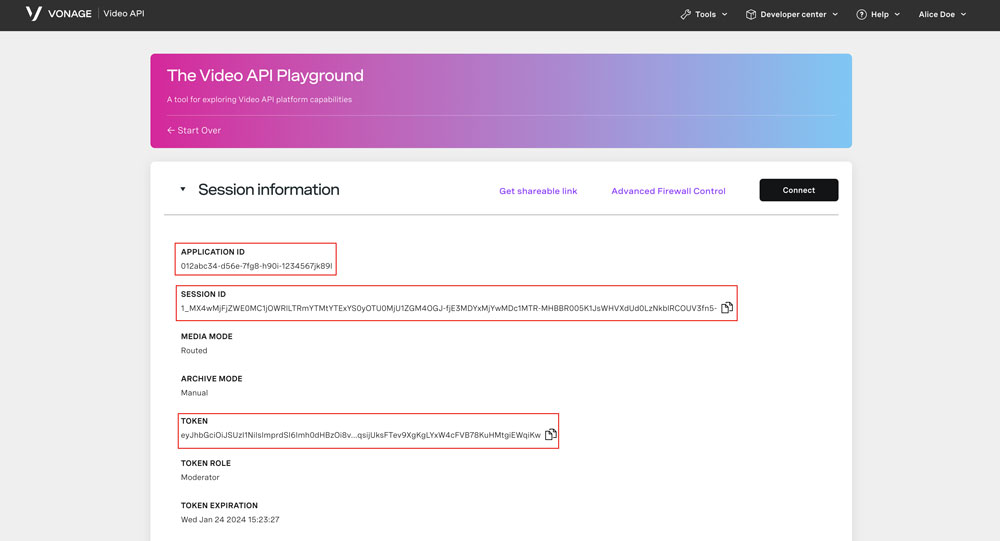
- Head over to the The Video API Playground. Either enter the Application ID or find it in the dropdown. You can leave the default values for the other options. Click "Create".
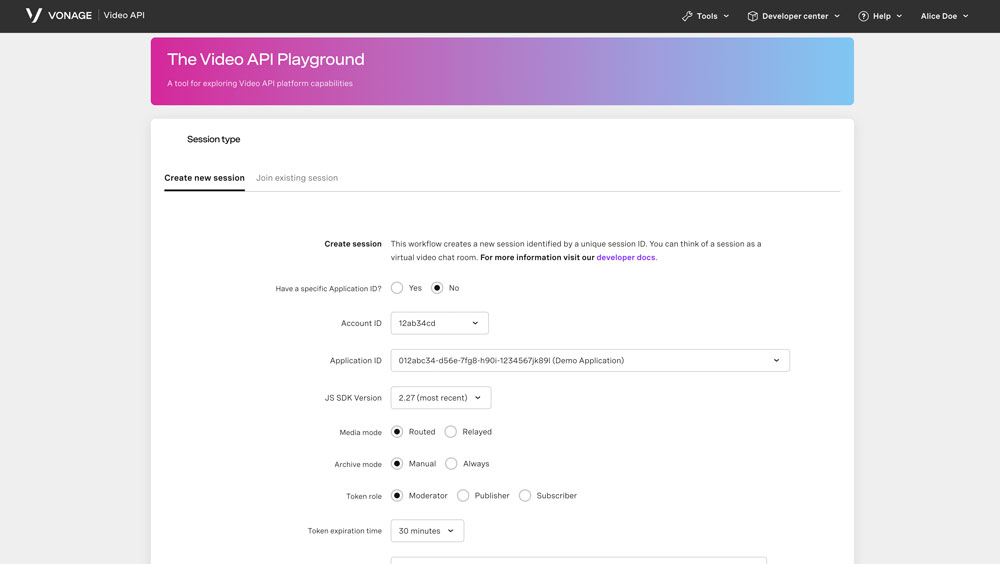
- Your Session ID and Token will be created.
Part 7: Creating a Session
A Session is essentially your video call. It is the “room” where participants/clients connect and interact with each other.
this.session = this.OT.initSession(this.applicationId, this.sessionId);
Part 8: (Optional) Setting Properties
There are some properties that can be set on the Web Components to add or change default functionalities.
pubProperties = { ... };
(see full list)
subsProperties = { ... };
(see full list)
Next steps
That’s It! Now that you've completed this tutorial, here are some more resources.
- Vonage Video API Web Components GitHub repo
- Angular and Web Components blog post
- Join us in the Vonage Community Slack