See the Demo
If you want to check out the demo before we write any code, we have a sample web server and JavaScript code to try out what a basic video call looks like. All of the code is open source and publicly available, so you can try out the demo and then use the code to make your own modifications.
Launch the Node.js Server
The video demo requires a backend server to handle things like creating client tokens for authorization and general session management. While you can build this in any language you want, we have a pre-built server you can use to get started over at the Vonage Video Learning Server (Node.js) on Code Hub. From the Developer Documentation, click on "Code Hub" in the top navigation bar, and then scroll down and find the card for "Vonage Video Learning Server (Node.js)." Click on it to open it up.
You will get a description of what this project does. For now, let's click on "Get code" so that we can load it into the Code Hub online editor. Click on "Create a new development environment." Name the workspace "Vonage Video Demo" as we can use this backend for multiple demos. This demo does require a number to be assigned to it, as the learning server supports telephone calls via SIP. While we will not use that in this demo, go ahead and click "Assign a number" to assign an existing number you have from Vonage, or purchase a new one to use with later demos.

Code Hub will create an application automatically for you, including setting up the public and private keys that our application will use. Once the workspace is created, you will be dropped into the code editor, which is an online version of Visual Studio Code. Feel free to follow along with later parts of this demo to view the code, and you can edit this code as needed for your own projects.

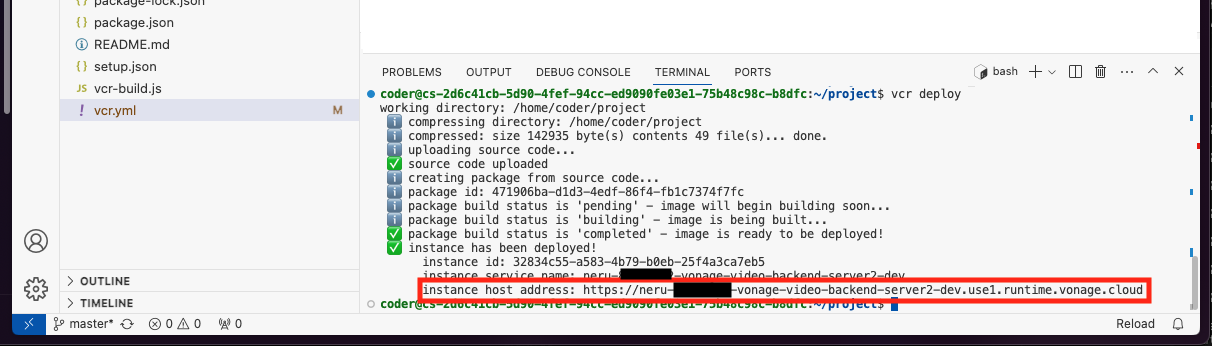
To run the application, click on "View" at the top of the editor, and then "Terminal." This will open a command line in which we can run commands. All we need to do is type vcr deploy and the code will be deployed. This will take a few moments as it packages up the code and executes it on the Vonage Code Hub servers. We will want to make note of the "instance host address" that it outputs near the end.
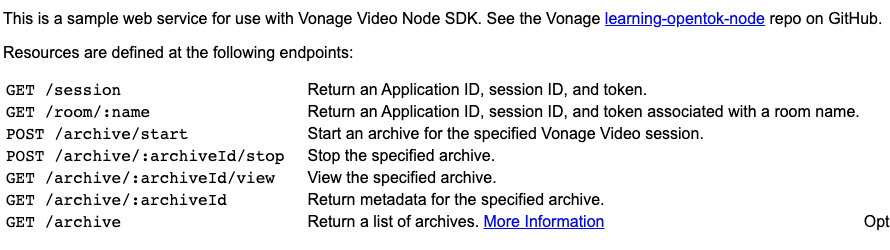
If everything is working properly, you should be able to visit the "instance host address" and be greeted with the following page:
Test the Front End
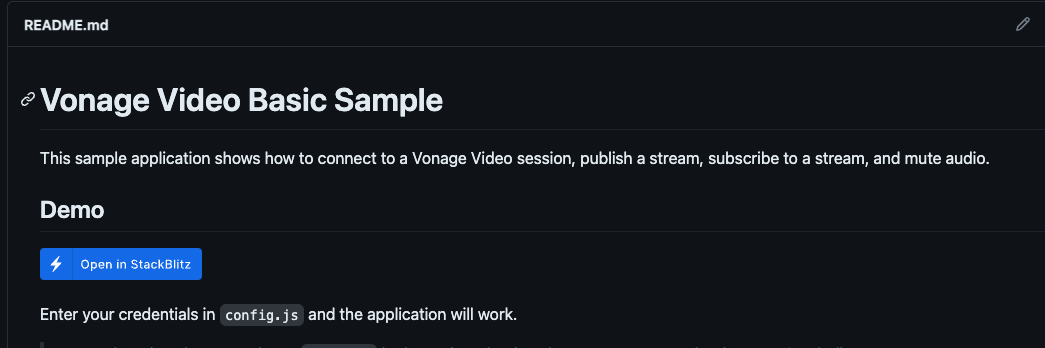
The backend server works directly with all of our pre-built demos, including this one-on-one demo. Head on over to https://github.com/Vonage-Community/video-api-web-samples/tree/main/Basic Video Chat, which is the source code for the front-end part of this demo. This sample allows two users with the URL to join a voice chat.
The easiest way to run this demo is to click on the "Open in Stackblitz" button in the README.
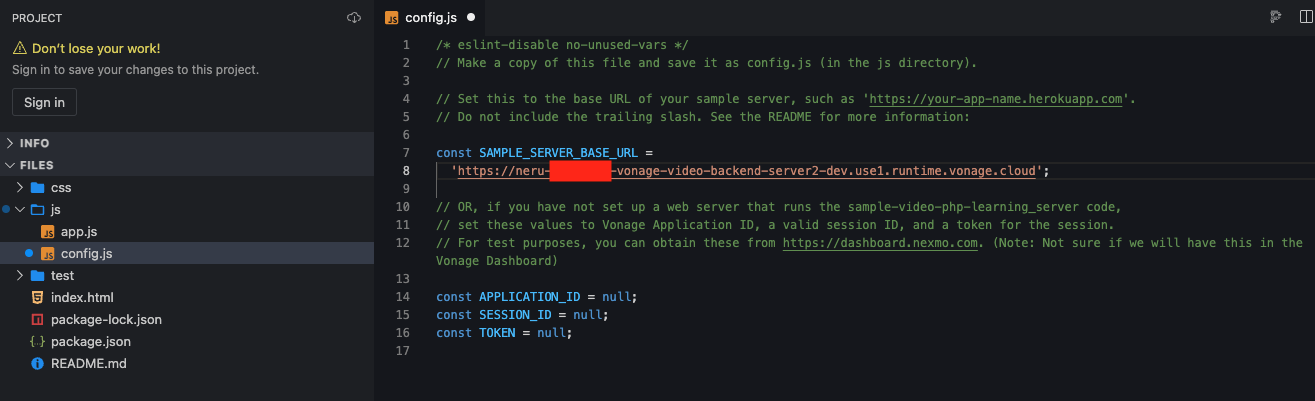
This will open the project in Stackblitz. As with the backend server, you can browse the code and modify it here if you would like. For this demo, all we will need to do is open the js/config.js file and plug in the Code Hub instance URL in the SAMPLE_SERVER_BASE_URL variable:
Once you save the file, you can refresh the demo view on the right-hand side of Stackblitz and your browser should ask you to allow your microphone and camera. Once you allow it, your image should appear in the bottom corner of the sidebar. If you copy that Stackblitz URL above the demo pane and visit it on your mobile device, another computer, or give it to a friend, anyone joining should be connected to your demo!