
RCS経由ジェミニ・ナノ・バナナで仮想試着
Google I/O 2025でAI関連の発表があった後、Geminiでビルドを始めるのがとても楽しみでした。 Google I/O 2025でAI関連の発表があった後だったので、Geminiでビルドを始めるのをとても楽しみにしていた。.このブログポストでは、Gemini Nano Banana(正式にはGemini APIでGemini 2.5 Flash Imageと呼ばれる)を使って、1枚以上の写真とテキスト命令を組み合わせて画像を生成・編集する方法を紹介する。
映画『クルーレスゲーム』で、主人公のシェールが10代の少女が学校の衣装を選ぶ日常について語り、自撮り写真を追加したアプリを見せる象徴的なシーンがある。そして、彼女は自分の服を選ぶことができ、それはとても古いコンピューターでバーチャルに表示される。自分に似合うかどうかわからないし、返品も面倒だ。このブログ記事の後は、自分のバーチャルワードローブを作ったり、買う前に服を試したり、その他いろいろな理由で、人に着せた服をプレビューできるようになるだろう!
この投稿はセットアップガイドであり、完全なステップバイステップのビルドではない。プロジェクトをクローンし、環境変数を追加し、GeminiとImagenを使用して写真に新しい服を追加するNode.jsサーバーを起動します。そして、サーバーはその結果を Vonage Messages APIを使用します。.ウェブフロントエンドはなく、あなたの電話、あなたのVonageアカウント、そしてサーバーだけです。
注 GitHub リポジトリ.
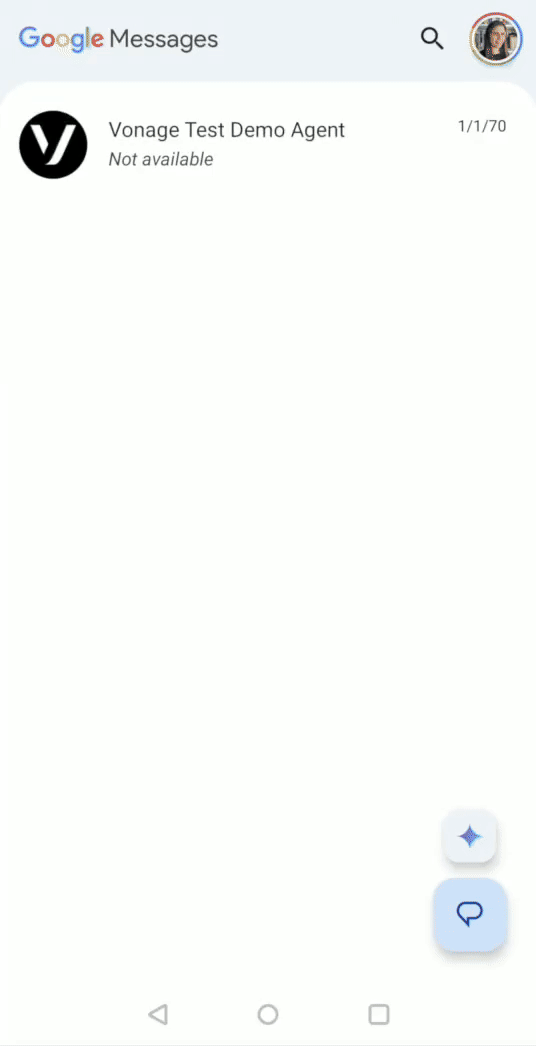 RCS Conversation
アプリの仕組みはこうだ。RBMエージェントに2枚の画像をメールする:まず、自撮り写真、次に試着したい洋服の中から1枚。
サーバーは、インバウンドのウェブフックから両方の画像を取得し、Gemini 2.5 Flash Imageに衣服を人物に合成するよう依頼し、出来上がったPNGをメモリに保存し、試着画像といくつかの返信候補を表示するRCSスタンドアロンリッチカードを返信する。
Google AI Studioに移動し、ログインして、新しいチャットを作成します。モデルを選択します。私は "Gemini 2.5 Flash Image "を使用しました。詳しくは Gemini Developer API ドキュメントページ.
コードを考えずに試してみたい場合は、相手の画像と着てほしい服を送信し、最終的な結果を会話チャットで見ることができます。 ‘<\>Get Code' をクリックし、お好みのプログラミング言語を選択すれば、RCSメッセージの送信やその他の方法で、このプロジェクトのコードを使用することができます。
A 登録済みRCSビジネスメッセージング(RBM)エージェント.Vonageアカウントマネージャーがこれを有効にすることができます。
テスト用のRCS機能付き携帯電話。
Node.js 18歳以上。
ングロク.
アプリケーションを作成するには アプリケーションの作成ページでアプリケーションの名前を定義します。
公開鍵と秘密鍵を生成」をクリックする。秘密鍵(.keyファイル)が生成されます。ダウンロードして安全に保管してください。この鍵はAPIリクエストを行う際の認証に必要です。注意:プライベートキーは、アプリケーションを保存しない限り機能しません。
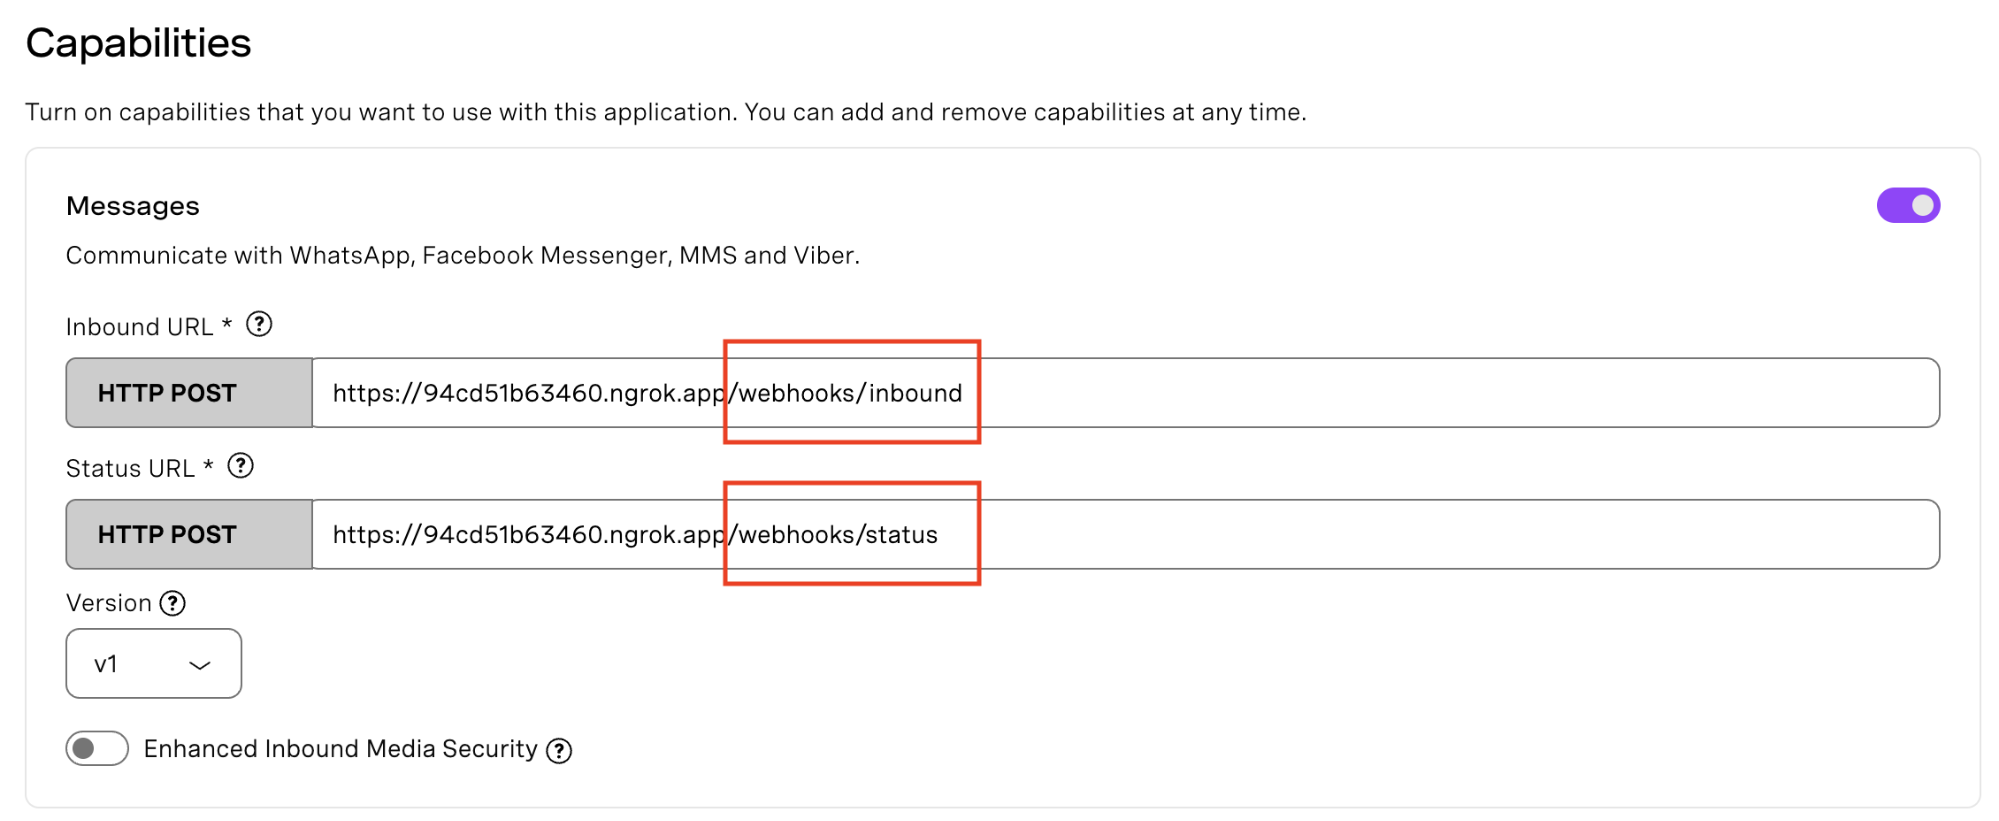
Messages'機能を選択し、必要なWebhook(イベントURL、応答URL、受信メッセージURLなど)を追加します。これらはチュートリアルの「Vonage DashboardでWebhookを設定する」で説明します。
保存してデプロイするには、"Generate new application "をクリックして設定を確定します。これでアプリケーションはVonage APIで使用する準備が整いました。
これまでngrokを使ったことがないなら ngrokでテストを始める方法を学ぶ.次のセクションの画像の下にインスタンスを実行する手順を次のセクションの画像の下に追加しました。
以下のコマンドを実行して、ngrokトンネリング・インスタンスを開始する。
ngrok http 3000出力には、https:// で始まり、.ngrok.app/ で終わる URL があります。次のステップでウェブフックを設定するために必要になるので、メモしておいてください。
Forwarding https://94cd51b63460.ngrok.app/ -> http://localhost:8000
作成したVonageアプリケーションを開き、"Edit "をクリックし、capabilitiesまでスクロールダウンし、capabilitiesの下にあるMessagesオプションを切り替え、受信メッセージとイベントのエンドポイントとしてngrokからサーバーのパブリックURLを設定します: https://94cd51b63460.ngrok.app/webhooks/inboundのようになります。 https://94cd51b63460.ngrok.app/webhooks/statusのようになります。ウェブフックについて Webhooksについてもっと知りたい方は、Vonageのドキュメントをご覧ください。.
プロジェクトをクローンし、そのディレクトリに移動し、package.jsonに記載されている依存関係をインストールする。
git clone https://github.com/Vonage-Community/blog-messages_rcs_nodejs-try_on.git

cd blog-messages_rcs_nodejs-try_on

npm install
プロジェクト・ルートに.envファイルを作成し、以下の環境変数を追加・設定する。
VONAGE_APPLICATION_ID=your-app-id

VONAGE_PRIVATE_KEY_PATH=./private.key

RCS_SENDER_ID=your-rcs-sender-id

GEMINI_API_KEY=your-gemini-api-key

VONAGE_API_SIGNATURE_SECRET=your-signature-secret

PUBLIC_BASE_URL=https://your-ngrok-subdomain.ngrok-free.app

PHONE_NUMBER=+<your_e164_number>

PORT=3000
その index.jsファイルRCSメッセージで2つの画像を受信し、GeminiのNano-Bananaモデルを使って試着マジックを行い、最終的に生成されたセルフィーのルックを含むRCS Rich cardメッセージを送り返す。あなたのプロジェクトには vonage.jsファイルファイルがあり、dotenvとVonage Client Setupが含まれている。
この handleInboundMessage(request)関数はVonageのウェブフックをリッスンし、入ってきたリクエストがVonageから来たことを安全に検証し、その署名のJWTを検証します(リクエストの検証についてもっと詳しく知ることができます。 リクエストの検証)を検証し、ユーザーのセルフィーURLと電話番号を抽出する。
私たちのアプリケーションの中核機能は generateTryOnImage(selfieUrl, clothingUrl).ナノバナナGemini APIを呼び出します。Gemini-2.5-flash-imageモデルに、正確なテキスト命令とともに両方の画像を送信する。APIは新しい最終画像を生成し、画像データをサーバーに返す。必要なスキルがなくても、写真編集ソフトウェアに匹敵する結果を、迅速なプログラム的アプローチで得ることができる。
この createAndSendRCSCard(newImageUrl, userPhoneNumber)メソッドは最終的な結果を返します。AIが生成した画像データを使用し、それを メッセージ API.
コマンドプロンプトまたはターミナルに以下のコマンドを入力してサーバーを実行する。
node index.jsあなたの ngrokトンネルがまだ実行中であること、そしてその HTTPS URL が Vonage Dashboard の Messages API Capabilities にインバウンドとステータスの両方の webhooks 用に設定されていることを確認してください。オプションとして、https://<your-ngrok-url>/test を開いて会話を開始します(これは会話スレッドを開始するだけで、画像のプリロードは行いません)。 {"ok":true,"to":"phone_number"}が表示されます。メッセージが正しく送信されていれば、RCS対応携帯電話にRCSメッセージが届いているはずです。
あなたの携帯電話から、RBMエージェントに自撮り写真(服を着る人物やキャラクターの写真)を送り、服の写真を送ります。そして最後に、編集されたプレビューが入ったRCSリッチカードが送られてくる。
これでできることは無限にある。RCSはすでにセットアップされているので 他のRCSメッセージタイプ.クイックリプライを使って、"Top / Bottom / Full look? "と尋ね、それに応じてプロンプトを条件付けることができる。
例えば、生地や照明、背景などの細部をもっとコントロールしたい場合は、Imagenを使ってさらに精密な編集をリクエストすることができる。 Imagenを使って天気を視覚化したブログ記事を作成したので、ぜひチェックしてほしい。
AIが提供するものはたくさんある。AIを使ったプロジェクトにぜひ挑戦してみてください。私たちのVonageブログで、より多くのアイデアをチェックしてください。私はAI全般にとても興奮していて、Geminiでたくさんの実験をしています。私は寝る前に子供のためにたくさんのベッドタイムストーリーを作っています。また、以下のことも学ぶことができます。 RCSリッチカードとGeminiでストーリーテリングサービスを構築するそして、私は最近Geminiの中でStorybooksをよく使っています。
ご質問がある場合、またはあなたが作っているものを共有したい場合は、こちらをクリックしてください。
登録する 開発者ニュースレター
フォローする X(旧ツイッター)最新情報
チュートリアルを見る YouTubeチャンネル
LinkedInの LinkedIn の Vonage デベロッパーページ
最新の開発者向けニュース、ヒント、イベント情報をお届けします。