Node.js
Set up The Testing Environment
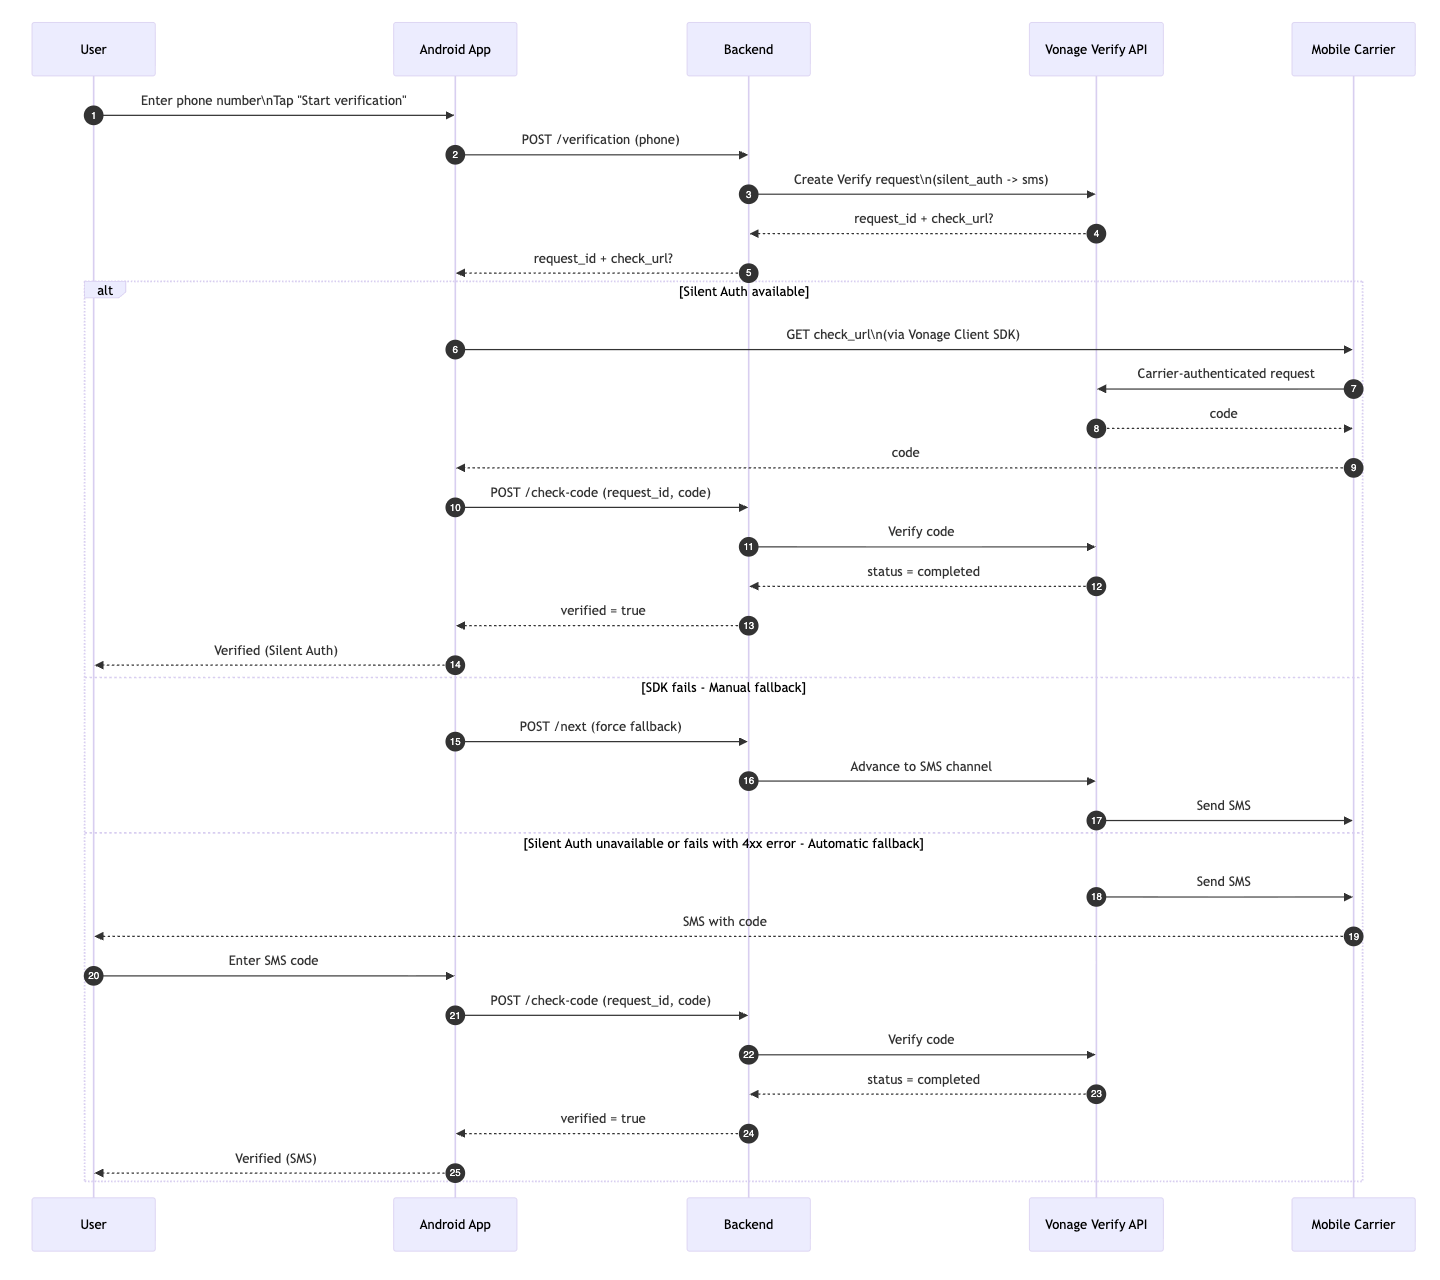
At this point, the project is fully wired end to end:
- An Android app that manages UI state and user interaction
- A Node.js backend that owns the verification flow
- Vonage Verify v2 orchestrating Silent Authentication and SMS fallback
- The mobile carrier network providing the trust signal for Silent Authentication
Prerequisites
For the Backend:
- Node.js backend running locally (
node app.js) - Backend reachable from the Android device. Use ngrok or any other similar tool, to create a public URL pointing to your local backend. Your backend should be listening for incoming petitions on
http://<your-public-ip>:3000 - Valid Vonage Application credentials in
.env
For the Android app:
- Built and installed successfully
- Internet permission enabled
- Correct backend URL configured via
local.properties - A real device running your Android application.
High-level verification flow
The following diagram shows the full verification flow at a high level, from user action to final verification result:
Getting Started with Silent Authentication
Silent Authentication takes quite a bit to understand. This tutorial shows you how to build an integration from scratch with Nodejs and Kotlin
Available on:
Steps
1
Introduction2
Backend Prerequisites3
Set Up the Environment4
Set Up Your Vonage Credentials5
Add the Vonage Verify API to the Backend6
Test the Backend7
Mobile App Prerequisites8
Set Up the Environment9
Create a Basic Android Application10
Connect with the Backend11
Use the Vonage Client SDK12
Set Up The Testing Environment13
Test the Implementation