着信コールを受ける
このコードスニペットは、スマートナンバーで着信コールを受信する方法を示しています。
前提条件
アプリケーションの作成
に行く。 アプリケーションのページをダッシュボードに表示し Name あなたのApplicationsのために。
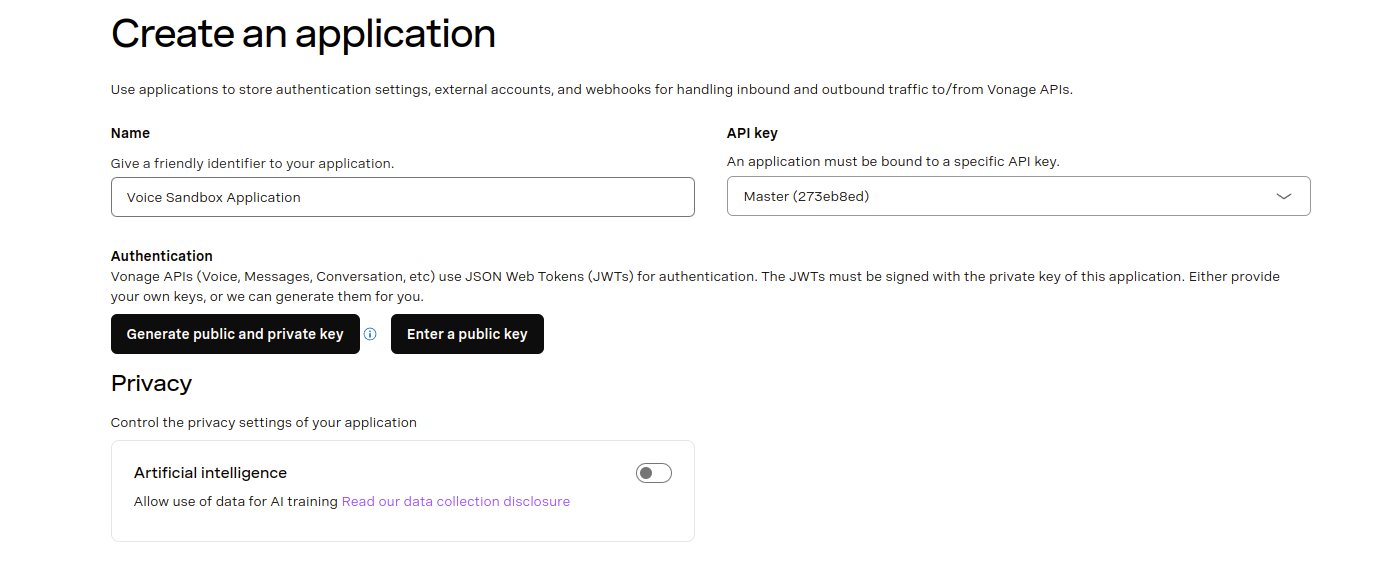
をクリックしてください。 公開鍵と秘密鍵の生成 ボタンをクリックし、ファイル private.key のあたりだ。
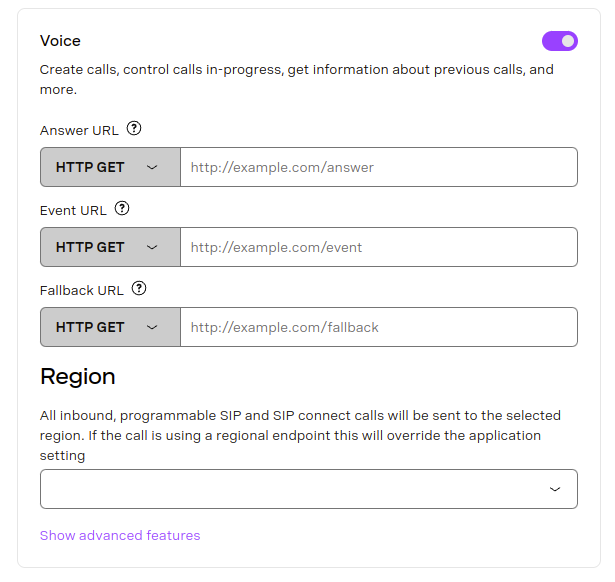
次に 声 ケイパビリティを持つ。 当面は、すべてデフォルトのままにしておいてください。
最後に 新規アプリケーションの作成 ページの一番下にある
チェックアウト Vonage CLIを始める CLIのインストールと設定方法の詳細については、こちらを参照してください。
Vonageアプリケーションを作成するには、次のコマンドを使用します:
コピー
vonage apps create 'Your application'

✅ Creating Application
Saving private key ... Done!
Application created

Name: Your application
Application ID: 00000000-0000-0000-0000-000000000000
Improve AI: Off
Private/Public Key: Set

Capabilities:
  None Enabled
コピー
vonage apps create 'Your application'

✅ Creating Application
Saving private key ... Done!
Application created

Name: Your application
Application ID: 00000000-0000-0000-0000-000000000000
Improve AI: Off
Private/Public Key: Set

Capabilities:
  None Enabled
vonage apps create 'Your application'
✅ Creating Application
Saving private key ... Done!
Application created
Name: Your application
Application ID: 00000000-0000-0000-0000-000000000000
Improve AI: Off
Private/Public Key: Set
Capabilities:
None Enabled
アプリケーションができたら、次に voice WebhookのURLを自分のものに置き換えてください:
コピー
vonage apps capabilities update 00000000-0000-0000-0000-000000000000 voice `
  --voice-answer-url='https://example.com/webhooks/voice/answer' `
  --voice-event-url='https://example.com/webhooks/voice/event' `
  --voice-fallback-url='https://example.com/webhooks/voice/fallback'

✅ Fetching Application
✅ Adding voice capability to application 00000000-0000-0000-0000-000000000000

Name: Your application
Application ID: 00000000-0000-0000-0000-000000000000
Improve AI: Off
Private/Public Key: Set

Capabilities:
 VOICE:
    Uses Signed callbacks: On
    Conversation TTL: 41 hours
    Leg Persistence Time: 6 days
    Event URL: [POST] https://example.com/webhooks/voice/event
    Answer URL: [POST] https://example.com/webhooks/voice/answer
    Fallback URL: [POST] https://example.com/webhooks/voice/fallback
コピー
vonage apps capabilities update 00000000-0000-0000-0000-000000000000 voice ^
  --voice-answer-url='https://example.com/webhooks/voice/answer' ^
  --voice-event-url='https://example.com/webhooks/voice/event' ^
  --voice-fallback-url='https://example.com/webhooks/voice/fallback'

✅ Fetching Application
✅ Adding voice capability to application 00000000-0000-0000-0000-000000000000

Name: Your application
Application ID: 00000000-0000-0000-0000-000000000000
Improve AI: Off
Private/Public Key: Set

Capabilities:
 VOICE:
    Uses Signed callbacks: On
    Conversation TTL: 41 hours
    Leg Persistence Time: 6 days
    Event URL: [POST] https://example.com/webhooks/voice/event
    Answer URL: [POST] https://example.com/webhooks/voice/answer
    Fallback URL: [POST] https://example.com/webhooks/voice/fallback
vonage apps capabilities update 00000000-0000-0000-0000-000000000000 voice \
--voice-answer-url='https://example.com/webhooks/voice/answer' \
--voice-event-url='https://example.com/webhooks/voice/event' \
--voice-fallback-url='https://example.com/webhooks/voice/fallback'
✅ Fetching Application
✅ Adding voice capability to application 00000000-0000-0000-0000-000000000000
Name: Your application
Application ID: 00000000-0000-0000-0000-000000000000
Improve AI: Off
Private/Public Key: Set
Capabilities:
VOICE:
Uses Signed callbacks: On
Conversation TTL: 41 hours
Leg Persistence Time: 6 days
Event URL: [POST] https://example.com/webhooks/voice/event
Answer URL: [POST] https://example.com/webhooks/voice/answer
Fallback URL: [POST] https://example.com/webhooks/voice/fallback
アプリケーションはその後作成され、必要な機能を持ちます。アプリケーションの作成とアプリケーション機能の追加については 申請書類.
依存関係をインストールする
npm install express
依存関係を初期化する
という名前のファイルを作成する。 receive-an-inbound-call.js そして以下のコードを追加する:
コピー
const app = require('express')()
コードを書く
以下を追加する。 receive-an-inbound-call.js:
コピー
const onInboundCall = (request, response) => {
  const from = request.query.from
  const fromSplitIntoCharacters = from.split('').join(' ')

  const ncco = [{
    action: 'talk',
    text: `Thank you for calling from ${fromSplitIntoCharacters}`
  }]

  response.json(ncco)
}

app.get('/webhooks/answer', onInboundCall)
試してみる
ファイルをあなたのマシンに保存し、以下のコマンドを使って実行する:
node receive-an-inbound-call.js
スマートナンバーに電話をかけると、音声合成メッセージが流れます。