Deploying
Vonage Cloud Runtime allows you to quickly create a running instance on the platform by deploying. Deploying bundles your source code with a configuration file, which creates a package. The package is then uploaded to the platform and becomes a running instance.
Configuration File
The configuration files gives information to the platform on how to debug and deploy your application. Here is an example configuration file:
project:
    name: app
instance:
    name: dev
    runtime: nodejs22
    region: aws.use1
    application-id: 773c2b45-c20a-4d6b-8afe-24ce29ba6f92
    entrypoint: [node, index.js]
    build-script: "./build.sh"
    capabilities:
        - voice
        - messages-v1
    environment:
        - name: VONAGE_NUMBER
          value: "44700000000"
        - name: INTEGRATION_API_KEY
          secret: MY_SECRET_API_KEY
    secrets:
        - MY_SECRET_API_KEY
debug:
    name: debug
    application-id: 884c2b45-c20a-4d6b-8afe-24ce29ba6f93
    environment:
        - name: DEBUG_VONAGE_NUMBER
          value: "4471111111"
    entrypoint: [nodemon, --inspect, index.js]
    preserve-data: false
- The project name is the unique namespace for your project which can contain many instances.
- The instance name is a unique identifier for your instance.
regionis where the instance will run.entrypointgives the Vonage Cloud Runtime platform information on how to start your application.build-scriptallows you to specify a script to run while the platform builds your application.
You can learn more about the options available to you in the configuration file guide.
Injected Environment Variables
When you deploy your project to Cloud Runtime (or use vcr debug), the platform will inject some environment variables for you along with the environment object from your configuration file.
VCR_PORT
VCR_REGION
VCR_DEBUG
VCR_CODE_DIR
VCR_REGION_ID
VCR_PRIVATE_KEY
VCR_API_REGION_ID
VCR_API_ACCOUNT_ID
VCR_API_ACCOUNT_SECRET
VCR_API_APPLICATION_ID
VCR_INSTANCE_PUBLIC_URL
VCR_INSTANCE_SERVICE_NAME
Application Address and Port
Your application must listen on the port provided by the VCR_PORT environment variable and bind to 0.0.0.0. VCR routes inbound traffic through an internal proxy — binding to localhost or 127.0.0.1 will make your application unreachable.
Node.js (Express):
const port = process.env.VCR_PORT || 8080;
app.listen(port, '0.0.0.0');
Python (FastAPI):
import os, uvicorn
port = int(os.environ.get('VCR_PORT', 8080))
uvicorn.run(app, host='0.0.0.0', port=port)
Go:
port := os.Getenv("VCR_PORT")
if port == "" { port = "8080" }
http.ListenAndServe("0.0.0.0:"+port, nil)
Java (Spring Boot):
# application.properties
server.port=${VCR_PORT:8080}
server.address=0.0.0.0
Ruby (Sinatra):
PHP:
# vcr.yml entrypoint
entrypoint:
  - php
  - -S
  - "0.0.0.0:${VCR_PORT}"
  - -t
  - public
Health Check Route
The Vonage Cloud Runtime platform expects a route, /_/health, to be available on your application which is used to check the health of your deployed application. The route should not be behind any authentication. Your application will be restarted if this route does not return a 200 status. If the route is missing it will cause your deployment to fail.
You can use this as an opportunity to perform some checks of your own, and have the platform restart your application for you automatically if it gets into a bad state by returning a non 200 status within 30 seconds.
Node.js (Express):
app.get('/_/health', (req, res) => res.sendStatus(200));
Node.js (Fastify):
fastify.get('/_/health', async () => ({ status: 'ok' }));
Python (Flask):
@app.route('/_/health')
def health():
    return 'OK', 200
Python (FastAPI):
@app.get('/_/health')
async def health():
    return {'status': 'ok'}
Go:
http.HandleFunc("/_/health", func(w http.ResponseWriter, r *http.Request) {
    w.WriteHeader(http.StatusOK)
    w.Write([]byte("OK"))
})
Java (Spring Boot):
@RestController
public class HealthController {
    @GetMapping("/_/health")
    public ResponseEntity<String> health() {
        return ResponseEntity.ok("OK");
    }
}
Ruby (Sinatra):
PHP:
if ($_SERVER['REQUEST_URI'] === '/_/health') {
    http_response_code(200);
    echo 'OK';
    exit;
}
How to Deploy
You can deploy using the Vonage Cloud Runtime CLI. To deploy, run:
If you get a "credentials not found error", run vcr app generate-keys to regenerate your Vonage application's credentials for Vonage Cloud Runtime.
This command does the following:
- Configures your Vonage Application's callbacks as described in your configuration file's
capabilitiesobject. - Packages up the current directory.
- Uploads it to the Cloud Runtime Platform.
- Runs your build script if provided in your configuration file.
- If all successful, runs the command in your
entrypoint.
To avoid uploading large or unwanted files as part of your deploy, use a .vcrignore file to exclude them.
By default, the deploy command will look for a configuration file called vcr.yml in the current directory. To use a different configuration file you can run:
For example, to deploy your current code with a configuration file called production.yml you would run:
Deploying with a GitHub Action
If you want to integrate deploying into your GitHub workflow you can add a GitHub Action to deploy for you. The main steps of the Action are to checkout your code, install the Cloud Runtime CLI, then run the deploy command. Here is an example workflow which assumes that you are using a build script to handle the custom aspects of your project:
name: Deploy to Cloud Runtime

on:
  workflow_dispatch:

jobs:
  deploy:
    runs-on: ubuntu-latest

    env:
      VONAGE_API_KEY: ''
      VCR_REGION: 'euw1'
      VCR_SHORT_REGION: 'eu'   # eu | us | ap

    steps:
      - name: Checkout code
        uses: actions/checkout@v3.0.2
      - name: Install Cloud Runtime CLI
        uses: Vonage/cloud-runtime-cli@main
      - name: Deploy
        run: |
          vcr deploy --api-key ${{env.VONAGE_API_KEY}} --api-secret ${{ secrets.VONAGE_API_SECRET }} --region aws.${{env.VCR_REGION}} --graphql-endpoint https://api-${{env.VCR_SHORT_REGION}}.vonage.com/v1/vcr/${{env.VCR_REGION}}/api/graphql/v1/graphql
You will need to replace VONAGE_API_KEY, VCR_REGION, and VCR_SHORT_REGION with your API key and the values for your target region:
| Region | VCR_REGION | VCR_SHORT_REGION | GraphQL endpoint |
|---|---|---|---|
| EU West (Ireland) | euw1 | eu | https://api-eu.vonage.com/v1/vcr/euw1/api/graphql/v1/graphql |
| US East (Virginia) | use1 | us | https://api-us.vonage.com/v1/vcr/use1/api/graphql/v1/graphql |
| AP Southeast (Singapore) | apse1 | ap | https://api-ap.vonage.com/v1/vcr/apse1/api/graphql/v1/graphql |
| AP Southeast (Sydney) | apse2 | ap | https://api-ap.vonage.com/v1/vcr/apse2/api/graphql/v1/graphql |
This workflow is run manually but you can edit it to run when PRs are closed and so on. You can learn more about GitHub Actions on the Actions Documentation.
Troubleshooting Deployment
You may get a "credentials not found" error if the Vonage Cloud Runtime platform does not have access to your Vonage application's credentials. You can generate a new private key pair using the CLI:
vcr app generate-keys --app-id <app-id>
View your Deployment
To take a deeper look at your project and deployments you can use the Vonage Cloud Runtime dashboard.
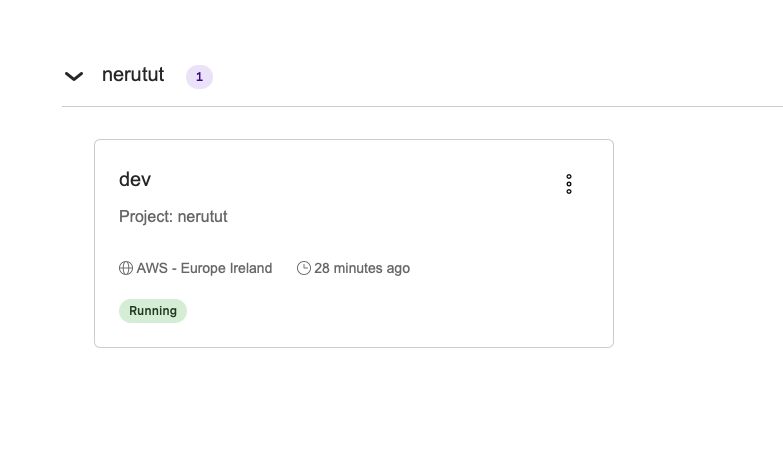
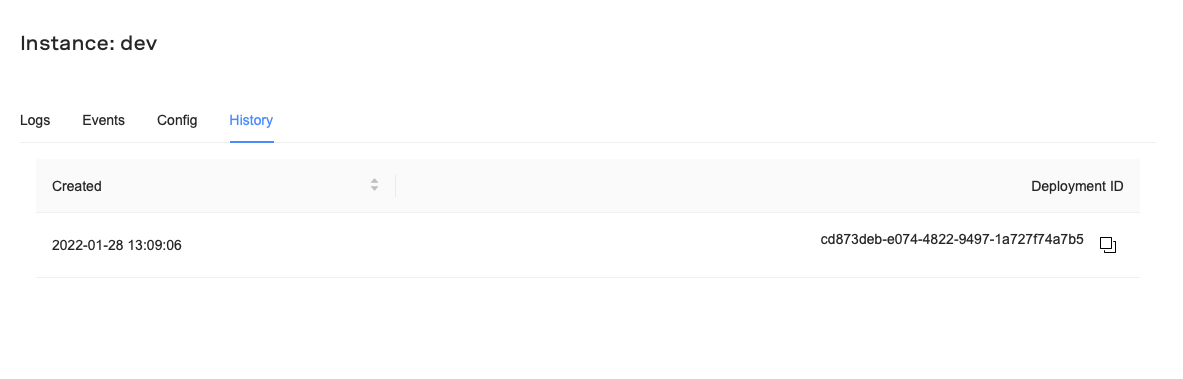
Clicking on your deployed instance will give you access to logs, events, and deployment history. For example, the history tab will show you the deployment history for this instance:
If you deploy more than one instance for your project they will all show on the dashboard:
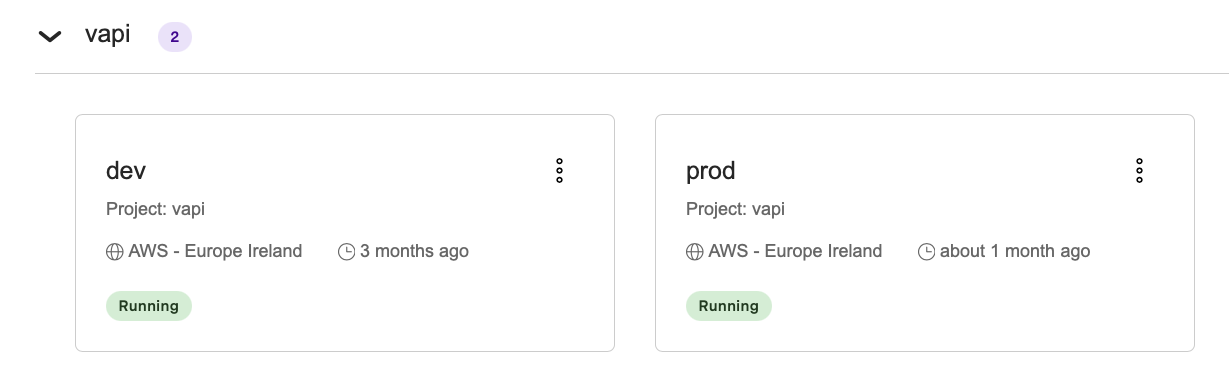
This is a project named vapi, which has two configuration files. One configuration file has an instance named dev and the other has an instance named prod. This allows you to have multiple instances running the same code but with different environments.
Remove an Instance
If you would like to remove a deployed instance you can use the Vonage Cloud Runtime CLI's instance remove command:
vcr instance remove --project-name <project-name> --instance-name <instance-name>
So, to remove the dev instance in the above screenshot you would run:
vcr instance remove --project-name vapi --instance-name dev
You can also remove an instance using the instance ID:
vcr instance remove --id <instance-id>
WARNING: This is an irreversible action! Attached state and schedulers will also be permanently deleted.
List Instances
To see all deployed instances for your account, run:
View Instance Logs
You can fetch logs from a deployed instance using the CLI:
Streaming Logs
Use the --follow (-f) flag to continuously stream new log entries as they arrive, similar to tail -f:
Press Ctrl+C to stop streaming.
Filtering Logs
You can narrow down log output using these optional flags:
| Flag | Short | Description |
|---|---|---|
--history <n> | Number of historical entries to fetch first (default: 300) | |
--log-level <level> | -l | Minimum log level: trace, debug, info, warn, error, fatal |
--source-type <type> | -s | Filter by source: application or provider |
Examples:
IP Address Allowlist
If you would like to restrict access to your systems, the Vonage Cloud Runtime IP addresses for each region are:
EU West - aws.euw1
- 52.215.68.46
- 46.137.9.43
- 54.72.25.154
US West - aws.use1
- 54.87.47.119
- 3.224.186.73
- 35.153.45.51
APAC Southeast - aws.apse1
- 13.251.207.33
- 52.76.50.31
- 54.169.132.8
APAC Southeast (Sydney) - aws.apse2
- 52.62.122.28
- 13.236.199.68
- 52.63.14.36