Run the Flask Server
Before you can start your server, you’ll need to provide configuration in a .env file. Start with the following and fill in your details:
# Do not use this in production:
FLASK_DEBUG=true

# Replace the following with any random value you like:
FLASK_SECRET_KEY=RANDOM-STRING_CHANGE-THIS-Ea359

# Get from ${CUSTOMER_DASHBOARD_URL}/your-numbers
NEXMO_NUMBER=447700900025

# Get the following from ${CUSTOMER_DASHBOARD_URL}/settings
NEXMO_API_KEY=abcd1234
NEXMO_API_SECRET=abcdef12345678
Now start your app with:
# You may need to change the path below if your Flask app is in a different Python file:
$ FLASK_APP=smsweb/server.py flask run
* Serving Flask app "smsweb.server"
* Running on http://127.0.0.1:5000/ (Press CTRL+C to quit)
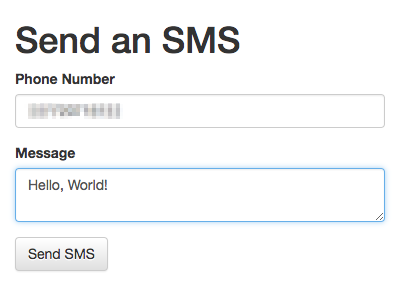
Now if you load http://localhost:5000/, you should see something like this:

How to Send SMS Messages with Python, Flask and Nexmo
This tutorial introduces you to sending SMS with Python, making use of the Nexmo Python library. It starts by showing how to send SMS from the REPL, then goes on to show you how to build a simple flask app with SMS capabilities.
Steps
1
Introduction to this tutorial2
Prerequisites3
Install the Vonage Python Server SDK4
Send an SMS from the Python REPL5
Set up an SMS Sending Flask App6
Add a Send SMS View7
Run the Flask Server8
Handle the Form Post9
What's next?