
Share:
Emre is a software developer focusing on Next.js and React. He is passionate about learning new things about programming and helping others learn programming language. In the past, he has experimented with different programming languages including Classic ASP, Java, and Python.
Send, Receive and Handle SMS Delivery Receipts with Next.js and Vonage
Time to read: 12 minutes
The Vonage SMS API enables you to send and receive text messages to and from users worldwide, using our REST APIs. In this tutorial, we will focus on sending and receiving SMS messages and handling delivery receipts with Next.js using the SMS API. Next.js is a React framework for creating full-stack web apps. It uses React Components for UI development and incorporates extra features and optimizations via Next.js. If you are interested in learning more, you can access the Vonage SMS API documentation.
tldr; If you would like to skip ahead and get right to deploying it, you can find all the code for the app on GitHub.
This tutorial assumes you have a basic understanding of Git, Next.js, React and JavaScript. Before you begin, make sure you have the following:
Vonage API account - Access your Vonage API Dashboard to locate your API Key and API Secret, which can be found at the top of the page.
Vonage Virtual Number - Rent a virtual phone number to send or receive messages and phone calls.
Node.js 18.17 or later - Node.js is an open-source, cross-platform JavaScript runtime environment.
Deployment Platform such as Vercel, Netlify, etc. - We’ll set up webhooks for the URLs that receive inbound SMS and delivery receipts. This way, we’ll be able to receive SMS and handle delivery receipts.
For the initial section of this tutorial, we’ll explore how to send text messages using Next.js. We will use the Vonage SMS API to interact with Next.js. To send an SMS with Next.js and the Vonage SMS API, proceed with these instructions:
How to Create a new Next.js project
How to Declare environment variables
How to Install the Vonage Node.js SDK
How to Install the validation library Zod
How to Create a server-only form
How to Run the development server
How to Deploy to Vercel
To create a Next.js app, run:
On installation, you’ll see the following prompts:
In this tutorial, we’ll use the App Router and JavaScript, so you can choose the same answers as above. After the prompts, create-next-app will create a folder with your project name and install the required dependencies.
Retrieve your API key and API secret from your API settings, also get your virtual number from the your numbers page, and create a .env.local file with the following environment variables:
VONAGE_API_KEY=your-vonage-api-key
VONAGE_API_SECRET=your-api-secret
VONAGE_VIRTUAL_NUMBER=your-virtual-number
Sign in to the developer dashboard.
In the left-hand navigation menu, click Numbers then Buy numbers.
Choose the attributes you need and then click Search.
In this tutorial we only need SMS capability. But you can use the same number to add other voice functionality as well!
Click the Buy button next to the number you want and validate your purchase.
Your virtual number is now listed in Your numbers.
We’ll use the Vonage Node.js SDK. It’s so easy to send an SMS with Next.js.
To install the Node.js SDK, run:
Zod is a TypeScript-first schema declaration and validation library. We will use it to check the values after the form is submitted. But it is not mandatory, you may skip this step if you want.
To install the Zod, run:
Create a new folder called lib inside /app. Then, create a new send-sms.js file inside the lib folder with the following content:
"use server";

import { revalidatePath } from "next/cache";
import { Vonage } from "@vonage/server-sdk";After importing the dependencies, initialize the Vonage node library installed earlier:
const vonage = new Vonage({
  apiKey: process.env.VONAGE_API_KEY,
  apiSecret: process.env.VONAGE_API_SECRET,
});

const from = process.env.VONAGE_VIRTUAL_NUMBER;Then initialize the Vonage node library, we will create an async function called sendSMS:
export async function sendSMS(prevState, formData) {
  try {
    const vonage_response = await vonage.sms.send({
      to: formData.get("number"),
      from,
      text: formData.get("text"),
    });

    revalidatePath("/");
    return {
      response:
        vonage_response.messages[0].status === "0"
          ? `🎉 Message sent successfully.`
          : `There was an error sending the SMS. ${
              // prettier-ignore
              vonage_response.messages[0].error-text
            }`,
    };
  } catch (e) {
    return {
      response: `There was an error sending the SMS. The error message: ${e.message}`,
    };
  }
}To send an SMS message using the SMS API, we’ll use the vonage.messages.send method of the Vonage Node.js library. This method accepts objects as parameters that contain information about the recipient, sender, and content. The SMS API has two types of response (vonage_response), one is message sent and the other is error. See SMS responses.
Example response for the Message Sent:
{
   "message-count": "1",
   "messages": [
      {
         "to": "447700900000",
         "message-id": "aaaaaaaa-bbbb-cccc-dddd-0123456789ab",
         "status": "0",
         "remaining-balance": "3.14159265",
         "message-price": "0.03330000",
         "network": "12345",
         "client-ref": "my-personal-reference",
         "account-ref": "customer1234"
      }
   ]
}Example response for the Error:
{
   "message-count": "1",
   "messages": [
      {
         "status": "2",
         "error-text": "Missing to param"
      }
   ]
}We’ll invalidate an entire route segment with revalidatePath, that allows you to purge cached data on-demand for a specific path. It does not return any value. See revalidatePath.
For more advanced server-side validation, use the Zod library. If you use it, the send-sms.js file should look like this:
"use server";

import { revalidatePath } from "next/cache";
import { Vonage } from "@vonage/server-sdk";
import { z } from "zod";

const vonage = new Vonage({
  apiKey: process.env.VONAGE_API_KEY,
  apiSecret: process.env.VONAGE_API_SECRET,
});

const from = process.env.VONAGE_VIRTUAL_NUMBER;

const schema = z.object({
  number: z
    .string()
    .regex(new RegExp(/^\d{10,}$|^(\d{1,4}-)?\d{10,}$/), "Invalid Number!"),
  text: z.string().min(1, "Type something, please!").max(140, "Too long text!"),
});

export async function sendSMS(prevState, formData) {
  try {
    const data = schema.parse({
      number: formData.get("number"),
      text: formData.get("text"),
    });

    const vonage_response = await vonage.sms.send({
      to: data.number,
      from,
      text: data.text,
    });

    revalidatePath("/");
    return {
      response:
        vonage_response.messages[0].status === "0"
          ? `🎉 Message sent successfully.`
          : `There was an error sending the SMS. ${
              // prettier-ignore
              vonage_response.messages[0].error-text
            }`,
    };
  } catch (e) {
    return {
      response: `There was an error sending the SMS. The error message: ${e.message}`,
    };
  }
}For UI, create a new send-form.jsx file inside /app with the following content:
"use client";

import { sendSMS } from "@/app/lib/send-sms";
import { useFormStatus, useFormState } from "react-dom";

const initialState = {
  response: null,
};

function SubmitButton() {
  const { pending } = useFormStatus();

  return (
    <button
      type="submit"
      aria-disabled={pending}
      className="border rounded-md hover:bg-slate-50 p-2 flex justify-center items-center"
    >
      {pending ? (
        <>
          <div class="border-gray-300 h-5 w-5 animate-spin rounded-full border-2 border-t-blue-600 mr-2" />
          Sending...
        </>
      ) : (
        "Send"
      )}
    </button>
  );
}

export function SendForm() {
  const [state, formAction] = useFormState(sendSMS, initialState);

  return (
    <form action={formAction} className="flex flex-col gap-y-2">
      <label htmlFor="number">Phone number:</label>
      <input
        name="number"
        id="number"
        type="number"
        placeholder="909009009099"
        autoComplete="off"
        className="border rounded p-2"
        required
      />
      <label htmlFor="text">Message:</label>
      <textarea
        name="text"
        id="text"
        rows={4}
        cols={40}
        placeholder="Hello from Next.js App!"
        className="border rounded p-2"
        required
      />
      <SubmitButton />
      <p aria-live="polite">{state?.response}</p>
    </form>
  );
}You can use the useFormStatus hook to display a loading status when a form is being submitted to the server. Another hook, the useFormState, allows you to update state based on a form action result.
Finally, you can import the send-form.jsx file to the page.js inside /app.
import { SendForm } from "./send-form";

export default function Home() {
  return (
    <main className="mx-auto max-w-3xl my-3 p-3 border border-slate-300 shadow rounded-lg divide-y divide-solid">
      <header className="flex flex-row p-3 items-center justify-between">
        <img src="/vonage.svg" alt="Vonage" />
        <h2 className="text-lg font-medium">Send SMS with the Vonage APIs</h2>
      </header>
      <section className="pt-3">
        <SendForm />
      </section>
    </main>
  );
}Note: You can find the vonage.svg file in the sample repository.
In the first step of this section, we created a directory called vonage-send-sms. Now let’s cd into it through the terminal:
cd vonage-send-sms
Then, run the following command:
npm run dev
This command launches the development server for your Next.js application on port 3000. To see your home page, open http://localhost:3000 from your browser. It should look like this:
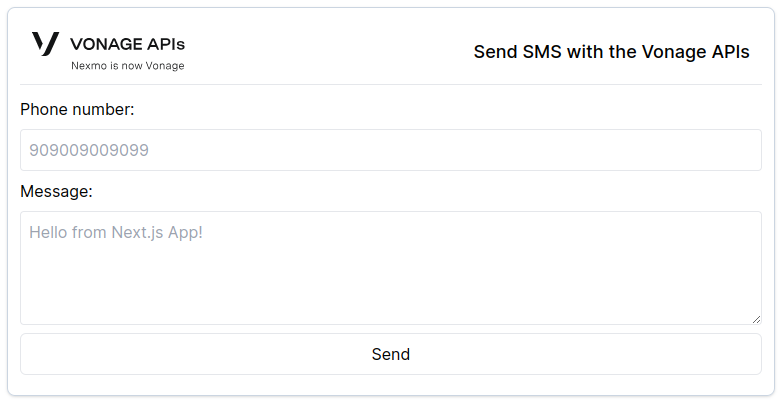 Next.js test form to send SMS
We’ll use Vercel to deploy our app for this tutorial but you can also deploy your project with Netlify. Vercel has several options to deploy your project such as Git, Vercel CLI, etc. The most popular method for creating a deployment on Vercel is by pushing code to Git repositories, so we’ll use Git with GitHub. You can start using it for free.
To begin using GitHub, create a free account on GitHub.com and confirm your email address.
Before the deployment, let’s upload our Next.js application to GitHub. The repository can be shared with everyone or kept private. You don’t have to set it up with a README or any other files.
To push to GitHub, run these commands, replacing <username> with your GitHub username:
git remote add origin https://github.com/<username>/vonage-send-sms.git
git push -u origin mainCheck out this guide on GitHub if you need help pushing your app.
To get started with Vercel, go to https://vercel.com/signup to create a Vercel account. Choose Continue with GitHub and go through the registration process.
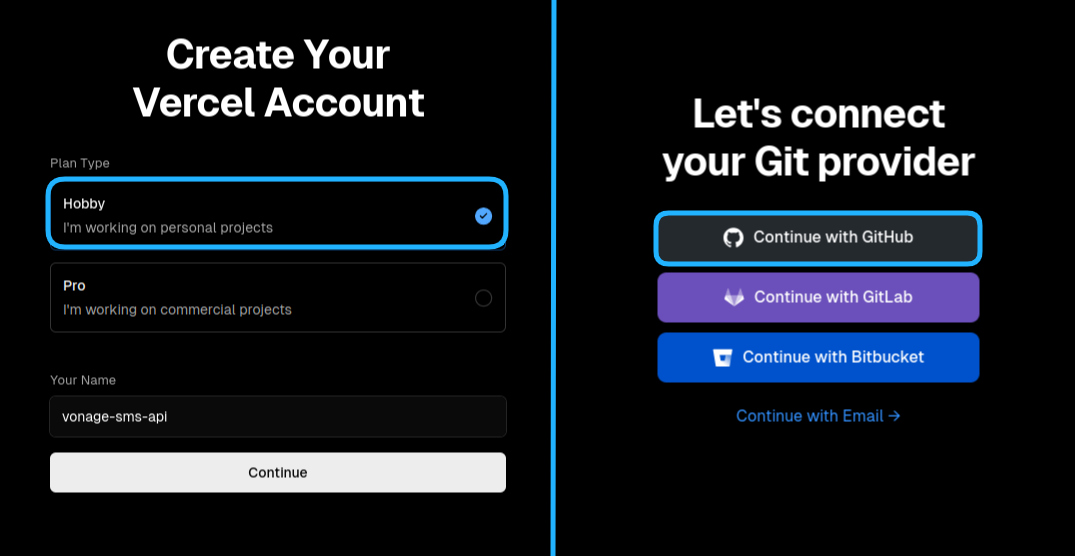 Vercel Sign Up Page
vonage-send-sms repository
After you’re signed up to Vercel and you push your app to GitHub, you can import your repository into Vercel. You just need to give it access to your repository, or All Repositories on this step. You can do it here: https://vercel.com/import/git.
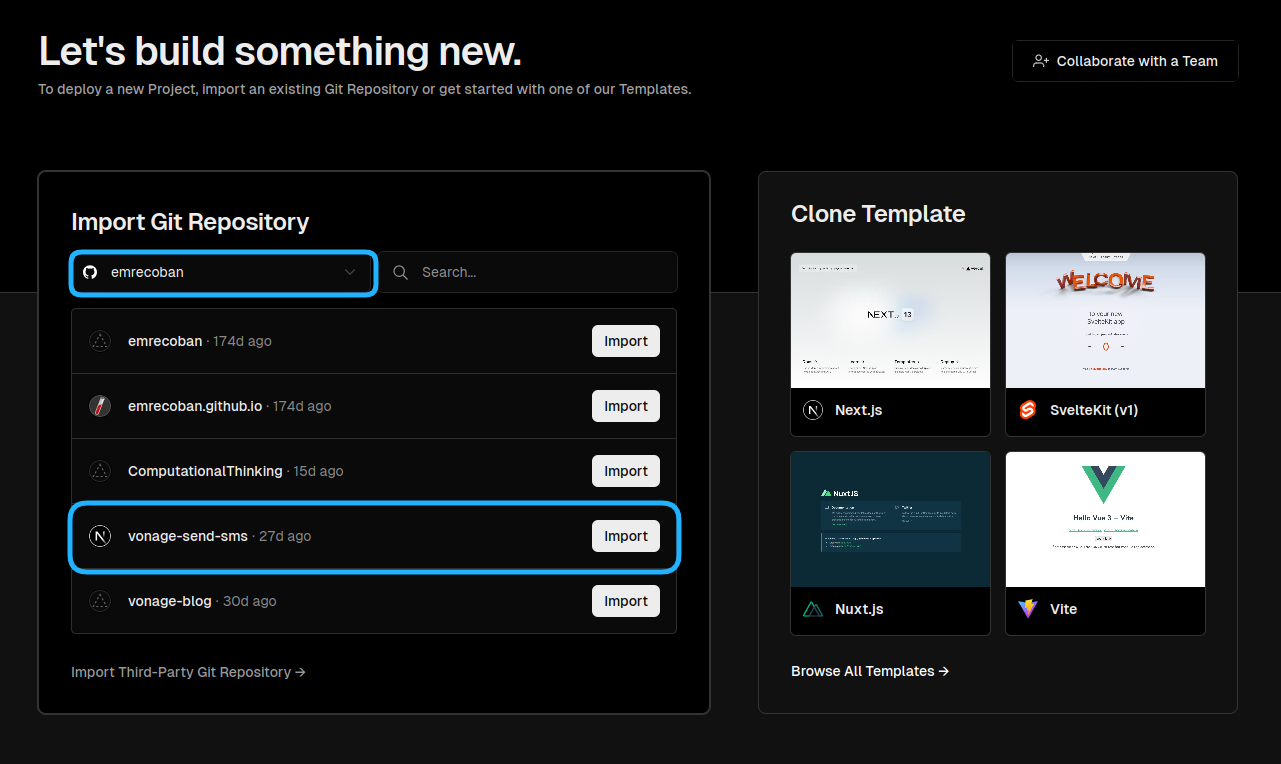 Vercel New Project Page
You can also deploy the sample repository we created for you in this step in one step with the deploy button If you want. But don’t forget to define Environment Variable Keys.
When the deployment is complete, you will receive URLs. Click on one of the links to access the Vonage Send SMS form in its live version. It’s that easy!
Once you deploy your app, Vercel will deploy every push by default.
In order to send SMS to some countries (like Turkey), virtual numbers must comply with country specific regulations. Checkout Country-Specific Features and Restrictions for more information.
When you successfully request the SMS API, it sends you an array of message objects, with each message having a status of 0 to indicate success. However, this does not guarantee that your recipients have received the message. To receive delivery receipts in our Next.js app, we must provide a webhook endpoint for Vonage to send them to.
Create a webhook endpoint
Create a handler for POST requests
Add a response to the handler
Configure the API Settings
Receive an SMS and handle delivery receipts
Create a new folder called webhook inside /app. Then, create a new folder one more called status inside the webhook folder. After that, create a new route.js file inside the status folder. The folder structure should look like this:
.
└── vonage-send-sms
    └── app
        ├── webhook
        │   └── status
        │       └── route.js
        ├── page.js
└── layout.jsSince we will do exactly the same to capture incoming SMS, we will create another folder called inbound with the route.js file under the webhook folder:
.
└── vonage-send-sms
    └── app
        ├── webhook
        │   ├── status
        │   │   └── route.js
        │   └── inbound
        │       └── route.js
        ├── page.js
        └── layout.js
We will create a handler for POST requests at /webhook/status to handle delivery receipts and at /webhook/inbound to handle incoming SMS messages. Then, we’ll log the body of the request to the console:
export async function POST(request) {
    const res = await request.json();
    console.log("The request from Vonage: ", JSON.stringify(res, null, 2));
}Right now, you can see the message status on the logs and also add the message status to your database or something else.
Vonage will assume that you have not received the message and will keep resending it for the next 24 hours. This way, the webhook endpoint must send a 200 OK or 204 No Content response:
export async function POST(request) {
    const res = await request.json();
    console.log("The request from Vonage: ", JSON.stringify(res, null, 2));

    return new Response("ok", {
      status: 200,
    });
}
Your webhook endpoint is now deployable on either Vercel, Netlify or your own server. After deploying your app, fill out each field by appending /webhook/inbound and /webhook/status to the Inbound SMS URL and Delivery Receipts URL in the API settings.
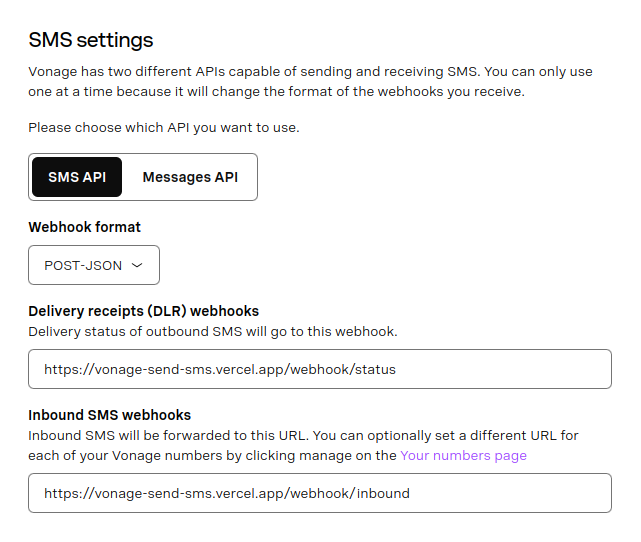 Configure SMS API Setting
To see delivery receipts and incoming SMS messages on Vercel:
Choose your Next.js App from the Vercel Dashboard.
Go to your project overview and select the Logs tab.
From here, you can see, filter, and search the runtime logs.
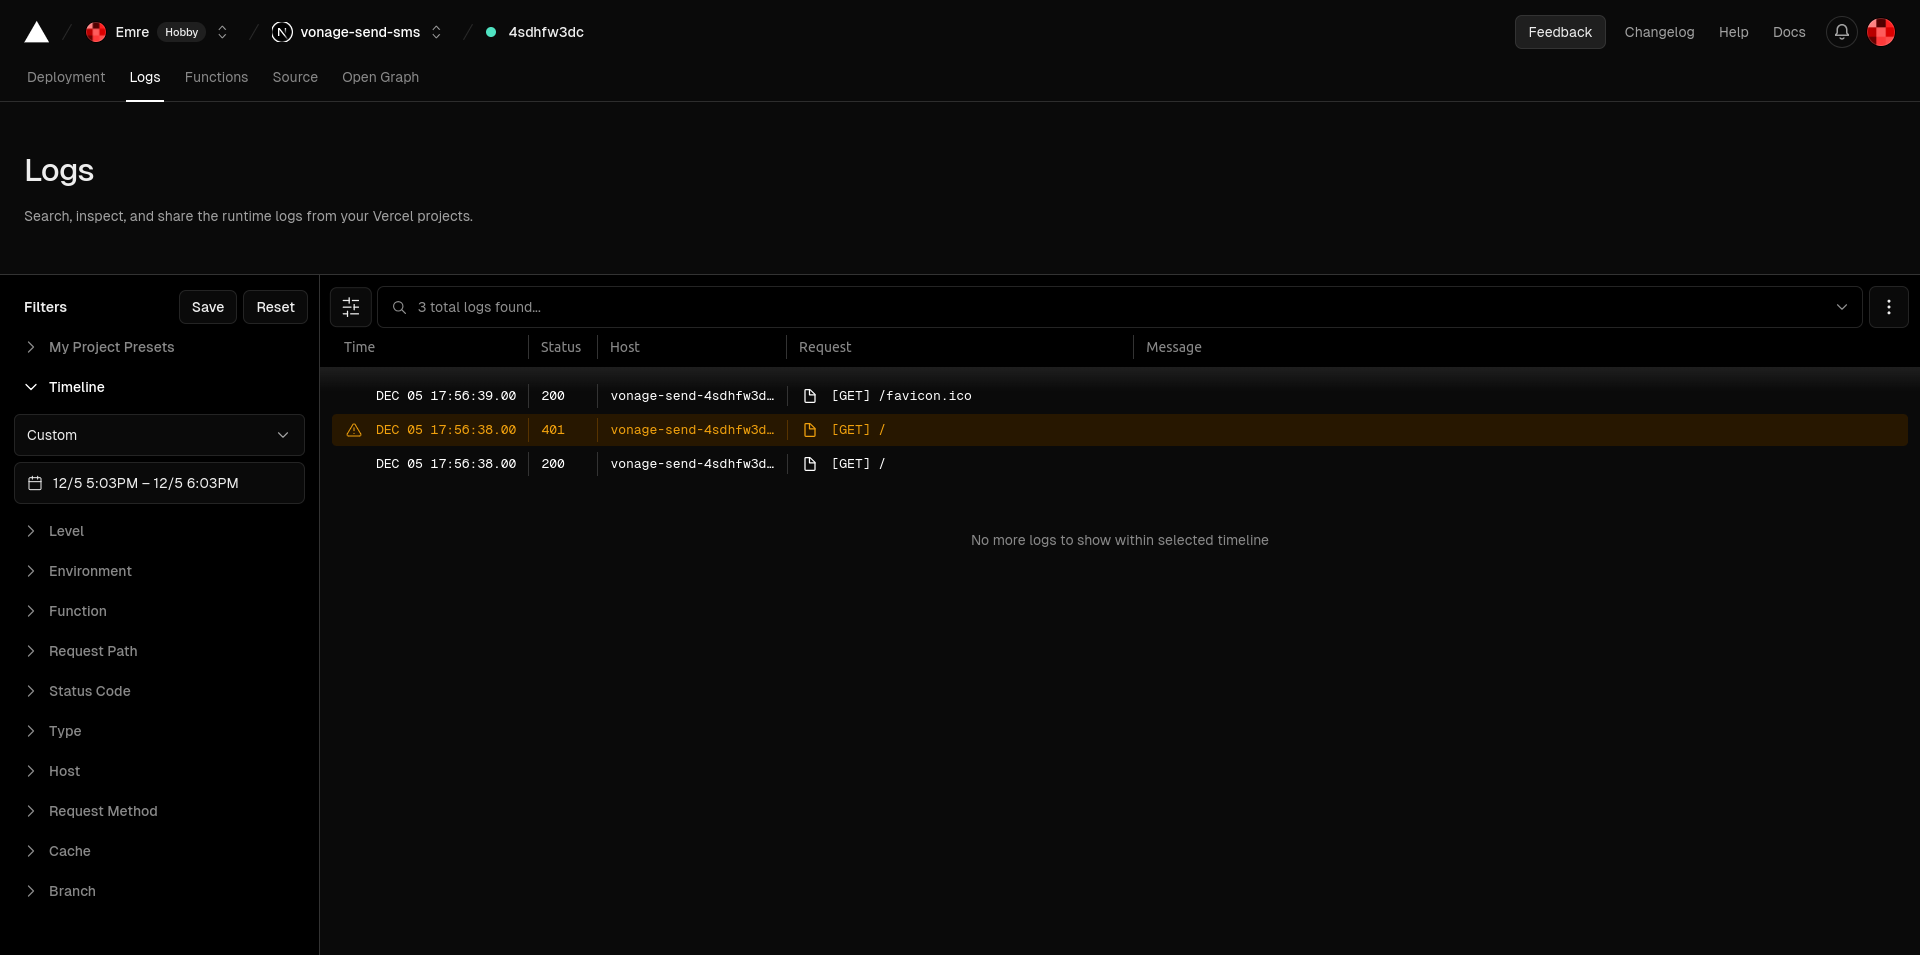 Vercel Runtime Logs
Now, send an SMS message through your Next.js application and you should be able to see the requests from Vonage on the runtime logs.
The response from Vonage will look something like this:
{
  "msisdn": "905423247231",
  "to": "***9512387",
  "network-code": "28603",
  "messageId": "4a3cf988-570f-4cdb-95be-179f89c64498",
  "price": "0.02380000",
  "status": "failed",
  "scts": "2311031929",
  "err-code": "1",
  "api-key": "******",
  "message-timestamp": "2023-11-03 19:29:32"
}See Understanding the delivery receipt.
To see how incoming SMS messages appear in the console log, send an SMS message from your phone to your Vonage number:
{
  "msisdn": "905423247231",
  "to": "***9512387",
  "messageId": "2B00000018726238",
  "text": "Hi! This is test message from Emre!",
  "type": "text",
  "keyword": "HI!",
  "api-key": "******",
  "message-timestamp": "2023-11-03 19:55:15"
}See Anatomy of an Inbound Message.
Now that you know how to send and receive SMS messages and get delivery receipts with the Vonage SMS API and Next.js. Consider expanding this project by replying to incoming SMS messages or adding more complex, interactive elements.
As always, feel free to reach out on the Vonage Developer Slack or Twitter for any questions or feedback. Thank you for reading, and I look forward to connecting with you next time.
If you liked this post, reach out to Emre! He has been looking for a job for a long time :)
Share:
Emre is a software developer focusing on Next.js and React. He is passionate about learning new things about programming and helping others learn programming language. In the past, he has experimented with different programming languages including Classic ASP, Java, and Python.