Share:
Donald is a software engineer with 10 years of experience. He is passionate about creating software products fast with high quality. He has hands-on experience in building automation frameworks, mentoring his colleagues about software quality mindset and how to get their hands dirty in the automation path. His tech stack includes JavaScript, Typescript, Java, Python, Go, Scala, and Rust recently, along with frameworks such as Playwright, Cypress, Serenity, Selenium, Gatling, k6, ZAP. His is also familiar with NoSQL and SQL databases such as Redis, PostgreSQL, MySQL, MongoDB. Donald also has more than 3 years of experience in the technical writing field, with blogs writing for famous publications in Medium , dev.to or other big clients in the tech world.
Enable Video Call for a Next.js Application Using Vonage Video API
Time to read: 14 minutes
Note: Some of the tools or methods described in this article may no longer be supported or current. For updated content or support, check our latest posts or our Documentation
One of the most effective ways to boost the user experience is enabling live video call support to your app so that your users can always get video call support for the problems they're encountering. However, adding video call support for your application takes work since you must handle both the server and client support to interact with the video call. In addition, scaling the video support for thousands of users is a lot of work. Understanding the pain points and difficulties of adding video support to your app, Vonage Video API was born.
In this article, you will learn how to enable video calls for a demo Next.js application by adding just a few lines of code using Vonage Video API.
Next.js is an opinionated open-source framework for building full-stack web applications on top of React library. It is a robust framework that combines the benefits of React with server-side rendering and static site generation. In addition, Next.js provides features and conventions that allow you to build the application quickly with excellent developer experience.
Let's build a demo application to understand and have hands-on practice enabling video call functionality to a Next.js application.
You will build a therapy application that allows users to schedule and make a video talk with the therapists of their choice. Enabling video call support is an excellent feature for users who often have problems socializing and interacting with others. Now they can join the therapy session from their house at their preferred time.
DISCLAIMER: This application is for tutorial purposes only, and you should consult your doctor for emergencies.
To build the demo application, you need to prepare the following prerequisites.
A Node.js environment with version 12.8 or above according to Next.js requirements.
A git command line environment to clone the application code from a GitHub repository
Have an account on the Vonage Video Platform so that you can create a new video API project to integrate video support into your Next.js app quickly.
Have an account on Vonage Developer Dashboard to use the SMS API to send messages within the demo application.
Now that you have prepared all these prerequisites let's build the Next.js application.
Since the application requires you to create several directories and files to implement the application logic and the user interface, let’s clone the existing application code from this GitHub repository. Open up your terminal, create a new Projects directory, and clone the application code under that directory.
Change the current directory to vonage-therapist-video-embed directory.
You should see the following directories and files listed below:
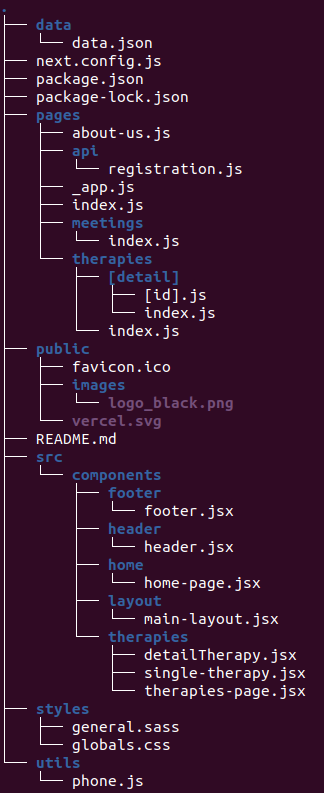 Code Project Structure
Let’s examine what they are.
In the Next.js application project, you must pay attention to the following files besides the regular files for the Node.js environment, such as package.json or package-lock.json, at the root directory.
next.config.jsfile:
This file defines the common configuration for the Next.js app. For example, you can set your application's image path, so if any images do not match these paths, Next.js will complain with an error message.
/** @type {import('next').NextConfig} */

const nextConfig = {
  …
  images: {
	domains: ['images.unsplash.com',],
  },
};

module.exports = nextConfig;pagesdirectory:
The pages directory implements:
Application APIs inside the
apisub-directory. These APIs are accessible using the API path format as /api/${api-name}. With the support for building APIs, that’s why we consider Next.js as a full-stack web application framework. You can learn more about Next.js Web API support at this API routes documentation.Application pages inside the other sub-directories like
meetingortherapies. End users can access the app pages at path /meeting or /therapies. Next.js supports nested routes and dynamic routing. This means you can set the page file name using a variable such as[id].jsinside thetherapies/[detail]directory, and users can get more information about all available therapists at /therapies/{therapyCategory}/{therapyId}. You can learn more about Next.js pages in this documentation.
src/componentsdirectory:
This directory defines all the web components you will use in the app, such as the header, footer, or custom button of the application page. The Next.js UI components are similar to React components but added custom support for UI components such as Link or Image.
utilsdirectory:
This directory implements the utilities’ functions that the therapy application will use. Currently, you have a file named phone.js, which allows the application to send an SMS message to the therapist, notifying that a user has created a meeting event at a particular time and with a meeting video link so the therapist can talk with the user.
datadirectory:
This directory stores all the data that the application will use. Currently, you have a data.json file that stores data about the therapist information such as the name of the therapists and the available times of the therapists so that the users can book meetings.
Finally, you have other files, such as images for the application logo and the CSS files to enhance the application's GUI (graphical user interface).
To enable video calls for the app, you have the three following options:
Use the Vonage Video SDK
Use the Vonage Video Chat Embed
Use Iframe option
Use Javascript option
In the production setting, you should use the Vonage Video SDK option, which allows you to set up the server and client SDKs separately to have more control over how you want the video support to be executed. To keep the demo application simple, let’s use the “Iframe” option to enable the video call feature.
Log in to the Vonage Video Account page and choose the "Projects" option at the left panel.
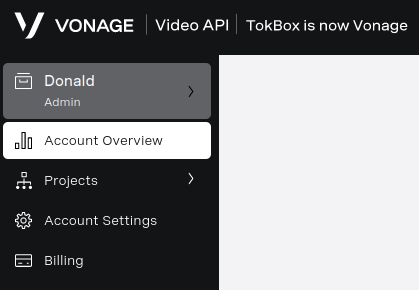 Video Projects
Choose "Create New Project" and click on "Create Embed Project" button.
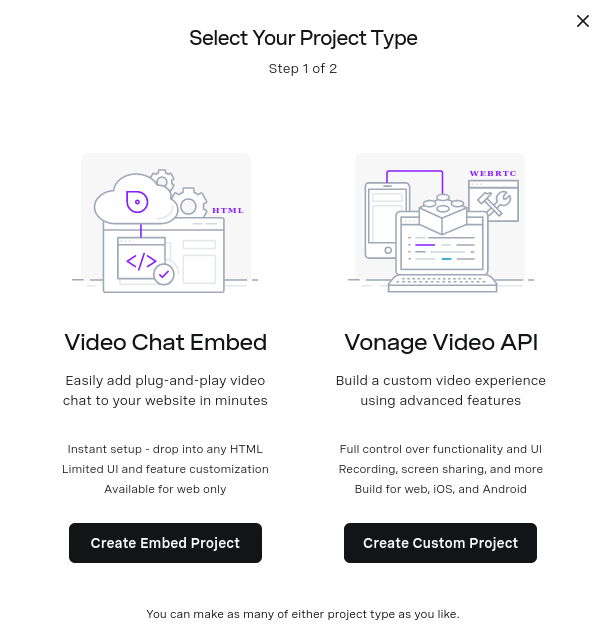 Create Embed Project
Then set the name of your project and the website URL. In a production setting, you should provide the website URL matching your app's registered domain. Since we will only build the application in the local environment, let’s set the website URL to http://localhost:3000.
 Configure Setting
Click the "Next" button, and copy the Iframe-generated code to somewhere safe.
Create a new file named embedCode.json inside the data directory. Inside the embedCode.json, you add the following content to it:
{
"embedCode":""
}Inside the blank value, you put the iframe-generated content to it. Remember to escape the iframe-generated content's special characters to match the JSON file rules.
The content of embedCode.json file looks similar to the one below:
{
	"embedCode": "<iframe src='https://tokbox.com/embed/embed/ot-embed.js?embedId=YOUR_EMBED_ID&room=DEFAULT_ROOM&iframe=true' width='800px' height='640px' scrolling='auto' allow='microphone; camera'></iframe>"
}
Look at the index.js file inside the pages/meetings directory. This file implements the meeting page so the user and the therapist can communicate.
const meetingData = data.replace('DEFAULT_ROOM', `meeting${meetingId}`);The above code will replace the DEFAULT_ROOM value from the iframe-embedded code with the randomly generated meetingId, so each meeting will differ. This allows each meeting to be separate from others, so you don’t end up having a bunch of users in the same meeting.
<div id="ot_embed_demo_container" dangerouslySetInnerHTML={{__html: meetingData}}>
</div>
In this code, the meetingData value is included inside the dangerouslySetInnerHTML field to allow the meeting page to show the video-embedded screen. You can learn more about how Next.js handle embedded scripts at this page.
To enable SMS sending capability, you must provide the following environment variables to the current terminal session:
VONAGE_SMS_BRAND: the Vonage SMS Brand is for registering the name of the sender in the SMS message. In the production setting, you should register the VONAGE_SMS_BRAND for your app. For the sake of the tutorial, you can set theVONAGE_SMS_BRANDvariable to “Vonage Sample App”. You can learn more about using Vonage SMS API and register theVONAGE_SMS_BRANDat the SMS API guideline page.THERAPIST_PHONE_NUMBER: this is the recipient phone number to which you will send the SMS message. In a real scenario, each therapist should have their own phone number. To simplify the tutorial, please set theTHERAPIST_PHONE_NUMBERto any phone number you can receive messages from.VONAGE_API_KEY`` andVONAGE_API_SECRET: to be able to send the SMS message using Vonage SMS API, you need to provide the Vonage API Key. You can grab the values ofVONAGE_API_KEYandVONAGE_API_SECRETfrom the Vonage SMS API getting started page.
Using Windows you can set the values using PowerShell with the following commands:
$env:VONAGE_SMS_BRAND = "Vonage Sample App"
$env:THERAPIST_PHONE_NUMBER = "your_therapist_phone_number"
$env:VONAGE_API_KEY = "your_vonage_api_key"
$env:VONAGE_API_SECRET = "your_vonage_api_secret"
You need to install the dependencies that the application needs by running:
Then, to bring up the application in the local machine, run the following command:
The server will start on port 3000 as shown below.
> therapist-mental-health-app@0.1.0 dev
> next dev
ready - started server on 0.0.0.0:3000, url: http://localhost:3000
Open your browser and navigate to this URL: http://localhost:3000. You should be able to see the home page of the application.
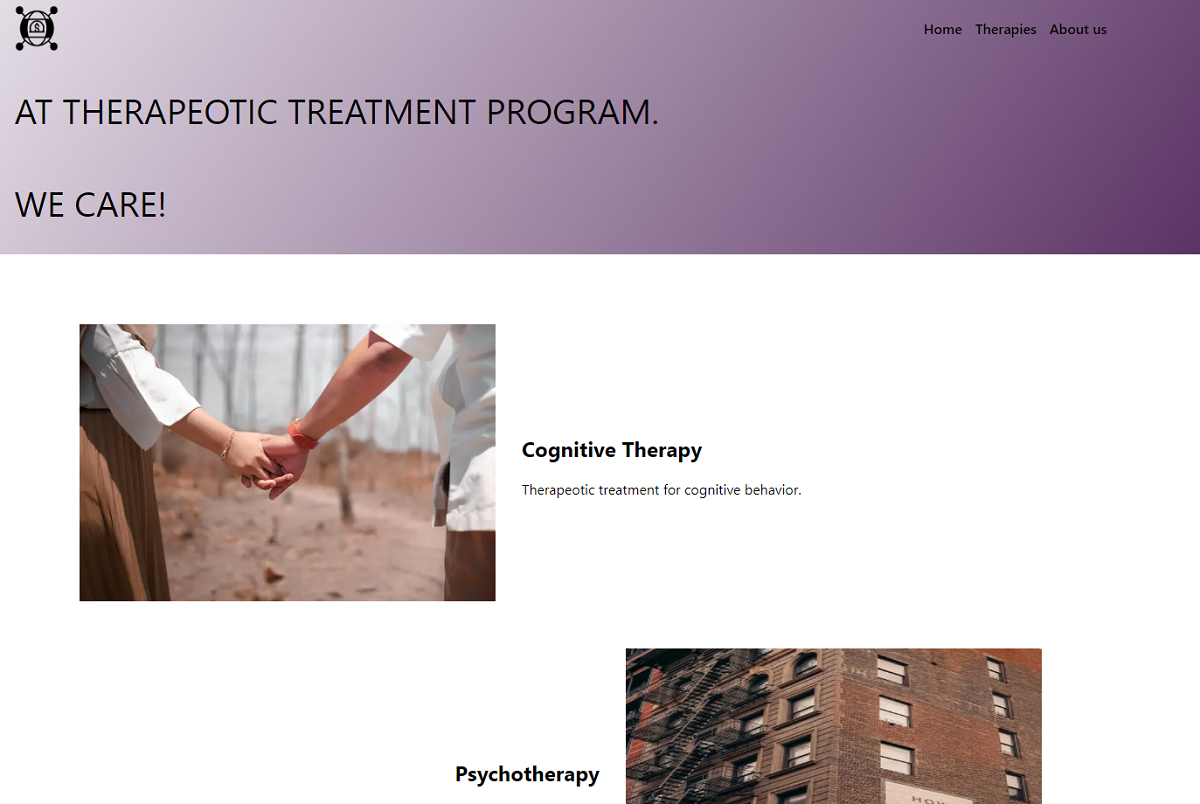 Therapist Home Page
Click on "Therapies" button on the menu, you can see all the types of therapies.
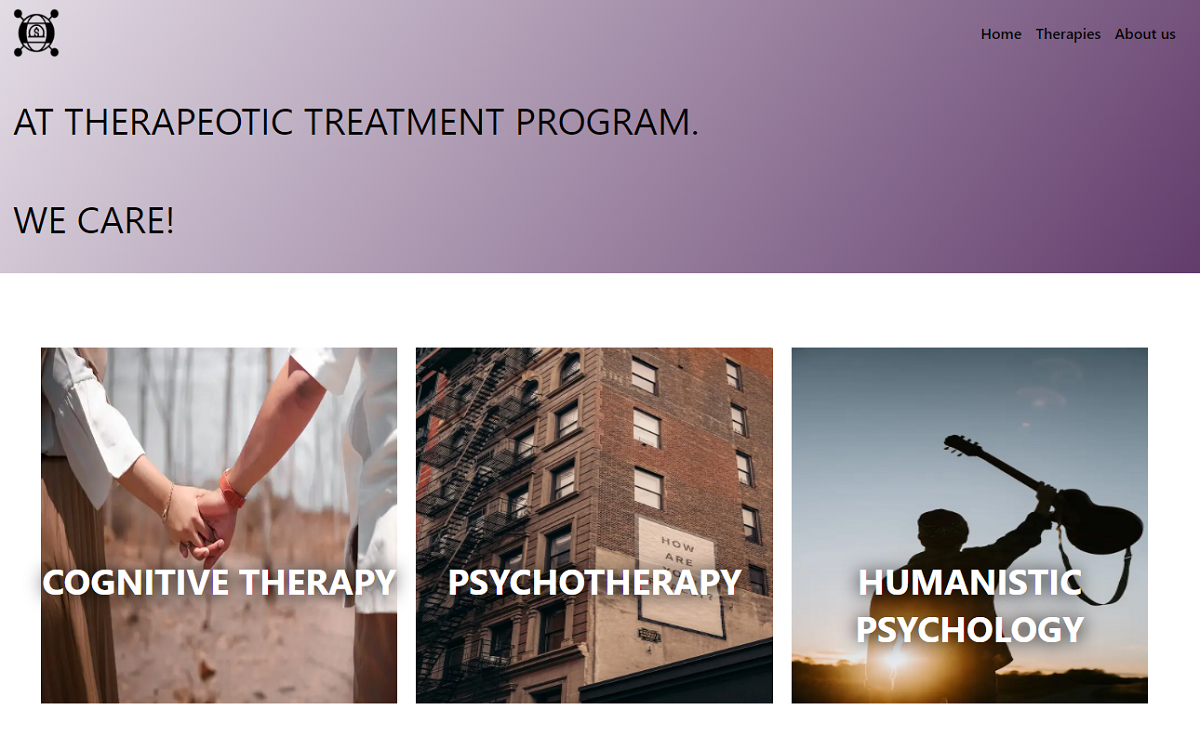 Therapies Page
Click on the "Cognitive Therapy" option, to see all the available therapists in "Cognitive Therapy" category.
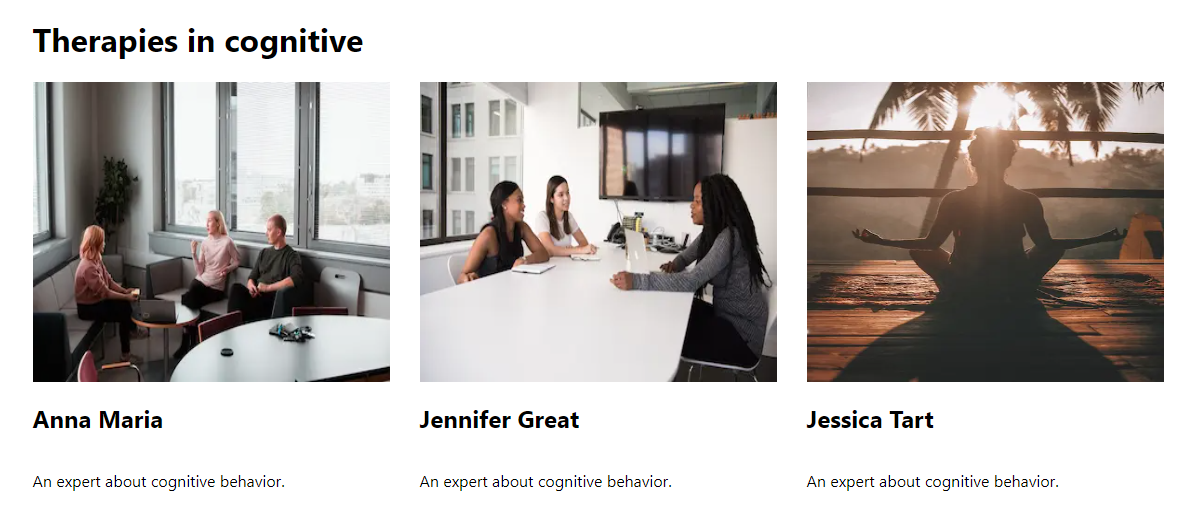 Therapy Cognitive Page
Here you can see three therapists named "Anna Maria", "Jennifer Great", and "Jessica Tart". Let’s choose "Anna Maria" to schedule a video call with them.
 Book a Meeting Form
Here you can see a number of time slot options. Let’s choose the time as "02-05-2023 10:00" and insert your email along with your phone number. Click the "Submit" button.
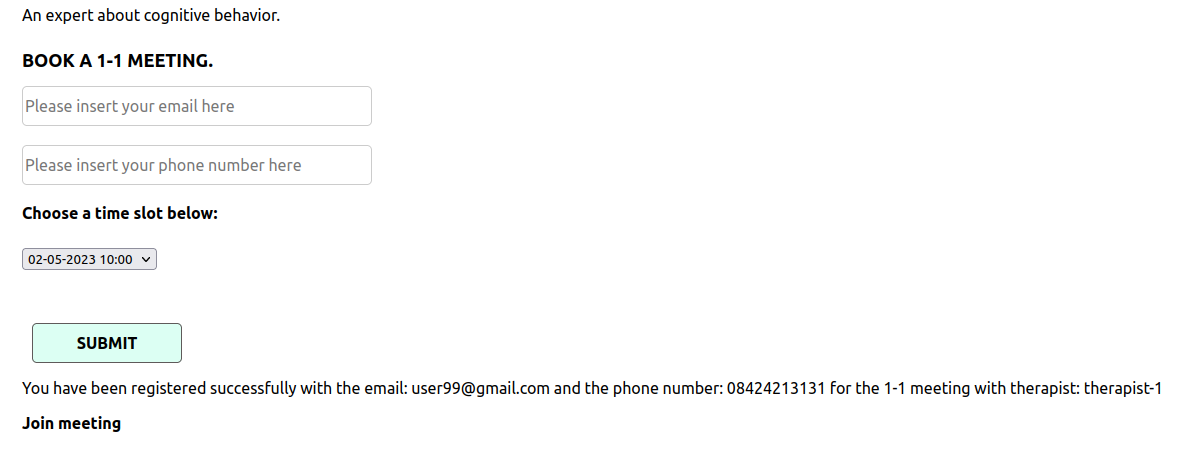 Book a Meeting Successfully
You will see that you have successfully registered for the meeting with the therapist-1. Also, an SMS message will be sent with the following content:
A user has booked a meeting with you. The meeting time is : ${therapyTime}. The meeting link is : http://localhost:3000/meetings?meetingId=${meetingId}NOTE: If you registered using the same phone number that has existed and met the error message “This phoneNumber xxx has already been registered”, you remove the phone number by:
Go to the file named
data.jsoninside thedatadirectorySearch for your phone number
Remove it from the “phoneNumbers_registered” list.
Save the file
The therapist can save the meeting link and join the video meeting at the scheduled meeting time.
Let’s assume the meeting time is right now. You can click on the "Join meeting" button to access the meeting video.
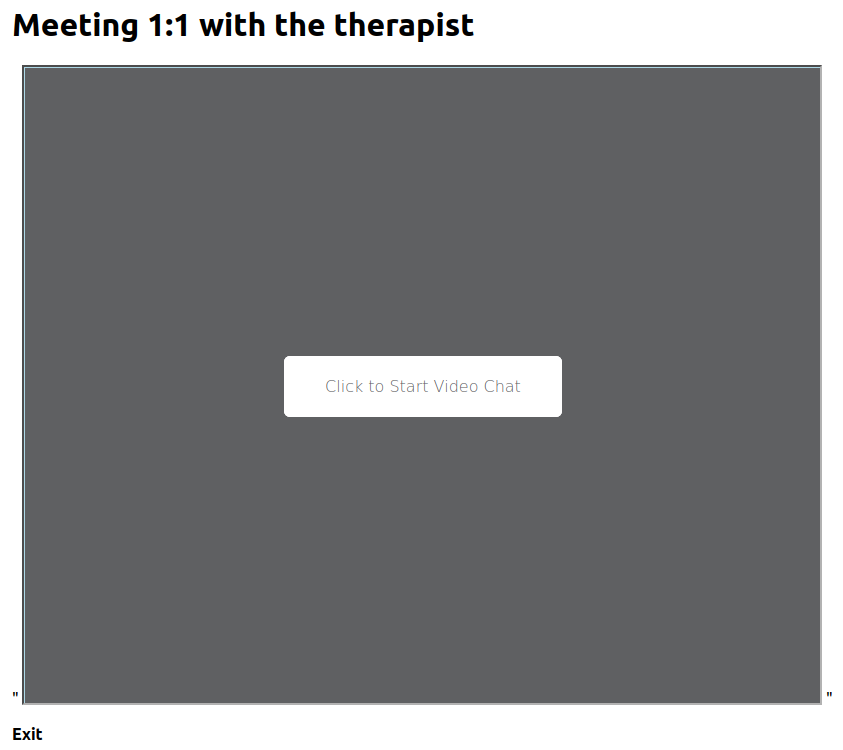 Meeting Therapist
Click on "Click to Start Video Chat", you should be able to join the video meeting with the therapist.
The article taught you what Next.js framework is and why you should consider Next.js framework to build your future applications. You also learned how to enable Video Call for the Next.js application by adding a few lines of code thanks to Vonage Video API support and applying the SMS notification feature using Vonage SMS API. If you want to learn more about the Vonage platform's other technologies, visit the Vonage Developer Home Page.
Share:
Donald is a software engineer with 10 years of experience. He is passionate about creating software products fast with high quality. He has hands-on experience in building automation frameworks, mentoring his colleagues about software quality mindset and how to get their hands dirty in the automation path. His tech stack includes JavaScript, Typescript, Java, Python, Go, Scala, and Rust recently, along with frameworks such as Playwright, Cypress, Serenity, Selenium, Gatling, k6, ZAP. His is also familiar with NoSQL and SQL databases such as Redis, PostgreSQL, MySQL, MongoDB. Donald also has more than 3 years of experience in the technical writing field, with blogs writing for famous publications in Medium , dev.to or other big clients in the tech world.