Share:
An English teacher turned empathetic software engineer. A curious optimist with a passion for creating accessible content and helping developers level up their skills.
How to Build a Dashboard of Live Conversations with Flask and React
Time to read: 10 minutes
Vonage recently introduced the Conversation API. This API enables you to have different styles of communication (voice, messaging, and video) and connect them all to each other.
It's now possible for multiple conversations within an app to coincide and to retain context across all of those channels! Being able to record and work with the history of a conversation is incredibly valuable for businesses and customers alike so, as you can imagine, we're really excited about this.
This tutorial covers how to build a dashboard with Flask and React that monitors all current conversations within an application. The goal is to showcase relevant data from the live conversations that are currently happening in real-time.
When a single conversation is selected from the list of current conversations, the connected members and events will be displayed. An individual member can then be selected to reveal even more information related to that particular user.
 dashboard gif
The Vonage Conversation API enables you to build conversation features where communication can take place across multiple mediums including IP Messaging, PSTN Voice, SMS, and WebRTC Audio and Video. The context of the conversations is maintained through each communication event taking place within a conversation, no matter the medium.
Think of a conversation as a container of communications exchanged between two or more Users. There could be a single interaction or the entire history of all interactions between them.
The API also allows you to create Events and Legs to enable text, voice, and video communications between two Users and store them in Conversations.
 flow of app
This tutorial also assumes that you will be running Ngrok to run your webhook server locally.
If you are not familiar with Ngrok, please refer to our Ngrok tutorial before proceeding.
First, you will need to create an Application:
Next, assuming you have already rented a Vonage Number (NEXMO_NUMBER), you can link your Vonage Number with your application via the command line:
To get this app up and running on your local machine, start by cloning this repository:
Then install the dependencies:
Copy the example .env.example file with the following command:
Open that new .env file and fill in the Application ID and path to your private.key that we just generated when creating our Nexmo Application.
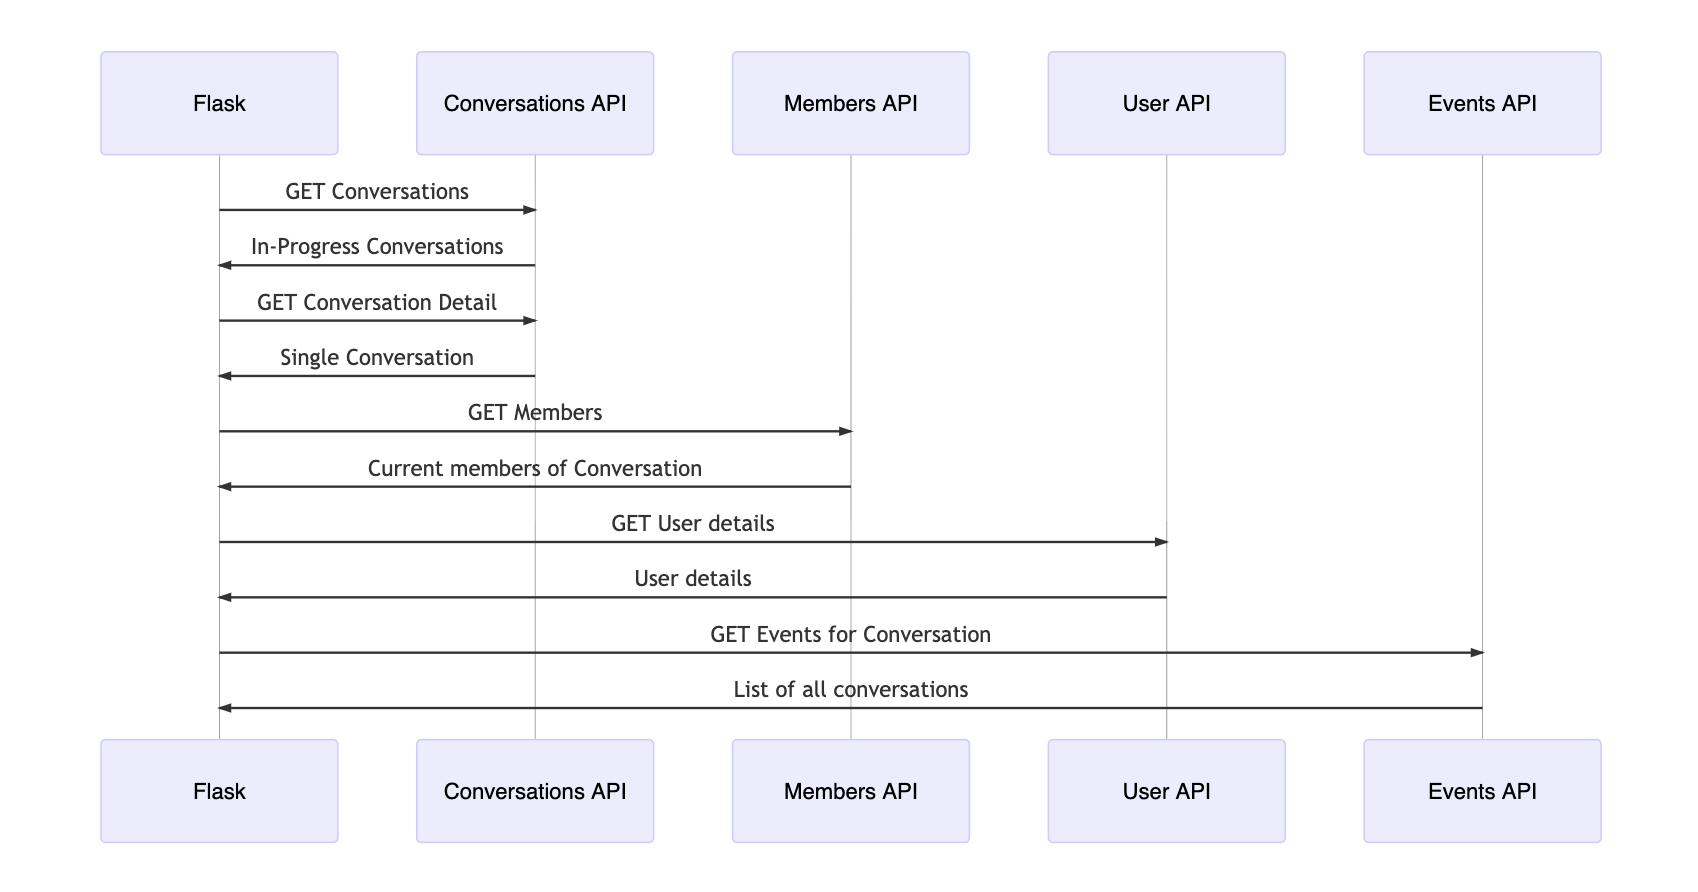
The important doc to inspect within our Flask files is the server.py one as it establishes all of the different endpoints the Conversation API.
The function, make_capi_request() connects to Vonage and authenticates the application:
def make_capi_request(api_uri):
   nexmo_client = nexmo.Client(
       application_id=os.getenv("APPLICATION_ID"), private_key=os.getenv("PRIVATE_KEY")
   )
   try:
       response = nexmo_client._jwt_signed_get(request_uri=api_uri)
   except nexmo.errors.ClientError:
       response = {}

return jsonify(response)Underneath that, we create the necessary routes:
@app.route("/")
def index():  # Index page structure
   return render_template("index.html")

@app.route("/conversations")
def conversations():  # List of conversations
   return make_capi_request(api_uri="/beta/conversations")


@app.route("/conversation")
def conversation():# Conversation detail
   cid = request.args.get("cid")
   return make_capi_request(api_uri=f"/beta/conversations/{cid}")

@app.route("/user")
def user():  # User detail
   uid = request.args.get("uid")
   return make_capi_request(api_uri=f"/beta/users/{uid}")

@app.route("/events")
def events(): # Event detail
   cid = request.args.get("cid")
return make_capi_request(api_uri=f"/beta/conversations/{cid}/events")Once authenticated, each of these routes accesses the Conversation API based on the Application ID and eventually the Conversation or User ID.
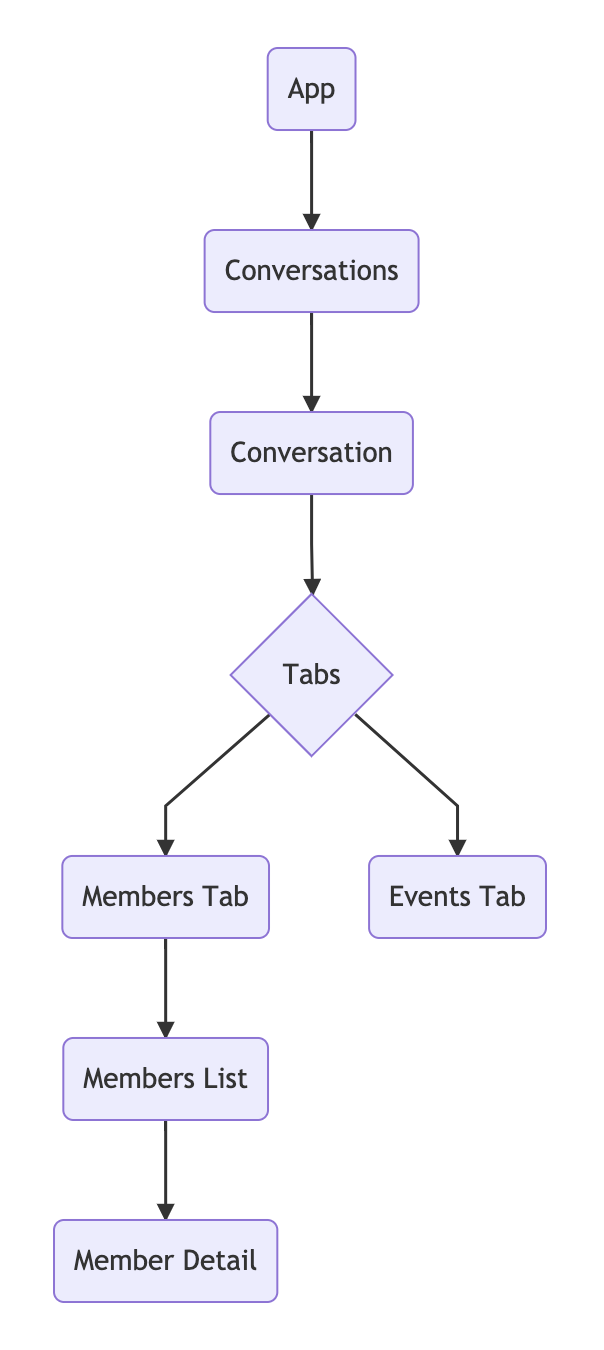
We’ll make use of React's ability to break our code into modularized and reusable components. The components we’ll need are:
 components - react tree
At the App.js level, notice that the "/conversations" endpoint is called within the constructor. Meaning that if there are any current conversations within the application, they are immediately displayed onto the page.
fetch("/conversations").then(response =>
  response.json().then(
    data => {
      this.setState({ conversations: data._embedded.conversations });
    },
    err => console.log(err)
  )
);
The user then will have the option to select one of the conversations from the list and the meta details of that conversation, such as name and timestamp, will be displayed.
<div>
  <article className="message is-info">
    <div className="message-header">
      <p>{this.props.conversation.uuid}</p>
    </div>
    <div className="message-body">
      <ul>
        <li>Name: {this.props.conversation.name}</li>
        <li>ttl: {this.props.conversation.properties.ttl}</li>
        <li>Timestamp: {this.props.conversation.timestamp.created}</li>
      </ul>
    </div>
  </article>
  <Tabs
    members={this.props.conversation.members}
    events={this.props.events}
    conversation={this.props.conversation}
  />
</div>Notice that once a particular conversation has been selected two tabs become visible: Events and Members.
Members is set as the default state, meaning that is displayed first. It is at this point that the "/conversation" and "/events" endpoints are called. Using the cid that is passed within the state, the details of the current members and events are now available.
refreshMembers = () => {
  fetch("/conversation?cid=" + this.props.conversation.uuid)
    .then(results => results.json())
    .then(data => {
      this.setState({ members: data.members });
    });
};

refreshEvents = () => {
  fetch("/events?cid=" + this.props.conversation.uuid)
    .then(results => results.json())
    .then(data => {
      this.setState({ events: data });
    });
};
The MembersList.js component will call the /user endpoint to retrieve even more data on that particular user, which then is shown within the MemberDetail.js component.
showMemberDetails = user_id => {
  fetch("/user?uid=" + user_id)
    .then(results => results.json())
    .then(data => {
      this.setState({ member: data });
    });
};
To start up the backend, run the Flask command:
And in another tab within your terminal, run the React command:
Open up http://localhost:3000 in a browser, and your app will be up and running!
Any conversations that are currently running within that connected application will now be visible within this dashboard.
Congrats! You've now created an application with Flask, React, and Vonage's Conversation API. You now can now monitor all sorts of things related to your application's conversations. We encourage you to continue playing with and exploring this API's capabilities.
The Conversation API is currently in beta and is ever-evolving based on your input and feedback. As always, we are happy to help with any questions in our community slack.