Share:
Alex Lakatos is a JavaScript Developer Advocate for Nexmo. In his spare time he volunteers at Mozilla as a Tech Speaker and a Reps Mentor. JavaScript developer building on the open web, he has been pushing its boundaries every day. When he’s not programming in London, he likes to travel the world, so it’s likely you’ll bump into him in an airport lounge.
How to Send and Receive SMS Messages With Node.js and Azure Functions
This blog post is part of the Applied Cloud Stories initiative.
Webhooks are ever-more popular in the API world, and Vonage uses them for quite a few of our APIs. So I end up writing quite a few of them. Since I'm a Node.js fan, I used to do most of them with Express. It was a hassle to spin up a webserver and get that deployed somewhere, so I started looking for alternatives. Serverless kept popping up in my research as one of the good alternatives, so I thought I'd use Azure Functions and Node.js to send and receive SMS messages.
For SMS, I'm going to use the Vonage SMS API, which allows you to send and receive a high volume of SMS anywhere in the world. Once you get your virtual phone number, you can use the API to manage outbound messages (“sending”) and inbound messages (“receiving”).
In this article, you will learn how to send and receive SMS messages with Node.js and an Azure Functions App.
The code for this tutorial can be found on GitHub.
Before you begin, make sure you have:
Node.js installed on your machine
There are a few ways you can set up an Azure Functions App. I've chosen to do so from the Azure Portal.
 Create Azure Functions App
I've named it send-receive-sms, created a new resource for it, and chose Node.js as the runtime. I've chosen the defaults in terms of deployment, region, and plans.
Once the deployment finishes (usually around 2 minutes), you can go to the newly created resource and create your first function. There is a wizard helping you through the process, and I've selected VS Code as my development environment and "Direct publish" as my deployment method. That gave me a set of instructions on how to set up VS Code for Azure.
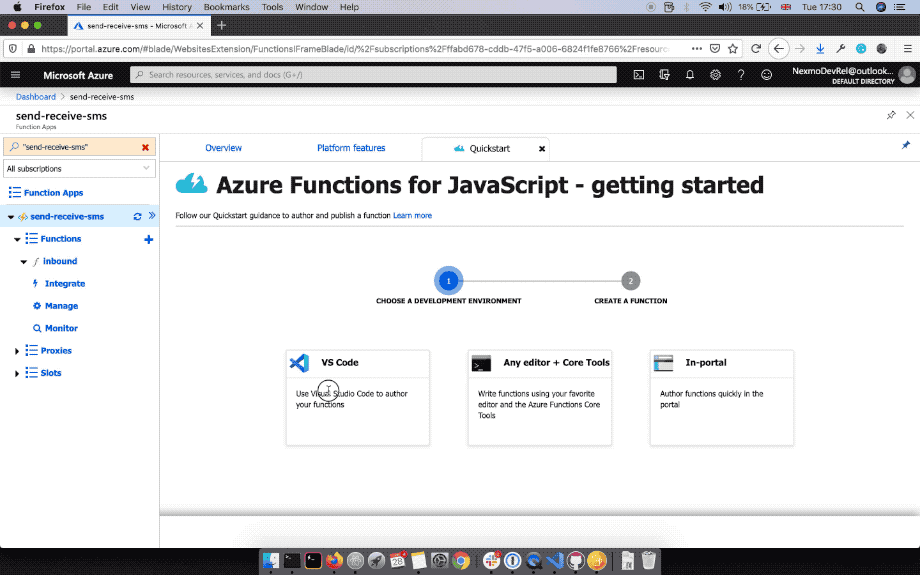 Create Azure Function quickstart
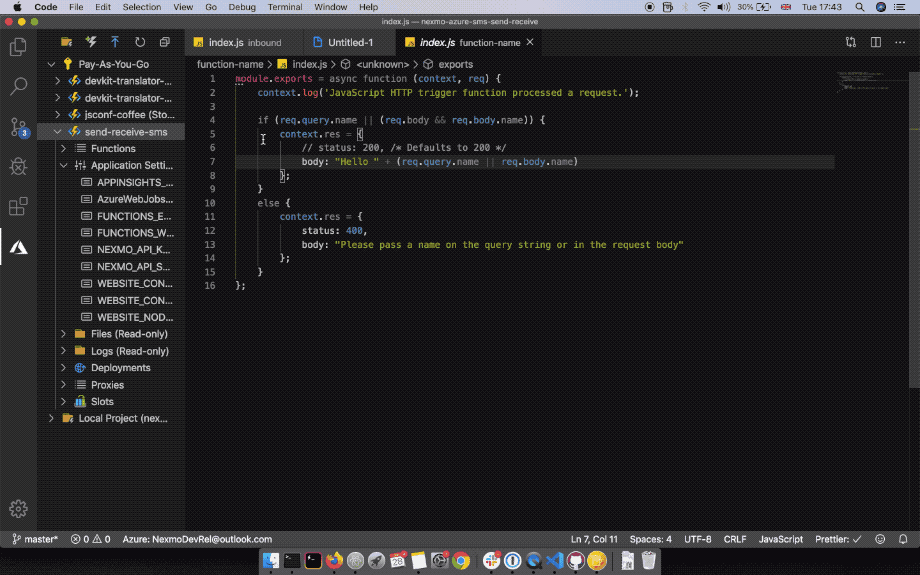
Once I was done with the setup, I created my first function, an HTTP Trigger. I've called it inbound, but you can use any name you want. For the security mechanism, you have a few options that control the authorization level on the function. "Function" requires a function-based API key, "Admin" requires your master API key from Azure, and "Anonymous" doesn't require an API key. I've chosen "Anonymous" as the security mechanism for it. That created a new file with a default template.
 Create Azure Function template
I've replaced the contents of the function to match the Receive an SMS code snippet we use on our developer portal. It combines the body and query parameters of a request and logs that to the console. It's a simple Webhook you can use to receive SMS messages on the Vonage platform.
module.exports = async function(context, req) {
    const params = Object.assign(req.query, req.body);

    if (params.text) {
      context.log("SMS received", params);
    }

    context.res = {};
  };
Because Vonage needs to be able to access a public URL, I've deployed my function with Azure. You can do so in VS Code. Once the deployment finishes, you'll get back a live URL for your function, for example, mine is https://send-receive-sms.azurewebsites.net/api/inbound.
 Deploy Azure Function
To receive an SMS message on the Vonage platform, you have to own a Vonage number. If you don't have one, you can buy one in the Vonage Dashboard:
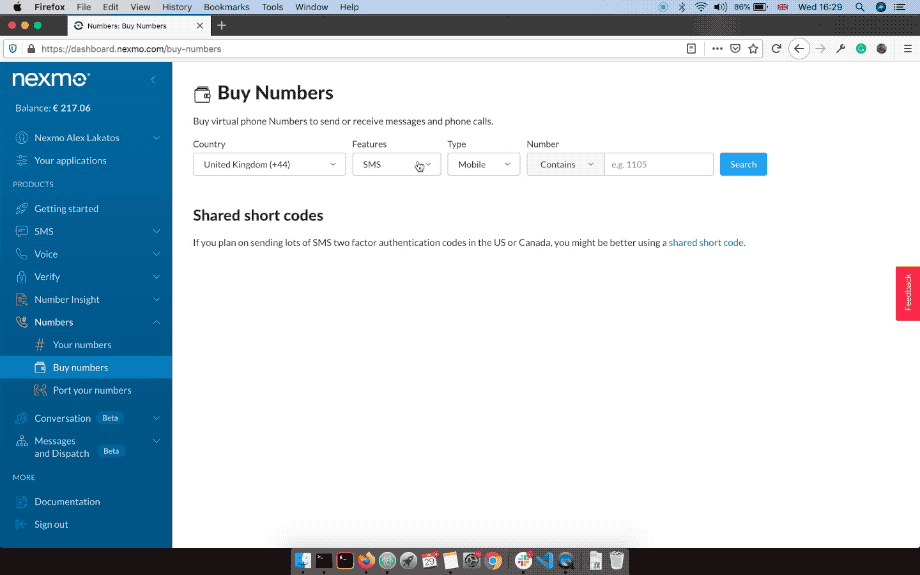 Buy Vonage Phone Number
When a Vonage phone number receives an SMS message, Vonage will pass that message to a Webhook you have specified in the Nexmo dashboard. We'll use our Azure Function as the receiving Webhook. To set up the webhook URL, go to the little gear icon next to your phone numbers in the Nexmo Dashboard and fill in the "Inbound Webhook URL" field with the URL you got after deploying the Azure function (mine was https://send-receive-sms.azurewebsites.net/api/inbound).
 Set Inbound Webhook URL on the Vonage Dashboard
You can test it works by sending an SMS from your phone to your Vonage phone number, and it will show up in the Azure function logs.
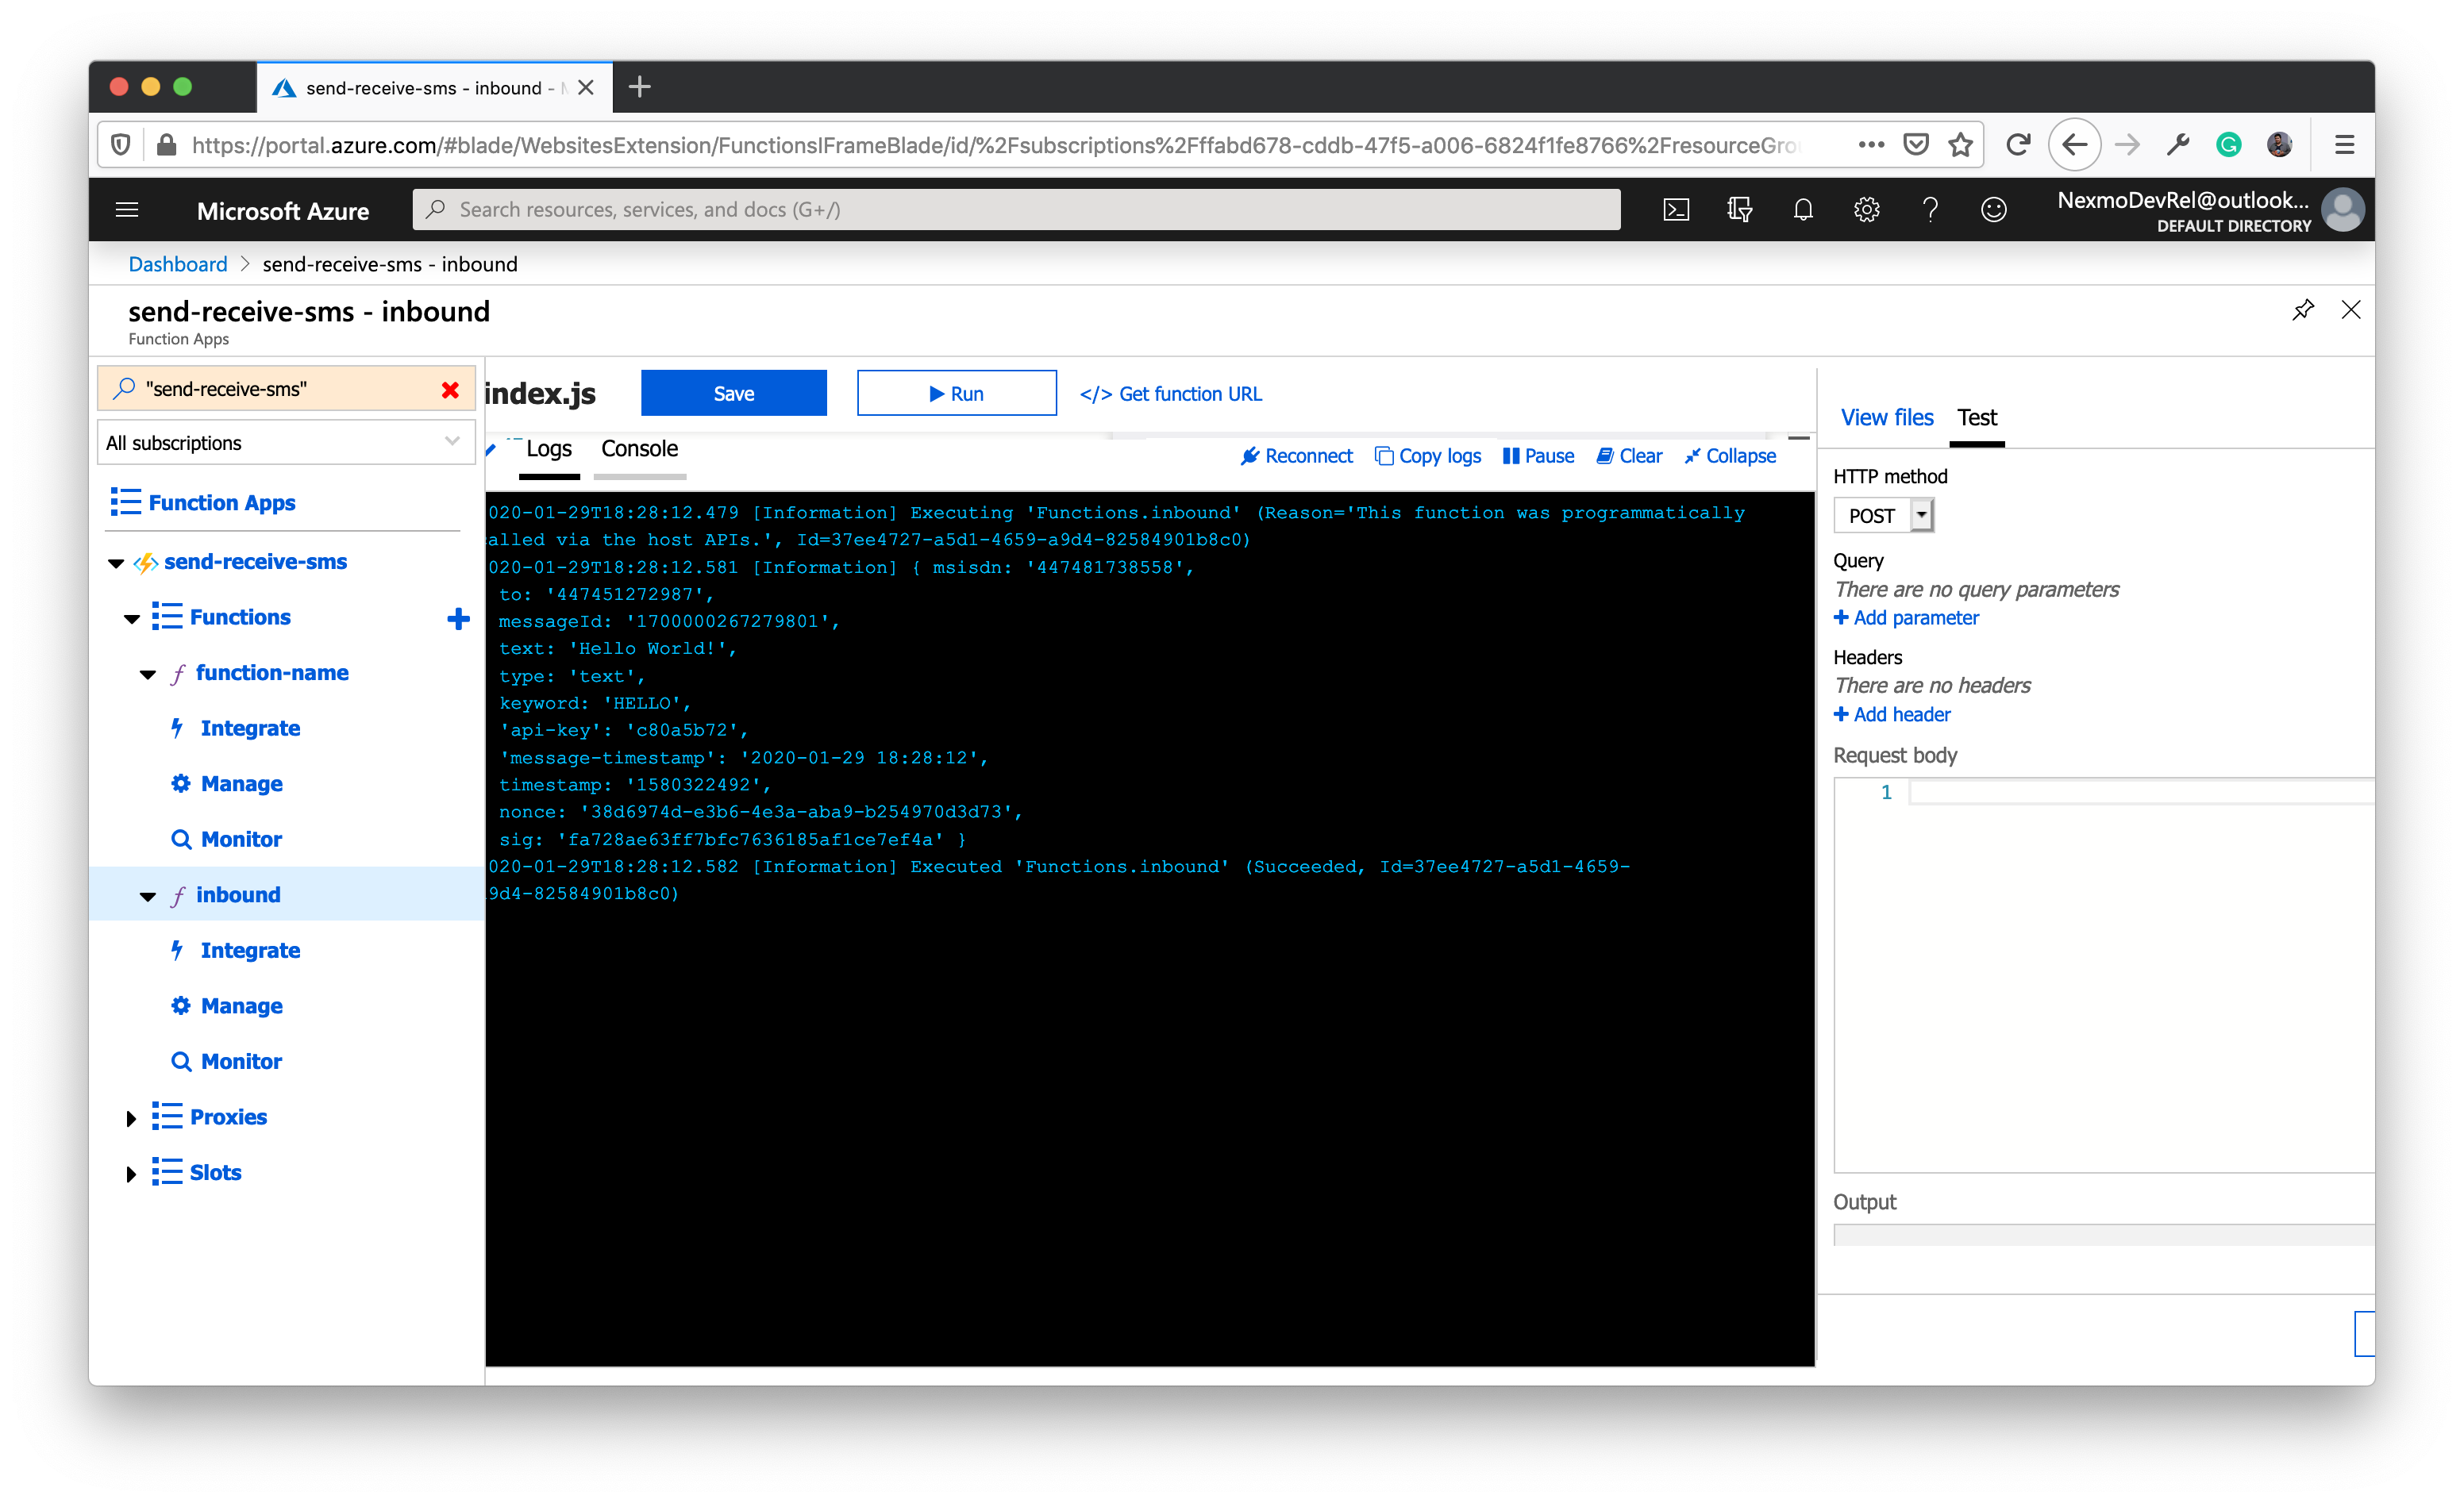
I thought it would be nice if the Function did a little more than logging the SMS messages, so I'm going to make it respond to SMS messages as well, changing the message from text to emojis.
I'm going to use the Vonage Node.js SDK for sending the SMS message, so you'll need to install it in the Azure function. The top-level folder for your function has a package.json file in it that gets installed with each deployment. So if you navigate to that folder in the Terminal and use npm install nexmo, that will give you access to the Vonage SDK inside the Azure function.
I've also updated the function to initialize the Vonage SDK, convert the SMS message to emojis and then send it as an SMS back to the original sender.
module.exports = async function(context, req) {
  const Nexmo = require("nexmo");

  const nexmo = new Nexmo({
    apiKey: process.env["NEXMO_API_KEY"],
    apiSecret: process.env["NEXMO_API_SECRET"]
  });

  const params = Object.assign(req.query, req.body);

  if (params.text) {
    var response = [];

    // transform inbound SMS into emojis
    for (let i = 0; i < params.text.length; i++) {
      const emoji = String.fromCodePoint(127715 + params.text.charCodeAt(i));
      response.push(emoji);
    }

    // send SMS back with emojis
    nexmo.message.sendSms(
      params.to,
      params.msisdn,
      response.join(""),
      {
        type: "unicode"
      },
      (err, responseData) => {
        if (err) {
          context.log(err);
        } else {
          if (responseData.messages[0]["status"] === "0") {
            context.log("Message sent successfully.");
          } else {
            context.log(
              `Message failed with error: ${responseData.messages[0]["error-text"]}`
            );
          }
        }
      }
    );
  }

  context.res = {};
};
You'll notice my code initializes the Vonage SDK with process.env["NEXMO_API_KEY"] and process.env["NEXMO_API_SECRET"]. The Azure Function App has Application settings and I've added my NEXMO_API_KEY and NEXMO_API_SECRET in there, and those get updated with each deployment from my local machine. You can do so as well, or replace those values with your actual API key and secret. You can find those on the "Getting Started" page in the Vonage Dashboard.
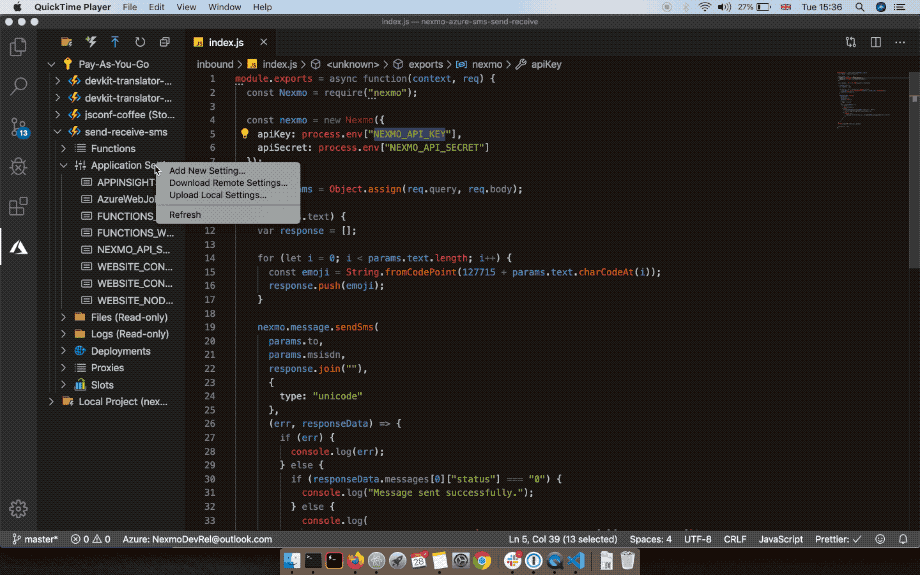 Add Application Settings in Azure
The SDK method for sending an SMS, nexmo.message.sendSms(), takes the sender ID, the recipient phone number, the text message and options as parameters. I've added {type: "unicode"} in the options because I'm sending emojis. It also accepts a callback that gets called when the API request is done.
The response data contains an array for all the messages that were sent, with information about their status. In most cases, it's going to be one element in that array, but if the SMS was longer than 160 characters, it gets split into a multipart SMS, and then the array contains data about each part sent. If the status of the message is 0, the SMS was sent successfully, otherwise, the error data for the message is on the error-text property of the message.
Because my text has an emoji in it, I'm setting the type unicode in the options object, otherwise, that emoji is going to be sent on the network as ?.
Now send an SMS message from your phone to your Vonage number. You should get back an SMS message converting your text characters to emojis. If you send Hello World! in the SMS, you should get back 🌷🍈🍛🍗🌃🍐🍈🌃🍗🍈🍑🍇🍈🍕🌑.
 Received SMS message with Vonage
I hope it worked and you've just learned how to send and receive SMS messages with the Vonage APIs, Azure Functions and Node.js.
Share:
Alex Lakatos is a JavaScript Developer Advocate for Nexmo. In his spare time he volunteers at Mozilla as a Tech Speaker and a Reps Mentor. JavaScript developer building on the open web, he has been pushing its boundaries every day. When he’s not programming in London, he likes to travel the world, so it’s likely you’ll bump into him in an airport lounge.