Share:
Javier studied Industrial Engineering back in Madrid where he's from. He is now one of our Solution Engineers, so if you get into trouble using our APIs he may be the one that gives you a hand. Out of work he loves playing football and travelling as much as he can.
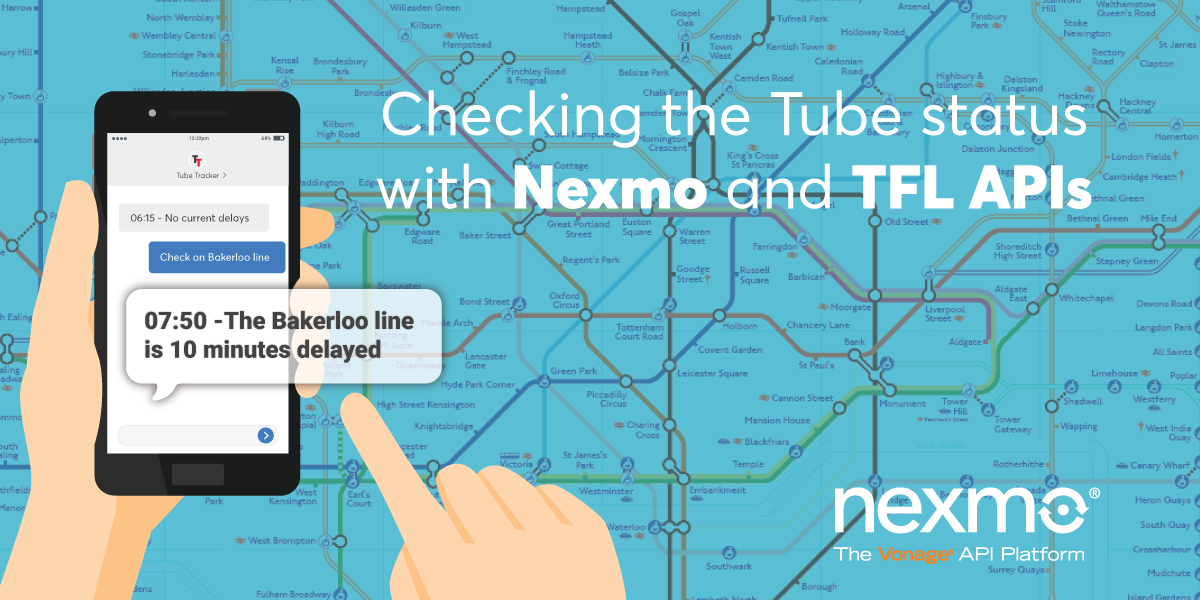
Checking the London Tube Status with Vonage's SMS API
Time to read: 21 minutes
Today we'll be building an application that will allow us to check the status of a given line of the London Underground using the Vonage SMS API. We are going to leverage the Transport for London (TFL API) to retrieve real-time data about the status of a tube line chosen by the user. The trigger will be an inbound SMS to our Virtual number. Does it sound like a plan? Follow through this tutorial then. We will get the same status as in their website straight into our handset via SMS. This is especially handy if for some reason you don't have internet access to check Google Maps/Citymapper or if you've exceeded your monthly data allowance.
Our application workflow will be something like the following diagram:
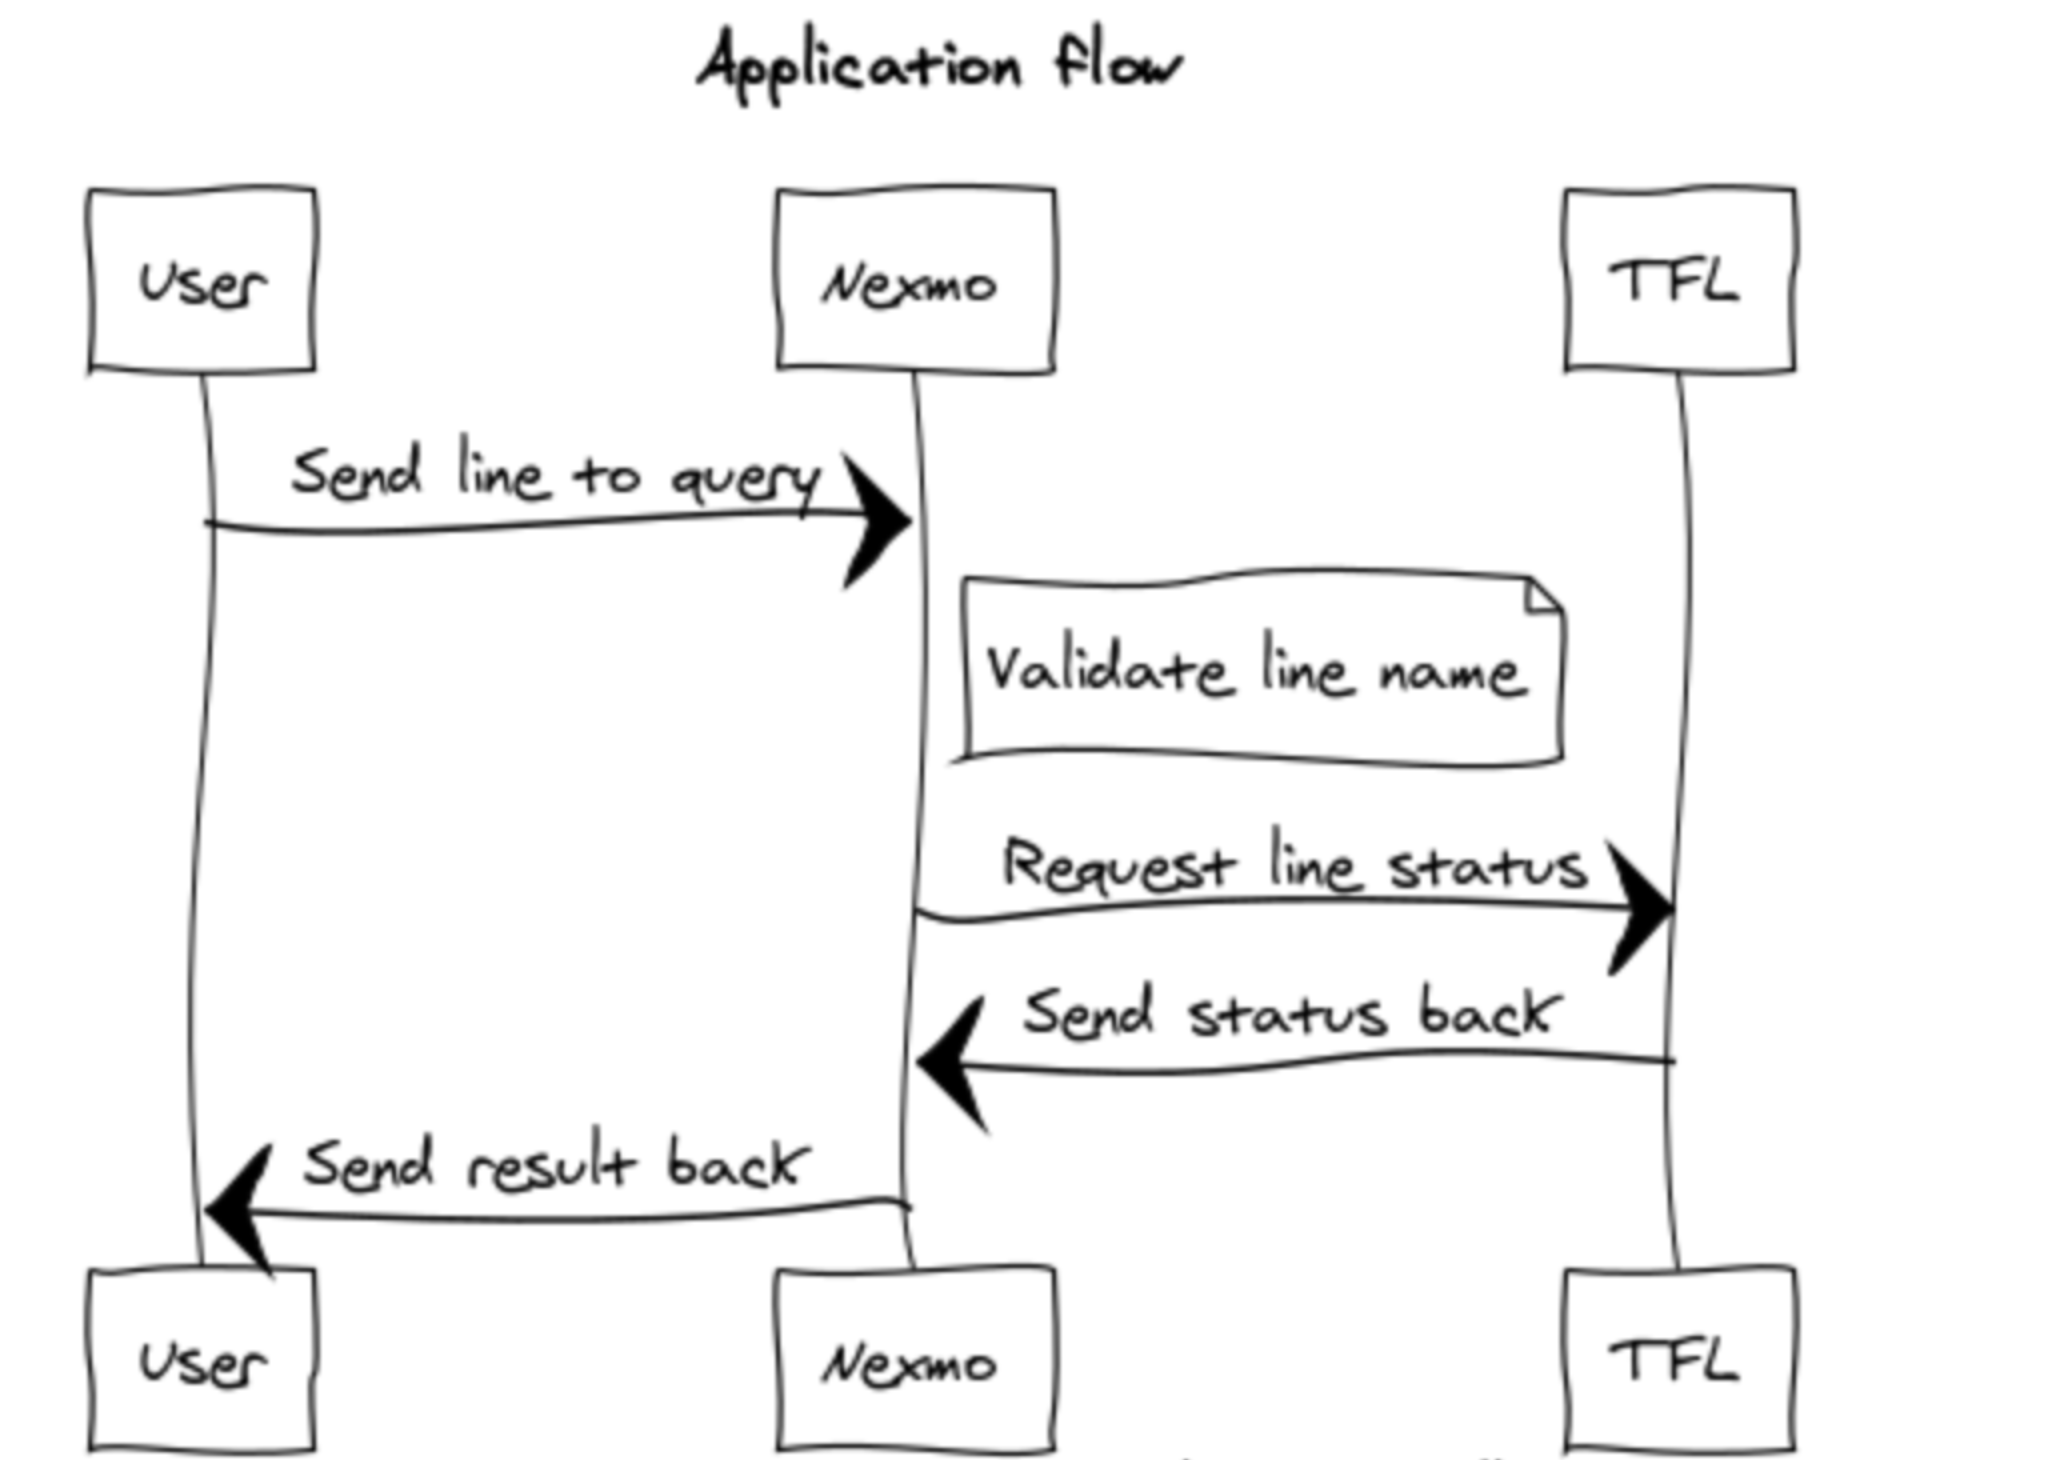 sketch diagram of workflow
I know 😌 chances are you don't live in London, and you may think this tutorial is not relevant for you. However, I truly believe that this is a very illustrative example of what you can build on top of Vonage.
This tutorial will walk you through all the steps to create this application from scratch. However, if you prefer to get a hold of the finished repository, please go check it out!
For the first part of the tutorial, we will need:
Some basic Javascript/node.js Knowledge.
You will need to use ngrok to expose your local server to the internet so Vonage can reach it. We have a detailed tutorial on this.
If you want to get your application deployed to Heroku, you will also need:
A Heroku account (we will only be using the Free-tier).
Some basic git commands to deploy our application to Heroku.
Create a project folder named tubestatus on your local machine and change to it.
mkdir tubestatus && cd tubestatus
Let's create our main file where we'll store our code. We will also create our .env file where we'll be storing our Vonage and credentials as well as some other variables.
The next step is to create the package.json file.
Let's install and save the necessary dependencies.
Now we need to create a Vonage app and buy a number.
Install the Vonage CLI globally with this command:
npm install @vonage/cli -gNext, configure the CLI with your Vonage API key and secret. You can find this information in the Developer Dashboard.
vonage config:set --apiKey=VONAGE_API_KEY --apiSecret=VONAGE_API_SECRETLet's run ngrok in the same port where our local server is listening (in my case 3000).
ngrok http 3000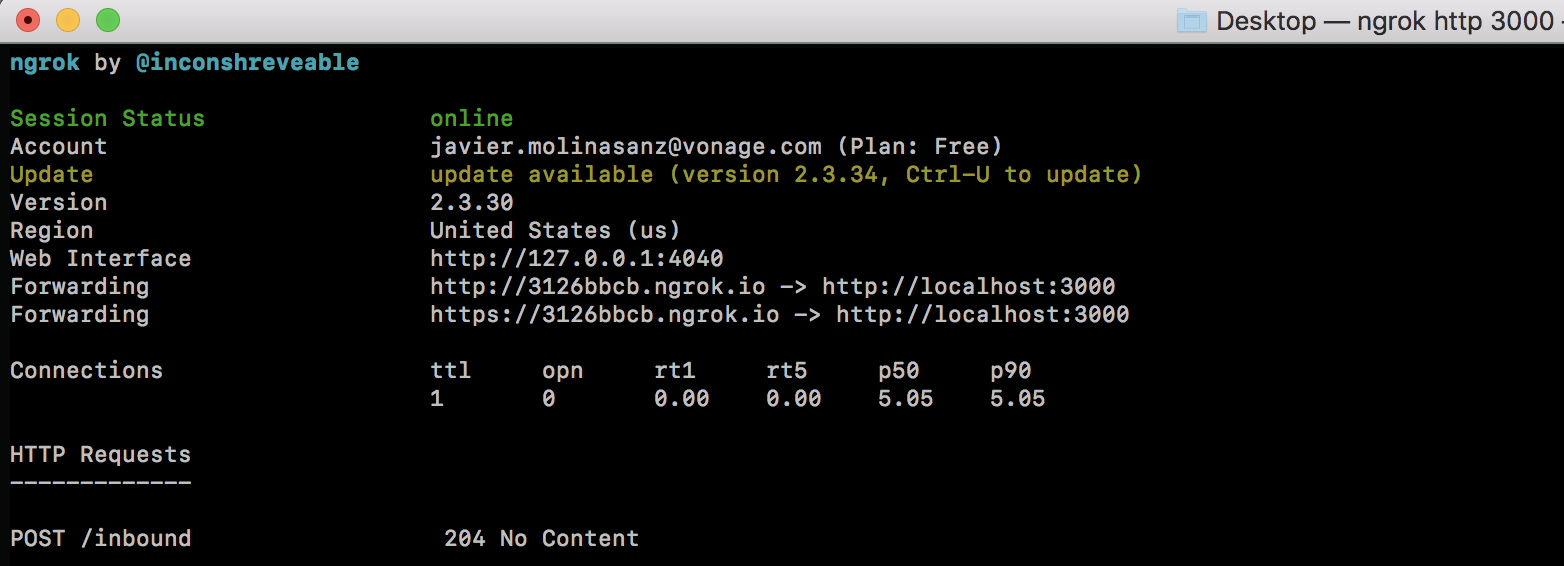
Now, use the CLI to create a Vonage application and create a webhook to your ngrok URL.
You'll want to save that ID that's printed out after Application created:. You'll need it shortly.
Now you need a number so you can receive calls. You can rent one by using the following command (replacing the country code with your code). For example, if you are in the USA, replace GB with US:
Now link the number to your app:
vonage apps:link --number=VONAGE_NUMBER APP_IDFinally, fill in the .env file with the Vonage API key for apiKey, Vonage secret for apiSecret, and the number you just purchased for from. Next, add your TFL app_id and app_key.
As always, let’s require all the dependencies at the beginning of our project. We will use the express framework to build our application. We’re going to use the dotenv library so that we work with environment variables. We'll be using body-parser so we can parse the incoming requests coming from Vonage's server. For the API requests to the TFL API, I chose the request library as I find it quite straightforward but you can use any other such as axios. Lastly and most importantly, 😊 we require the Vonage library to send the line status back to the user.
Paste the following code into your newly created file. We import all the dependencies installed, and we've defined a variable that contains all the accepted line names provided by the TFL API. We don't want to send a request to the TFL API if the user doesn't provide a valid line name (I will explain in a bit why all the values are capitalized). The variable called status will contain any relevant status in relation to the status of the said line. Also, add in the different credentials you’ll need to utilize the Vonage and TFL APIs respectively. These will be retrieved from the .env file:
const Vonage = require('@vonage/server-sdk')
const express = require('express');
const bodyParser = require('body-parser');
const port = process.env.PORT || 3000;
const request = require('request');
const dotenv = require('dotenv');

let status = []

dotenv.config();

const lines =['CENTRAL','BAKERLOO', 'DISTRICT', 'VICTORIA', 'NORTHERN', 'CIRCULAR', 'HAMMERSMITH-CITY', 'JUBILEE', 'METROPOLITAN', 'PICCADILLY', 'WATERLOO-CITY' ];

const vonage = new Vonage({
  apiKey: process.env.apiKey,
  apiSecret: process.env.apiSecret
})In the following lines, we're initiating our application and defining some basic middleware. Note that we have defined the port 3000 for our server to be listening in, but you can choose other. Take into account that there's some space in between (commented out) that will be filled out with our route for incoming requests:
const app = express();

app.use(bodyParser.json());
app.use(bodyParser.urlencoded({ extended:true}));

//We will define our route here

app.listen(port, ()=>{console.log('App listening in port ', port)});
Let's define two functions to tidy-up a little bit the code. The first function sendSms() is going to take in two parameters: the phone number of the user and the text to be sent back to the user. We’ll be reusing a little bit of the code.
function sendMessage(to, message){
  vonage.message.sendSms(process.env.from, to, message, (err, responseData) => {
    if (err) {
        console.log(err);
    } else {
        if(responseData.messages[0]['status'] === "0") {
            console.log("Message sent successfully.");
        } else {
            console.log(`Message failed with error: ${responseData.messages[0]['error-text']}`);
        }
    }
})
}
The second function checkLineStatus() will take in two parameters: the line name and the user's phone number as we will be sending a message back to the user with the requested information.
function checkLineStatus(Line, number) {

    var options = {
        json: true,
        url: 'https://api.tfl.gov.uk/Line/' + Line + '/status?app_id=' + app_id + '&app_key=' + app_key,
    }

    request(options, function (err, res, body) {
        if (err) {
            console.log(err)

        }
        else {
            if (body[0].lineStatuses[0].statusSeverityDescription === 'Good Service') {
                sendMessage(number, 'There is a ' + body[0].lineStatuses[0].statusSeverityDescription + ' operating on ' + body[0].name + ' line')

            }
            else {
                for (let i = 0; i < body.length; i++) {
                    for (let j = 0; j < body[i].lineStatuses.length; j++) {
                        status.push(body[i].lineStatuses[j].reason)
                    }
                }
                sendMessage(number, status)
                console.log(status)
            }
        }
    })
}
If the status of the given line is Good Service (Note that the TFL API will always return this when normal service is running) send this back to the user. Otherwise, It's important to take into account that when there's a line disruption, the TFL API will provide a reason within the lineStatus object. That's what we're pushing into our array for every disruption occurred (Hopefully none for commuters' sake 😂). Don't forget that within this function, we’re also calling the sendSms() function to return the line status to the user in both scenarios.
Lastly, we're going to fill in our inbound route to listen to incoming messages from the users. Let's have a look at what an inbound message from Vonage looks like.
To accomplish our goal, we're going to need to store two of the above parameters; The text sent by the user (line name) and the user's number. These will be stored in our new variables (Tube_line and Number_msisdn respectively) as soon as our /inbound route gets hit.
It is important to note that we're capitalizing the tube line. The reason behind this is that we want to compare a specified String to another String ignoring case considerations (the user can send us Central, CENTRAL or central). By capitalizing the input from the user and comparing it with our lines array (already capitalized) we work around this. Add in the following code in the space we got reserved for our route.
app.post('/inbound', (req, res) => {
    let Tube_Line = req.body.text.toUpperCase()
    let Number_msisdn = req.body.msisdn

    if ((lines.indexOf(Tube_Line) > -1)) {
        checkLineStatus(Tube_Line, Number_msisdn)
    }
    else {
        sendMessage(Number_msisdn, 'Valid values are ' + lines)

    }

    res.status(204).send()
})
The (lines.indexOf(Tube_Line) > -1) bit will allow us to check if the value stored in Tube_line matches any of the values in the lines array. This method returns a first index at which the given item can be found in an array, or -1 if it is not present in an array. We'll want only to check the status of a given line if the input matches any of the valid values. Otherwise, we will receive a beautiful HTTP 404 back from the TFL API. Presuming we're gentle enough to let the user know that they've introduced a wrong value, we'll send them back a message providing them with the valid values. This is done when the indexOf method is equal to -1 as explained above.
Alright, it's time to test this out 🙈. Let's grab our phone and send an SMS with any line name that matches our lines array to your Vonage number. As an example, I will query the name of the line that gets me to work every day.
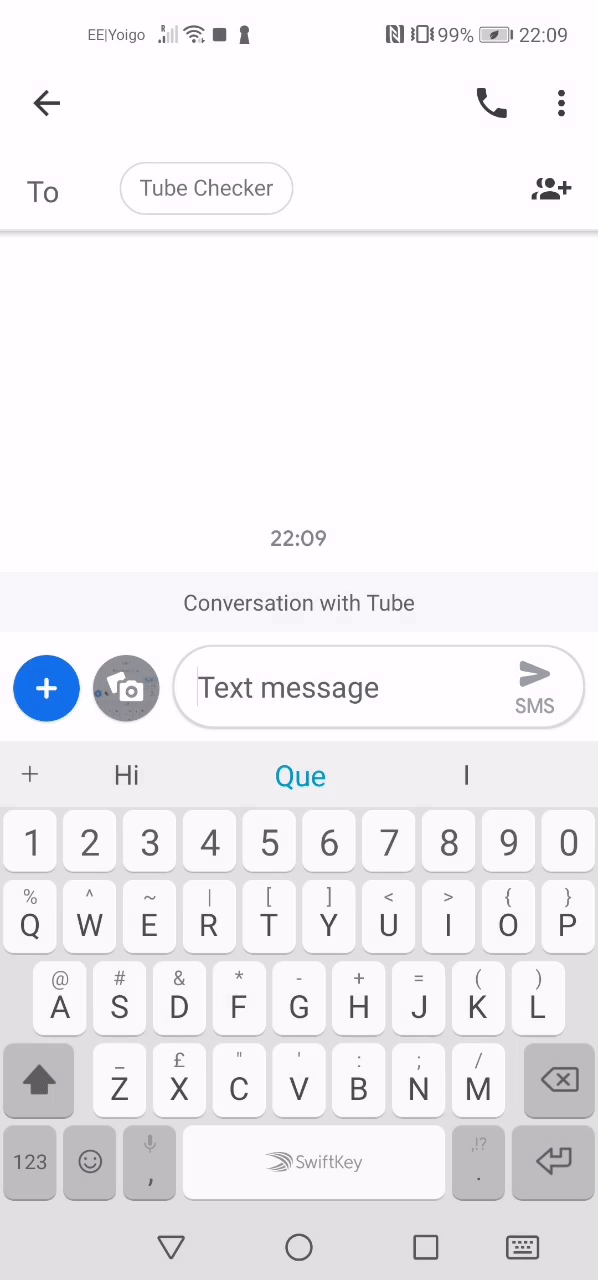 demo of app performance on phone
💃💃 As you can see, shortly after we send a message to our previously configured virtual number, we are receiving an SMS with the status of the requested line. Well done and thanks for following through that far!
If for some reason you don't have the chance to use your handset or you don't want to manually send SMS in order to test the application, we've got you covered as well. An inbound message is simply represented as a GET or POST request to your webhook. You can define which method you want Vonage to use to deliver your inbound messages in your Vonage Dashboard Settings. I'm using POST for this tutorial.
Taking this into account, we can simulate the behavior of an inbound message by manually hitting our local server exposed with ngrok to see if the application works as it should. I'll be using POSTMAN but feel free to use any other service of your choice. We're going to make a POST request to our inbound webhook defining a generic raw JSON body (as the one that Vonage would send for an inbound message). However, do remember to change the msisdn so that our application knows where to reply. Also, replace the text parameter to play around with different line name values, you can purposely type down an invalid value so that you receive a message containing the permitted values. My API request looks something like this:
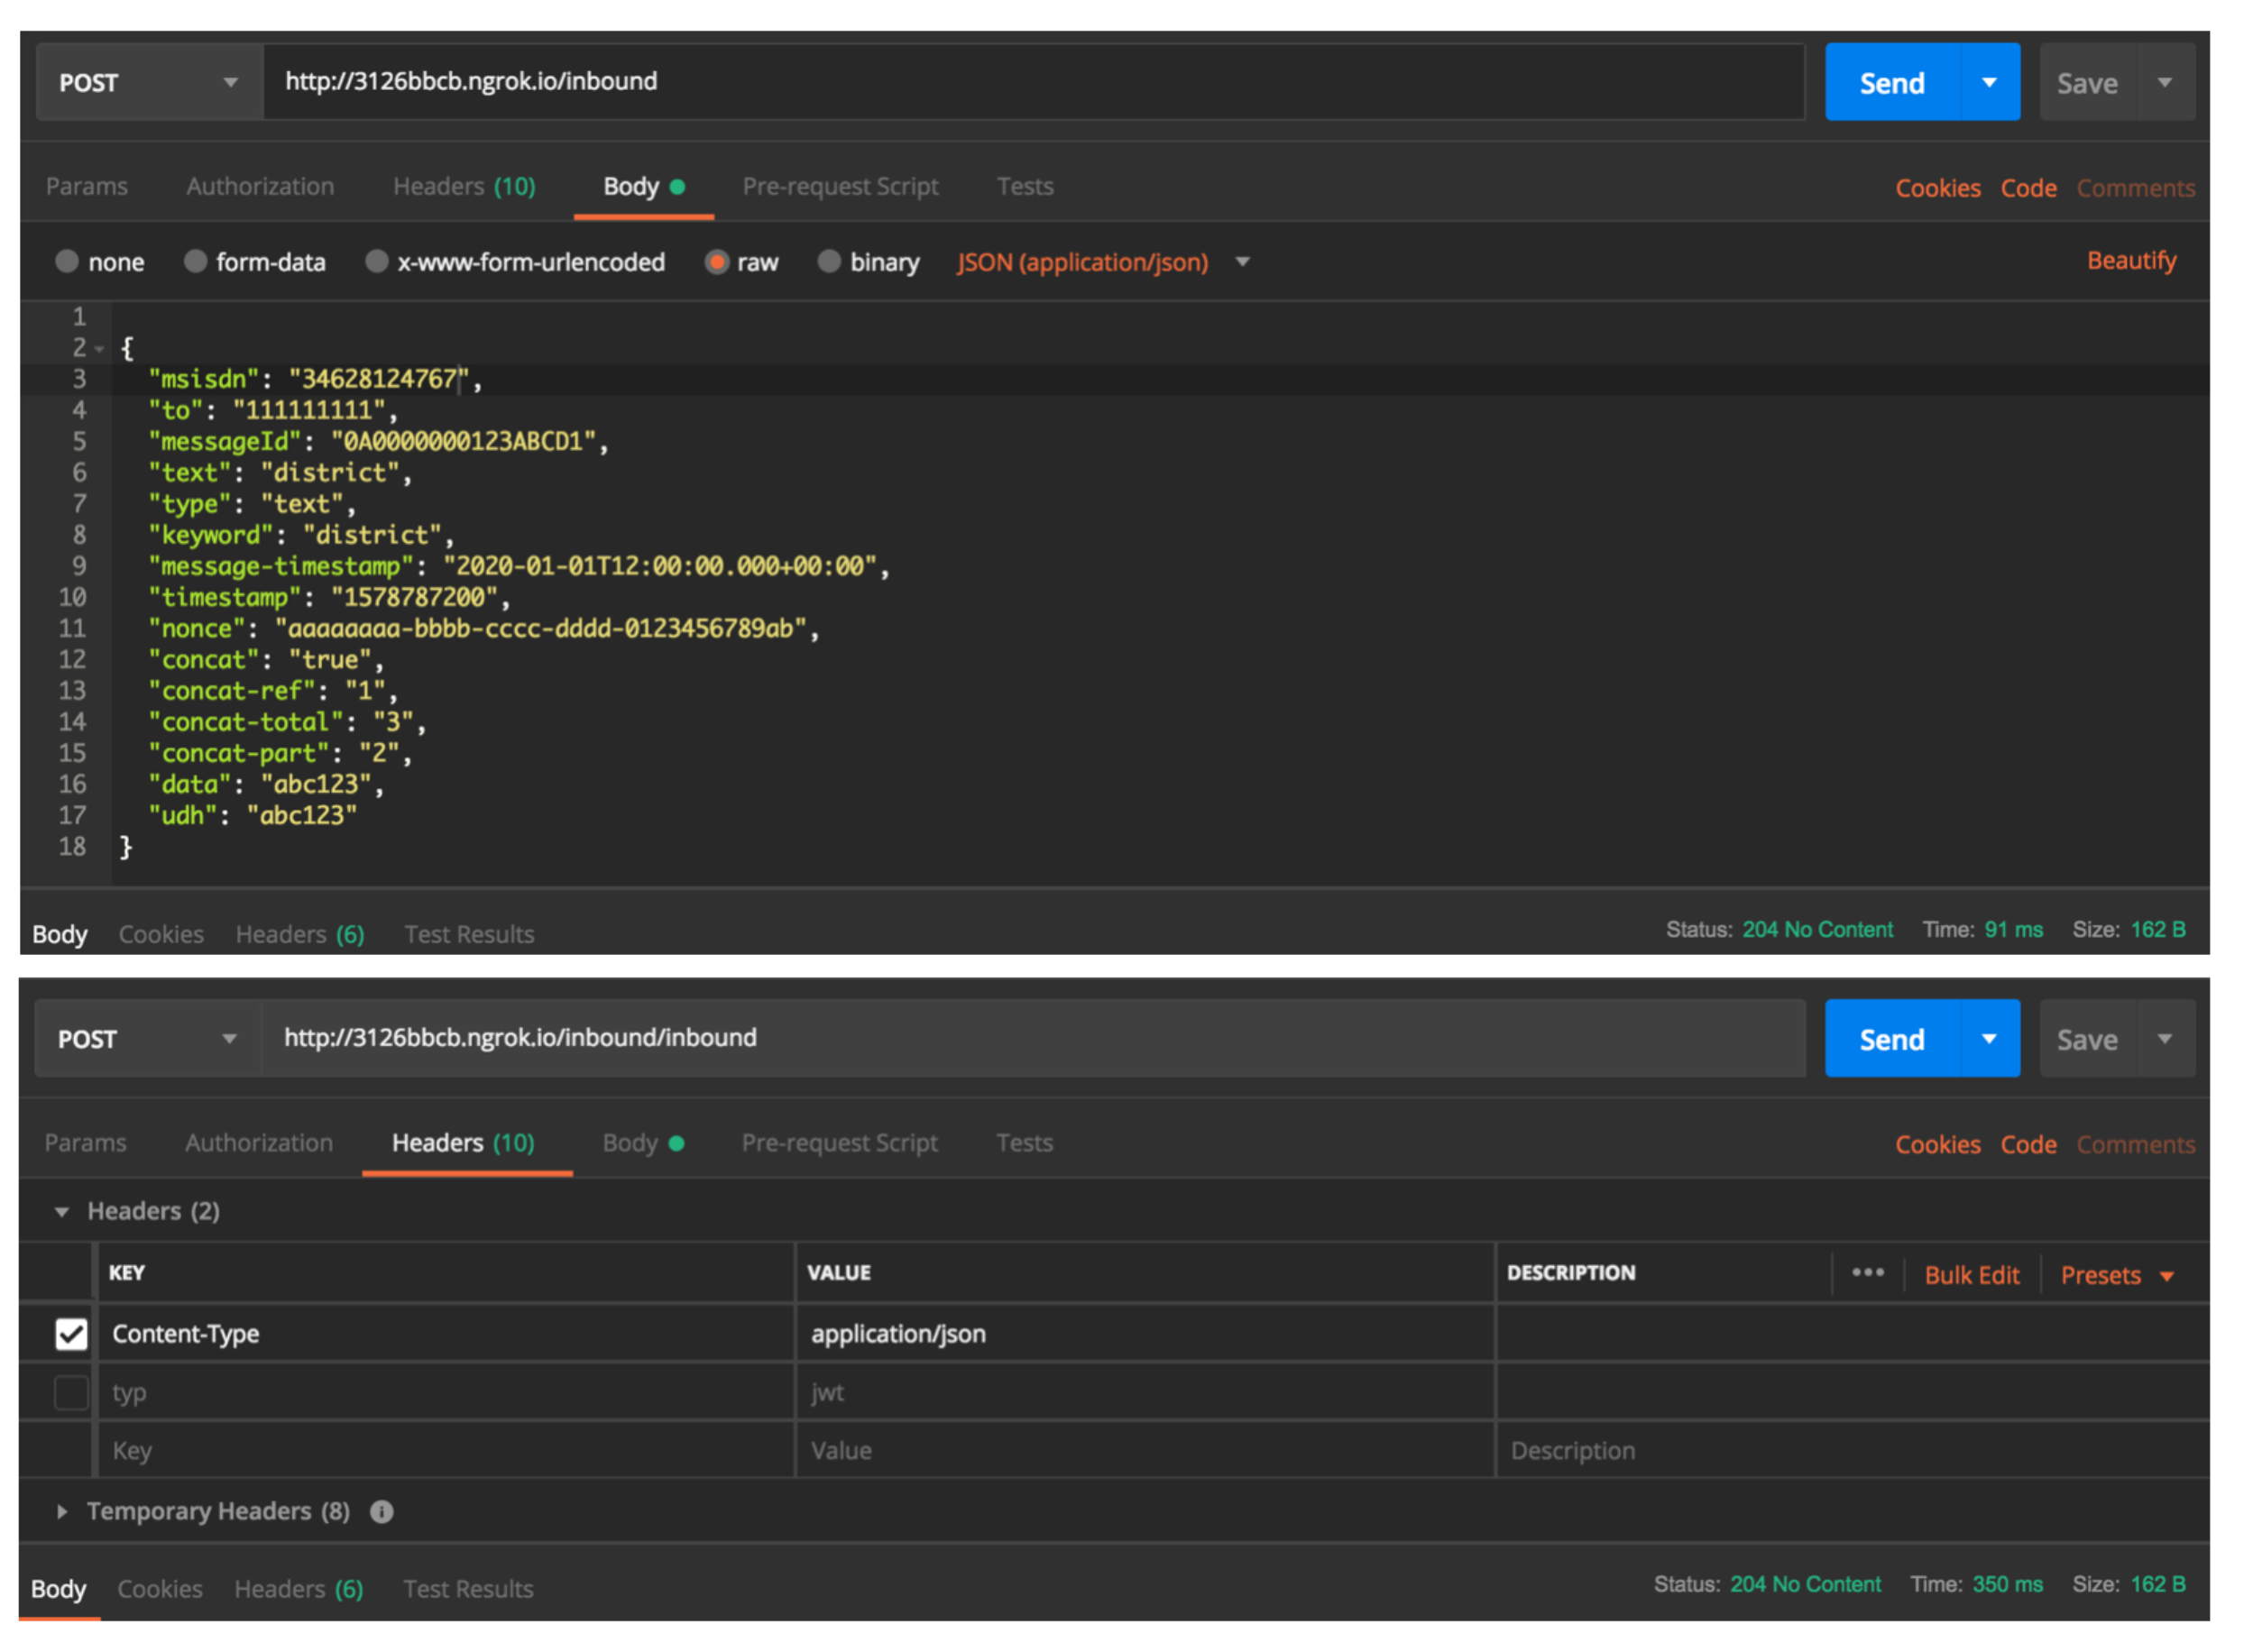
In this case, the to parameter is not relevant so I set it to a random value. It is important to add the Content-Type header and set it to application/json so that our application knows how to handle this data. As you can see at the bottom-right-hand side, our application returns an HTTP 204 as defined in our /inbound route via the res.status(204).send()
Heroku is a platform intended to easily deploy your Web application and scale your services according to your needs. They also offer some useful add-ons to simplify some daily tasks. We are going to leverage Heroku due to the fact that it's pretty easy to use, and the documentation is great on the Heroku site. By using Heroku we can avoid the hassle of renting, and configuring our server.
The concept of dynos exists within Heroku's platform. This is nothing but a container where your application will be deployed. Your application usage will consume dyno hours (only when it's running) but don't worry as they offer 550 free hours a month out-of-the-box or 1000 hours in case you agree to verify your account by providing a credit card. You can easily scale up or down your application taking into account the traffic demand, but this is out of the scope of this tutorial.
If you've never deployed a Heroku application, it may be worth to go through their docs, or at least read the bit where they explain how to deploy a node.js application. To determine how to start your app, Heroku first looks for a Procfile. This is a file that specifies the commands that are executed by the app on startup. If no Procfile exists for a Node.js app, Heroku will attempt to start a default web process via the start script in your package.json.
Let's edit our package.json, so the part that contains the scripts property has this bit included:
"scripts": {
    "start": "node server.js"
},Then, we're going to create a .gitignore file to ensure that local environment variables, build related output and modules are not committed to the git repository
/node_modules
npm-debug.log
.DS_Store
/*.envThe only downside of using the free-tier is that once your application idles after 30 minutes of inactivity, it can take a little bit until it awakes (when receiving a new request). Pragmatically, this means that we may see a slight delay when receiving the message back from Vonage if the application has been inactive for a while. This is because the request to the TFL API will be handled once the application is restarted again. This is acceptable as this application is not time-critical. However, if you don't find this sufficient, you can move to the paid service and have a dedicated dyno running for your application.
To determine how to start your app, Heroku first looks for a Procfile. If no Procfile exists for a Node.js app, Heroku will attempt to start a default web process via the start script in your package.json. The command in a web process type must bind to the port number specified in the PORT environment variable. If it does not, the dyno will not start.
Double-check that you have the Heroku CLI installed and then run the following commands within your project folder, one at a time:
At this point, we've created a new git repository, added all of the changes to our repository and submitted our first commit. Let's now create our application and deploy it to Heroku:
In these few lines, we've created our Heroku app and pushed the changes to Heroku. If everything went as expected, you should have your own application created. They will also provide you with the URL where your app can be found once it has been deployed. Well done!
Lastly, we have to tell our app where to find the environment variables given that we didn't provide any .env file. Run this command to set the required config variables
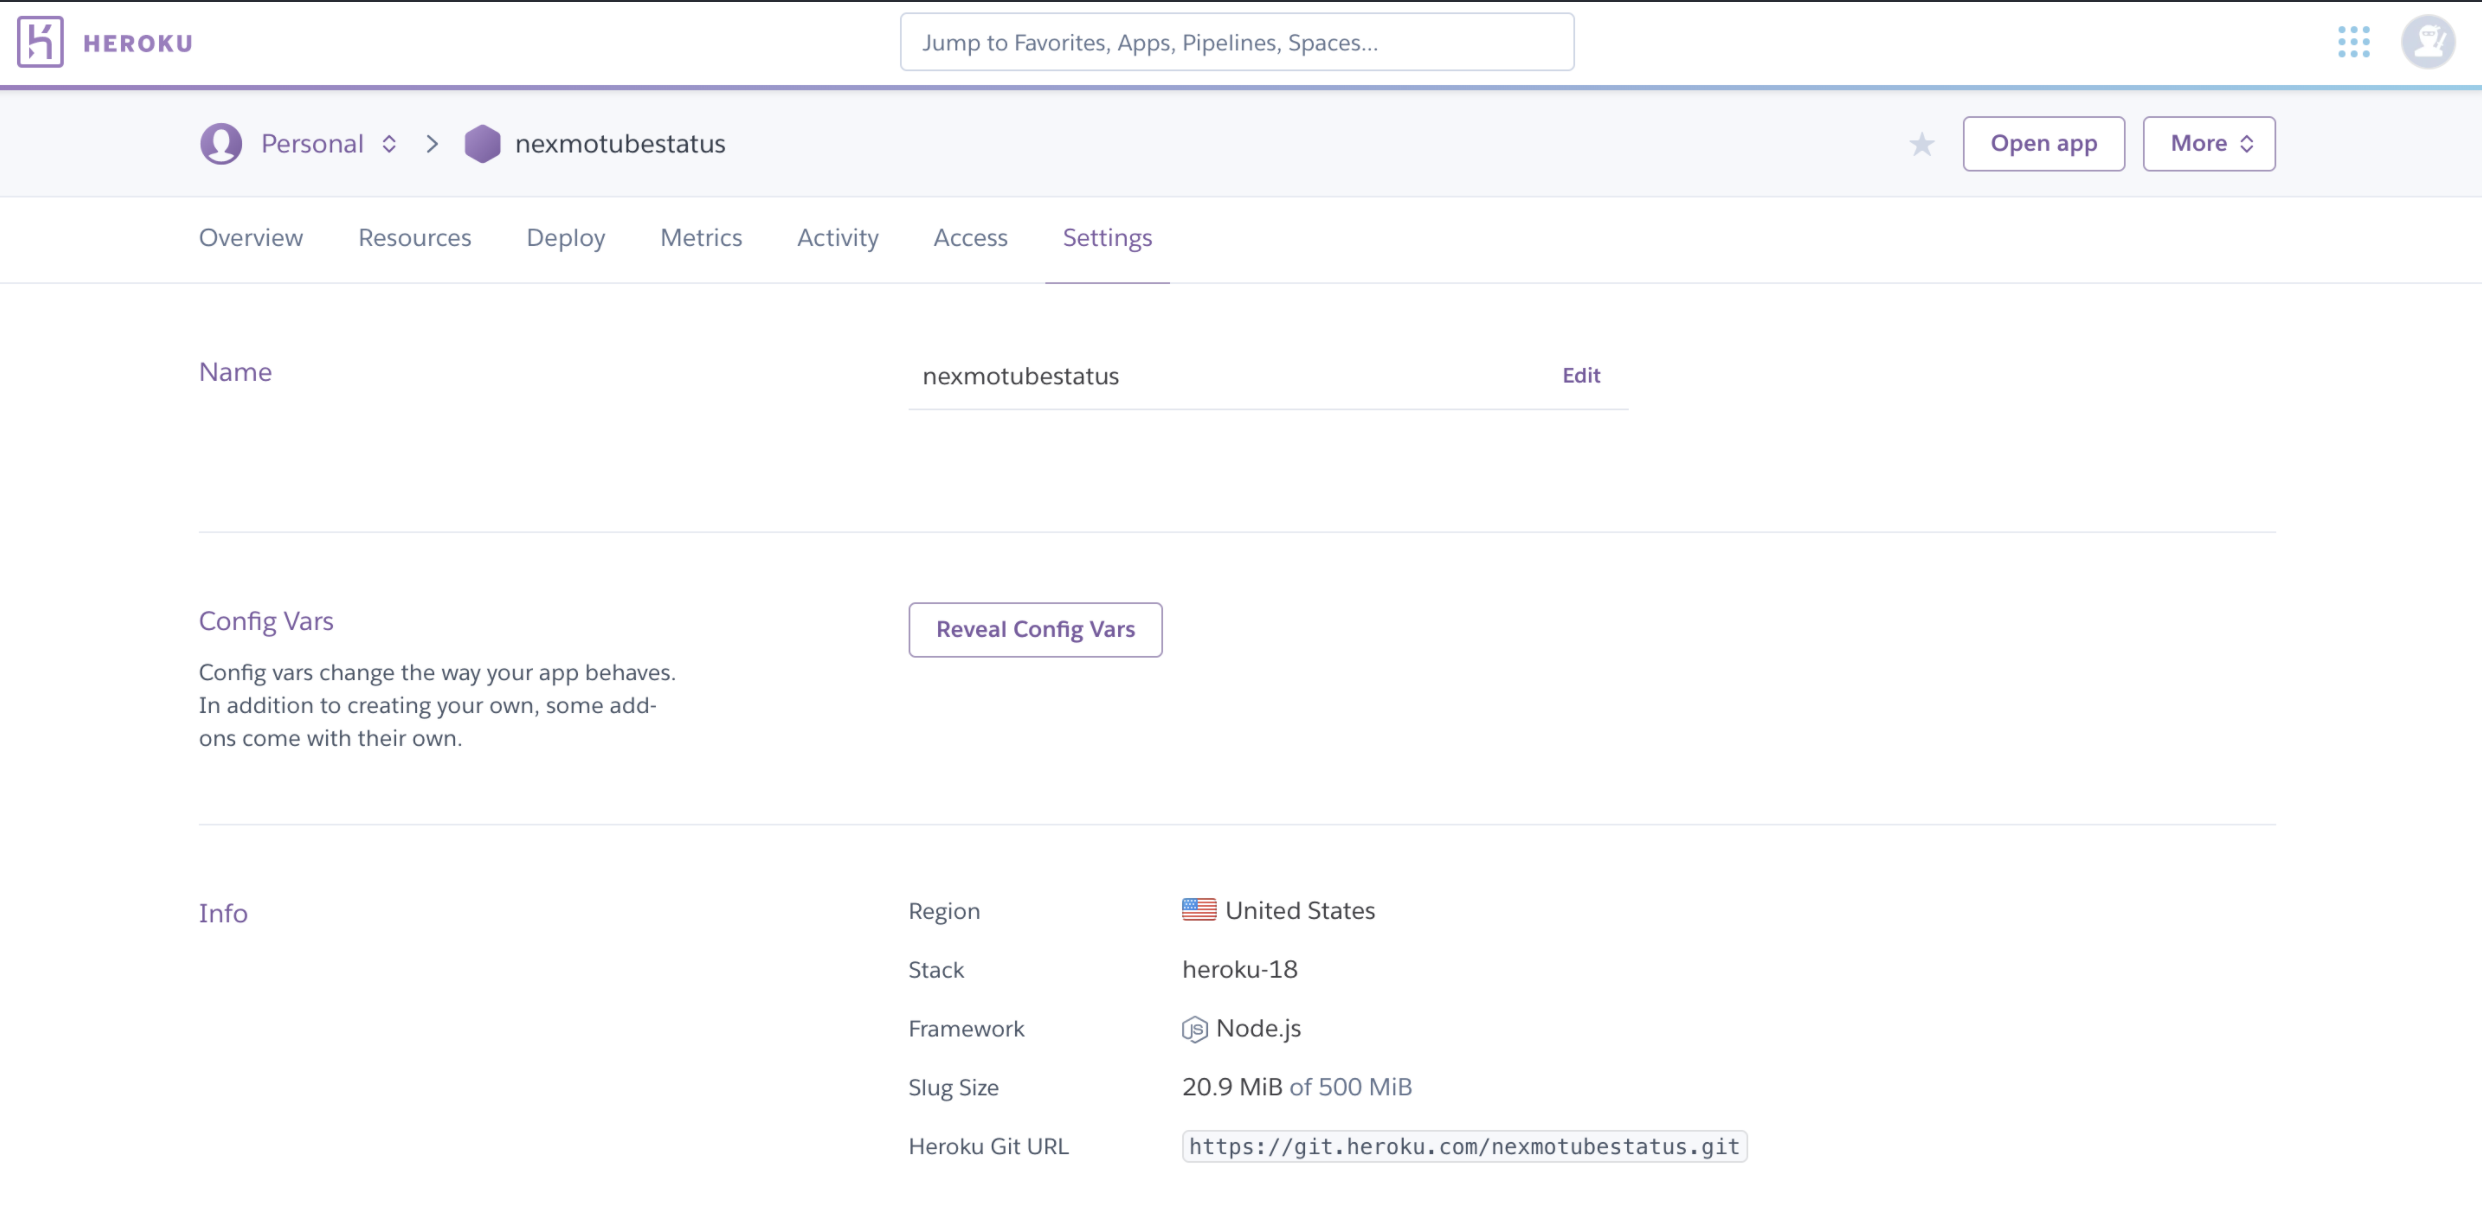
You can double-check that these variables were added fine by taking a look at your application settings under Heroku Dashboard. This is what our application looks like in the Heroku dashboard. If we hit on Reveal Config Vars, we'll see the environment variables configured via the Heroku CLI.
In conclusion, this process was relatively simple! I was able to get this up and running in a matter of a few minutes, which is excellent. All that is left now is to update our number to point to our new webhook, you can simply replicate the steps above (when we configured our number via the Numbers API). As a reminder, don't forget to include the /inbound at the end of the URL matching the route in our script.
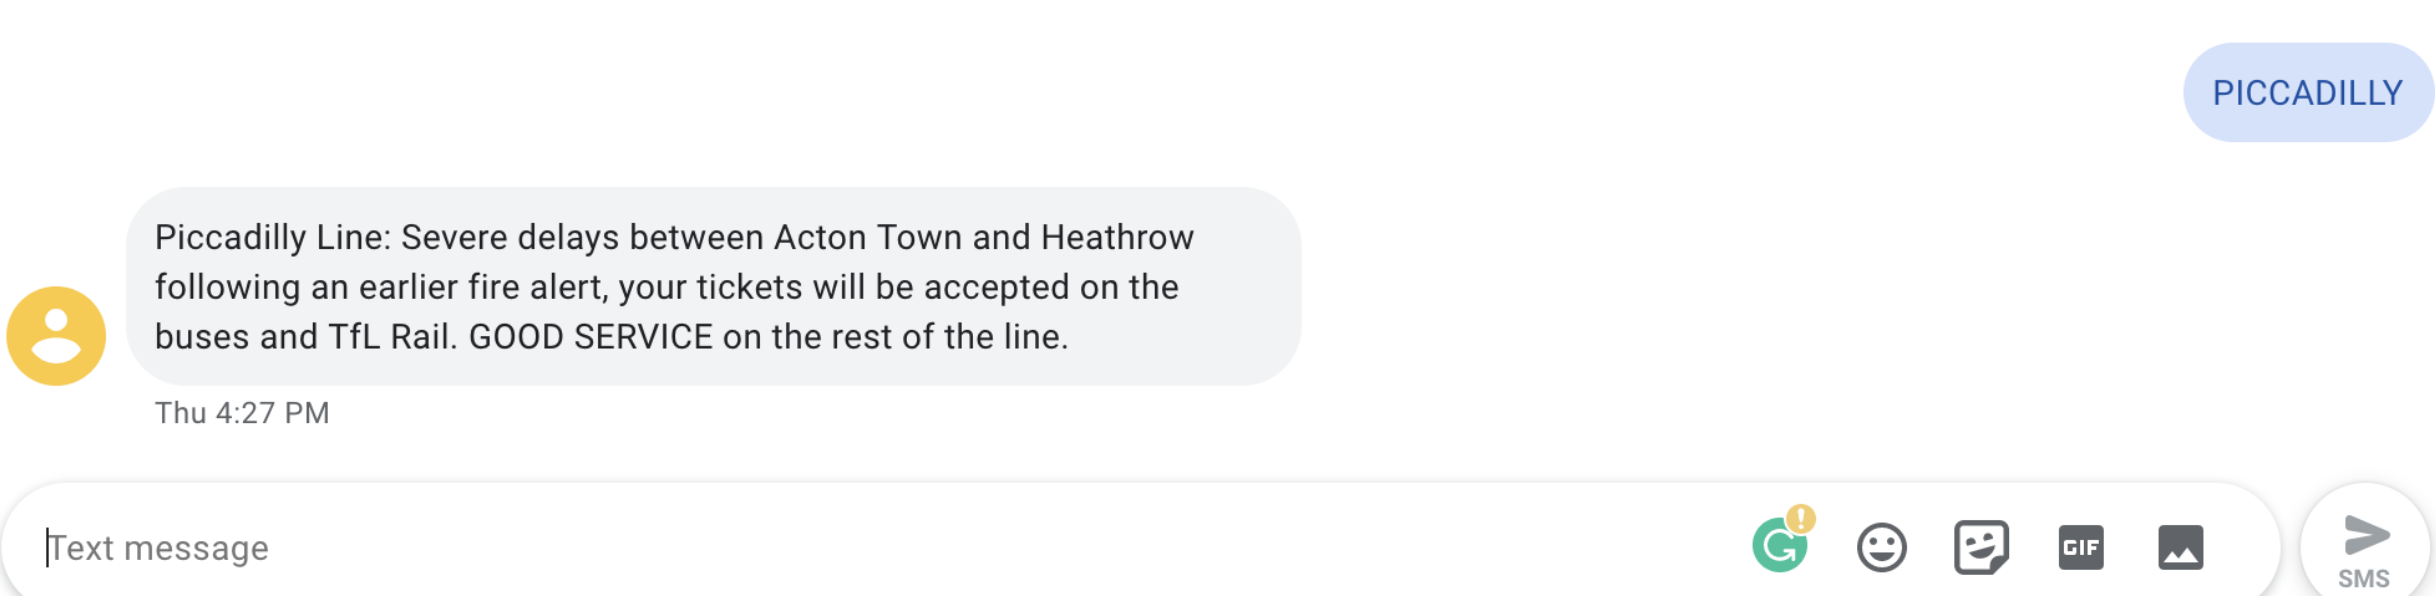
Hopefully, if we send an SMS once we have updated the Inbound Webhook URL for our number, this will work as expected. This is what a disruption status looks like. It seems that it would have been necessary to reschedule our journey if we were traveling to Heathrow via the District Line at the time I was testing this.
That's all for today but if you are willing to continue playing around with our APIs, you may find helpful the following links:
Documentation for the different APIs on the developer portal
Series of tutorials for various Vonage APIs
If you need us, try the Vonage Community Slack channel
Let us know what you think by tweeting at @VonageDev