Share:
Benjamin Aronov is a developer advocate at Vonage. He is a proven community builder with a background in Ruby on Rails. Benjamin enjoys the beaches of Tel Aviv which he calls home. His Tel Aviv base allows him to meet and learn from some of the world's best startup founders. Outside of tech, Benjamin loves traveling the world in search of the perfect pain au chocolat.
Building a Resilient Voice Agent: A Guide to Failover Systems
Time to read: 7 minutes
If you were born after 1980, there’s about an 80% chance that you fear answering or making phone calls (according to studies out of Germany and the US). For businesses, that means that soon more than half the global consumer population will be predisposed to “telephonobia”.
Even though reaching out to customers over voice calls is an efficient means of communication, businesses would be smart to implement alternative ways to accommodate their customers' preferences. A simple solution would be to follow up by text, WhatsApp, or email. This could have many real-world applications: confirming appointments, payment reminders, outbound marketing, and more.
Vonage’s AI Studio allows you to build outbound telephony chatbots in an intuitive no-code/low-code platform. The platform is easy to get started and allows you to build powerful integrations to take your customer experience to the next level. In this blog post, you’ll learn to trigger an outbound call from your agent and then send a follow-up SMS message and Email when the call is unsuccessful.
Vonage Developer Account
2 Vonage Virtual Numbers - Rent 1 number for each virtual agent
Node.js - download and install Node
Postman Account - Sign up for Postman
Ngrok Account - Sign up for ngrok
To create your agent, follow the instructions found in the AI Studio documentation here. There are three important options for our agent, select:
Type: Telephony
Template: Start From Scratch
Event: Outbound
Because the functionality you want to create is based on the call failing somehow, you will only need to build the simplest agent. Add a single "Speak” Node to your agent and add a phrase for the agent to say. Then add an End Call node to finish the flow.
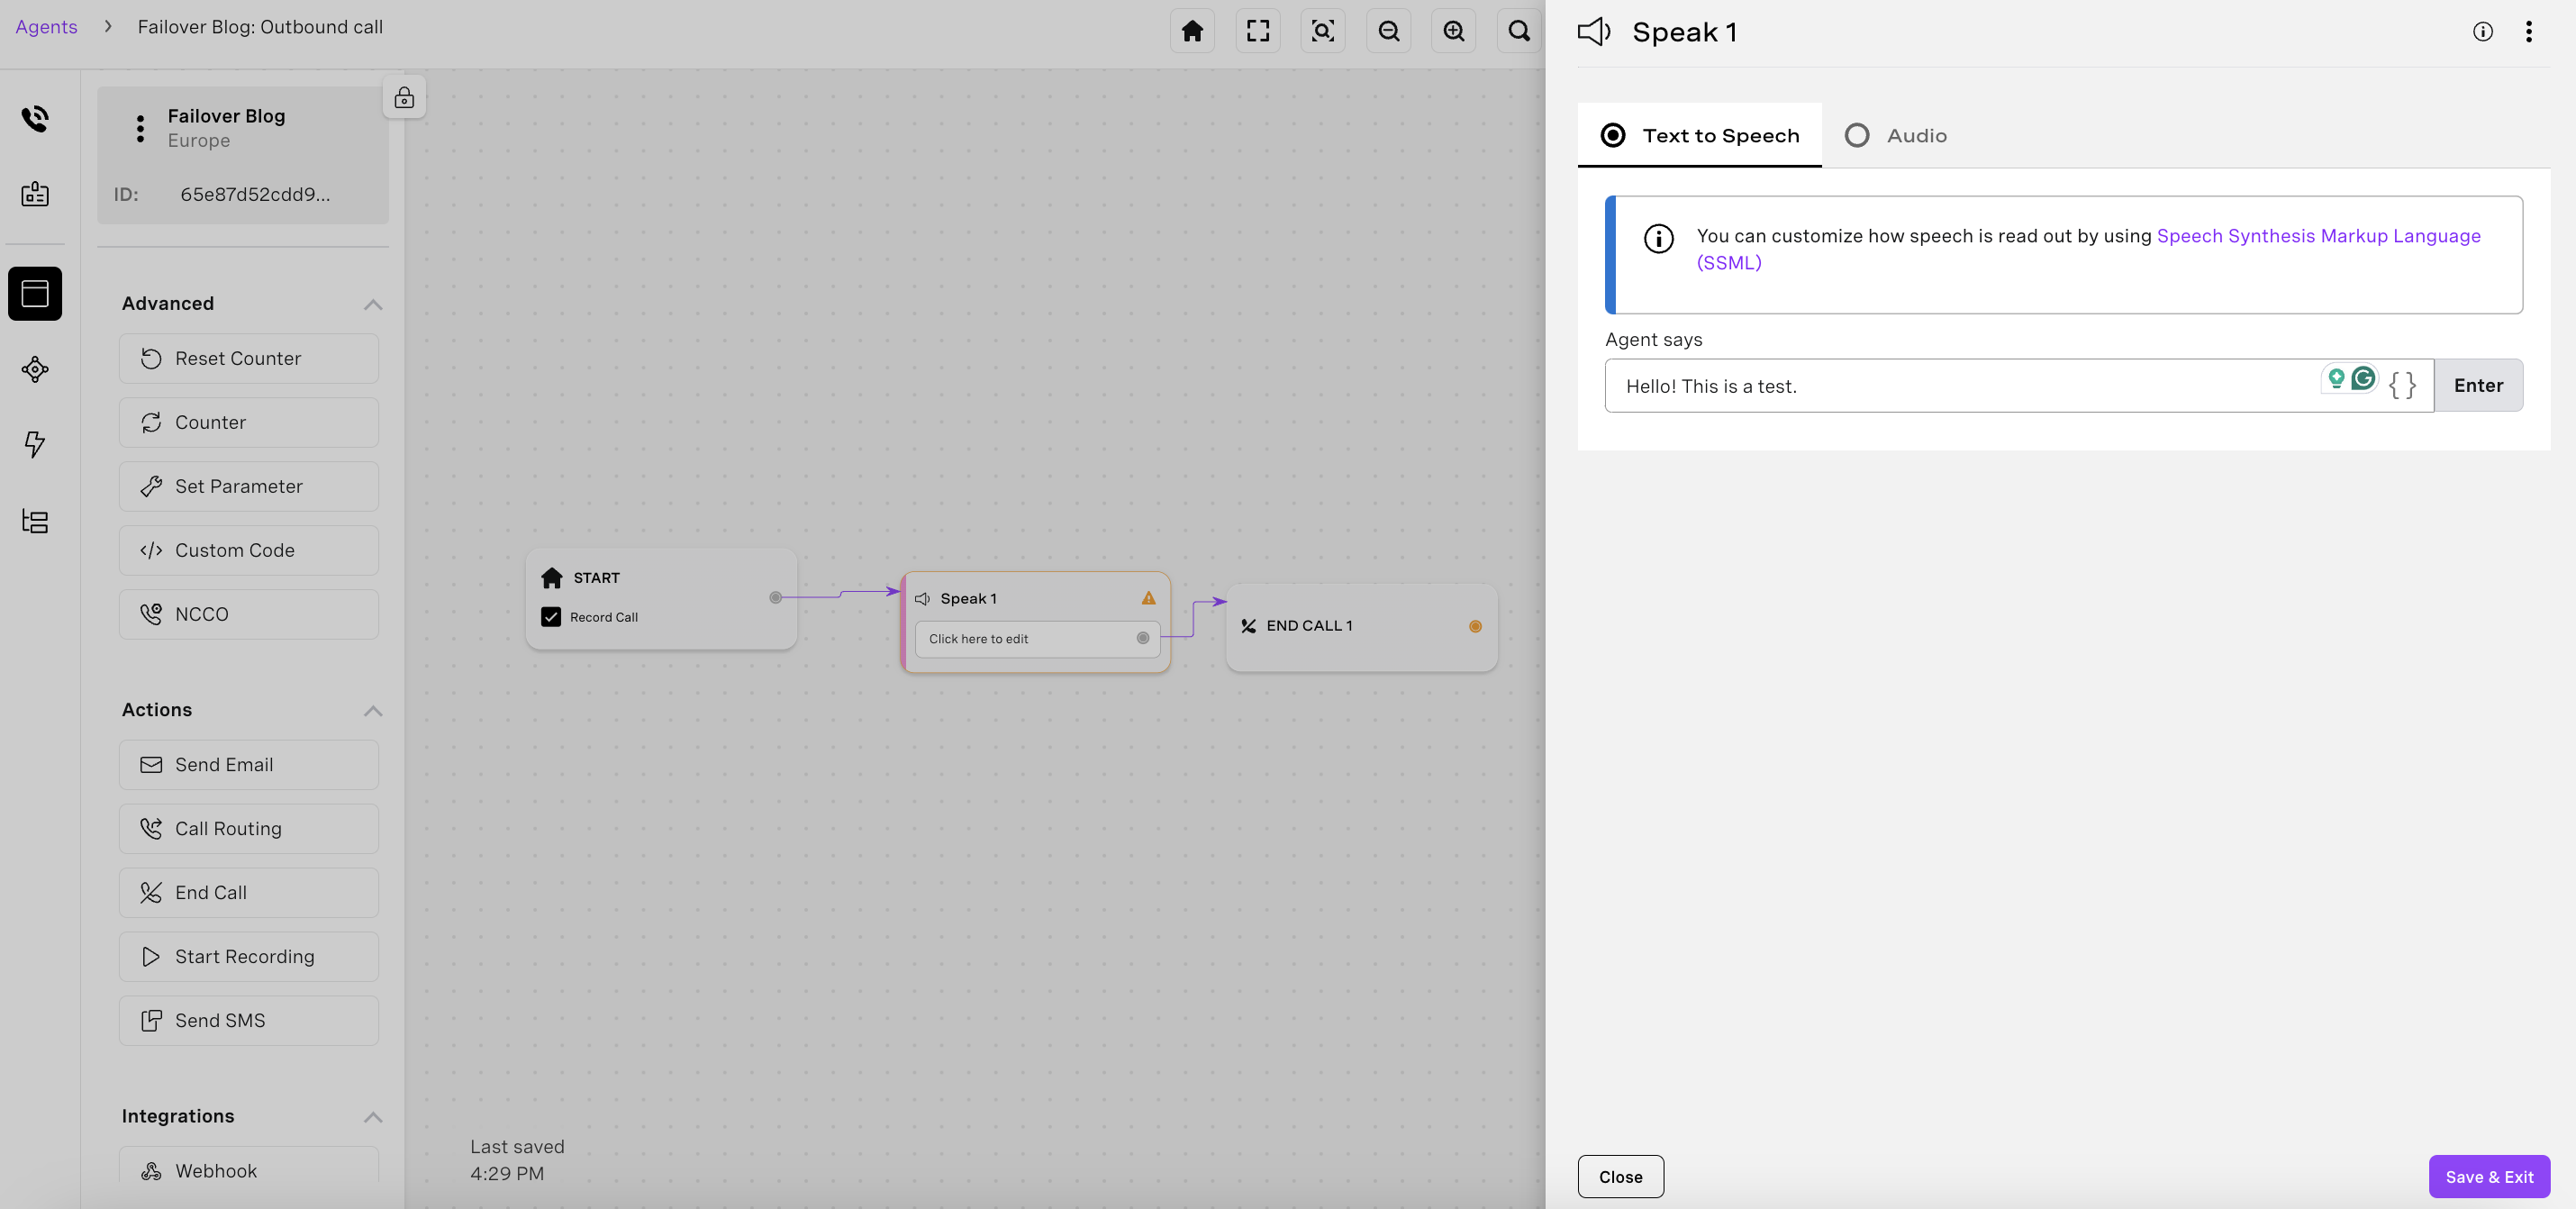 Simple Voice Agent in AI Studio
The final step is to connect your agent to a virtual number. This guide explains how to publish your agent.
Now that you’ve created your agent, you’ll need to trigger AI Studio’s Outbound Call API. To do so you can use Postman. Once logged in, create a new Collection. Then you’ll create a new HTTP request of type POST.
If your agent is located in Europe, the URL should be:
https://studio-api-eu.ai.vonage.com/telephony/make-callIf your agent is located in the United States, the URL should be:
https://studio-api-us.ai.vonage.com/telephony/make-call
You can see your agent’s location under Agent Details.
In the Headers tab, you need to add your AI Studio X-Vgai-Key. You can find the X-Vgai-Key at the top right of your AI Studio canvas. Click on the "user" icon, and then "Generate API Key".
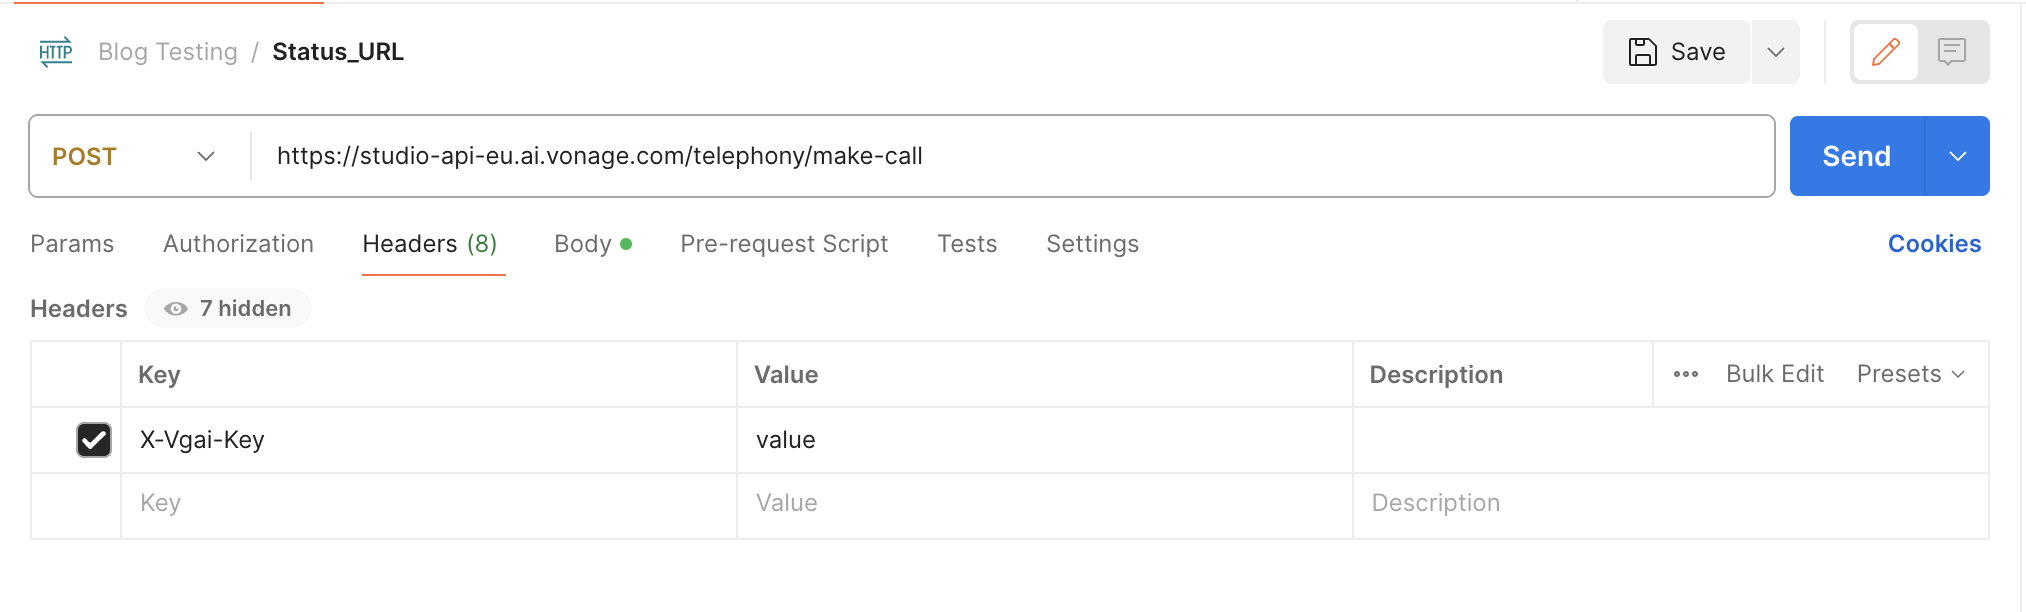 Outbound Agent Triggered From Postman
Now open the Body tab and select the raw option and from the dropdown select JSON. Lastly, add the following:
{

    "to": “TESTING_NUMBER",
    "agent_id": "YOUR_AGENT_ID",
    "status_url": ""

}Replace TESTING_NUMBER with your phone number or whatever number you want to receive the call. The number should be in international format without any leading + or 00. Replace YOUR_AGENT_ID with the id of your Vonage AI Studio agent. This can be found under agent details. Leave the status_url blank for now. This will be updated with the URL of your application’s server.
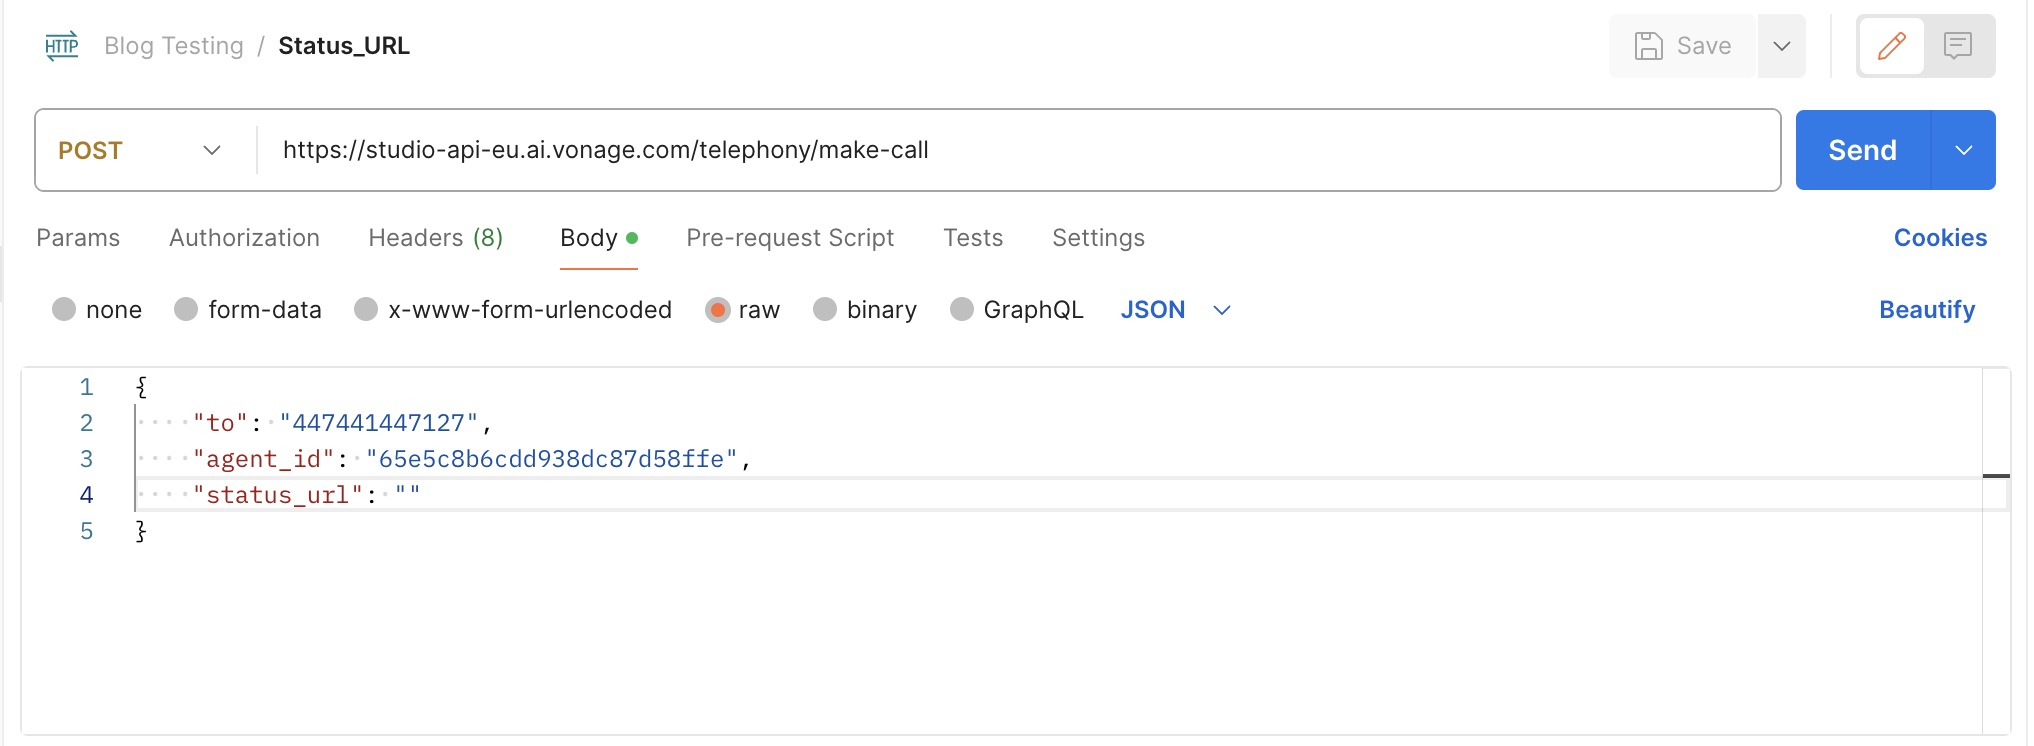 Outbound Agent Postman Request with Data
Hit "Save" and test your agent by clicking "Send". You should get a call from your agent, pretty cool right?!
Now you’re going to create an application to handle that status_url call. Open your terminal and create a new project:
Next, initialize the project as a Node application and install the Express package:
Lastly, create a file called app.js. This is where our code will live.
touch app.js
Add the following to the app.js file. This largely boilerplate code creates an Express server that runs on port 3000 and handles POST requests. When a POST request is received, the application will console.log the content of the request.
// app.js

const express = require('express');
const bodyParser = require('body-parser');
const app = express();
const port = 3000;

// Use bodyParser middleware to parse JSON requests
app.use(bodyParser.json());

// Handle POST requests to the root endpoint
app.post('/', (req, res) => {

  // Display the payload in the console
  console.log('Received POST request. Payload:', req.body);

  // Send a response back to the client
  res.status(200).send('POST request received successfully');
});

// Start the server
app.listen(port, () => {
  console.log(\`Server is running on http://localhost:${port}\`);
});
Now save your app.js and run the application:
node app.js
Lastly, you’ll need to expose your application by using ngrok. Open a new tab in your terminal and run:
ngrok http 3000
In your terminal ngrok will create a tunnel URL for you. You’ll now need to copy/paste your tunnel URL for the value of status_url in your Postman request body.
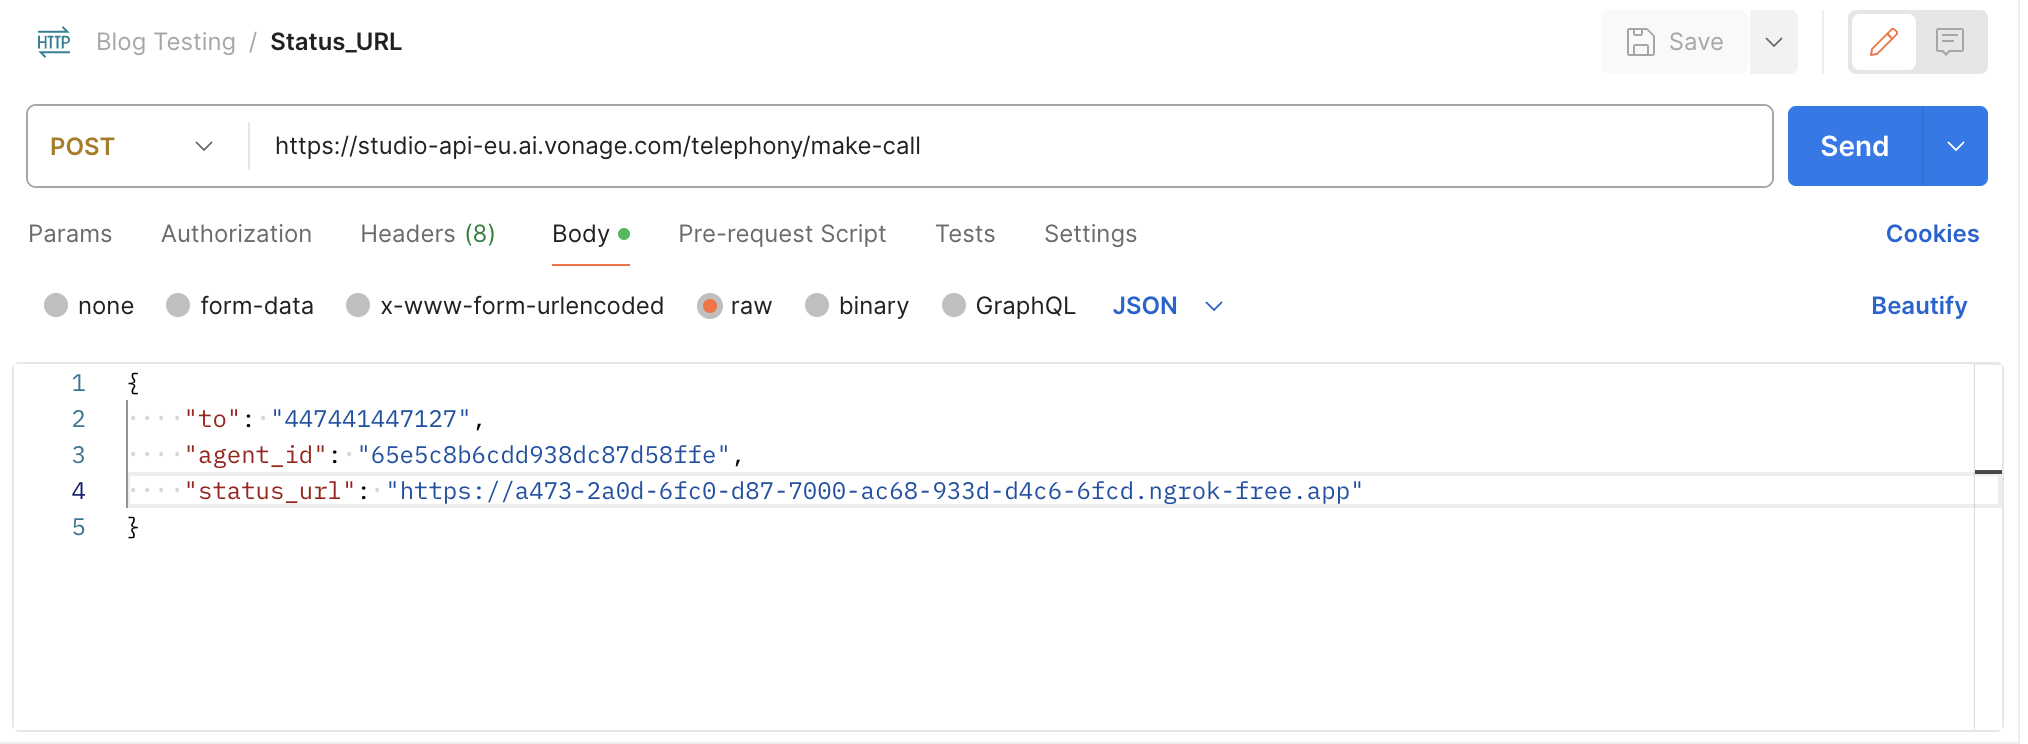 Outbound Voice Agent with Status URL Webhook
You can now hit Send to test the call. But this time do not answer the call. Then head back to the tab in your terminal that is running your application’s server. You should see the payload of the POST request from AI Studio!
 Node Server with Status URL Payload
If you don’t receive a payload and you’ve made sure that you’ve done everything correctly, it may not be your fault! The status_url endpoint relies on information received from telephony carriers. Data provided varies from country to country and even by individual providers. You can test this by trying phone numbers by different network providers.
Now you’ll need to create a second agent. In this example, we’ll use SMS as a failover method but you can also use WhatsApp or HTTP similarly. There are three important options for our agent, select:
Type: SMS
Template: Start From Scratch
Event: Outbound
Our SMS agent will be quite simple. Add 2 nodes:
A Send SMS node with the text “Hello, we attempted to call you!”
The “To” field should be set to $SENDER_PHONE_NUMBER system parameter, which will get its value from the request we will send to Studio in the next section.
The “From” field should be replaced with the $AGENT_PHONE_NUMBER.
A Send Email node that you can configure to your personal email with subject and message of your choosing
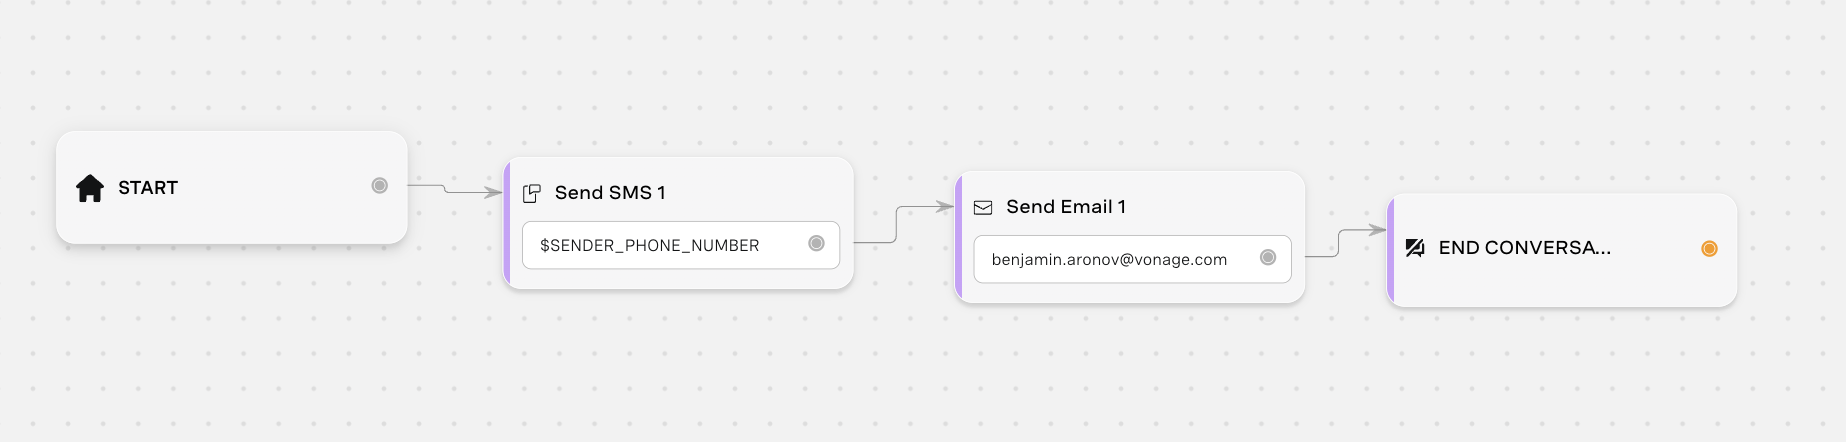 Simple SMS Agent in AI Studio
But how will this agent get triggered? You guessed it! Through a POST request similar to our Voice agent. This POST request will come from inside our node application. To do so we’ll require the axios package. So stop your server and install axios:
npm i axios
Then you’ll need to update your app.js file a bit. We’ll need to require the axios package, prepare our Outbound SMS Request with the required headers and data, and then trigger the request once we’ve received status from our Voice Agent. You can see how the final code looks:
// app.js

const express = require('express');
const bodyParser = require('body-parser');
const axios = require('axios');

const url = 'https://studio-api-eu.ai.vonage.com/messaging/conversation';
const data = {
  "to": "DESTINATION_NUMBER",
  "agent_id": "YOUR_AGENT_ID",
  "channel": "sms"
  // optional to pass status_url
  // "status_url": "string"
}

const headers = {
  'Content-Type': 'application/json',
  'X-Vgai-Key': 'YOUR_VGAI_KEY',
};

const app = express();
const port = 3000;

// Use bodyParser middleware to parse JSON requests
app.use(bodyParser.json());

// Handle POST requests to the root endpoint
app.post('/', (req, res) => {
  axios.post(url, data, { headers })
    .then(response => {

    })
    .catch(error => {
      console.error('Error:', error);
    });

  // Send a response back to the client
  res.status(200).send('POST request received successfully');
});

app.get('/', (req, res) => {
  // Send a response back to the client
  res.status(200).send('GET request received successfully');
});


// Start the server
app.listen(port, () => {
  console.log(`Server is running on http://localhost:${port}`);
});
And that’s it! Run the Postman request, ignore the call, and you should get a text on your phone and an email in your inbox! How cool is that?
Note the
agent_idhere should be the ID of your outbound SMS agent; the second agent you created.
In this tutorial, we've covered how to build an outbound telephony chatbot using Vonage's AI Studio and how to trigger it using a POST request. We've also explored how to create a Node application to handle a failed call and send a follow-up message via SMS or email. By following the steps outlined in this tutorial, you can create a seamless customer experience that adapts to the preferences of modern consumers.
We want to know how you’re enjoying (or hating) AI Studio! Please reach out to me in our Developer Community Slack or on X, formerly known as Twitter. This article was inspired by a question in our Slack, so who knows? Maybe my next blog post will be inspired by you!
Share:
Benjamin Aronov is a developer advocate at Vonage. He is a proven community builder with a background in Ruby on Rails. Benjamin enjoys the beaches of Tel Aviv which he calls home. His Tel Aviv base allows him to meet and learn from some of the world's best startup founders. Outside of tech, Benjamin loves traveling the world in search of the perfect pain au chocolat.