
Build an Appointment Scheduler using Node, Firebase, and Vonage
Time to read: 12 minutes
In this tutorial, we are going to build an appointment scheduler web application using Node.js, Express, Firebase, and the Vonage Messages API. The GitHub repository for this project is also available, feel free to clone it here.
To start, let's create a new project from the Firebase console.
Click on
add a new projectGive your project a meaningful name, for instance
vonage appointment schedulerCheck if you like the unique identifier id for your project (it is used in your Realtime Database URL, Firebase Hosting subdomains, and more. It cannot be changed after project creation)
Click on the button to continue
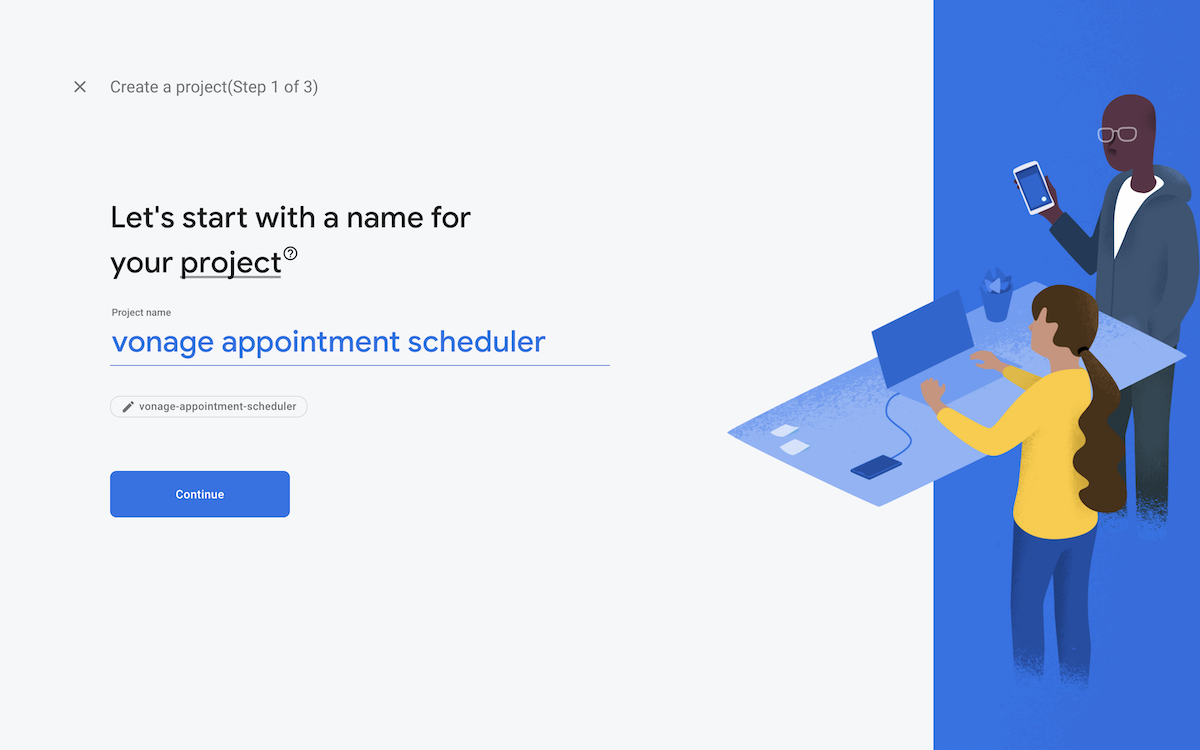 Console view with a text field to enter project and name and edit the project id
Select if you want to enable analytics. We won't in this tutorial
Click on the button to create the project
Wait for the project to be created
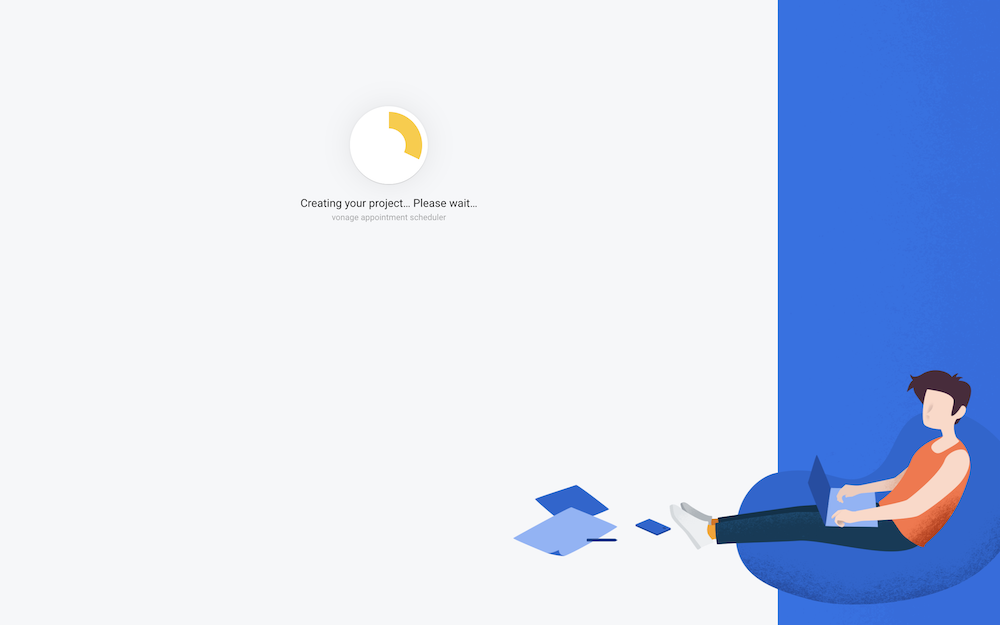 Project being created
Once the project is ready, click to continue. You will be taken to your project's console view
Set the Billing type by clicking on the gear icon, followed by Usage and Billing, then on the Details & Settings tab and modify the plan to use Blaze. This pay-as-you-go plan is required when using a third-party API
From your terminal, install the Firebase tools with NPM if you don't already have them by typing: npm install -g firebase-tools. Next, type firebase login. This will open a window in your browser which will either authenticate you automatically (if you're already logged in) or ask you for your credentials. Once that's complete you now have the Firebase CLI installed.
Now it's time for us to create the NoSQL database instance that will hold the appointment slots' information. Our app will include a view where a user will be able to make or cancel appointments. As the person interacting with the view picks an appointment date and time, that slot will be added or removed from the Firebase RealTime Database.
From the Firebase Console Menu, click on "Realtime Database" under Build
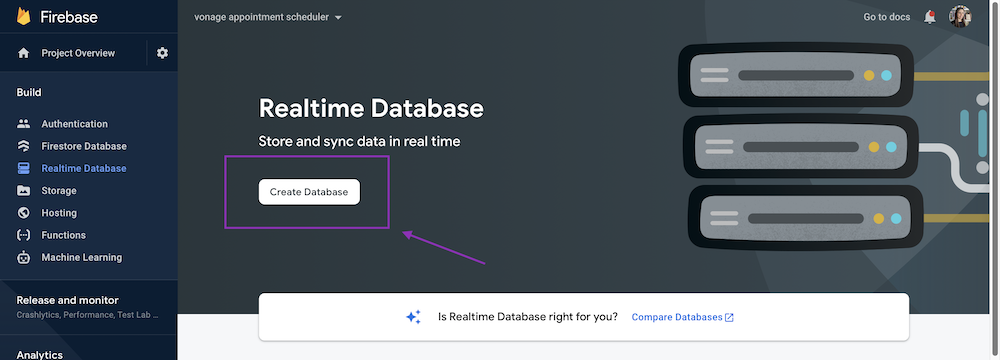 Button to create the database
Click on "Create Database"
Select the Realtime Database location where your data will be stored and click on
nextSelect if you will use the database in locked or test mode. For this example, I am using the test mode
Click
enable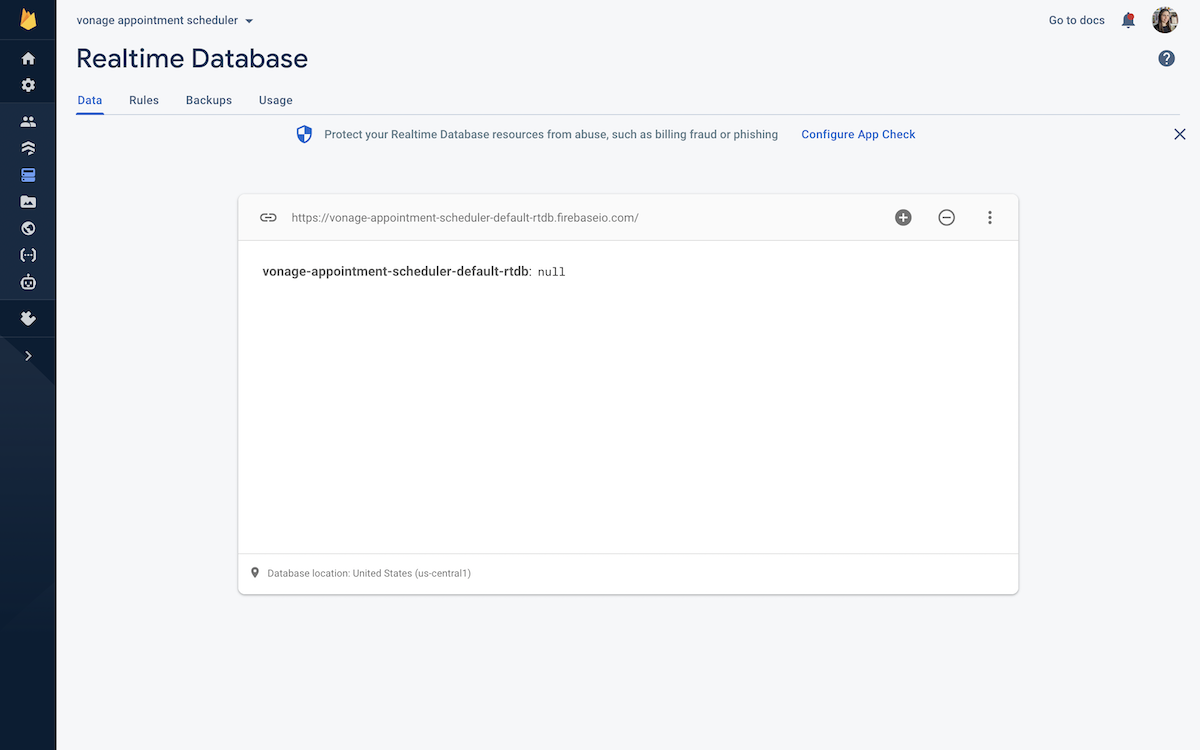 Database created
Let's import an example database which already contains some allocated slots, and from which you'll be able to add and remove future slots. You can create a file called myAppointments.json containing the JSON in the snippet below, and then import this file from the console.
myAppointments.json
{
  "myAppointments": {
    "0": {
      "date": "2021-06-01T09:00",
      "userId": "1234abcd"
    },
    "new_activity_7kh3a3a3z": {
      "date": "2023-06-01T08:50",
      "userId": "_7kh3a3a3z"
    },
    "new_activity_etxen95x3": {
      "date": "2021-06-01T08:40",
      "userId": "_etxen95x3"
    }
  }
} Import Database
The Firebase Realtime Database Rules determine who can access your database, how your indexes are built, and how your data is structured.
From the Firebase console on the Realtime database view, you can see "Rules", click on that tab. You'll be taken to a screen that will allow you to edit your rules
Copy and paste the rules from the below code snippet to your console in order to set the
myAppointmentscollection to be indexed by thedatefield.Click on
Publish
{
  "rules": {
    ".read": "now < 1643842800000",  // 2022-2-3
    ".write": "now < 1643842800000",  // 2022-2-3
    "myAppointments": {
      ".indexOn": ["date"]
    }
  }
}
 Edit Firebase Database Rules
By the end of this tutorial, this is roughly how your project structure will look like. In the following steps, we will create the files that will build up the content, appearance, functionalities, and handle the services we will use.
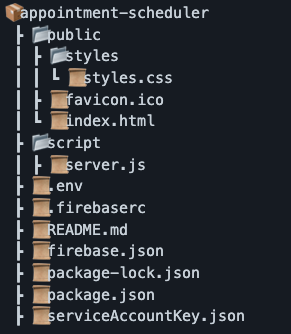 Project Structure
Create the project folder and
cdinto it:mkdir appointment-scheduler && cd appointment-schedulerInitialize NPM:
npm init. This command prompts you to add information about the projectInstall the dependencies:
npm install @vonage/server-sdk dotenv uuid express firebase-admin firebase-functionsType
firebase init. Since we already created a project in the dashboard, you can selectUse an existing projectwhich will prompt you to choose the desired project. You can see my example with my project idvonage-appointment-schedulerbelow. I also chose to use theRealtime Databasefeature
Did you know that the HTML input element has many type options for date and time selection? For instance, we have: date, datetime-local, time. For this tutorial, we will use <input type="datetime-local">. This approach is perhaps not as robust as using date-time library, as there can be some inconsistencies, but it works for the purpose of this tutorial. The user will be able to book slots every 5 minutes ending in 0 or 5 for instance 18:00 is bookable but 18:01 is not.
Create the
public/index.htmlthat contains the content for the view to select a new appointment or cancel them by adding the below code snippet
  <!-- index.html -->
<!DOCTYPE html>
<html>
  <head>
    <title>Appointment Scheduler</title>

    <meta charset="utf-8" />
    <meta name="viewport" content="width=device-width, initial-scale=1" />
    <link rel="stylesheet" href="styles/styles.css" />
  </head>
  <body>
    <main>
      <h1>Appointment Scheduler</h1>
      <!-- datepicker from html. Source: https://developer.mozilla.org/en-US/docs/Web/HTML/Element/input/datetime-local -->
      <form action="/appointment" method="POST">
        <div>
          <label for="slot">Choose your slot: </label>
          <input
            id="slot"
            type="datetime-local"
            name="slotdate"
            min="2021-06-01T08:30"
            max="2023-10-30T16:30"
            step="300"
            required
          />
          <span class="validity"></span>
        </div>
        <div>
          <label for="phonenumber">Your phone number:</label>
          <input type="tel" id="phonenumber" name="phonenumber" required />
          <span class="validity"></span>
        </div>
        <div>
          <input type="submit" value="Book slot!" />
        </div>
      </form>
      <form action="/cancelAppointment" method="POST">
        <div>
          <input type="text" name="code" placeholder="code" />
          <input type="submit" value="Remove slot!" />
        </div>
      </form>
    </main>
  </body>
</html>
For this demonstration web app, we'll add some styling to center the contents on the page, and also display a red ✖ in case the input is invalid and a ✓ in case it is valid.
Create the
public/styles.cssfilePaste in the below CSS code
body {
    margin: auto;
    width: 50%;
    padding: 10px;
}

div {
    margin-bottom: 10px;
    display: flex;
    align-items: center;
}

label {
  display: inline-block;
  width: 300px;
}

input:invalid+span:after {
    content: '✖';
    color: red;
    padding-left: 5px;
}

input:valid+span:after {
    content: '✓';
    color: green;
    padding-left: 5px;
}
Create the
.envand populate it with the below information
The
FIREBASE_DATABASE_URLcan be found on the Firebase consoleThe
VONAGE_API_KEYand theVONAGE_API_SECRETcan be found in the Vonage DashboardThe
VONAGE_FROM_NUMBERcontains the number, name, or brand that will appear as the sender of the messageThe
VONAGE_TO_NUMBERis the number that will receive the SMS messages
server.js
We will create the server.js to tell Express how to handle the requests posted by the UI. I'll show you step by step how we will build it. You can find the complete server file here.
Our web app will use express and it will read the static files we previously created from the public folder.
To add the dependencies and import files, add this below code snippet to your
script/server.js
// script/server.js
require('dotenv').config();
const express = require('express');
const app = require('express')();
const port = 3000; //setting the port to listen to as 3000
const admin = require('firebase-admin');
const Vonage = require('@vonage/server-sdk');
const SMS = require('@vonage/server-sdk/lib/Messages/SMS';
const { v4: uuidv4 } = require('uuid');

app.use(express.static('public'));

app.use(express.json());

app.use(express.urlencoded({ extended: true }));
A Firebase service account can be used to authenticate various Firebase features; for our project, we will use the Firebase Admin SDK to access our Database URL.
From the Firebase Console, click on the gear and select the Service Account tab
Click on the button to
generate keyAdd the generated file to the root of your project and rename it to
serviceAccountKey.jsonCopy and paste the Admin SDK configuration snippet to your project, as you can see in the following step of this tutorial, to initialize Firebase. We are using
${process.env.FIREBASE_DATABASE_URLto read the URL from the.envfile, but it's the same Database URL found on the Firebase Admin SDK configuration.
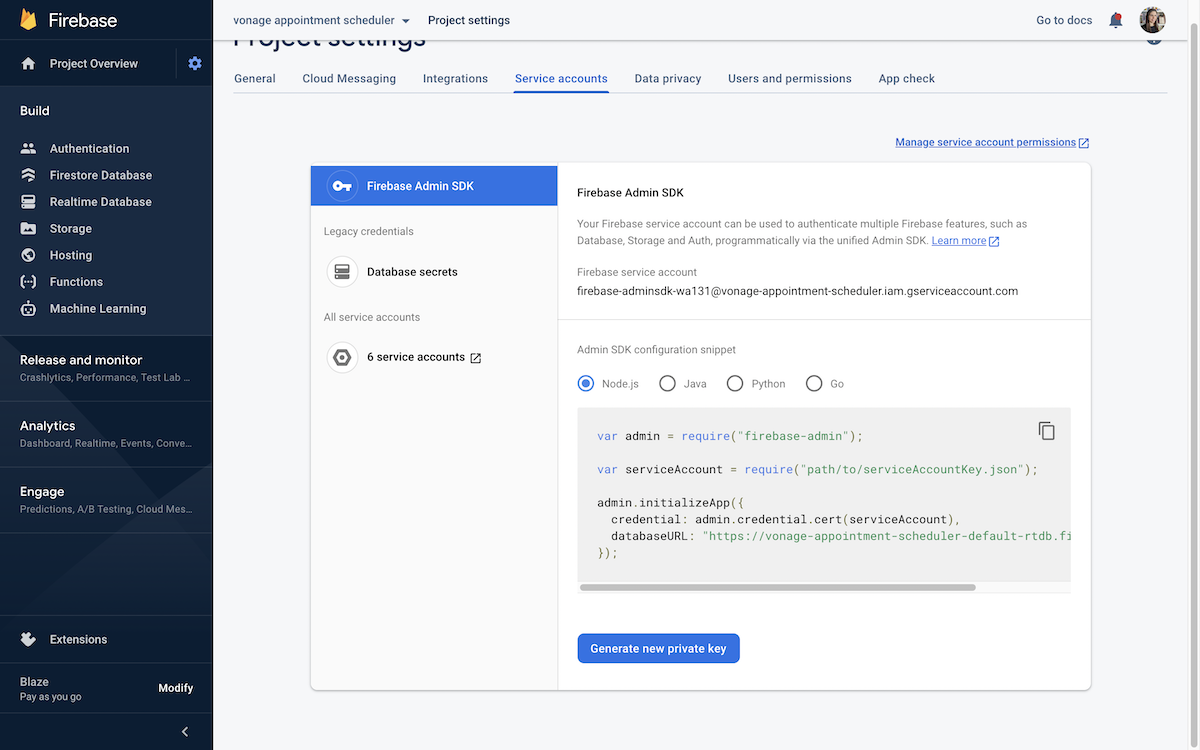 Admin SDK configuration
We use initializeApp to create and initialize a Firebase app instance that will use the /myAppointments Firebase database instance we have previously created and populated from the Firebase Console.
Add this below code snippet to your
server.jsto initialize Firebase.
const serviceAccount = require('../serviceAccountKey.json');

// Initializes firebase
admin.initializeApp({
  credential: admin.credential.cert(serviceAccount),
  databaseURL: `${process.env.FIREBASE_DATABASE_URL}`,
});

// A Reference represents a specific location in your Database and can be
// used for reading or writing data to that Database location.
ref = admin.database().ref('/myAppointments');
We create the instance of the Vonage client class, initializing it with the Vonage API Key and Secret that you have previously added to your .env file.
Add the below code snippet to your
server.jsto add Vonage.
const vonage = new Vonage({
  apiKey: process.env.VONAGE_API_KEY,
  apiSecret: process.env.VONAGE_API_SECRET,
});
The HTML input type datetime-local is formatted as YYYY-MM-DDThh:mm. So we will write a function to separate the date from the hour by splitting it on the character T. For instance, in the example 2018-06-12T19:30, we'd have 2018-06-12 for the date and 19:30 for the hour.
Add this below code snippet to your
server.jsto add thegetDateTime()function
  const getDateTime = (slot) => {
    return slot.split('T');
  };
/appointment endpoint
It's time to create the /appointment endpoint to handle the POST requests for creating an appointment. This endpoint will check if the slot is available, it will add the slot to the Firebase database, and finally, it will send an SMS confirmation back to the user's phone using the Vonage Messages API.
Add this below code snippet to your
server.jsto create the/appointmentendpoint.
app.post('/appointment', async (request, response) => {
  let phonenumber = request.body.phonenumber;
  let slot = request.body.slotdate;
  let [date, time] = getDateTime(slot);

  // Checks if a slot is available
  checkIfAvailable = async (slot) => {};

  // Adds to Database
  addToDatabase = () =>  {};

  // Sends an SMS back to the user's phone using the Vonage Messages API
  sendSMStoUser = async (code) => {};
});
You may have noticed that much of the functionality within the request handler has not yet been implemented, so let's now expand on the stubs for the required functionalities.
This function validates if a slot is available by checking if the slot already exists in the database. We are querying ref.orderByChild('date'). Queries are allowed to order one key at a time. We have previously defined our index via the .indexOn on the Firebase Rules for better performance. And then we make use .once('value') to listen for exactly one event of the value, and then it stops listening.
Add this below code snippet to your
server.jsto create thecheckIfAvailable()function
  // Checks if a slot is available
  checkIfAvailable = async (slot) => {
    let snapshot = await ref.orderByChild('date').once('value');

    let available = true;

    snapshot.forEach((data) => {
      let dataval = data.val();
      for (let key in dataval) {
        let datapoint = dataval[key];
        if (slot === datapoint) {
          available = false;
        }
      }
    });
    return available;
  };
The following function addToDatabase() adds the slot and a code to the Firebase database. This code is required to cancel the appointment.
  // Adds the slot to the database
  addToDatabase = () => {
    let code = uuidv4();

    ref.child(code).set({
      date: slot,
      userId: code,
    });

    return code;
  };
Finally, once the slot is reserved, an SMS confirmation is sent back to the user with the message Meeting booked at ${time} on date: ${date}. Please save this code: ${code} in case you'd like to cancel your appointment. as you can see in the function sendSMStoUser().
Add this below code snippet to your
server.jsto create thesendSMStoUser()function
// Sends an SMS back to the user's phone using the Vonage Messages API
sendSMStoUser = async (code) => {
  const to = phonenumber;
  const text = `Meeting booked at ${time} on date: ${date}. Please save this code: ${code} in case you'd like to cancel your appointment.`;
  const result = await new Promise((resolve, reject) => {
    vonage.messages.send(
      new SMS(text, process.env.VONAGE_TO_NUMBER, "Vonage"),
      (err, data) => {
        if (err) {
          console.error(err);
        } else {
          console.log(data.message_uuid);
        }
      }
    );
  });
};
The piece of code below is responsible for calling the previously created helper functions. If the slot is available, the user will have their slot added to the database and have the SMS sent back to them. Otherwise, they will be requested to choose a different time slot.
let available = await checkIfAvailable(slot);

if (available) {
	let code = addToDatabase();
	await sendSMStoUser(code);
	response.send(`This slot is available, booking it for you now: ${slot}`);
} else {
	// Sends user error
	response.send(
		`Sorry, you'll need to choose a different slot.${slot} is already busy.`
	);
}/cancelAppointment
Let's create the /cancelAppointment endpoint handling the POST requests for cancelling an appointment from the database by using a code provided by the user that they received upon scheduling their appointment.
app.post('/cancelAppointment', async (request, response) => {
  let code = request.body.code;

  // Removes slot from the database
  removeSlotFromDB = (code) => {
    ref.child(code).remove();
  };
  removeSlotFromDB(code);

  response.send(`This slot has been removed.`);
});
Finally, the app will be listening on the specified port; if run locally, this will be accessible on https://localhost:${port}. In this URL, you can interact with the UI of this demo application and check the slots being added/ removed on the Firebase console web page.
app.listen(port, () => {
  console.log(`I run on port ${port}`);
});
In your
package.jsonfile add the start script"start": "node script/server.js"right under"test": "echo \"Error: no test specified\" && exit 1",. It should look like this:
Install all the dependencies
npm installRun the NPM command to execute the project
npm run startNavigate to
http://localhost:3000Add and remove appointment slots and see them being added and removed from the Firebase Realtime Database
 Example adding a slot and it being shown on the Firebase Realtime database
Today you saw how to build an appointment scheduler demo web app. Now you can go ahead and add fancier styling and other functionalities. You can take what you learned here to create many appointment schedulers may it be for a gym or for a vaccination slot - let the creativity flow!