
Share:
Karl is a Developer Advocate for Vonage, focused on maintaining our Ruby server SDKs and improving the developer experience for our community. He loves learning, making stuff, sharing knowledge, and anything generally web-tech related.
Build a Fantasy Adventure Game With Rails and RCS
Time to read: 25 minutes
It is late Autumn in the Land of Messaging. As the temperature falls and the leaves change colour, you set forth on a new quest with your trusty companion, Vonage, armed with the magic of RCS…
In October last year I attended DevFest Nantes in France. Every year this event has a specific theme and this year’s theme was “the magical world of legends and tales”.
 Banner image for DevFest Nantes 2025, with the tagline ‘This year step into the magical world of legends and tales!’Vonage sponsored the event and we had a booth at the venue. Whenever I’m talking with developers at our booth I always like to have some sort of demo application that shows off our products. RCS business messaging has taken off in a big way recently, and so I wanted to have a demo that used the RCS channel of our Messages API. As a team we also wanted to go all-in on the theme of the event, and the demo app was a great opportunity to show off some of the awesome features of RCS messaging while at the same time creating a fun and engaging game that drew on the theme of the event. Thus was born the RCS Fantasy Adventure Game!
 Screen recording of the game being played.
Although the app was built as a booth demo, the same approach could be used for various business use-cases such as sales and marketing messages. In this article we’ll walk through the implementation of the application. Before we get to the implementation details though, we'll briefly cover the RCS channel of the Vonage Messages API, specifically the Rich Card and Suggested Reply features which were used in the app.
TL;DR If you’re the kind of developer who prefers to dive straight into code, feel free to check out the repository for the demo app on the Community GitHub workspace. I’ll also be referring to specific parts of that repo at various points during this article.
One thing that struck me when speaking to developers at DevFest is that although many of them had heard of RCS messaging before, most thought of it simply as a ‘newer version of SMS’, and weren’t aware of its full range of features and capabilities.
We aren’t going to cover everything that RCS can do in this blog post, so be sure to check out our documentation for more information. What we are going to cover is two specific RCS messaging features that I used in the demo app: Rich Cards and Suggested Replies.
Rich Cards are UI elements within RCS messaging that let you combine text, media (such as images or videos), and suggestion chips (such as suggested replies or actions) in a single message.
The layout of a card can be adjusted in various ways, such as specifying a vertical or horizontal layout, and adjusting media height or alignment.
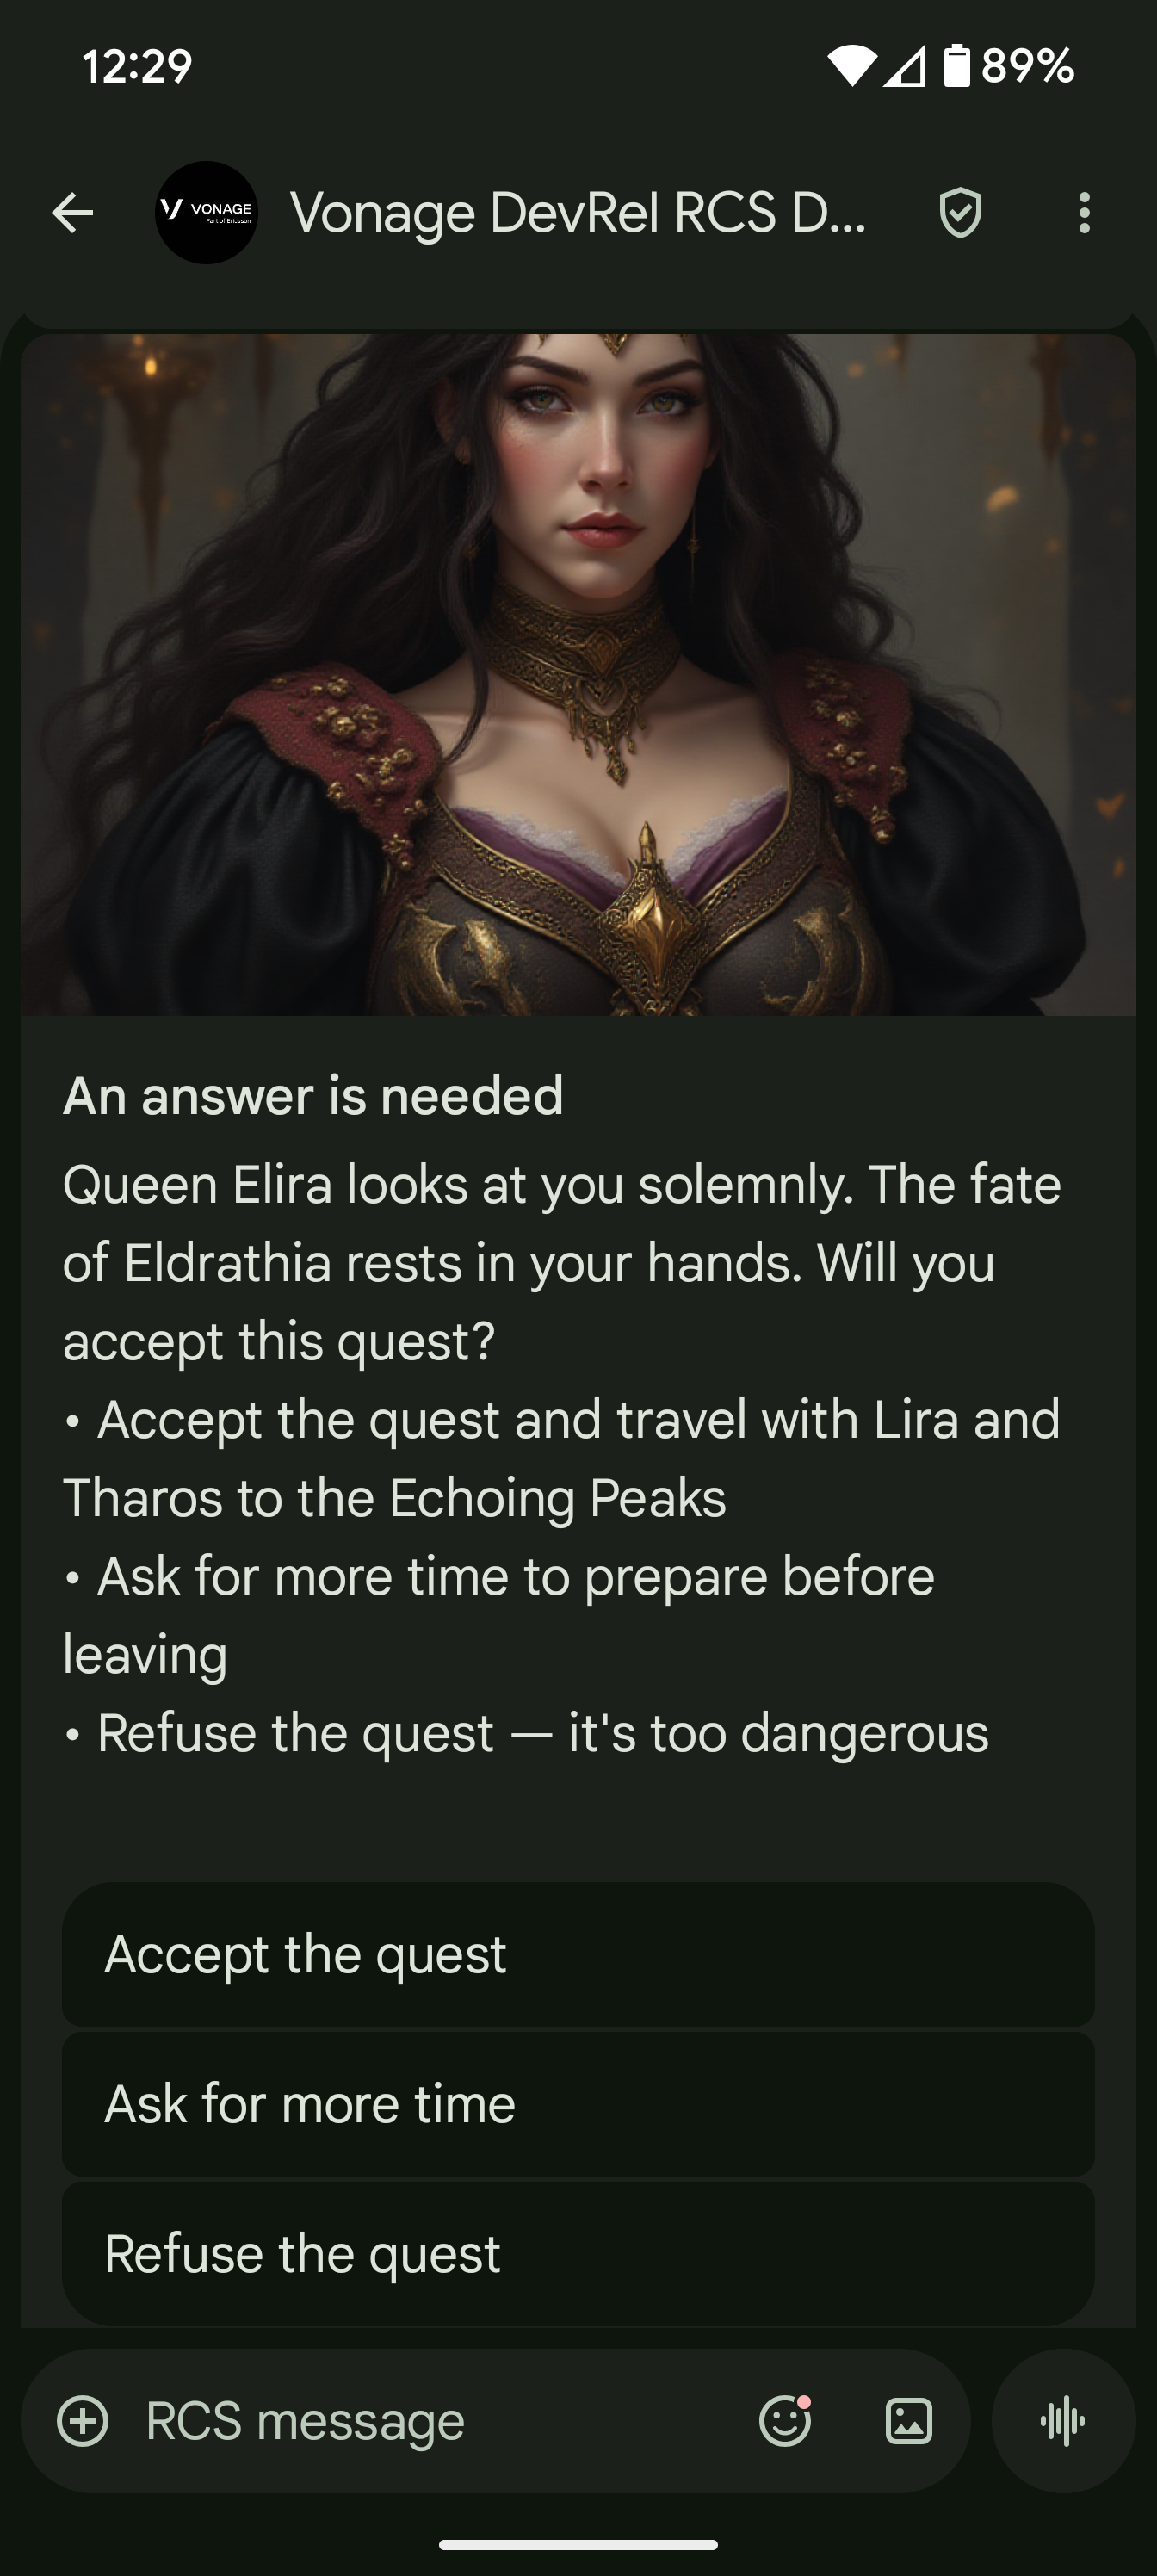
The card below ( from our game) is in vertical orientation with a tall media height, and contains title text, an image, content text, and three suggested reply chips (buttons).
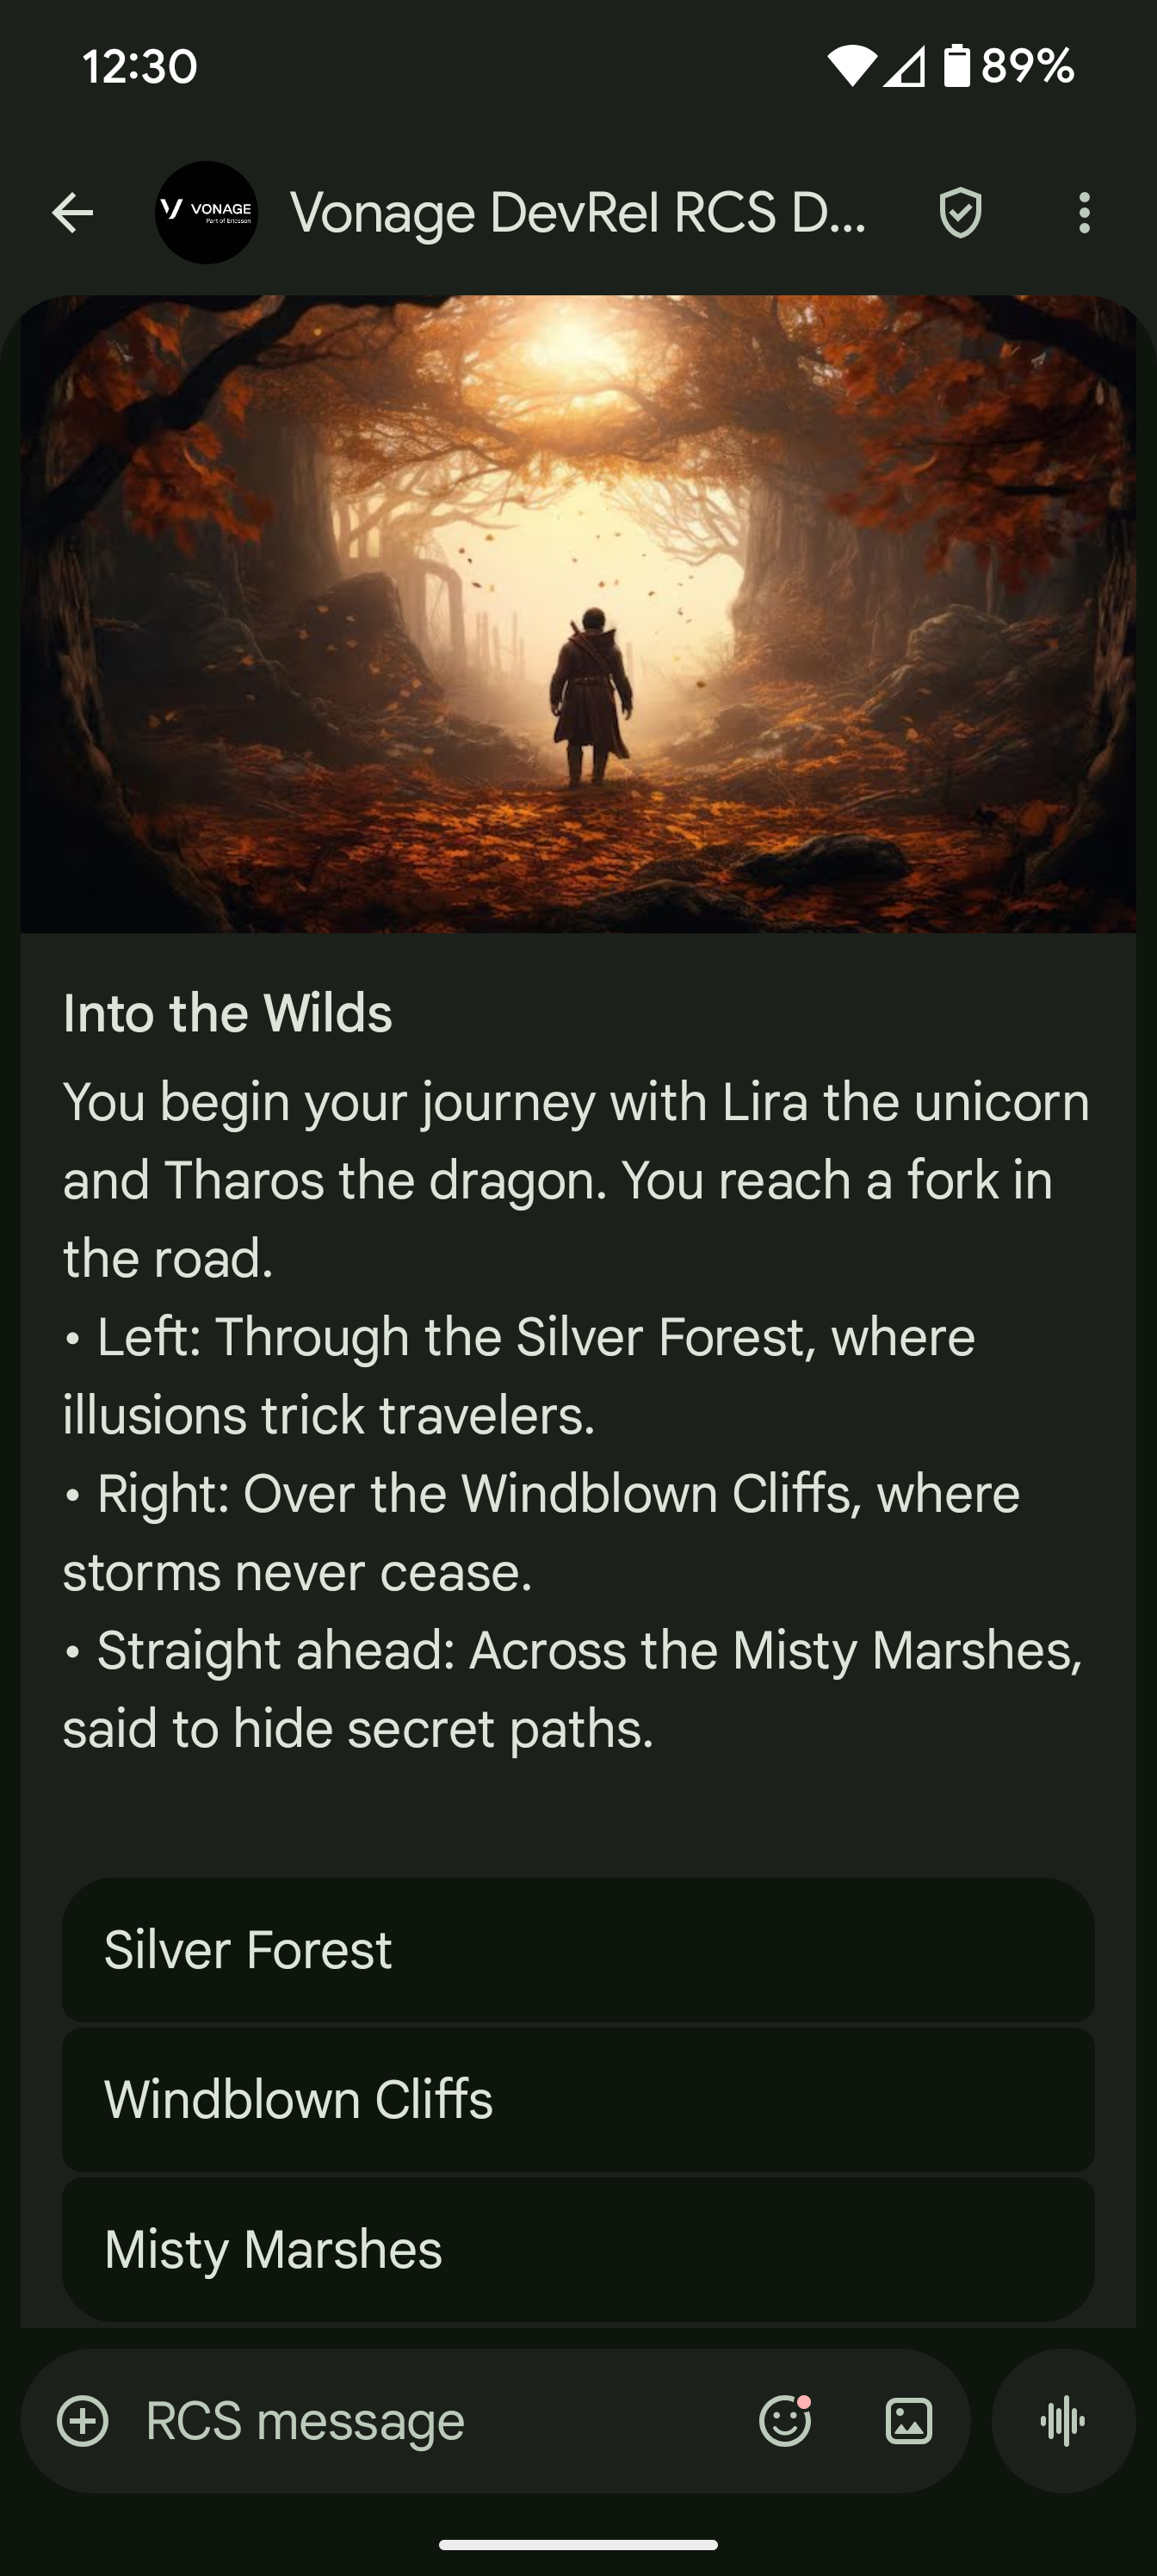 A screenshot of an example RCS message from the adventure game
To send this card, the JSON payload of the request to the Messages API would look something like this:
{
   "to": "447700900000",
   "from": "Vonage",
   "channel": "rcs",
   "message_type": "card",
   "card": {
      "title": "An answer is needed",
      "text": "Queen Elira looks at you solemnly. The fate of Eldrathia rests in your hands. Will you accept this quest?",
      "media_url": "https://example.com//img/message-media/step-zero.png",
      "media_height": "TALL",
      "media_force_refresh": false,
      "suggestions": [
         {
            "type": "reply",
            "text": "Accept the quest",
            "postback_data": "en-step_one"
         },
         {
            "type": "reply",
            "text": "Ask for more time",
            "postback_data": "en-step_twelve"
         },
         {
            "type": "reply",
            "text": "Refuse the quest",
            "postback_data": "en-step_two"
         }
      ]
   },
   "rcs": {
      "card_orientation": "VERTICAL",
      "image_alignment": "RIGHT"
   }
}You can read more about RCS Rich Cards, but a couple of important things to note here:
The value of media_url needs to be a publicly accessible URL for a file of a supported media type. The file accessed in this URL will be used to display the media (in the case of our demo application, the image) in the card message received by the player.
The value of postback_data the property of each of the objects in the suggestions array, is used by our application to determine the content of the card that is next sent to the user. We’ll look at this in a bit more detail in the next section.
Suggested Replies are a type of suggestion that can be included in RCS Text, Card, and Carousel messages. They let you define specific replies for the recipient of the message to choose from rather than having to use freeform text.
If you look at the JSON example in the Rich Cards section above, you will see that Suggested Reply objects contain three properties:
type, the value of which is always reply
text, which defines the text shown on the suggestion chip
postback_data, which is data included in the inbound message
{
  "type": "reply",
  "text": "Accept the quest",
  "postback_data": "en-step_one"
}When the recipient taps on a suggested reply chip in their messaging app, this triggers an inbound reply message from which you can identify which reply was selected.
The inbound message request will be sent to the webhook address that you have specified in your Vonage Application settings. The JSON payload for that request will look something like this:
{
   "message_uuid": "aaaaaaaa-bbbb-4ccc-8ddd-0123456789ab",
   "timestamp": "2025-02-03T12:14:25Z",
   "to": "Vonage",
   "from": "447700900001",
   "channel": "rcs",
   "message_type": "reply",
   "reply": {
      "id": "en-step_one",
      "title": "Accept the quest"
   }
}
Note that the value of the title property comes from the text property of the selected reply. The value of the id property comes from the postback_data property of the selected reply.
Later, we will explore how the relationship between the postback_data of the suggested reply and the id of the inbound reply message create a messaging workflow, which forms the mechanics of the main part of the game.
Let's first walk through the overall game mechanics and workflow.
The initial setup for the game is conducted via a web app, with the actual game itself conducted via RCS messaging. The reason for this is that although the RCS messaging channel of the Messages API supports both outbound and inbound messages, under the current implementation of the API the conversation needs to be initiated by the business (i.e. an outbound message needs to be sent first).
The initial game setup has a couple of steps:
The starting point for the game is a form where the user can create their player by entering a name. For a real-world implementation you would need to capture the user’s phone number at this point, but for the demo app I was using a test RCS agent with a pre-defined test number for the device we were using at the booth. The number for that device was set in the environment, so capturing a user’s number at this step was not necessary.
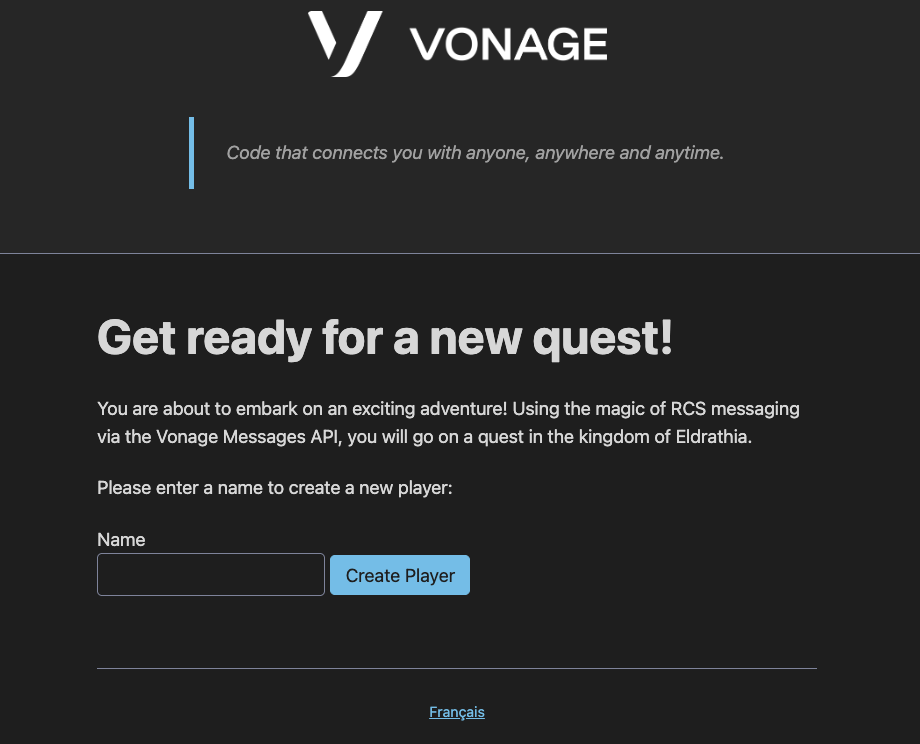 A screenshot of the New Player view from the web application for the adventure gameOnce the form is submitted the web app redirects to the Create Game page.
This page displays some initial text as well as a button to start the game.
 A screenshot of the New Game view from the web application for the adventure gameOnce the button is clicked, the web app redirects to a page explaining that the game has started and the recipient will receive an RCS message shortly.
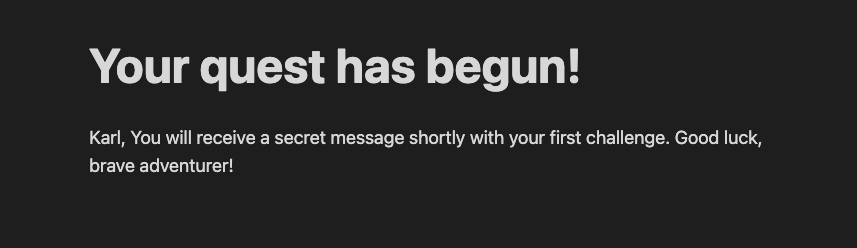 A screenshot of the Show Game view from the web application for the adventure gameThe remainder of the game workflow is then conducted entirely via RCS messaging.
The game starts with the same initial message each time, challenging the player to accept the quest. From that point forward, the message that the player next receives depends on the choice they made (i.e. which suggested reply they selected) in the previous message.
 A screenshot of an example RCS message from the adventure gameThere are a number of routes the player can take through the game, with various side-quests, and a few possible endings.
The actual messaging flow is the same each time though. The player receives a RCS card message with some suggested replies, they select a reply option and receive another message with some more suggested replies, and so on until the end of the game where they will receive a final message with no suggested replies.
Now that we have a general understanding of RCS cards and suggested replies and an overview of the game mechanics, it’s time to dive into the actual implementation of the application.
The application is built using Ruby on Rails 8 and the Vonage Ruby SDK, but you could follow the same basic approach with any tech stack of your choice.
The implementation for the initial game setup is pretty much just standard Rails code. We’ll briefly cover this now, starting with the routes.
Rails.application.routes.draw do
  scope "/:locale" do
    resources :players, only: %i[new create] do
      resources :games, only: %i[new create show]
    end
  end
  resources :inbound_messages, only: %i[create]
  resources :status_messages, only: %i[create]

  root to: redirect("/#{I18n.default_locale}/players/new")
end
The app uses Rails’ resourceful routing syntax to define the routes. We define new, create and show routes for game and new and create routes for player. The game routes are nested within the player routes, and we’ll look at the relationship between these two things when we cover the models.
There are also routes defined for inbound_messages and status_messages, which we will cover when we look at the implementation for the RCS integration.
One final thing to note is that the root path is redirected to the new_player path under the default locale.
As well as the use of default_locale in the redirect of the root path, you may also have noticed that the player and game routes mentioned above are scoped to a :locale path parameter. DevFest Nantes, the event for which the demo application was built, took place in France and so I decided to provide a choice of French and English when interacting with the game. The choice of languages was implemented using Rails’ built-in i18n (internationalization) functionality. If you want to dig further into internationalization, I recommend the Rails Guide. The relevant files in the demo application for the i18n implementation are:
Note that the internationalization for the RCS messages is handled separately from the built-in Rails internationalization, and will be covered in the section on the RCS messaging integration.
There are very basic models for Player and Game, with as has_many / belongs_to relationship defined between them.
class Player < ApplicationRecord
  has_many :games, dependent: :destroy
end
class Game < ApplicationRecord
  belongs_to :player
end
The Player model has a name attribute, which can be seen in the migration.
The two controllers relevant to the initial game setup are:
PlayersController
GamesController
class PlayersController < ApplicationController
  def new
    @player = Player.new
  end

  def create
    @player = Player.new(player_params)
    if @player.save
      redirect_to new_player_game_path(@player)
    else
      render "new"
    end
  end

  private

  def player_params
    params.require(:player).permit(:name)
  end
end
The PlayersController defines two actions:
A new action, which simply renders the players/new view.
A create action, which creates a new Player object, saves it to the database, and then redirects to the new_player_game_path for that Player object, which routes to the GamesController#new action
class GamesController < ApplicationController
  def show
    @player = Player.find(params[:player_id])
    @game = Game.find(params[:id])
  end

  def new
    @player = Player.find(params[:player_id])
    @game = @player.games.new
  end

  def create
    @player = Player.find(params[:player_id])
    @game = @player.games.new
    if @game.save
      message = MessagesCreator.new("#{I18n.locale}-step_zero").create_message
      begin
        Vonage.messaging.send(
          from: ENV["RCS_SENDER_ID"],
          to: ENV["MESSAGES_TO_NUMBER"],
          **message
        )
      rescue StandardError => e
        Rails.logger.error("Failed to send message: #{e.message}")
        render "new" and return
      end
      redirect_to player_game_path(@player, @game)
    else
      render "new"
    end
  end
end
The GamesController defines three actions:
A new action, which simply renders the games/new view.
A create action, which creates a new Game object associated with the Player, saves it to the database, and then attempts to send an RCS message. We’ll look in detail at what MessageCreator is, and what is happening in the begin/rescue block, when we dig into the RCS messaging integration. In terms of the initial game setup the relevant part of this action is the fact that if the message is successfully sent it redirects to the player_game_path for the Player and Game objects, which routes to the #show action.
A show action, which renders the games/show view for the newly created game.
There are three view templates used during the initial game setup:
A players/new view, which contains some intro text and the form to create a new player.
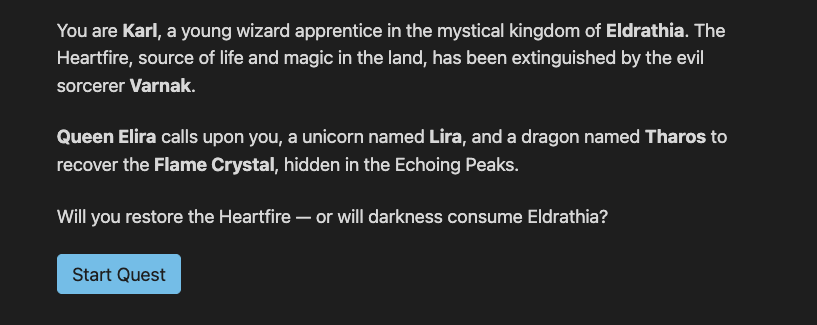
A games/new view, which contains an image and some text as well as the form to create a new game.
A games/show view, which contains the text explaining that the game has started and that the player will be sent an RCS message.
The view templates all use Rails’ i18n API, specifically the t alias of its translate method, to interpolate the text content for the set locale into the view. For example, the games/show view calls the method twice: once to output the quest_started heading text, and once to output the intro_paragraph_html text.
<h1><%= t "show_game.quest_started" %></h1>
<p><%= @player.name %>, <%= t "show_game.intro_paragraph_html" %></p>Note that by default, Rails’ i18n API will escape any HTML in text strings. The use of html appended to the intro_paragraph_html key means that the HTML in these particular strings will not be escaped. See the Rails Guide for more information on this feature.
So far, we’ve looked at standard Ruby on Rails MVC code. Now let’s explore how RCS messaging works with the Vonage Messages API.
This app uses the Vonage Ruby SDK, specifically the Vonage Rails Initializer, to integrate with the Messages API. We won’t cover the setup here, see the README for full instructions.
Note: Want to use another tech stack? We also offer SDKs in other languages.
To send messages via the Messages API, the SDK uses JWT authentication, which requires an Application ID and Private Key from your Vonage Application.
To create an application, go to the Create an Application page on the Vonage Dashboard, and define a Name for your Application.

If you intend to use an API that uses Webhooks, you will need a private key. Click “Generate public and private key”, your download should start automatically. Store it securely; this key cannot be re-downloaded if lost. It will follow the naming convention private_<your app id>.key. This key can now be used to authenticate API calls. Note: Your key will not work until your application is saved.
Choose the capabilities you need (e.g., Voice, Messages, RTC, etc.) and provide the required webhooks (e.g., event URLs, answer URLs, or inbound message URLs). These will be described in the tutorial.
To save and deploy, click "Generate new application" to finalize the setup. Your application is now ready to use with Vonage APIs.
When setting up your Vonage Application:
Enable the Messages API.
Set the Inbound and Status webhook URLs to your app's base URL (or Ngrok URL during local development), followed by /inbound_messages and /status_messages respectively.
The Rails Initializer uses either environment variables or Rails credentials to load your credentials. For this demo, we used environment variables:
VONAGE_APPLICATION_ID=your-app-id
VONAGE_PRIVATE_KEY=path/to/private.key
If running locally, place the Private Key in the root directory. For production, use a secure method appropriate to your deployment platform.
If you look at the .env-example file from the repository, you will see that there are three other environment variables set there:
RCS_SENDER_ID. This is the sender_id for the RCS Agent that you are using to send the messages
MESSAGES_TO_NUMBER. This is the number the messages are being sent to.
BASE_URL. This is the base URL for the application. Either a local/testing URL (e.g. an ngrok tunnel) or a production URL.
The Messages API expects a POST request with a JSON payload that describes the type and content of the message to be sent. For example, the payload for sending a RCS text message would look something like this:
{
   "to": "447700900000",
   "from": "Vonage",
   "channel": "rcs",
   "message_type": "text",
   "text": "Hello from Vonage!"
}
The Vonage Ruby SDK defines a messaging method which returns a Messaging object, which in turn defines a send method. This method takes keyword arguments, converts them to JSON and then sends them as the payload of a POST request to the Messages API, adding the necessary header for authentication and so on.
You can simply pass all of the JSON properties as keyword arguments, though the SDK also provides some convenience methods for each channel that takes a subset of the arguments and returns a hash that matches the expected structure. For example, to create the RCS text message above, you could use the rcs method like so:
message = Vonage.messaging.rcs(
  type: "text',
  message: "Hello from Vonage!"
)
This hash can then be passed as keyword arguments to the send method via destructuring:
Vonage.messaging.send(
   to: "447700900000",
   from: "Vonage",
   **message
)
This approach might not seem that useful for something basic like a text message, but for more complex message types such as RCS card messages, defining the message content in a separate hash like this can simplify the overall workflow.
Note that the convenience methods also take an opts keyword argument for defining any JSON parameters outside of the main message content. We’ll look at this a little later in this article.
When we earlier covered the GamesController#create action, we briefly mentioned the MessagesCreator class. In this section, we will break down in detail what the purpose of that class is and how it is implemented.
Let’s first walk through what’s happening in the create action in full.
We start off by retrieving a Player object from the database using the player_id provided in the request params, and assigning this to a @player instance variable
We then create a new Game object for that player and assign that game to a @gmae instance variable
We then attempt to save that Game object to the database.
If the save is not successful, we render the games/new view template.
If the save is successful, we:
Create a new message using the MessagesCreator class
Enter a begin/rescue block where we attempt to send the message using the Messaging#send method of the Vonage Ruby SDK and log any errors if the API call returns an error response
Redirect to the GamesController#show action
Most of the above steps are standard Rails code, and the Messaging#send method of the Vonage Ruby SDK we covered in an earlier section. What we haven’t explored yet is this line of code:
message = MessagesCreator.new("#{I18n.locale}-step_zero").create_messageLet’s do that now.
We call new on the MessagesCreator class, passing in a string argument which is the currently set locale value interpolated into the string ’-step_zero’, so the resulting string will be ’fr-step_zero’ or en-step_zero’.
The call to new instantiates a new MessagesCreator object on which we then call the create_message method, assigning the return value of that method to a message local variable.
But what exactly is MessagesCreator, and what does the create_message method do?
The MessagesCreator class is a custom class created specifically for this demo application and is defined in the app/services/messages_creator.rb file.
The purpose of this class is to provide a way of creating the JSON payload that defines the structure and content of a RCS card message, based on a specific input value. For example, the input will return the structure and content for the French locale version of the step_zero card (which is the first RCS card message sent to the player). If this doesn’t make complete sense just yet, it should become clearer as we break down the implementation of this class.
The class defines an initialize method, which sets the value passed in as the data_id parameter (for example, ’fr-step_zero’) to a @data_id instance variable. It also defines a data_id getter method for accessing the value of that instance variable.
The class also defines a create_message public method and the following private methods:
message_content
card_content
standard_params
message_opts
parse_yaml
set_base_url_for_media_params
Let’s explore what all of these methods do.
def create_message
  Vonage.messaging.rcs(
    type: "card",
    message: message_content,
    opts: message_opts
  )
end
This method calls the Messaging#rcs convenience method from the Vonage Ruby SDK that was discussed earlier. Here it passes in the value for type: as ‘card’, the value for message: as the return value of calling the message_content method, and the value for opts: as the return value of calling the message_opts method.
This method will return a hash that defines the structure and content of the RCS message which can then be used as part of the JSON payload in the request sent to the Vonage Messages API.
def message_content
  content = card_content
  set_base_url_for_media_params(content)
  content.merge(standard_params)
end
This method calls the card_content method. As we will see shortly, the card_content method returns a hash of keys and values that define some of the structure and content for the JSON payload of the RCS card API request. The return of this method call is assigned to a content local variable.
The set_base_url_for_media_params method is then called, passing in the content hash as an argument. What this method does is update the value of the media_url key in the content hash to include whatever is set as the BASE_URL in our environment variables. This is so the that URL provided to the Messages API is the full publicly accessible URL required to access the specific image.
The content hash is then merged with the hash returned by calling the standard_params method and the resulting merged hash is then returned by the message_content method.
This method returns a hash containing the majority of the properties and values required for the RCS message card object within the JSON payload of the request to the Messages API.
def card_content
  content_lang = data_id.split("-").first
  content_step = data_id.split("-").last
  parse_yaml("message_content.yml")[content_lang][content_step]
end
In order to return the correct card content, the method uses the value assigned to the data_id instance variable when the MessagesCreator object was instantiated. The data_id string is split on the hyphen, with the first part of the split being assigned to a content_lang variable and the second part to a content_step variable. The parse_yaml method is then called. This method returns YAML data from a specified file as a Ruby hash. The values of the content_lang and content_step variables are then used as keys to access a specific piece of data from that hash.
The message_content.yml file is structured as follows:
en:
  step_zero:
    title: "An answer is needed"
    text: |
      Queen Elira looks at you solemnly. The fate of Eldrathia rests in your hands. Will you accept this quest?
      • Accept the quest and travel with Lira and Tharos to the Echoing Peaks
      • Ask for more time to prepare before leaving
      • Refuse the quest — it's too dangerous
    media_url: '/img/message-media/step-zero.png'
    suggestions:
      - type: "reply"
        text: "Accept the quest"
        postback_data: "en-step_one"
      - type: "reply"
        text: "Ask for more time"
        postback_data: "en-step_twelve"
      - type: "reply"
        text: "Refuse the quest"
        postback_data: "en-step_two"
  step_one:
    title: "Into the Wilds"
    text: |
      You begin your journey with Lira the unicorn and Tharos the dragon. You reach a fork in the road.
      • Left: Through the Silver Forest, where illusions trick travelers.
      • Right: Over the Windblown Cliffs, where storms never cease.
      • Straight ahead: Across the Misty Marshes, said to hide secret paths.
    media_url: '/img/message-media/step-one.jpg'
    suggestions:
      - type: "reply"
        text: "Silver Forest"
        postback_data: "en-step_three"
      - type: "reply"
        text: "Windblown Cliffs"
        postback_data: "en-step_four"
      - type: "reply"
        text: "Misty Marshes"
        postback_data: "en-step_thirteen"
# rest of YAML data
You can view the entire data/messages_content.yml file.
So, for example, if the value of content_lang was and en the value of content_step was step_one, then the following method call:
parse_yaml("message_content.yml")[content_lang][content_step]Would return the following YAML data:
title: "Into the Wilds"
text: |
   You begin your journey with Lira the unicorn and Tharos the dragon. You reach a fork in the road.
   • Left: Through the Silver Forest, where illusions trick travelers.
   • Right: Over the Windblown Cliffs, where storms never cease.
   • Straight ahead: Across the Misty Marshes, said to hide secret paths.
media_url: '/img/message-media/step-one.jpg'
suggestions:
  - type: "reply"
    text: "Silver Forest"
    postback_data: "en-step_three"
  - type: "reply"
    text: "Windblown Cliffs"
    postback_data: "en-step_four"
  - type: "reply"
    text: "Misty Marshes"
postback_data: "en-step_thirteen"In the form of a Ruby hash like this:
{
  title: "Into the Wilds",
  text: "You begin your journey with Lira the unicorn and Tharos the dragon. You reach a fork in the road.\n• Left: Through the Silver Forest, where illusions trick travelers.\n• Right: Over the Windblown Cliffs, where storms never cease.\n• Straight ahead: Across the Misty Marshes, said to hide secret paths.",
media_url: "/img/message-media/step-one.jpg",
suggestions: [
  {
    type: "reply",
    text: "Silver Forest",
    postback_data: "en-step_three"
  },
  {
    type: "reply",
    text: "Windblown Cliffs",
    postback_data: "en-step_four"
  },
  {
    type: "reply",
    text: "Misty Marshes",
    postback_data: "en-step_thirteen"
  }
 ]
}
def standard_params
  parse_yaml("message_settings.yml")["standard_params"]
end
This method is similar to the card_content method in that it calls parse_yaml in order to access data from a YAML file (messages_settings.yml) and access some data from that file in the form of a Ruby hash. The difference is that the same data is accessed each time, specifically the data under the standard_params key. The defined YAML data is as follows:
media_height: "TALL"
media_force_refresh: falseThe reason for defining this standard set of properties is that they will be the same for every card object in the JSON payload sent to the Messages API, and extracting them in this way removes repetition from the messages_content.yml file.
def message_opts
  parse_yaml("message_settings.yml")["card_opts"]
end
This method is practically identical to the standard_params method, but instead returns a hash for defining the message options outside of the card object. The defined YAML data accessed by this method is as follows:
rcs:
  card_orientation: "VERTICAL"
image_alignment: "RIGHT"This is used to define the rcs object in the JSON payload of the request to the Messages API, and again will be the same for every request.
def parse_yaml(filename)
  YAML.load_file(Rails.root.join("data", filename))
end
This is the method that is used in the card_content, standard_params, and message_opts methods. It calls the load_file method of the YAML module (which is part of Ruby’s Standard Library). This method reads YAML from the specified file and deserializes it to a Ruby object appropriate to the way that the file is structured (in the case of our files, a Hash).
def set_base_url_for_media_params(content)
  if content.key?("media_url")
    content["media_url"] = "#{ENV['BASE_URL']}#{content['media_url']}"
  end
end
This method is called in the message_content method. The purpose of this method is to update the value of the media_url key in the Ruby hash returned by parsing the message_content.yml file. The various cards in the YAML file have their media_url value set to path of the media file under the root of the Rails application, for example /img/message-media/step-zero.png. In order for the image to be displayed in the RCS message however, the image file needs to be accessible via a complete URL. This method therefore updates the value of the media_url key by prepending the value of the BASE_URL environment variable. For example, if BASE_URL is set to https://example.com then media_url in this case would be updated to https://example.com/img/message-media/step-zero.png.
To briefly sum up what the MessagesCreator class does:
You instantiate a new MessagesCreator object by passing in a data_id value such as en-step_zero
Calling create_message on that object:
Reads the YAML content from the message_content.yml file appropriate for the object’s data_id
Updates the media_url value to include the BASE_URL
Merges the specific message content with standard_params
Set the merged hash as the value of the message keyword in an invocation of the Messaging#rcs method of the Vonage Ruby SDK
Reads the YAML content from the message_settings.yml file and sets the deserialized value of the card_opts key as the value of the opts keyword argument in the invocation of the Messaging#rcs method of the Vonage Ruby SDK
Returns a Ruby hash representing all the RCS card message content for the specified step, this can then be destructured to keyword params in an invocation of the Messaging#send method of the Vonage Ruby SDK
We’ve already seen this process in action in the context of the GamesController#create action, let’s now look at it in the context of an inbound reply message in the InboundMessagesController#create action.
As briefly mentioned earlier, when the player who received an RCS Card message taps one of the Suggested Reply options, this triggers an inbound RCS reply message to the sender of the initial message (in this case our RCS Test Agent).
This inbound message is sent by the Vonage Messages API to the URL that you specified as your Inbound webhook when you set up your Vonage Application. In our Rails application we have an /inbound_messages route defined, and this path, along with the base URL for our application, is set as the Inbound webhook. All inbound messages from the Vonage Messages API will therefore be sent to this route in our app, and since these inbound message requests are POST requests, the Rails application will automatically route these to a create action in the controller associated with our route, in this case the InboundMessagesController.
The InboundMessagesController class is fairly bare-bones. It calls a skip_before_action method and also defines the create action. Before we look at the create action, let’s briefly cover what the skip_before_action method is doing here.
skip_before_action :verify_authenticity_token
The skip_before_action method is a method built into the Ruby on Rails framework that lets you skip certain callbacks from being run. By default, every time a controller action is invoked within a Ruby on Rails application, Rails invokes a number of callback methods. One of these default callback methods is verify_authenticity_token. This is one of a number of methods used by Rails to protect against Cross-Site Request Forgery (CSRF) attacks. You can read more about this in the Ruby on Rails API documentation, but in brief, what this method does is check that the HTTP request routed to your controller action originates from Origin as the application itself.
In the case of our inbound message request it originates from the Vonage Messages API and so would normally be blocked by the verify_authenticity_token action. By calling the skip_before_action method, and passing in :verify_authenticity_token as an argument, the verify_authenticity_token action is skipped and so the request is not blocked.
def create
  reply_id = params[:reply][:id].to_s
  message = MessagesCreator.new(reply_id).create_message

  Vonage.messaging.send(
    from: ENV["RCS_SENDER_ID"],
    to: ENV["MESSAGES_TO_NUMBER"],
    **message
  )
  head :ok
end
The JSON payload for the inbound RCS reply message routed to the InboundMessagesController#create action will look something like this:
{
   "message_uuid": "aaaaaaaa-bbbb-4ccc-8ddd-0123456789ab",
   "timestamp": "2025-02-03T12:14:25Z",
   "to": "Vonage",
   "from": "447700900001",
   "channel": "rcs",
   "message_type": "reply",
   "reply": {
      "id": "en-step_one",
      "title": "Accept the quest"
   }
}
Ruby on Rails provides this payload to the create action in the form of a params hash. The part of the JSON payload we are interested in in the context of our application workflow is the reply.id property, which is accessed in the controller action in the following way:
reply_id = params[:reply][:id].to_sThe value of the reply.id property is then passed to the MessagesCreator.new method invocation. As we saw in the section on the MessagesCreator class, this instantiates a MessagesCreator object with a data_id instance variable assigned to the value of the inbound reply.id property.
The create_message method is then called on the MessagesCreator object and returns a Ruby hash representing the structure and content of a RCS card message. This hash is then destructured to keyword params in an invocation of the Messaging#send method from the Vonage Ruby SDK, along with the from and to params.
 Vonage.messaging.send(
    from: ENV["RCS_SENDER_ID"],
    to: ENV["MESSAGES_TO_NUMBER"],
    **message
)The send method makes a request to the Vonage Messages API to send the RCS card message to the recipient. The player then receives this RCS card message, selects a Suggested Reply option, and the process repeats.
The final thing to mention about the InboundMessagesController#create action is that it returns a 200 HTTP status code with no body. This is because if the Vonage webhook doesn’t receive a 200 response, it will retry sending the request periodically for the next 24 hours.
The final piece of implementation to mention with regards to the RCS messaging flow is the StatusMessagesController class. When we set up the Vonage Application, as well as the Inbound Message webhook we also set the URL for the Message Status webhook. Like the Inbound Message webhook, with the Message Status webhook a POST request sent by the Vonage Messages API to a predefined URL. Rather than being triggered by an inbound message though, it is triggered by changes in status to an outbound message. For example if you send an outbound RCS message via the Vonage Messages API and that message is rejected, delivered, or read, these changes in status will trigger a Status Message to your status webhook URL.
In our Rails application we have a route defined which passes these requests to our StatusMessagesController#create action for handling.
def create
  p "Status message received: " + params.to_unsafe_h.to_s
  head :ok
end
Our create action doesn’t do anything with the Message Status request other than output the payload to the console. In a real-world application though, some logic could be implemented to perform different actions based on the various statuses. We’ll briefly cover this, and some other considerations, in the next section.
The only other things to mention about the StatusMessagesController class are:
It calls skip_before_action :verify_authenticity_token in the same way, and for the same reason, as the InboundMessagesController class.
The create method returns a 200 in the same way, and for the same reason, as InboundMessagesController#create.
This application was built as a one-off demo for a specific event. It is not intended to be production quality, and the implementation reflects that fact. The same fundamental approach could be used for a real-world application, but there are certain aspects of the implementation that you might want to approach differently.
In our application, the messages we sent and received were ephemeral – we didn’t persist a record of these in any way. Additionally, although we created Player and Game records in our database, these records aren’t used in any way beyond the initial game setup. In a real-world context you may want to store records of messages sent and/or recipient responses in a database, and relate these messages to the Game and/or Player records.
The create action of the InboundMessagesController is defined in such a way that it expects the inbound message to have a message_type of reply. We expect the recipient to respond by selecting one of the Suggested Reply options, but in a real-world situation there are many types of RCS message that the recipient could send in response. In a production-quality application you would probably want to add some conditional logic to the controller action for handling different types of inbound messages.
As mentioned in the section on the StatusMessagesController class, we are not really doing much with the data received via our Message Status webhook. There are a number of things that you might want to consider in a real-world application in terms of adding additional functionality around message status, for example:
If you were persisting outbound message data in a database, you could use the status data to update those records.
You could implement some logic to retry sending messages which have received a rejected status.
Since this demo application was only intended to be used once, with a pre-defined set of messages that didn’t need to be changed, using YAML to define the message structure and content was a reasonable choice as it required less development overhead in terms of the initial implementation.
In a real-world context you might be regularly creating or updating multiple messaging flows, using YAML to define the messages could become tedious and error-prone. A more robust solution might be to store the data for defining the RCS messages in a database, and implement some sort of admin UI for creating and maintaining the message objects.
If this blog post has inspired you to start building with Vonage APIs, you can sign-up for a free account, check out our documentation and tooling, and get involved with our developer community!
Have a question or want to share what you're building?
Subscribe to the Developer Newsletter
Follow us on X (formerly Twitter) for updates
Watch tutorials on our YouTube channel
Connect with us on the Vonage Developer page on LinkedIn
Stay connected and keep up with the latest developer news, tips, and events.