Set Up iOS Push Notifications
On incoming events such as a new message, or an incoming call, the user often expects to receive a push notification, if the app is not active.
For Voice, you can integrate VoIP push notifications in your app using PushKit and CallKit. Our blog features an end to end tutorial on how integrate VoIP push notifications which features a completed sample project.
For Chat, you can integrate User Notifications in your app. You can customize the push you get from Vonage before displaying it to your user with a notification service app extension.
Create a Push Certificate
Apple Push Notifications service (APNs) uses certificate-based authentication to secure the connections between APNs, Vonage servers and the end devices. You will need to create a certificate and upload it to the Vonage Servers.
Adding a Push Notification Capability
To use push notifications you are required to add the push notification capability to your Xcode project. To do this select your target and select Signing & Capabilities:

Then select add capability and add the Push Notifications and Background Modes capabilities:

Under the Background Modes capability, select Voice over IP and Background processing. If Xcode is automatically managing the signing of your app it will update the provisioning profile linked to your Bundle Identifier to include the capabilities.
Then select add capability and add the Push Notifications capability:

Generating a push certificate
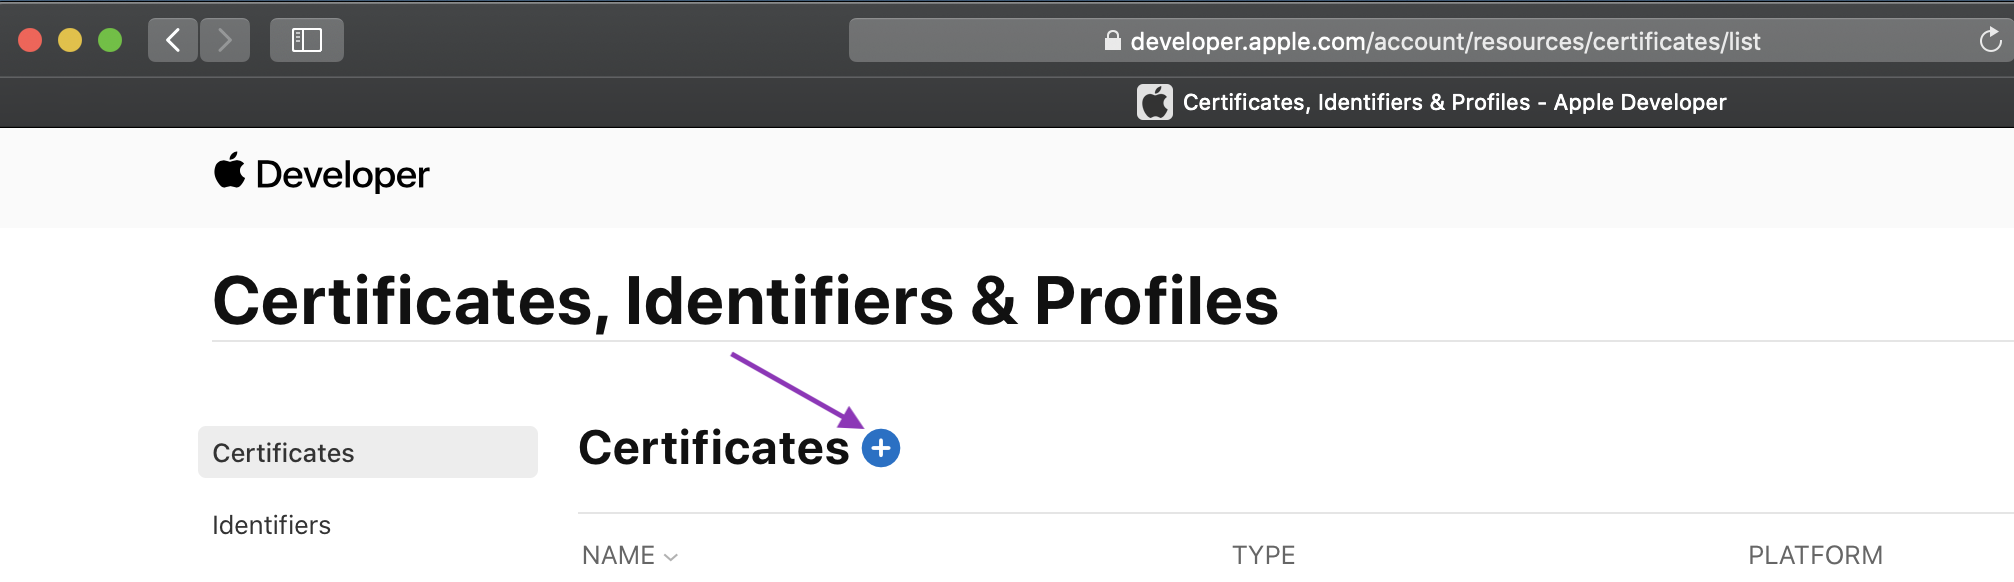
To generate a push certificate you will need to log in to your Apple developer account and head to the Certificates, Identifiers & Profiles page and add a new certificate:
Choose an Apple Push Notification service SSL (Sandbox & Production) and continue.
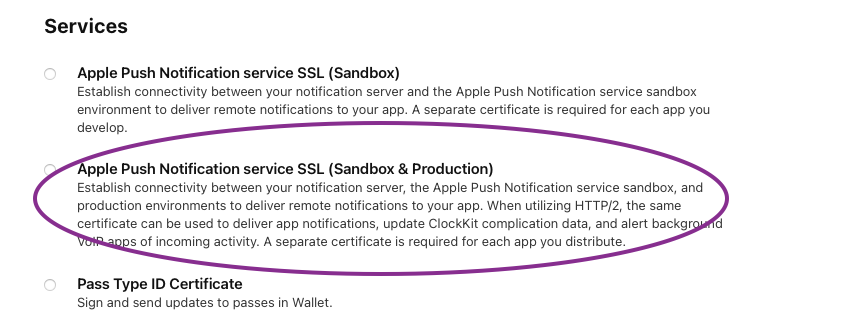
If the Apple Push Notification service option is not available to you, you will need to ask an admin for your Apple developer account to complete this step for you.
You will now need to choose the App ID for the app that you want to add push notifications to and continue. If your app is not listed you will have to create an App ID. Xcode can do this for you if it automatically if it manages your signing for you, otherwise you can create a new App ID on the Certificates, Identifiers & Profiles page under * Identifiers*. Make sure to select the push notifications capability when doing so.
You will be prompted to upload a Certificate Signing Request (CSR). You can follow the instructions on
Apple's help website
to create a CSR on your Mac. Once the CSR is uploaded you will be able to download the certificate. Double click the
.cer file to install it in Keychain Access.
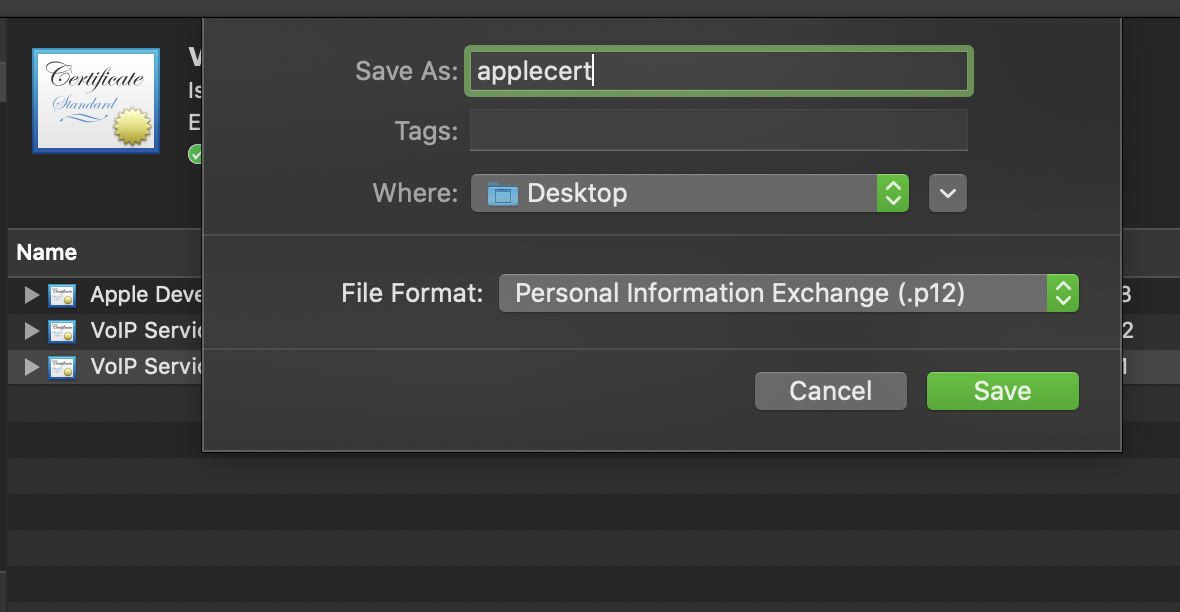
To get the push certificate in the format that is needed by the Vonage servers you will need to export it. Locate your
Apple Push Notification service certificate in Keychain Access and right-click to export it. Name the export
applecert and select .p12 as the format:
You can find more details about connecting to APNs in Apple's official documentation.
Upload your certificate
You upload your certificate to Vonage using the API Dashboard. Open your application on the dashboard, then open the "Enable push notifications" tab:
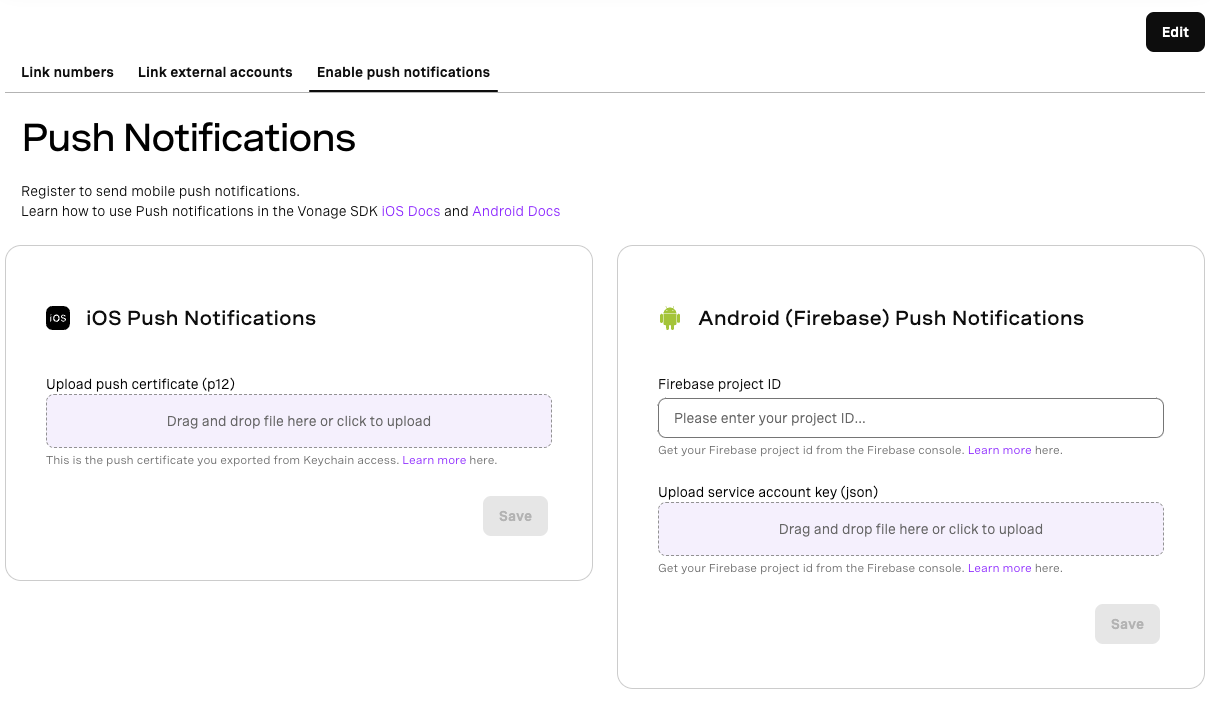
Upload your certificate, in .p12 format, from the previous step and add a password if needed.
Using the Terminal
You can also upload your certificate via the terminal. You will need your Vonage Application ID to upload using the terminal, you will also need to generate a Vonage admin JWT.
To generate a Vonage admin JWT run the following Vonage CLI command. Remember to replace the APPLICATION_ID with ID
of your Vonage application and PRIVATE_KEY with the name of your private key file:
NOTE An admin JWT is a JWT without a sub claim. More details on how to generate a JWT can be found in the authentication guide.
Then run the following Curl command, replacing jwt, applecert.p12, app_id with your values:
If you used a password when exporting your certificate, add the password to your request's body like so:
-d "{\"password\":\"$PASSWORD\"}" \
If you are updating an existing token, delete the existing token first by making a DELETE request to the same
endpoint with the same authentication.
NOTE: There is no validation at this endpoint. The 200 return code means that Vonage got the data and stored
it but hasn't checked that values are valid.
Integrate Push Notifications in your Application
After you have uploaded your certificate to Vonage, integrate VoIP push in your app by following these steps:
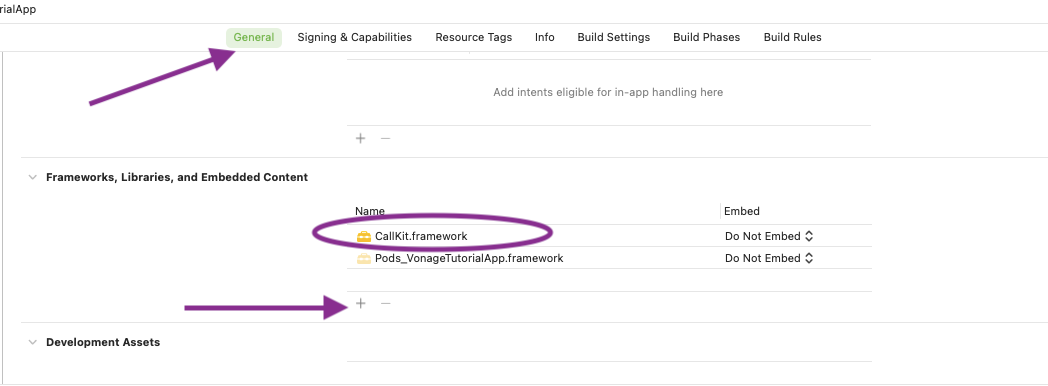
1. Link the CallKit Framework
When using VoIP push notifications, you have to use the CallKit framework. Link it to your project by adding it under Frameworks, Libraries, and Embedded Content under General:
2. Set Up PushKit
In your AppDelegate, add a voipRegistry property:
let voipRegistry = PKPushRegistry(queue: nil)
and set it up:
func registerForVoIPPushes() {
    self.voipRegistry.delegate = self
    self.voipRegistry.desiredPushTypes = [PKPushType.voIP]
}
Call the above function in the didFinishLaunchingWithOptions AppDelegate function.
3. Register for VoIP Push Notifications
Implement the PKPushRegistryDelegate didUpdate delegate function, which will provide you with a PKPushCredentials object. This object contains the token needed to register this device.
NOTE: Before registering the token, ensure that you have first successfully created a session.
Call registerDevicePushToken on the VGVoiceClient after creating a session and pass in the push credentials token:
var isSandbox = false
#if DEBUG
   isSandbox = true
#endif

client.registerVoipToken(token, isSandbox: isSandbox) { error, deviceId in
      if error == nil {
         // Push token registered
      } else {
        // Push token registration error
      }
}
This will bind the token to this device and the user who created the session. For example, if you created a session with the user Alice, every time there is an incoming call for Alice Vonage will look up the device token for Alice. 'isSandbox' allows you to control whether you are using the Apple sandbox push notification server or not. You can use the deviceId to unregister the device for push.
4. Handle an Incoming VoIP Push Notification
When the device receives and incoming VoIP push notification, the PKPushRegistryDelegate delegate function didReceiveIncomingPushWith will be called. Here you will need to check if this push is from Vonage, and process it:
func isVonagePush(with userInfo: [AnyHashable : Any]) -> Bool {
   VGVoiceClient.vonagePushType(userInfo) == .unknown ? false : true
}

func pushRegistry(_ registry: PKPushRegistry, didReceiveIncomingPushWith payload: PKPushPayload, for type: PKPushType, completion: @escaping () -> Void) {
   if isVonagePush(with: payload.dictionaryPayload) {
      if let invite = client.processCallInvitePushData(payload) {
            // Report new call to CallKit
      } else {
            // Report failed call to CallKit
      }
   }
}
To process the incoming push, you will need an active session belonging to the intended recipient of the call. It is recommended to simultaneously create a new session, and call processCallInvitePushData providing the user is not currently on a call.
When processCallInvitePushData successfully completes, you will get a call invite on the didReceiveInviteForCall delegate function. Here you can report the call to CallKit.
func voiceClient(_ client: VGVoiceClient, didReceiveInviteForCall callId: String, from caller: String, withChannelType type: String) {
   let activeCall = UUID(uuidString: callID)
   let update = CXCallUpdate()
   update.localizedCallerName = caller

   // provider is an instance of CXProvider
   provider.reportNewIncomingCall(with: activeCall!, update: update) { error in
      if error == nil {
            completion()
      }
   }
}
NOTE: Before calling answer or reject for the call invite, make sure that the session you created earlier has successfully been created.
After you have uploaded your certificate to Vonage, integrate push in your app by following these steps:
- Ask for Push Notification Permissions
func registerForPushNotificationsIfNeeded() {
    UNUserNotificationCenter.current().requestAuthorization(options: [.alert, .sound, .badge]) { [weak self] granted, _ in
        print("Permission granted: \(granted)")
        if granted {
            self?.getNotificationSettings()
        }
    }
}

func getNotificationSettings() {
    UNUserNotificationCenter.current().getNotificationSettings { settings in
        print("Notification settings: \(settings)")
        guard settings.authorizationStatus == .authorized else { return }
        Task { @MainActor in
            UIApplication.shared.registerForRemoteNotifications()
        }
    }
}
Call the registerForPushNotificationsIfNeeded function in the didFinishLaunchingWithOptions AppDelegate function.
- Register for Push Notifications
Add the didRegisterForRemoteNotificationsWithDeviceToken function to your AppDelegate class. This will be called by the system to give you a device token. Call registerDeviceToken on the VGChatClient after creating a session and pass in the device token:
func application(_ application: UIApplication, didRegisterForRemoteNotificationsWithDeviceToken deviceToken: Data) {
    var isSandbox = false
    #if DEBUG
        isSandbox = true
    #endif

    client.registerDeviceToken(deviceToken, isSandbox: isSandbox) { error, deviceId in
        ...
    }
}
This will bind the token to this device and the user who created the session. For example, if you created a session with the user Alice, every time there is an incoming message for Alice Vonage will look up the device token for Alice. 'isSandbox' allows you to control whether you are using the Apple sandbox push notification server or not. You can use the deviceId to unregister the device for push.
Conclusion
In this guide you have seen how to set up push notifications.
Voice:
- You can learn more about CallKit on developer.apple.com.
- For an end to end tutorial visit our Handling VoIP Push Notifications blog.
- View the completed sample project on GitHub.
Chat:
- You can learn more about User Notifications on developer.apple.com.