Java
Initialize client
Before you can place a call, you need to initialize Client SDK. Add this line at the end of onCreate method of MainActivity class:
IDE will display a warning about the unresolved reference:
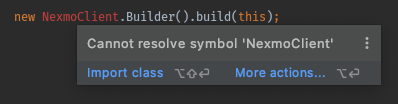
Put caret on the red text and press Alt + Enter to import the reference.
Set connection listener
Now below client initialization code add connection listener to monitor connection state:
Now client needs to authenticate to the Vonage servers. The following additions are required to onCreate method inside MainActivity. Replace the ALICE_TOKEN with the JWT token, you obtained previously from Vonage CLI:
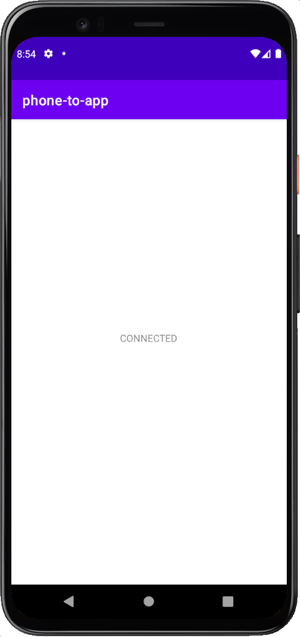
Build and Run
Press the Ctrl + R keys to build and run the app again. After successful login you will see CONNECTED text:
Receiving a phone call in-app
You receive a call from a phone to your app
Steps
1
Introduction to this task2
Prerequisites3
Create a webhook server4
Create a Vonage Application5
Buy a Vonage number6
Link a Vonage number7
Create a User8
Generate a JWT9
Create an Android project10
Add permissions11
Building the interface12
Initialize client13
Manage the call14
What's next?