Share:
Chris is the Developer Relations Tooling Manager and leads the team that builds your favorite tools. He has been programming for more than 15 years across various languages and types of projects from client work all the way up to big-data, large scale systems. He lives in Ohio, spending his time with his family and playing video and TTRPG games.
Using Vonage APIs with MongoDB Atlas - Part 3
Time to read: 7 minutes
In this series:
Part 3 - Using Vonage for Customer Interactions
We continue diving into MongoDB Atlas and its use with various Vonage APIs. In Part 1, we took a look at exactly what MongoDB Atlas is and some of the services that it offers. In Part 2, we dove into the sample application to see how to use MongoDB to back our registration process and wire in Vonage Verify for additional user security. Now in Part 3, we look at contacting the customer for their order and what we can do when customers need to speak to the restaurant.
Vonage offers a wide variety of ways for developers to connect to their customers, and one of the simplest ways is through our Messages API. This API allows developers to message end users through a variety of channels. At the time of this article, Vonage supports SMS, MMS, WhatsApp, Facebook Messenger, and Viber, but Vonage is continually working on adding more channels. This tutorial will look at sending an SMS, which is usually the easiest way to message a customer. Other channels require more setup and may have additional restrictions.
For the demo, once a user has placed an order, we will send them an SMS notification letting them know that their order has been received. You could expand this in the future to also send notifications on the status of an order or even in-time delivery notifications. Right now, we will send one message so you can see how it is done.
In a perfect world, that would be the last interaction with a customer, but we all know how the world works. What happens if the customer has an issue with the delivery? We could have them call us or even send a text message back with the problem, but what if they could show us the problem? The Vonage Meetings API is a quick way to set up a one-to-one video chat without building a video application. We can use it to send a link to the customer and drop them into a pre-built interface, and we barely have to write any code for it.
Once a user logs in, they should see a Hamburger and a Soda for sale. There is nothing magical going on with this. We have an API endpoint on the server that will query all the available inventory and returns it as a JSON blob. We will then add that to a VueJS variable so that they display.
let inventory = ref(Array());

async function getInventory() {
    await fetch(import.meta.env.VITE_API_URL + '/api/inventory')
        .then(resp => resp.json())
        .then(data => {
            inventory.value = []
            data.forEach((dish: {name: string, price: string}) => {
                inventory.value.push(dish)
            })
        })
        .catch(err => console.log(err));
}
When the user selects something from the menu, we save that to a VueJS store powered by Pinia. Pinia is a plugin for VueJS that makes sharing information across different views easier, so we will store our cart here as we move between the menu page to the order page. If you dug into the authentication code as part 2, you would also see we used it to store the fact the user is authenticated.
Once you select an order and click "Check Out," you will get a confirmation page. Again, nothing is special here as we pull the information from the cart store and display it on the page. The magic happens when we click "Submit Order."
The VueJS code will submit the cart contents to our backend API through a call to fetch(). The server-side code will take our order and save it into MongoDB as a new document in the orders collection.
const { items } = req.body
const bearerToken = req.header('authorization').split(' ')[1]
const decodedToken = jwt.decode(bearerToken);
const userRecord = await client.db('restaurant_pos_demo').collection('users').findOne({ _id: new ObjectId(decodedToken.user_id) });

const orderTime = new Date().toISOString()
const result = await client.db('restaurant_pos_demo').collection('orders').insertOne({
    items, orderTime, status: 0, lastUpdated: orderTime, user_id: userRecord._id
});If you are coming from a relational database background, you may notice that we take the items that were sent from the order and just put them into the new order document. We are storing all the relevant item and order information in this document instead of denormalizing the data (where we would rather store just the item ID to link it to the inventory collection). Document-based databases keep all the needed information within the document instead of using foreign keys to reference other documents and collections. You can, as each document has an ID, but it is common.
This is one of the significant advantages of Document-based databases. All of the information for a document can be stored within the document instead, reducing the number of external lookups that need to be done. You may use a series of JOIN operands in a relational database to piece together a row of information from various tables. Still, in MongoDB, this is accomplished through aggregate pipelines.
Aggregate pipelines allow you to select and manipulate documents through a series of queries and pipe those results into other aggregate queries. While we are not using them in this example, as we are just storing the inventory information in the order document, you can do quite complex data manipulation with aggregations.
Once the order is saved, we fire an SMS message through the Messages API. Since we are using our Node.js SDK is just a single call to vonage.messages.send(). We pass in an SMS object with the text message, the number to send to, and the number we have linked to our application (which we set up in Part 1 and have in our .env file).
await vonage.messages.send(
    new SMS(
        'Your order has been submitted',
        userRecord.phone,
        process.env.VONAGE_FROM
    )
);That is all it takes to send an SMS through our Messages API! The user should get a text message on their mobile device in just a few minutes.
If you have dug around in our developer documentation, you may notice that we have two APIs for sending SMS messages. One is the Messages API we just discussed, and the other is our SMS API. Why do we have two APIs for the same thing?
The SMS API is one of the original APIs provided by Vonage and was built when SMS was the only text message option. As such, it is purpose-built for not only basic "Send an SMS through an HTTP API" but also more advanced SMS interactions like the SMPP protocol, or Short Message Peer-to-Peer protocol. SMPP is a telecom industry protocol that allows a more direct message exchange between applications and providers like Vonage.
The Messages API is designed for more day-to-day users. It takes the ease-of-use of the original SMS API and extends it to more channels like MMS and WhatsApp. Since it focuses on more general usage, it does not have SMPP access.
We recommend using the Messages API for any new projects. SMS and Messages must still abide by country-specific SMS restrictions like 10DLC in the US, so unless you specifically need very low-level SMS sending like SMPP the Messages API is a better choice.
Once the user submits their order, they are brought to an Order Status screen. This displays the order number returned from the MongoDB record we added and could be extended to show the order items themselves. We want to look at the "Video Call" button now, as this is a way for the customer to contact the restaurant.
From the end-user perspective, they can click this button, and a new window will open into a video call. They will enter a meeting room with a nice visual theme, the ability to turn their camera and mic on and off, and all the comforts you would want for a video call. The best part is this works with all major browsers on both desktop and mobile devices.
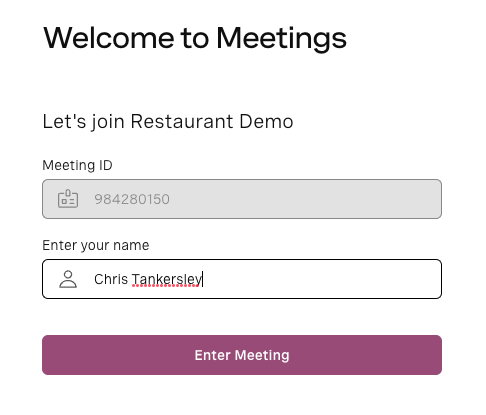 Meeting Login
 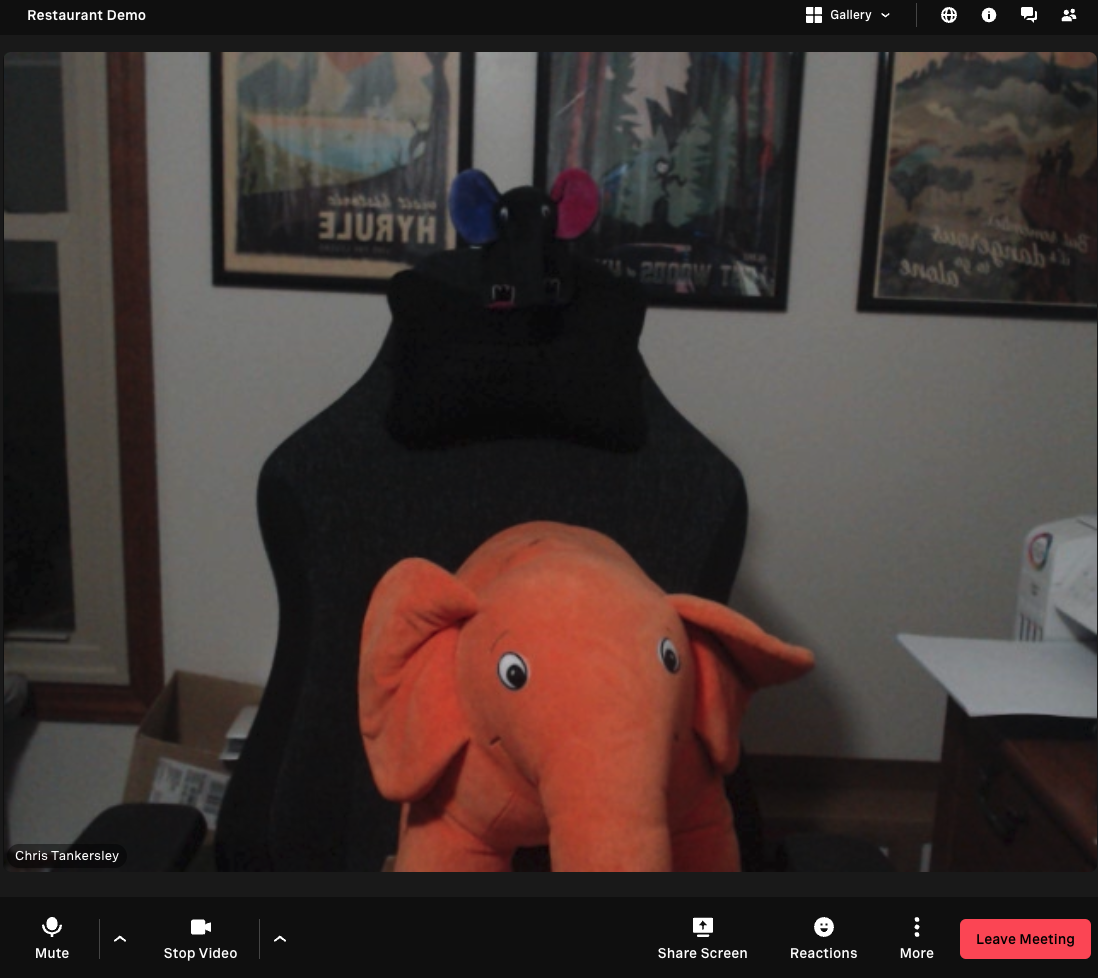 Meeting Interface
The Meetings API is still in beta at this article's time, but setting it up is incredibly easy. The first thing we are going to do is set up a theme. This can be done before and only needs to be done once, but you can create a theme with your companies logo, color scheme, and branding. To set up a new theme, it takes a single API call.
const privateKey = readFileSync(process.env.VONAGE_PRIVATE_KEY);
const token = tokenGenerate(process.env.VONAGE_APPLICATION_ID, privateKey);
await fetch('https://api-eu.vonage.com/beta/meetings/themes', {
    method: 'POST',
    body: JSON.stringify({
        theme_name: 'Restaurant Theme',
        main_color: '#a05683',
        brand_text: 'Vonage Restaurant',
        short_company_url: 'my-restaurant'
    }),
    headers: {
        'Authorization': 'Bearer ' + token,
        'Content-Type': 'application/json'
    }
})
    .then(resp => resp.json())
    .then((data: any) => {
        res.json(data)
    })
    .catch(err => console.error(err))
Since we are not using the SDK, we will use the tokenGenerate() method from @vonage/jwt to create a JWT token to talk to the API. We then make a POST call to the Meetings API with our theme name, color, and other information. Check out the Meetings API Reference for all the options. This API call will return a theme ID we will use later in the demo.
Once we have the meeting ID, we send it back to the client so it can be used to open a new window.
app.post('/api/website/video-call', async (req, res) => {
    const { orderNumber } = req.body;
    const privateKey = readFileSync(process.env.VONAGE_PRIVATE_KEY);
    const token = tokenGenerate(process.env.VONAGE_APPLICATION_ID, privateKey);

    fetch('https://api-eu.vonage.com/beta/meetings/rooms', {
        method: 'POST',
        body: JSON.stringify({
            display_name: 'Restaurant Demo',
            type: 'instant',
            theme_id: '6ba90e1b-c27a-45e8-9e49-877634c315b0'
        }),
        headers: {
            'Authorization': 'Bearer ' + token,
            'Content-Type': 'application/json'
        }
    })
        .then(resp => resp.json())
        .then(async (data: any) => {
            console.log('guest url: ' + data._links.guest_url.href)
            console.log('host url: ' + data._links.host_url.href)
            const orderRecord = await client.db('restaurant_pos_demo').collection('orders').updateOne({ _id: new ObjectId(orderNumber) }, { $set: { meetingUrl: data._links.host_url.href}})
                .then(async (document) => {
                    res.json({
                        guest_url: data._links.guest_url.href
                    })
                });
        })
        .catch(err => console.error(err))
});
A single API call is all we need to add to our application to add video conferencing to our application. We did not have to do anything to set up the UI for the video room, and it all uses the WebRTC standard to work on almost any device.
Just like with Verify, we could add SMS capabilities to our application with a single line of code. If you have an existing application, it is just as easy. All you need is to install the @vonage/server-sdk package, configure a new client, and add the line to call the Messages API wherever you want to send an SMS.
We also added video conferencing just as easy. Creating a new room is a single API call; now, we have a fully-featured video call without writing a single line of front-end code.
How does the restaurant know to join the video call? We will tackle that in a future article. Next, we will look at using MongoDB Atlas's user authentication, allowing us to offload our user authentication to Atlas for our administrative backend.
Part 3 - Using Vonage for Customer Interactions
Share:
Chris is the Developer Relations Tooling Manager and leads the team that builds your favorite tools. He has been programming for more than 15 years across various languages and types of projects from client work all the way up to big-data, large scale systems. He lives in Ohio, spending his time with his family and playing video and TTRPG games.