Share:
Chris is the Developer Relations Tooling Manager and leads the team that builds your favorite tools. He has been programming for more than 15 years across various languages and types of projects from client work all the way up to big-data, large scale systems. He lives in Ohio, spending his time with his family and playing video and TTRPG games.
Using Vonage APIs With MongoDB Atlas - Part 1
Time to read: 6 minutes
Developing applications is hard. Not only are there the base requirements for the application itself, but there are always common problems to solve, like how to authenticate users, how the database is managed, and where is all of this hosted. In 2023 we are almost spoiled with the number of services that can help solve these problems, but all of this needs to be brought together inside an application. One solution that has come along is MongoDB Atlas, a suite of products that are designed to help developers build their applications quickly and handle many common problems.
MongoDB Atlas is a hosted cloud database service that multiple cloud hosting providers can use. This means that you can host your database in various regions and across AWS, Azure, and Google Cloud Platform for multi-cloud availability. Since the databases are hosted in the cloud, scaling up and down can be done on demand. For developers, it frees up a lot of administrative time handling more servers by allowing MongoDB to manage all the infrastructure while developers can focus on their applications.
MongoDB Atlas allows you to set up MongoDB clusters. If you are not familiar with MongoDB, it is a document-based NoSQL Database system. Unlike a traditional Relational Database Management System (RDMS), MongoDB stores information as JSON-like documents that can be searched. It has limited relational capabilities and focuses more on lightly-structured data than tabular row/column architectures. Documents are grouped as "collections," replacing the standard table architecture. Documents in a collection can share a common schema, like an RDMS table, but can also change their structure.
{
 "_id": ObjectId("6413733ba623c618c2fab2d9"),
 "name": "Hamburger",
 "price": 995
}NoSQL databases, as the name suggests, do not use SQL to query for information. MongoDB uses a JSON-like query syntax to search for documents that match the criteria. For example, instead of using something like SELECT * FROM users WHERE admin = true, you would use the following syntax:
db.users.find({
 admin: {
 $eq: true
 }
})Many developers prefer using a NoSQL database for the freedom of the schemaless document design. There are no major migrations as new "columns" can be added to documents by adding them to new or existing documents. You can define a schema if you want, but it largely only helps the database engine filter through data in larger data sets.
MongoDB Atlas also brings a few additional features that developers can use to build their applications on top of the robust NoSQL database that MongoDB brings. This is part of their "App Service" layer that adds user authentication, a serverless function runtime, an associated API gateway and router, automatic GraphQL and HTTPS data access, and a device data syncing service called MongoDB Realm.
This means that a developer can start developing their application right away without having to piece together a bunch of disparate services and can focus on the business problems that the application solves, not shave the proverbial yak on how to do user authentication or how to deploy code. Atlas and its App Services can do much of that heavy lifting for a developer.
In the next series of articles, we are going to walk through building an application that utilizes MongoDB Atlas and a suite of Vonage communications APIs. The demo application will take the form of a simple restaurant website and an associated backend. We will show:
How to integrate Vonage Verify with a user login
How to use Vonage Messages to send an order confirmation
How to use Vonage Meetings for issue resolution
How to use In-App messaging to pass notifications back to "admin" users
We will also help developers set up:
A MongoDB Atlas cluster and associated App Service
Having a front-end app talk back to MongoDB Atlas via Realm
User Authentication with MongoDB Users
While we will be breaking down how all of this works over time, feel free to take a quick glance at the source code for the application at the source code on GitHub.
Realm CLI - A command line application that makes it easier to manage App Services in MongoDB Realm
Node.js 16+ - Node.js is an open-source, cross-platform JavaScript runtime environment.
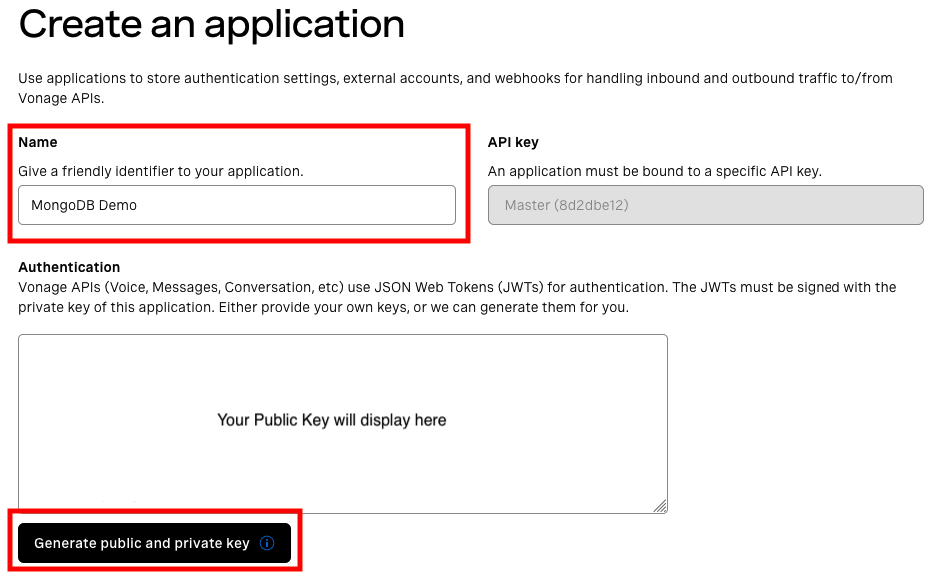
Our Messages, Verify, and In-App Messaging APIs are all backed by a Vonage Application, a set of configuration data that can be grouped. Once you have signed into your developer account, go to the Applications page and create a new application. Give your application a name like MongoDB Demo, then click Generate Public and Private key. This will create the authentication keys we will use in the SDKs.
 Name and Secret Keys
Now scroll down, and we can turn a few different capabilities. We will need Messages, RTC (In-app voice & messaging), and the Meetings API. Toggle each of those capabilities on. Messages and RTC needs a few callback URLs that we will not utilize for the moment, so enter https://example.com for those handfuls of URLs that are required. Meetings can stay blank. Once that's all done, click on "Generate new application."
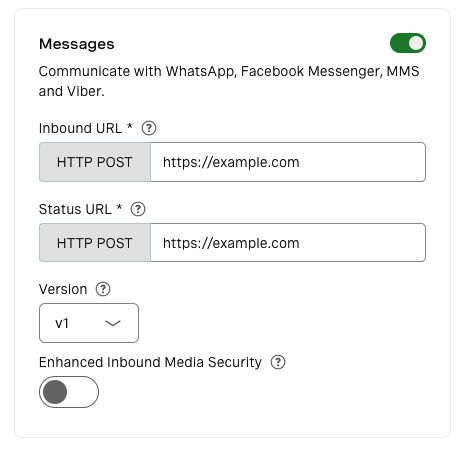 Messages API Capability
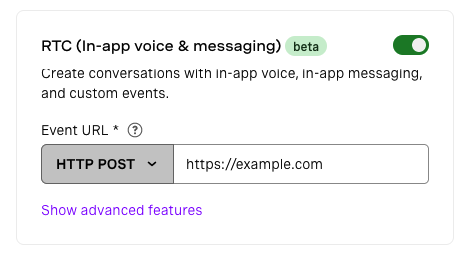 RTC API Capability
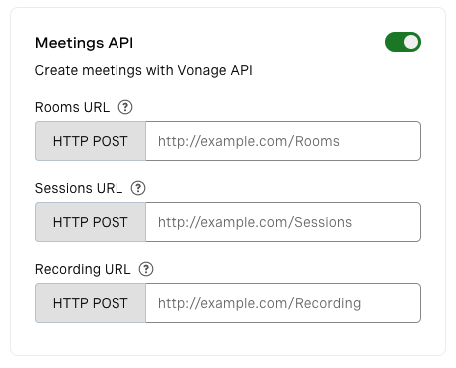 Meetings API Capability
Since we are using the Messages API, we will need to link a telephone number to our application. This will be used for outbound SMS later on. Developer Accounts should have a number already where available, so just click the "Link" button to attach it to this application.
Now that we have the Vonage side let's set up the database in MongoDB Atlas. When you first log into your account, it will prompt you to deploy your database. We must set up some hosting information as this is a hosted plan. Thankfully the MongoDB Atlas system has a very generous free tier. Just select the M0 free tier to host our database. This is powerful enough for us to play around for our demo. The only other thing you will need to do is add a Name for the database cluster. For this demo, I have just named it VonageDemo. If you want, you can change the hosting provider or Region, but for now, you can leave them at the default of "AWS" and "N. Virgina (us-east-1)". Click Create to move on.
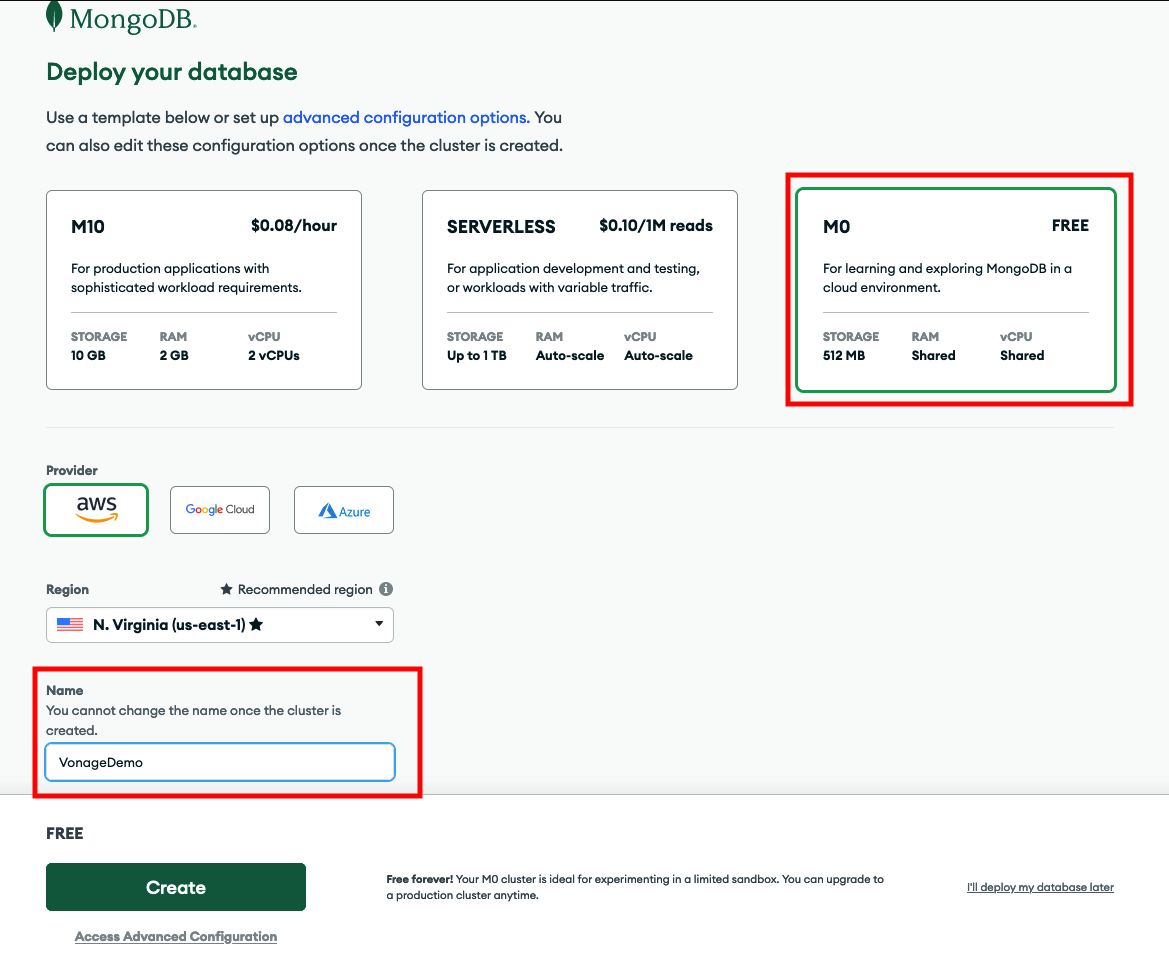 Database Cluster Settings
We will need to set up authentication as we will be accessing the MongoDB cluster over the internet. We can use Username and Password auth for our demo as it is the easiest to get up and running. It will pre-fill a username and password for you. Feel free to change these. Just note down the password for later; we will need that to authenticate to MongoDB. When you are done, click Create User.
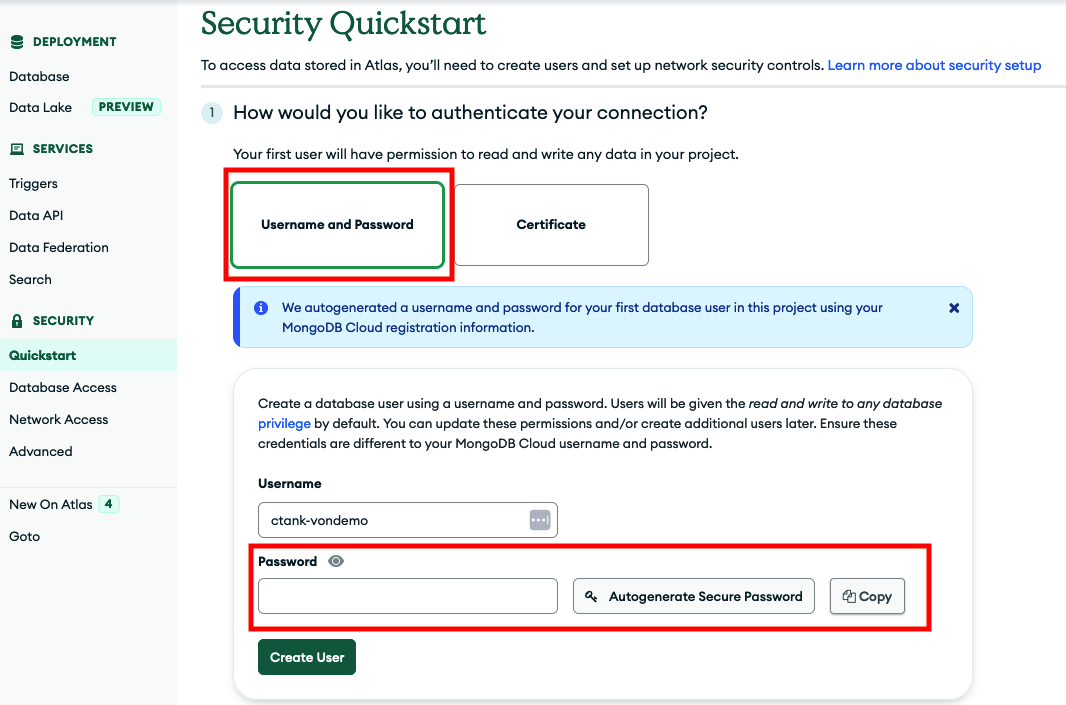 MongoDB Cluster Authentication
For security reasons, MongoDB Atlas restricts who can talk to your cluster. For our demo, you can select My Local Environment. The server component of the demo will connect directly to the cluster, so we will need to allow it access to the cluster. By default, it adds your public IP address to the list. This is fine for running the demo locally, but if you are going to deploy this to a public server, you will need to add that server's IP address. If you are hosting the server on another machine, please check with your hosting provider for your public IP address. If you host the demo in a cloud provider like AWS or Google Cloud Platform, you can select Cloud Environment and provide the appropriate details. Click Finish and Close to finish up.
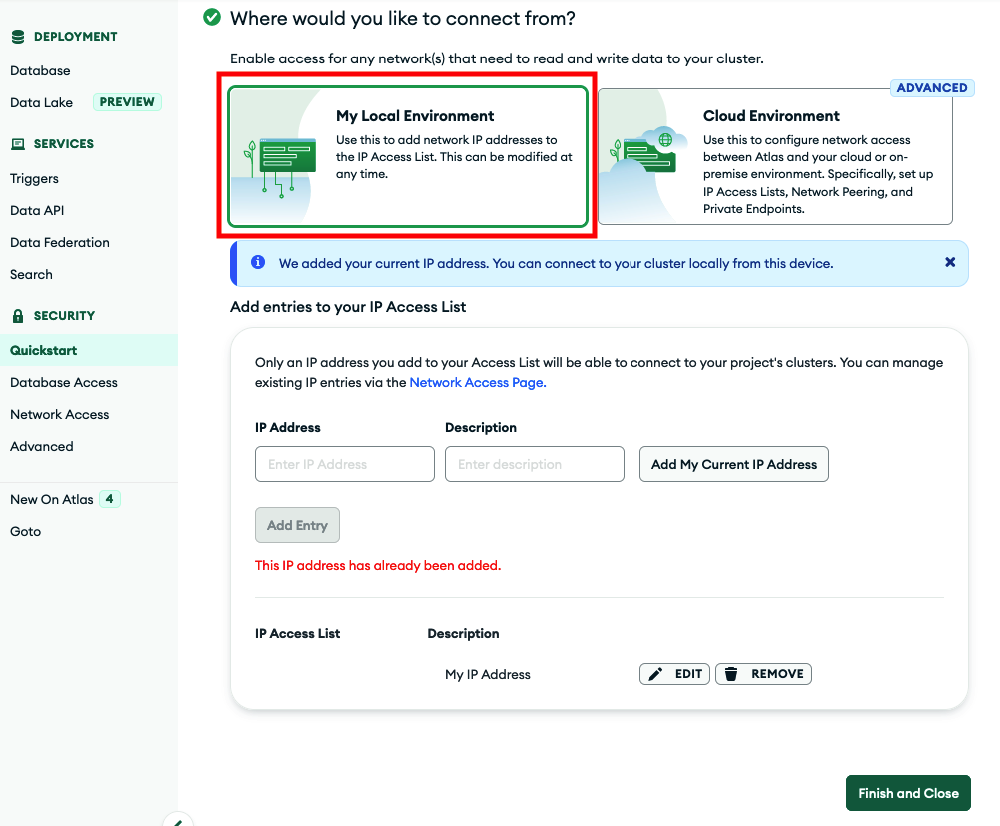 MongoDB Security Settings
Your MongoDB Atlas cluster is now all setup! You can administer the cluster through the browser, including viewing the stored documents. The dashboard also has instructions for connecting through the MongoDB VSCode plugin to access the database directly in your IDE.
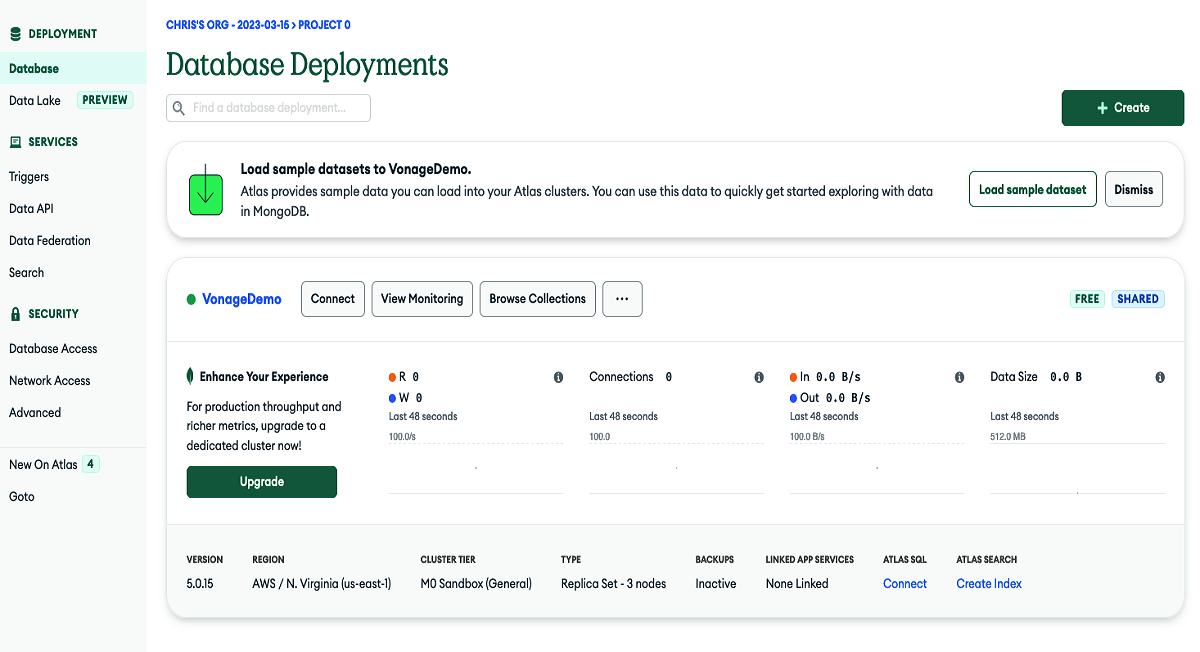 MongoDB Dashboard
In the next part, we will add some sample data to our MongoDB cluster, and walk through setting up the demo application to run. In the meantime, feel free to poke around the MongoDB Atlas dashboard as well as the Vonage Dashboard to see all the different services both companies offer.
Share:
Chris is the Developer Relations Tooling Manager and leads the team that builds your favorite tools. He has been programming for more than 15 years across various languages and types of projects from client work all the way up to big-data, large scale systems. He lives in Ohio, spending his time with his family and playing video and TTRPG games.