Share:
Chris is the Developer Relations Tooling Manager and leads the team that builds your favorite tools. He has been programming for more than 15 years across various languages and types of projects from client work all the way up to big-data, large scale systems. He lives in Ohio, spending his time with his family and playing video and TTRPG games.
Using Vonage APIs with MongoDB Atlas - Part 2
Time to read: 9 minutes
In this series:
We are continuing our dive into MongoDB Atlas and it's use with various Vonage APIs. In Part 1 we took at look at exactly what MongoDB Atlas is and some of the services that it offers. In Part 2, we will dive into the sample application to see how we can use MongoDB to back our registration process as well as wire in Vonage Verify for additional user security.
Vonage Verify is a Two-Factor Authentication service that Vonage provides as an API. It allows you to make a simple API call to send a code to a user, and then check its validity with another API call. This provides additional security by ensuring that not only does the user know their password, but they have a physical device that they have told us about to receive the code. Since most people have a mobile device, it's pretty safe to assume they will have access to receive the code on it.
Vonage Verify generates the code and contacts the customer on your behalf. We also will try to contact the customer multiple times in a variety of ways. For example, if you do not try and validate the code from a customer within a certain timeframe, we will try and call the customer with an automated message to provide them with the code. If they still do not enter it, or answer the phone, we will try SMS again. You can control how we try and contact the customer through what are known as Workflows.
Our legacy Verify product supports SMS and Voice to contact the customer. Verify product support SMS, Voice, WhatsApp, Email, and device-based authentication channels with fully customizable workflows. Both products relieve you from having to manually send notifactions to your customers and track their responses. nor have to worry about sending complaint messages or getting caught in telephone company spam filters.
You just send an API request to us, we send the code, and you verify it.
For our demo to work, we need some food for users to order! Adding information into a MongoDB database is a bit different than adding data to a traditional Relational Database Management System like Postgres or MySQL. MongoDB is a document-based system, so instead of creating a databse with tables, we will create a database with Collections. These Collections will store documents, which are special JSON-like documents that we can search for and use.
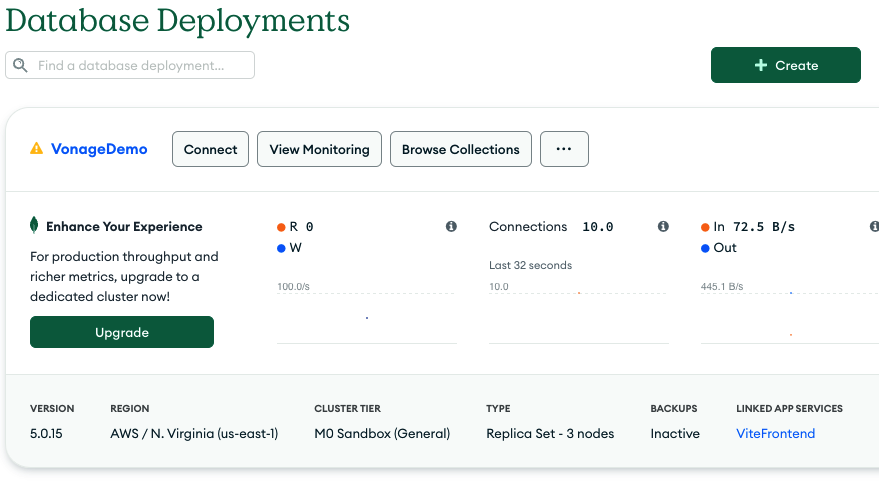
Let's create our first databse. From your MongoDB Atlas dashboard, click the Browse Collections button for your cluster.
 MongoDB Dashboard
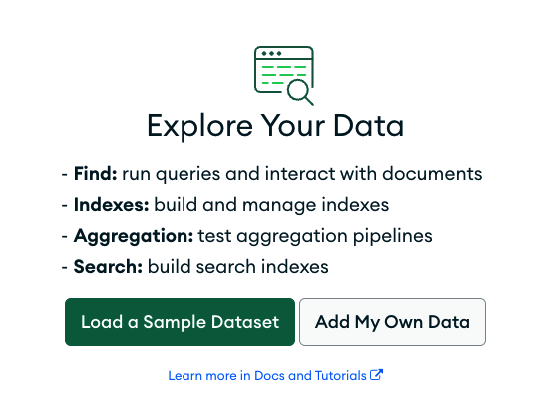
This will bring you to a view of all the information in your cluster. At the moment it is quite bare as we have no databases or information. Let's add a few food items for users to purchase. Click the My Own Data button.
 Adding Data
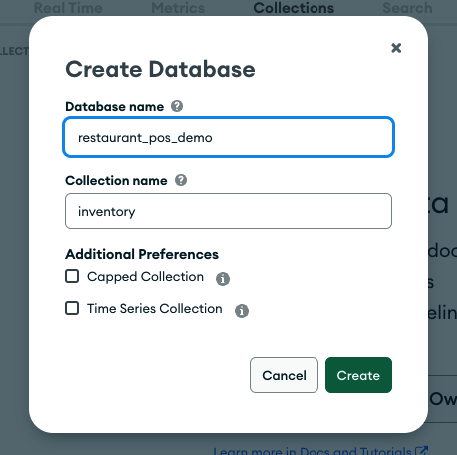
It will then ask for the database name, and a collection name. For our demo we want "restaurant_pos_demo" for the Database name and "inventory" for the Collection name. The demo is already set up to look for this database and collection, so make sure you use these names instead of something custom. Once you have that entered, click the Create button.
 Create new Collection
Now we can enter some data. Click the Insert Document button. This will bring up the document editor. While it gives a decent little set of drop-downs for entering information, we can also just paste in some documents. Click the {} button at the top to switch to the text-entry mode, and paste in the small block of JSON for the Hamburger document. Click on Insert, and the inventory item will be saved. Do this again, but the second time paste in the Soda document.
// Document 1
{
  "name": "Hamburger",
  "price": 995
}

// Document 2
{
  "name": "Soda",
  "price": 199
}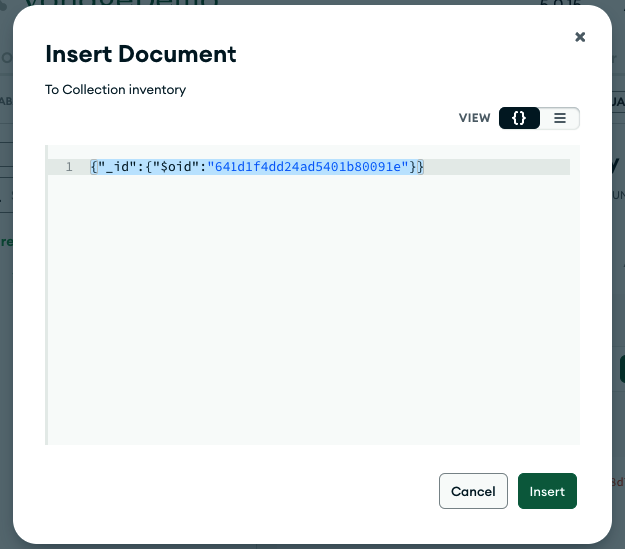 Document Editor
Once you have entered the two documents, you can see them in the database view. This editor is a great way to play around with documents and data while you build your database, and can save a lot of time during the development phase debugging data. In a larger production environment you can run queries to filter out data, but for now this is a good quick way to enter our data.
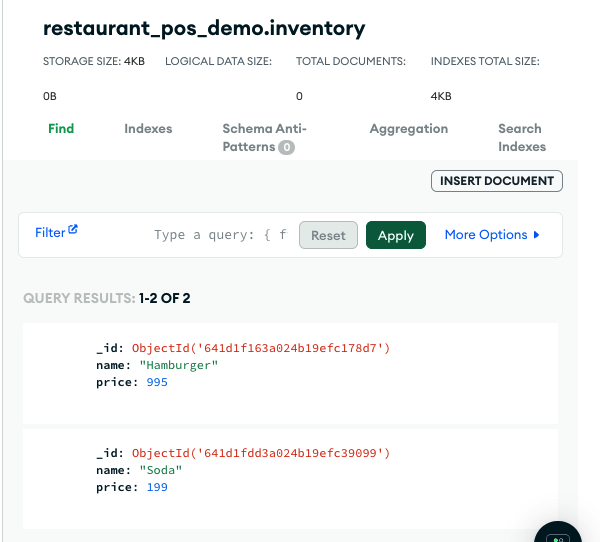 Documents
Now that we have some data, we can wire up our demo. Clone the demo from https://github.com/Vonage-Community/sample-mongodb-vonage-integration-restaurant-demo. There are two folders, both "webapp" folder with the source code and an "app-service" folder with some MongoDB configuration we will use later. For now, go into the "webapp" folder and open that up in your favorite editor.
We need to add some configuration details so the application knows how to talk to your MongoDB cluster. Make a copy of the .env.dist file in the repository, and name it .env. This file will have all of the information custom to your install inside of it.
Open up .env and make the following changes:
Change "ENABLE_VERIFY" to "1" so that we can see the Vonage Verify API in action
Set "VONAGE_API_KEY" to the Vonage API key available on your Vonage Customer Dashboard
Set "VONAGE_API_SECRET" to the Vonage API secret available on your Vonage Customer Dashboard
Change the "JWT_SIGNING_KEY" to some random value. The string does not really matter, but we will use this later for validating API calls.
We will also need to set the value of "MONGODB_DSN" to the connection string for your cluster. To find this value, go to your MongoDB Atlas dashboard, and click the Connect button for your cluster. In the pop-up, click Connect your application. This will bring you to a screen that has your connection string. Copy that value, and paste it into the value for "MONGODB_DSN" in .env. Make sure to change the <password> part to the password for your cluster.
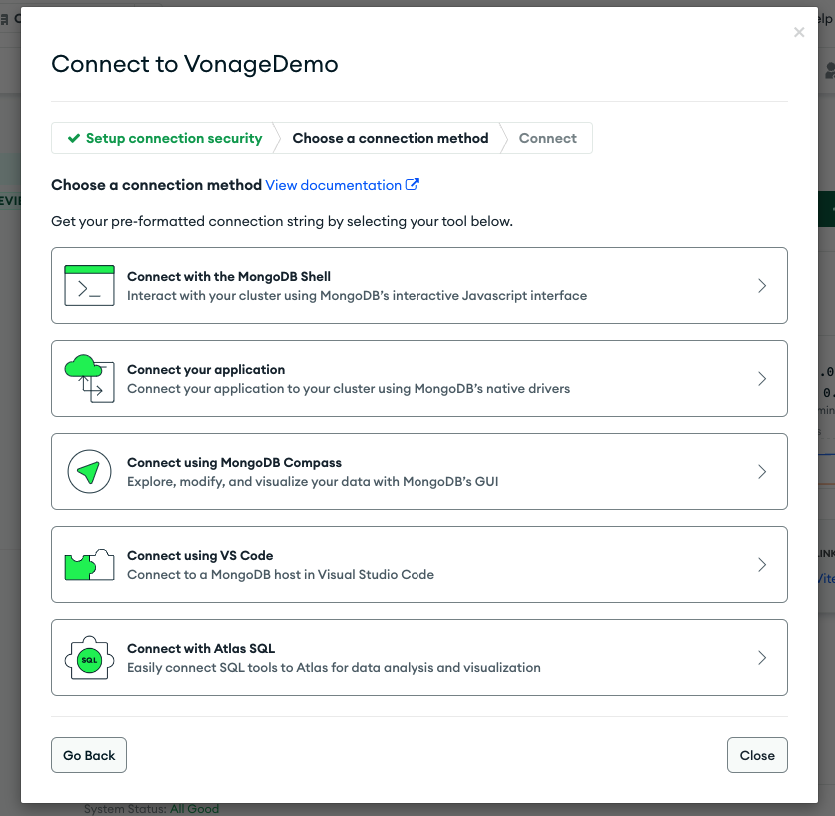 Connecting to the application
We should be able to run the demo now!
The demo itself is built using Vite, Vue.js, and Typescript. To run the demo, we need to run both the front-end client application and a back-end server application. Open up two command-line terminals.
In the first terminal, in the webapp/ folder run npm ci to install all the dependnencies, and then run npm run dev. If everything goes correctly, you should get a screen saying "Vite <version>" and then a link for Local, probably pointing to http://localhost:5173. Your link may be slightly different if you have other things listening on port 5173.
In the second terminal, navigate to webapp/server. Like the other window run npm ci to install all the dependencies, and then run npm run dev. This screen should show nodemon start and eventually say "Server Started". If you see an error about not being able to connect, check your MongoDB cluster connection string.
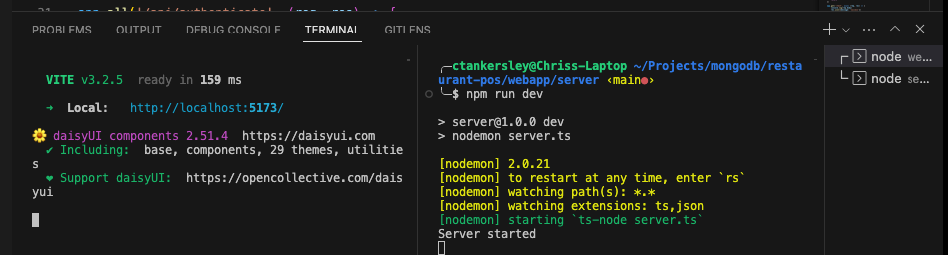 Starting the demo
Open your browser, and navigate to http://localhost:5173/website/login (replace the port number with whatever Vite says it's running for you.). You should be greeted with the following login screen!
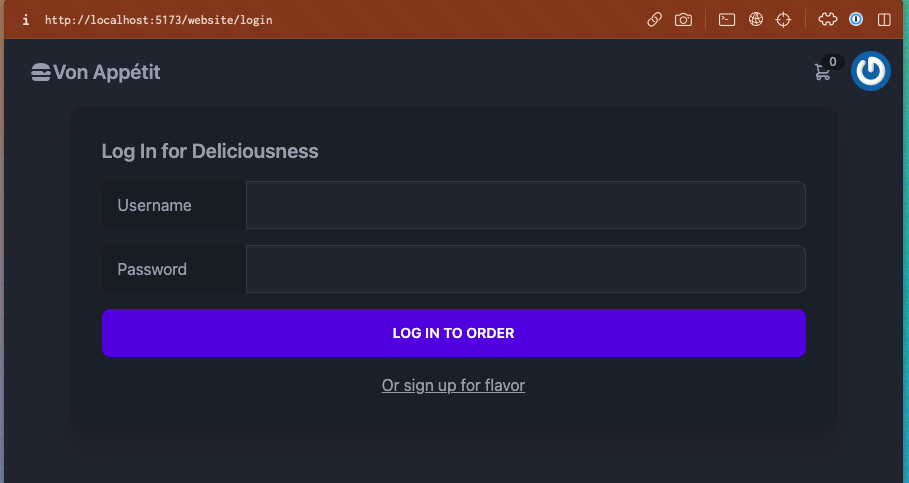 Login Page
We currently have no users, so let's create one. Click the Or sign up for flavor link on the page. Enter a username, password, and mobile telephone number. Your number should include the country code prefix and no dashes. We will send a two-factor authentication code to this mobile number as part of the user login, so make sure to use an actual mobile number, not a Google Voice number. If you are in the US, an example will look like "15556661234".
Once you have entered your user information click Register.
You should now be able to log in. Enter your username and password that you just registered with. If the authentication was successful, you should be taken to a small form asking you to enter your 2FA Code.
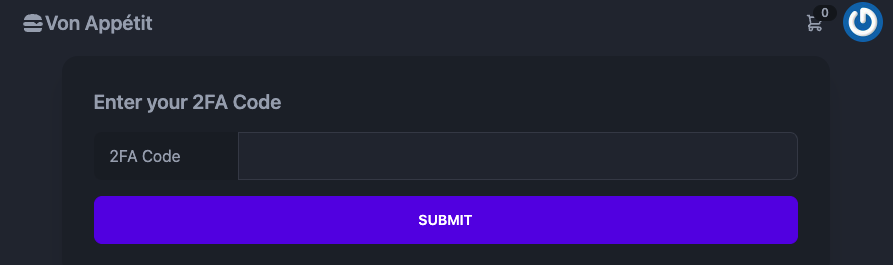 2FA Form
After a few seconds, you should receive an SMS with a four-digit code. Enter that code into the form and click Submit. If everything works, you will see an order screen with our hamburger and soda!
When the user logs in, our Vue.js client-side application sends the username and password to our backend server, specifically /api/website/authenticate. This route connects directly to our MongoDB cluster and finds the user from a users collection. When we registered a new user, MongoDB automatically created the collection for us and stored a document for the user. We retrieve this document and then compare the password to the stored hashed copy in the document.
The MongoDB Node.js client is a fluent client, which means we can chain together method calls to generate a query. The line:
const userRecord = await client.db('restaurant_pos_demo').collection('users').findOne({ username });tell the MongoDB client to use our "restaurant_pos_demo" database, search in the "users" collection, and find one document with the "username" that was supplied in the request. Since we stored the password as a bcrypt hash, we can use bcrypt.compare() to check the user-supplied password with the one we stored in the user's document. If they match, the user entered the correct password!
// webapp/server/server.ts

app.all('/api/website/authenticate', async (req, res) => {
    const { username, password } = req.body
    const userRecord = await client.db('restaurant_pos_demo').collection('users').findOne({ username });

    if (userRecord) {
        await bcrypt.compare(password, userRecord.password)
            .then(async (match) => {
                if (match) {
                    const token = jwt.sign({user_id: userRecord._id }, process.env.JWT_SIGNING_KEY, { expiresIn: '15m'})
                    let verifyId = {request_id: 'abcd'};
                    if (process.env.ENABLE_VERIFY === "1") {
                        verifyId = await vonage.verify.start({number: userRecord.phone, brand: 'Vonage Restaurant'})
                        console.log(verifyId);
                    } else {
                        console.log('Verify Disabled');
                    }

                    res.status(200).json({ token, verifyId: verifyId.request_id })
                } else {
                    res.status(401).send()
                }
            })
        return
    }

    res.status(401)
    res.send()
    return
})We then generate a temporary JWT to send back to the Vue.js application. Our Vue.js app will use this temporary JWT when the user enters the code on the client-side application. If Verify is enabled in the demo with "ENABLE_VERIFY", we use the Vonage Node.js SDK to call the Verify API. We pass the user's telephone number and set the brand to "Vonage Restaurant." When the user receives an SMS message or a voice call, it will be identified as "Vonage Restaurant" when they receive it.
The Vonage API returns a "request ID." We will also send this back to the front-end and use this request ID to check the code from the user. We then send the temporary JWT token and request ID back to the Vue.js app.
Once we verified the user was who they said they were, we changed the Vue.js form to ask for the 2FA code. When the user enters the code, the Vue.js app sends a request to /api/website/authenticate/verify with the token, Verify Request ID and the code the user entered.
The JWT contains the user's document ID, so we decode the token and look the user back up in MongoDB. If we find them, we then call the Verify API, but this time we use the check() method and send along the request ID and code. The API will return a success if the code matches. If it matches, we generate a real JWT with a longer expiration and return it to the Vue.js application.
// webapp/server/server.ts

app.all('/api/website/authenticate/verify', async (req, res) => {
    const { token, verifyId, tfaPin } = req.body
    const decodedToken = jwt.decode(token)
    const userRecord = await client.db('restaurant_pos_demo').collection('users').findOne({ _id: new ObjectId(decodedToken.user_id) });

    if (userRecord) {
        if (process.env.ENABLE_VERIFY === "1") {
            await vonage.verify.check(verifyId, tfaPin)
                .then(resp => {
                    console.log(resp)
                    const token = jwt.sign({user_id: userRecord._id }, process.env.JWT_SIGNING_KEY, { expiresIn: '2h'})
                    res.status(200).json({ token })
                })
                .catch(err => {
                    console.error("there was an error", err);
                })
            return
        } else {
            const token = jwt.sign({user_id: userRecord._id }, process.env.JWT_SIGNING_KEY, { expiresIn: '2h'})
            res.status(200).json({ token })
        }
    }

    res.status(500)
    res.send()
    return
})The Vue.js application knows we are fully authenticated once it gets back the proper JWT. It stores this token inside a global store called "authenticationStore", and the rest of the application will use this JWT to authenticate the user for any further API calls.
// src/views/Website/Login.vue

const verify = async() => {
    fetch(import.meta.env.VITE_API_URL + '/api/website/authenticate/verify', {
        method: 'POST',
        headers: {
            'Content-Type': 'application/json'
        },
        body: JSON.stringify({
            token: tempJWT.value,
            verifyId,
            tfaPin: tfaPin.value
        })
    })
        .then(resp => resp.json())
        .then(async (json) => {
            console.log(json)
            authStore.setToken(json.token)
            router.push({ name: 'website.order' });

            return
        })
        .catch(err => console.log(err));
}
If you already have an authentication step in your application, adding Vonage Verify is only a few additional lines of code. For our Vue.js app, it meant one additional call to our backend and a new form, and on the server side, we just needed to make the API call to send the code and then a new route to verify the code. Since Vonage handles all the heavy lifting of generating, sending, and checking the code, the impact on our codebase is minimal. The flexibility of MongoDB's document-based storage meant we did not need to run any database migrations and could quickly write the code to insert a new user and do the lookups.
Now that our users can log in, they should order some food!
In the next section, We will look at using MongoDB to store the order and the Vonage SMS API to send an order confirmation. We will also get a peek at using the Vonage Meetings API to quickly add video conferencing to our application for customer service resolutions.
Share:
Chris is the Developer Relations Tooling Manager and leads the team that builds your favorite tools. He has been programming for more than 15 years across various languages and types of projects from client work all the way up to big-data, large scale systems. He lives in Ohio, spending his time with his family and playing video and TTRPG games.