Share:
Friendly tech educator, family man, diversity champion, probably argue a bit too much. Formerly a backend engineer. Talk to me about JavaScript (frontend or backend), the amazing Vue.js, DevOps, DevSecOps, anything JamStack. Writer on DEV.to
Snapchat Style Filters with Tracking.js and Vonage
Time to read: 19 minutes
Be Batman or just freak some people out. In this guide, you're going to add facial tracking using Tracking.js and create some cool Snapchat style filters for a video stream. Cool!
Vonage Video API produces a WebRTC based platform for adding live video, voice & messaging to web, mobile and desktop applications. We'll use the Vonage Video API for connecting from our application to a video streaming session. When working with the Vonage Video API you may see the name OpenTok, its previous name, used in code or documentation.
Tracking.js is a lightweight and powerful real-time face detection and color tracking library that brings different algorithms and techniques into the browser environment. We'll use tracking.js to track faces so we can apply masks.
This is what you'll need to follow this tutorial.
To get started you're going to need node and the node package manager (npm) installed. Let's check if they're installed by running:
If you don’t have node and npm installed, check out nodejs.org and install the correct version for your operating system. I wrote this article with Node 11.8 and NPM 6.8.
Head over to Vonage to sign up for a free trial.
See if you have Git installed.
If not, Atlassian has a great guide on how to install Git. I wrote this article with Git 2.17 installed.
As a base, I have prepared a version of the application, from OpenTok web samples for stream filters, that you can edit.
Check out my version of the OpenTok web filter samples here by running the following command in your command line tool of choice, or by using your Git interface to check out this URL: https://github.com/nexmo-community/snapchat-filters-with-opentok-and-face-tracking.git
Note: The
masterbranch is at the start point, but if you're impatient (and like to skip to the end like me) you cangit checkout demo-endand run the application from there.
So, before you start coding, you need to configure the application as it is and get a feel for the starting point. This will need the Vonage account mentioned in the pre-requisites. If you don't have one, head over to Vonage to sign up now.
Once you've confirmed your email address and logged in, you'll be able to click on Create Project from your account overview. Create a new Vonage Video API project by clicking on Create Custom Project. Give your project a name and click on Create.
Now, make a note of your API KEY and SECRET for the config step.
Having created your project, you'll be redirected to the project dashboard. Scroll down to Project Tools and click on Create Session ID. You could also choose between Relayed and Routed. Basically, Relayed attempts a peer-to-peer connection but will use relay servers when firewalls block peer-to-peer. Routed is the default where streams go to the Media Router. You can read more about sessions in the documention.
Make a note of the SESSION ID that gets created.
Before we configure the application, we need to generate a token. On your project dashboard, under Project Tools (the same section where you created your session ID), enter the SESSION ID you just generated and click Generate token.
Make a note of the GENERATED TOKEN for the next step.
Make a copy of js/config.js.example and save it as js/config.js (in the js directory) making sure to modify the values to those from your Vonage account.
API KEY, SESSION ID, and TOKEN are all created above. If you are running the application locally using npm start, you will need a BASE URL of http://127.0.0.1:8080. For something like Heroku, it's more like https://app-name.herokuapp.com.
Quick Tip: If you're running the application having run
npm startyou can stop it again with CTRL+C.
Your js/config.js will end up looking something like this.
// js/config.js
(function closure(exports) {
  exports.BASE_URL = 'base url';
  exports.API_KEY = 'api key';
  exports.SESSION_ID = 'session id';
  exports.TOKEN = 'token';
})(exports);
Now use npm to install your dependencies. Run this from inside your project directory.
You can start the application by using npm start. This is a smart little function. If you don't configure a custom start script in package.json, this will assume you mean node index.js where index.js is the main file configured in package.json. In our case, it's going to run ./node_modules/bin/http-server to start our node based web server.
Once up and running you can view the session locally by opening localhost:8080 in your favourite browser. It should look something like this, but with you instead of me.
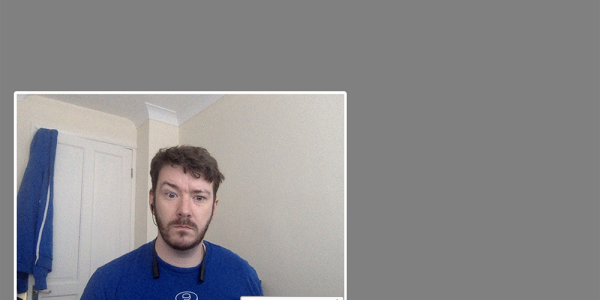 Basic Vonage Video example up and running
Now, load the same URL in another browser window so you can talk to yourself!
Important note: I don't always look so scruffy :)
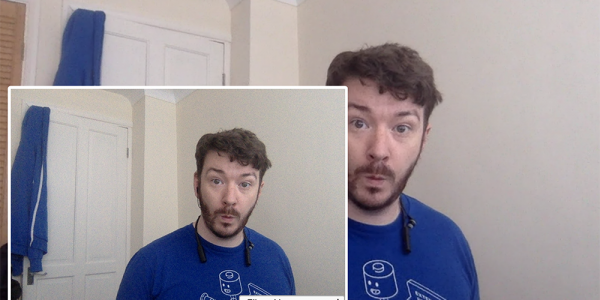 Basic Vonage Video conversation occuring
The Vonage Video API platform makes it easy to embed real-time, high-quality interactive video, messaging, screen-sharing, and more into web and mobile apps. Here, specifically, we'll be using the JavaScript Client SDKs.
The JavaScript Client SDK is doing the real heavy lifting. It's going to use hardcoded credentials to connect to a session using a token we generate in the developer portal. It's then going to subscribe to and publish audio-video streams in our browser.
Tracking.js is a lightweight JavaScript library for tracking facial positions inside images and video. We're going to retrieve the coordinates on the canvas.
The application you've cloned and started comes pre-built with some filters already. These filters work by using image data from the Canvas API and modifying it. The image data is in an object containing width, height, and pixel data. The pixel data is contained in an array. Every 4 items represent a pixels R, G, B, and A respectively.
So applying image effects can work by modifying the RGBA data.
Here is a hacky example. The code is explained using comments, but it won't actually run.
// The existing image data.
const imgData = new ImageData(existingData, width, height);

// An empty typed data array for our new modified image data
const dataArray = new Uint8ClampedArray(imgData.data.length);

// Loop over the data, skipping to every 4th item.
for (let i = 0; i < imgData.data.length; i += 4) {
  // i is R / red
  // i+1 is G / green
  // i+2 is B / blue
  // i+3 is alpha - which specifies the opacity of the color.

  // here, we're addoing 80 to the relative channel value, effectively lighting this channel
  dataArray[i] = imgData.data[i] + 80;
  dataArray[i + 1] = imgData.data[i + 1] + 80;
  dataArray[i + 2] = imgData.data[i + 2] + 80;
  // lightening every channel will result in a whitewashed/brightened effect

  dataArray[i + 3] = imgData.data[i + 3];
}

return new ImageData(dataArray, imgData.width, imgData.height);
You can see the existing filters modifying the RGB values in js/filters.js.
Below are the steps to edit the application for the creation of two new filters, to adjust the brightness and thresholding our stream.
Adjusting the brightness of an image is one of the most straight forward image processing operations that can be done. As shown in the earlier code sample, all you need to do is add the desired change in brightness to each of the red, green, and blue channels.
Open js/filters.js and find the line with the comment // Brighten and replace the comment with a new function for our filter.
Quick Tip: Comments like
// ...and<!-- // ... -->show that more code exists but has been removed, for the sake of clarity, here in the blog.
// js/filters.js
(function closure(exports) {
  var Filters = {

    // ...

    brighten: function brighten(imgData) {
      // New data

      // Loop

      // Return
    }
  };

  // ...
})(exports);The image data in an 8 bit unsigned clamped array. This means it has a fixed length and the values are clamped to unsigned values between 0-255. Perfect for RGB values. So we need to create a new, empty, 8-bit array that we'll store our modified image data in. Replace // New data as shown here, where you're setting the fixed length with the length of the existing data.
// js/filters.js
    // ...

    brighten: function brighten(imgData) {
      const res = new Uint8ClampedArray(imgData.data.length);

      // Loop

      // Return
    }

// ...Now, loop over the existing data and shift the values to apply a brightening effect. Replace // Loop as shown here. And, as explained earlier in the article, you're looping over the data, skipping to every 4th index in the array.
// js/filters.js
    // ...

    brighten: function brighten(imgData) {
      const res = new Uint8ClampedArray(imgData.data.length);

      for (let i = 0; i < imgData.data.length; i += 4) {
        var inputRed = imgData.data[i];
        var inputGreen = imgData.data[i + 1];
        var inputBlue = imgData.data[i + 2];
        res[i] = inputRed + 80;
        res[i + 1] = inputGreen + 80;
        res[i + 2] = inputBlue + 80;
        res[i + 3] = imgData.data[i + 3];
      }

      // Return
    }

    // ...
Last of all, for this function, you'll return the new data array. Replace // Return as shown.
// js/filters.js
    // ...

    brighten: function brighten(imgData) {
      const res = new Uint8ClampedArray(imgData.data.length);

      for (let i = 0; i < imgData.data.length; i += 4) {
        var inputRed = imgData.data[i];
        var inputGreen = imgData.data[i + 1];
        var inputBlue = imgData.data[i + 2];
        res[i] = inputRed + 80;
        res[i + 1] = inputGreen + 80;
        res[i + 2] = inputBlue + 80;
        res[i + 3] = imgData.data[i + 3];
      }

      return new ImageData(res, imgData.width, imgData.height);
    }

    // ...
With your function set up, now you need to be able to select it. So open index.html and replace <!-- Brighten --> with an option to select our new function.
<!-- index.html -->
<!-- // ... -->
          <select id="filter">
            <option value="none">Filter: None</option>
            <option value="grayscale">Filter: Grayscale</option>
            <option value="sepia">Filter: Sepia</option>
            <option value="invert">Filter: Invert</option>
            <option value="brighten">Filter: Brightening</option>
            <!-- Threshold -->
          </select>
<!-- // ... -->Now, start the application again opening localhost:8080 and check out the new brightening filter. The option value is the same as the function name.
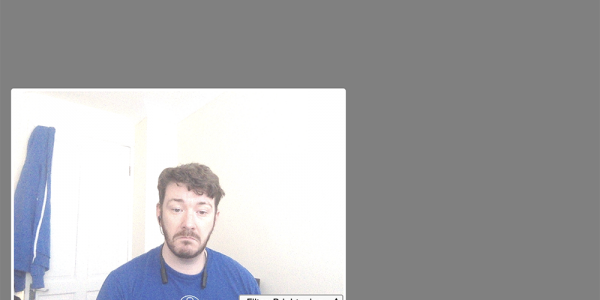 Vonage Video stream with a brightening filter
Next up is thresholding the image.
Open js/filters.js and find the line with the comment // Threshold and replace it with the following function. This time, you have the whole function.
How thresholding works, is that we replace the colour with white or black based on an algorithm involving the sum of the values of the red, green, and blue channels. A calculated sum over 100 (>= 100), representing the brighter colours, is made white. Everything else is made black.
// js/filters.js
(function closure(exports) {
  var Filters = {

    // ...

    threshold: function threshold(imgData) {
      const res = new Uint8ClampedArray(imgData.data.length);
      for (let i = 0; i < imgData.data.length; i += 4) {
        var inputRed = imgData.data[i];
        var inputGreen = imgData.data[i+1];
        var inputBlue = imgData.data[i+2];
        var v = (0.2126 * inputRed + 0.7152 * inputGreen + 0.0722 * inputBlue >= 100) ? 255 : 0;
        res[i] = res[i+1] = res[i+2] = v;
        res[i + 3] = imgData.data[i + 3];
      }

      return new ImageData(res, imgData.width, imgData.height);
    }

  };

  // ...
})(exports);
Now to add an option to select thresholding. So open index.html and replace <!-- Threshold --> with an option to select our new function.
<!-- index.html -->
<!-- // ... -->
          <select id="filter">
            <option value="none">Filter: None</option>
            <option value="grayscale">Filter: Grayscale</option>
            <option value="sepia">Filter: Sepia</option>
            <option value="invert">Filter: Invert</option>
            <option value="brighten">Filter: Brightening</option>
            <option value="threshold">Filter: Thresholding</option>
          </select>
<!-- // ... -->Now, start the application again opening localhost:8080 and check out the new thresholding filter.
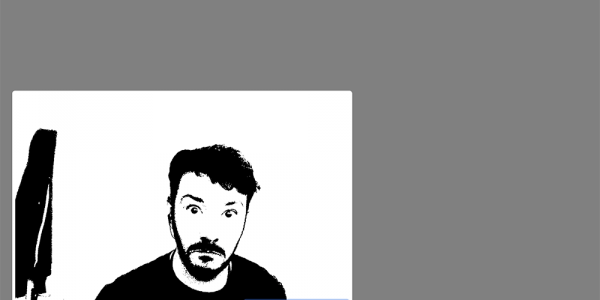 Vonage Video stream with a thresholding filter!
Next up, you'll add Tracking.js and render an image over your face like a mask.
Using npm, install Tracking.js.
Add the library to your application using the traditional approach. Edit index.html and find the comment where it says <!-- Scripts -->. Replace this with the new script tags shown below. The first file tracking-min.js is the minified Tracking.js library. The second file face-min.js is data used by Tracking.js for tracking faces in media. Other data sets such as facial features, including eyes, nose, and mouth, are also available.
<!-- index.html -->
<!-- // ... -->

      var exports = {};

    <a href="http://node_modules/tracking/build/tracking-min.js">http://node_modules/tracking/build/tracking-min.js</a>
    <a href="http://node_modules/tracking/build/data/face-min.js">http://node_modules/tracking/build/data/face-min.js</a>
    <a href="http://js/config.js">http://js/config.js</a>
<!-- // ... -->Now, as filters and masks operate slightly differently, I have kept them separate. This is to do with the available objects inside the established js/filters.js file.
Create a new file js/masks.js and give it the following content to start with.
// js/masks.js
(function closure(exports) {
  var Masks = {
    none: function none(tracker, canvas, ctx) {}

    // Guy Fawkes

    // Batman
  };

  // Set the initial mask to none
  Masks.selectedMask = Masks.none;

  // When the mask selector changes we update the selectedMask
  var maskSelector = document.querySelector('#mask');
  maskSelector.addEventListener('change', function change() {
    Masks.selectedMask = Masks[maskSelector.value];
  });

  exports.Masks = Masks;
})(exports);Open and edit js/publish.js and find the // Tracker.js comment. Replace that, as shown here.
This object tracker is what will read the media and recognise any faces. Tracking works in general by effectively stepping a "shape" around your media until it finds a near match. The configuration is what sets the starting scale of the "shape" and step size. These will aid to fine tune (and improve the speed of) the tracker.
Note: With my built-in and 720p webcams this configuration tended to work just fine.
// js/publish.js

    // ...
    var reqId;

    // Draw a box around face
    var tracker = new tracking.ObjectTracker('face');
    tracker.setInitialScale(10);
    tracker.setStepSize(2);
    tracker.setEdgesDensity(0.01);

// ...And in the same file, find the // apply Mask comment and replace that like this.
// js/publish.js

      // ...
      ctx.putImageData(imgData, 0, 0);

      exports.Masks.selectedMask(tracker, canvas, ctx);

// ...Edit index.html and find both <!-- Masks --> comments.
To keep masks separate, you'll also create a separate select box. We'll leave the selections empty, for now.
You also need to include the new js/masks.js file here.
<!-- index.html -->
<!-- // ... -->
    <div id="videos">
        <div id="subscriber"></div>
        <div id="publisher">
          <!-- // ... -->

            Mask: None
            <!-- Guy Fawkes -->
            <!-- Batman -->

        </div>
    </div>
    <!-- // ... -->
    <a href="http://js/filters.js">http://js/filters.js</a>
    <a href="http://js/masks.js">http://js/masks.js</a>
<!-- // ... -->Before you run it, there is some styling to apply to the masks select box. Edit css/app.css and find the comment /* Masks menu css */ and replace it with the following CSS.
/* css/app.css */
/* // ... */
#mask {
  position: absolute;
  bottom: 0;
  left: 0;
  z-index: 102;
}You've not created any masks yet, but start the application again opening localhost:8080 to check you haven't made any errors. If the stream works, you're on the right track.
The first mask will be Guy. The Guy Fawkes mask has become a symbol of anonymity, which is the point of wearing a mask!
Open js/masks.js and find the comment // Guy Fawkes. Replace the comment with the new function.
// js/masks.js
// ...
(function closure(exports) {
  var Masks = {
    none: function none(tracker, canvas, ctx) {},

    guy: function guy(tracker, canvas, ctx) {
      // Load an image

      // Start tracking

      // Apply our image as a mask
    }

    // Batman
  };
// ...Load the image you want to place over any faces found by the tracker, replacing the // Load an image comment as shown here. ../images/guy.png should be available from the repository.
// js/masks.js

    // ...
    guy: function guy(tracker, canvas, ctx) {
      var mask = document.createElement("img");
      mask.src = '../images/guy.png';

      // Start tracking

      // Apply our image as a mask
    }
// ...Now, enable tracking against our media. The media you're using is the canvas stream. You need to enable camera and audio here. Replace the // Start tracking comment like this.
// js/masks.js

    // ...
    guy: function guy(tracker, canvas, ctx) {
      var mask = document.createElement("img");
      mask.src = '../images/guy.png';

      tracking.track(canvas, tracker, { camera: true, audio: true });

      // Apply our image as a mask
    }
// ...You need to register an event listener against the track event of the tracker so that when it finds a face, it can draw the mask over the detected face.
// js/masks.js

    // ...
    guy: function guy(tracker, canvas, ctx) {
      var mask = document.createElement("img");
      mask.src = '../images/guy.png';

      tracking.track(canvas, tracker, { camera: true, audio: true });

      tracker.on('track', function(event) {
        event.data.forEach(function(rect) {
          ctx.drawImage(mask, rect.x - 100, rect.y - 100, rect.width * 1.5, rect.height * 1.5);
        });
      });
    }
// ...Now, you need to add the option for the Guy mask to the application. Edit index.html, look for the <!-- Guy Fawkes --> comment and add the option as shown below.
<!-- index.html -->
<!-- // ... -->
    <div id="videos">
        <div id="subscriber"></div>
        <div id="publisher">
          <!-- // ... -->

            Mask: None
            Mask: Guy Fawkes
            <!-- Batman -->

        </div>
    </div>
<!-- // ... -->Fingers crossed, it all works! Start the application again opening localhost:8080. Select your first mask and check it out.
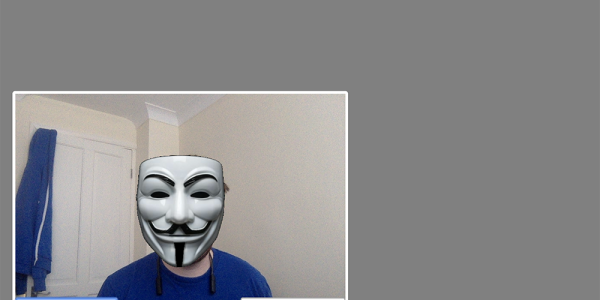 Vonage Video stream with a Guy Fawkes mask!
The final mask and edit to our code will be Batman. Open js/masks.js and find the comment // Batman. Replace the comment with this new function.
// js/masks.js

    // ...

    batman: function batman(tracker, canvas, ctx) {
      var mask = document.createElement("img");
      mask.src = '../images/batman.png';

      tracking.track(canvas, tracker, { camera: true, audio: true });
      tracker.on('track', function(event) {
        event.data.forEach(function(rect) {
          ctx.drawImage(mask, rect.x - 60, rect.y - 170, rect.width * 1.4, rect.height * 1.5);
        });
      });
    }
// ...Now add the option for the Batman mask to the application. Edit index.html, look for the <!-- Batman --> comment and add the option as shown below.
<!-- index.html -->
<!-- // ... -->
    <div id="videos">
        <div id="subscriber"></div>
        <div id="publisher">
          <!-- // ... -->

            Mask: None
            Mask: Guy Fawkes
            Mask: Batman

        </div>
    </div>
<!-- // ... -->Can I be Batman?? Start the application again opening localhost:8080. Select the mask and try it out.
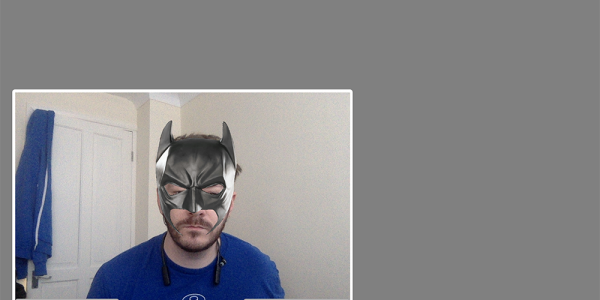 Vonage Video stream with a Batman mask
Writing Snapchat filters and wearing masks in video streams is made easier by Vonage Video's SDKs. Vonage Video also lets you send your streams to platforms like YouTube Live, Twitch, and Facebook all at the same time. So, besides being able to build your own live stream site, you can still reach people on other services.