
Share:
Hui Jing is a Developer Advocate at Nexmo. She has an inordinate love of CSS and typography, and is generally passionate about all things web.
Build an SMS Bot on Glitch with Hapi.js and the Nexmo Messages API
Time to read: 8 minutes
The Nexmo Messages API allows you to utilise a single API to send messages via multiple channels, like SMS, MMS and several popular social chat applications. You can handle incoming messages, decide what to do with the message content, and send out a reply accordingly. This blog post will cover how to build a simple bot that can tell you random facts about numbers.
Glitch is an online developer environment that allows developers to get up and running with building and deploying their apps without the hassle of server setup. All apps on the platform can be remixed and personalised, making it a perfect place to share code and figure out how things work.
Before starting this tutorial, it would be helpful to already possess a basic understanding of Javascript and Node.js.
Glitch is constantly improving its interface and features, so as of time of writing, you can create a new account on Glitch by clicking on the Sign in button in the top right corner of the page, and choose either Github or Facebook to login.
 Create a new account on Glitch
After that, you can click on the New Project button to get started. There are 3 choices, hello-webpage, hello-express and hello-sqlite. For the purposes of this tutorial, go with hello-express as this gives you an environment with Node.js and npm already installed.
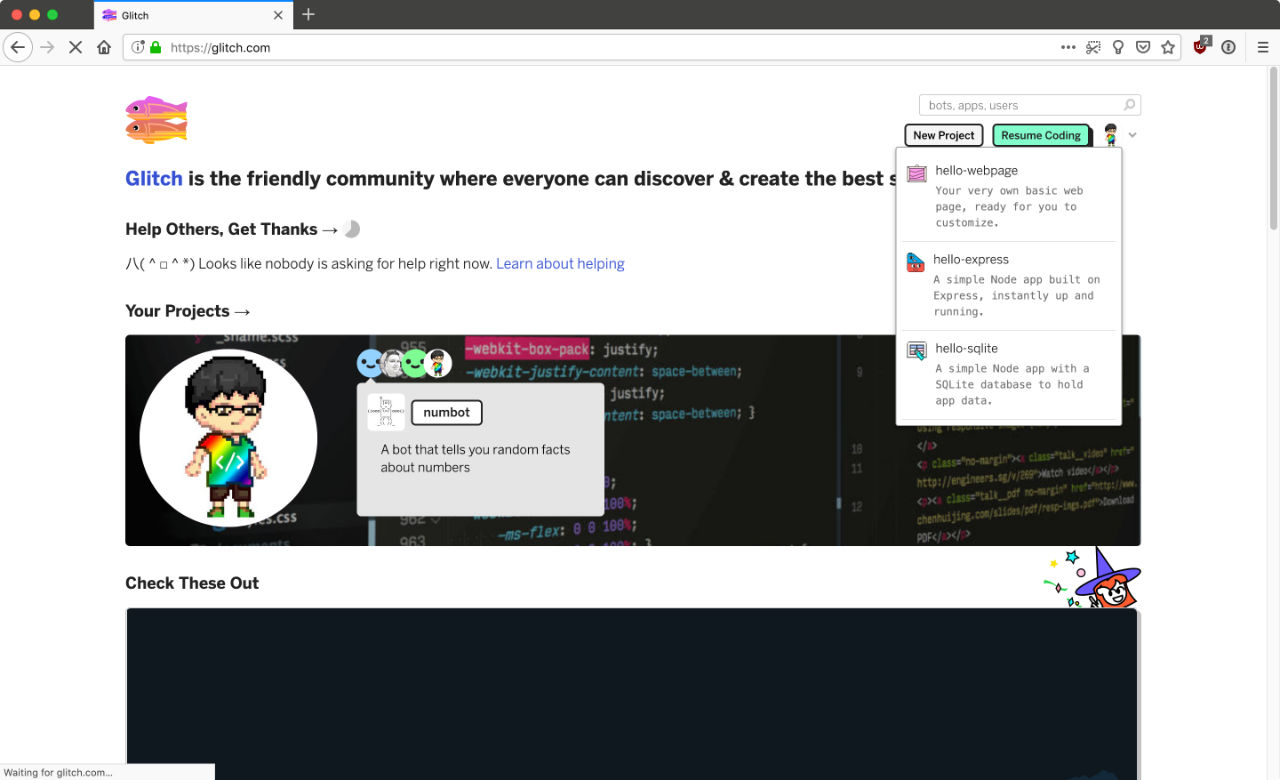 Click New Project button to get started
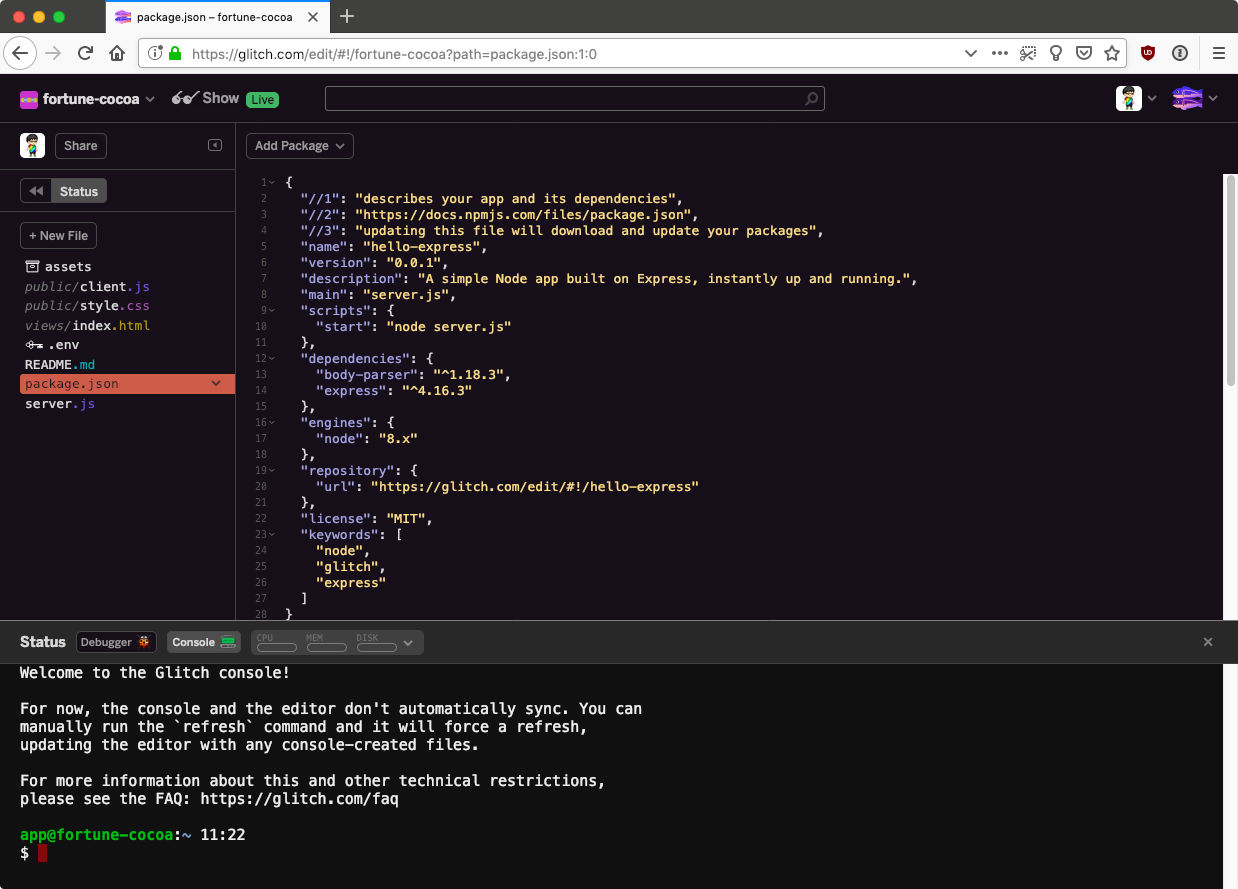
To install additional node packages, you can access the command line by clicking on the Console button in the status window.
 Click Console button on Glitch status window
You can toggle the status window by clicking on the Status button near the top of the sidebar. From there, you can use all the standard CLI commands in a bash environment. The only difference is that on Glitch, you would use pnpm instead of npm.
Glitch uses Express as its default Node.js framework, but converting the app to Hapi.js is not too complicated.
 Click Status button near the top of the sidebar
Remove express and body-parser from the project with the following command:
Install Hapi.js with the following command:
The console and the editor do not automatically sync, so run the refresh command to update the package.json file in the editor.
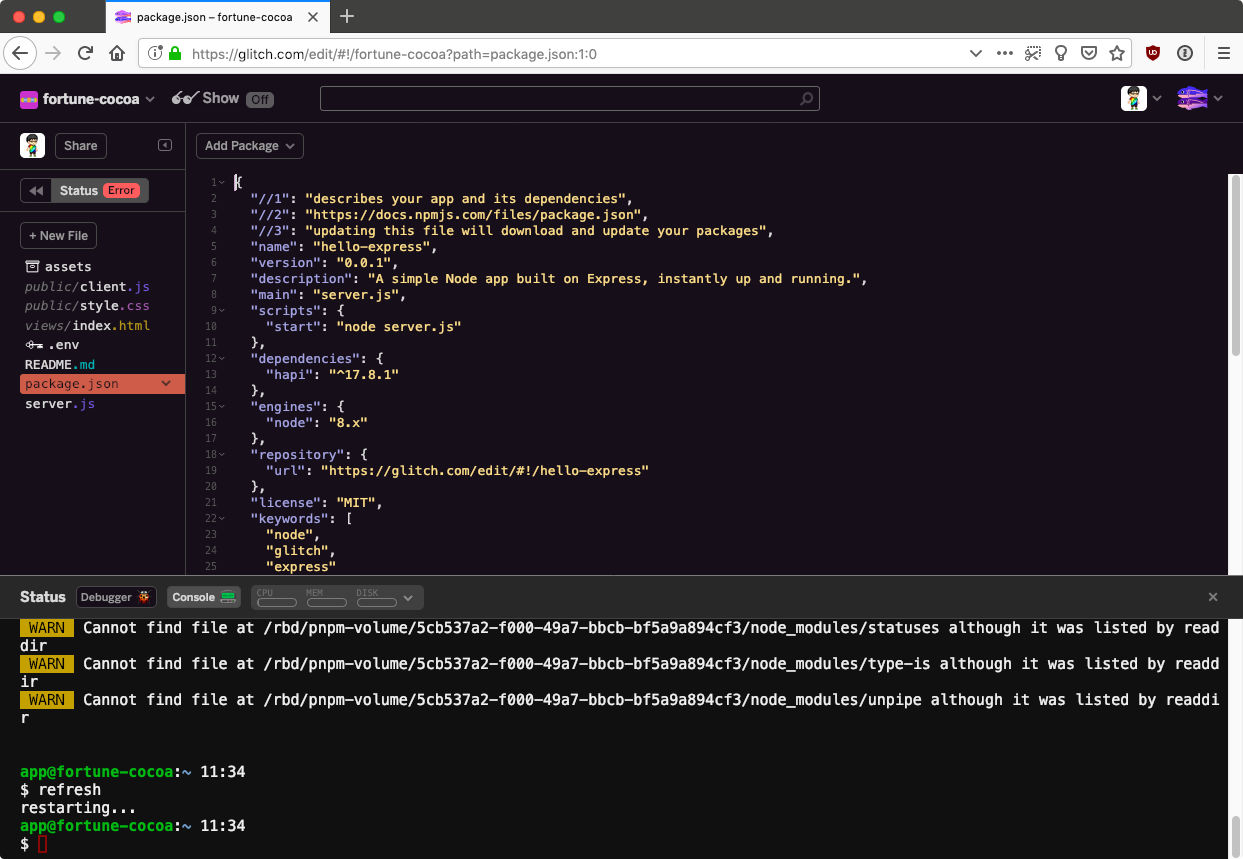 Status of application shows an error
You'll also notice that the status of your application shows an error. This is expected because the default server.js file still references express.
To fix this, replace the contents of server.js with the following code:
const Hapi = require('hapi');

// Create a server with a host and port
const server = Hapi.server({
  port: 8000
});

const init = async () => {
  // Add a basic route
  server.route({
    method: 'GET',
    path: '/',
    handler: function(request, h) {
      return 'hello world';
    }
  });

  // Start the server
  await server.start();
  console.log('Server running at:', server.info.uri);
};

init();
Now, when you try to view your application, it should show the words a blank page with the words hello world.
Even though the messages are largely handled on the server-side of things, it would still be nice to have a basic landing page of sorts for your bot. To do that, we can serve up a basic HTML page when people try to access your application through the browser.
inert is a static file and directory handlers plugin for hapi.js. Install it into your project via the console with the following command:
pnpm install inert --saveTo make things less complicated, place all the required files for the landing page into the public folder. You can move the index.html file from the views folder to the public folder by renaming the file path on the sidebar.
 Move files into public folder
You can also do it via command line through the console.
Once that's done, modify the server.js file to use Inert and serve files out of the public folder as follows:
const Hapi = require('hapi');
const Path = require('path');
const Inert = require('inert');

// Create a server with a host and port
const server = Hapi.server({
  port: 8000,
  routes: {
    files: {
      relativeTo: Path.join(__dirname, 'public')
    }
  }
});

const init = async () => {
  await server.register(Inert);

  // Add the route
  server.route({
    method: 'GET',
    path: '/{param*}',
    handler: {
      directory: {
        path: '.',
        redirectToSlash: true,
        index: true
      }
    }
  });

  // Start the server
  await server.start();
  console.log('Server running at:', server.info.uri);
};

init();
Now, instead of hello world, your app should be serving the default Glitch index.html file. You are free to customise that file however you like.
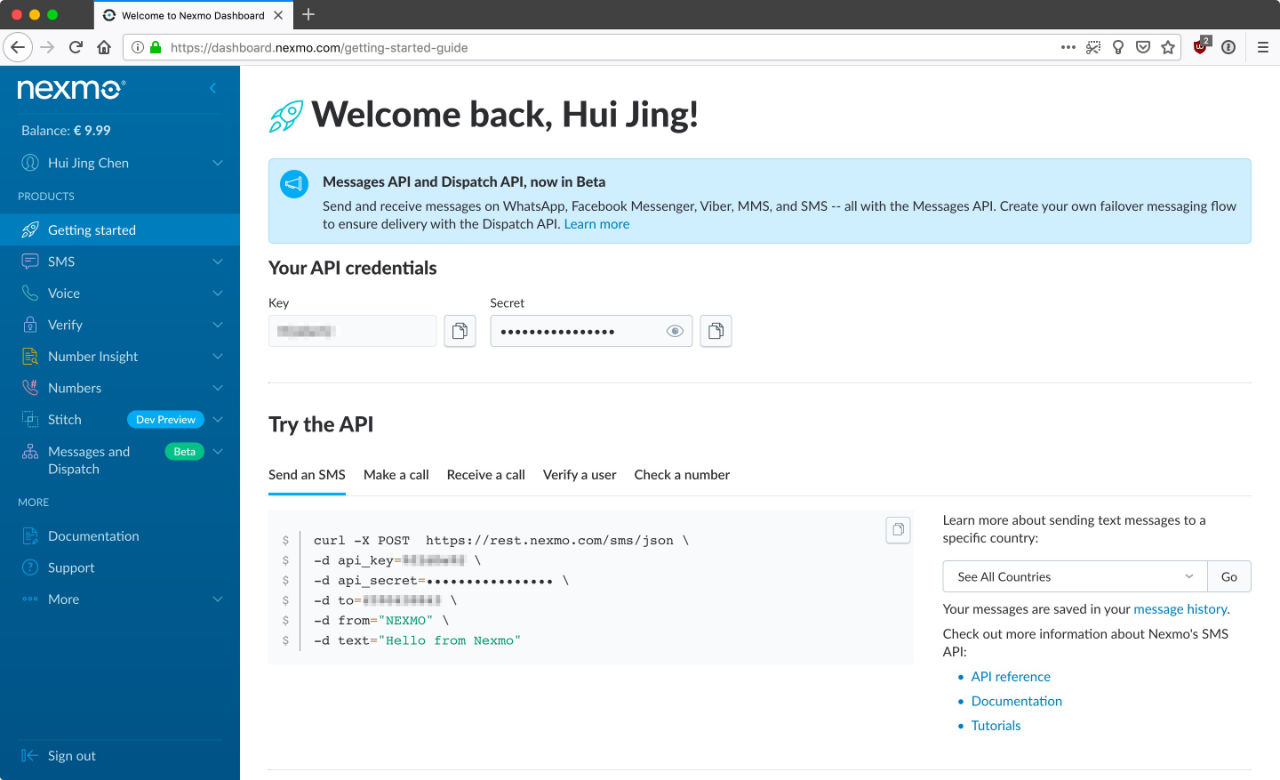 API credentials on the dashboard
Go back to your Glitch app and install the Nexmo REST API client for Node.js with the following command:
pnpm install nexmo@beta --saveAnd if you refresh your project, your package.json should now look like this:
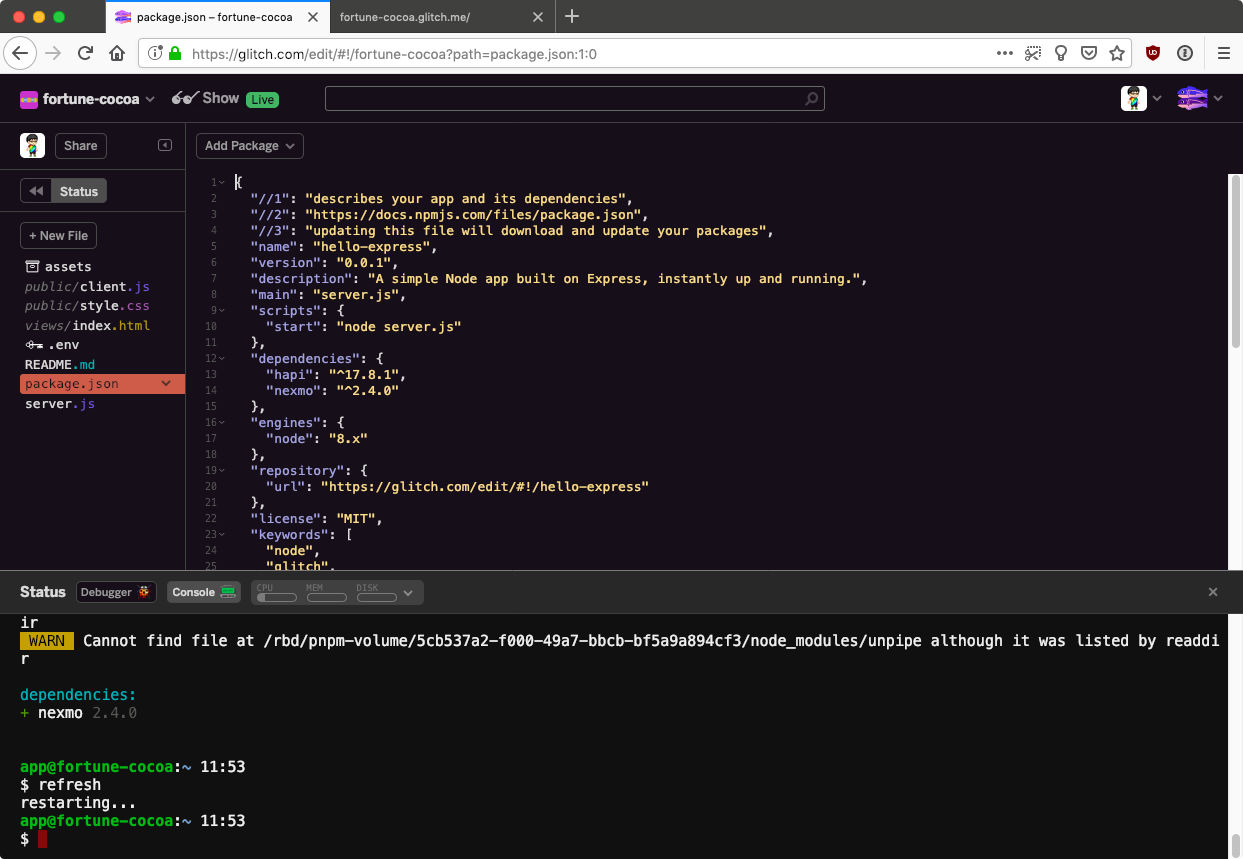 Glitch status window
Now you're ready to start building a bot of your own. This tutorial describes how to build a bot that returns random trivia about numbers, using NumbersAPI, which is an API that returns interesting facts about numbers. But you're free to use other APIs to generate your bot's responses.
To send and receive SMS via the Messages API, you will also need a virtual phone number, which is like any standard phone number, except they are not tied down to any physical phone line or device.
You can choose a number local to a country of your choice, features supported and type of number, be it mobile, land-line or toll-free.
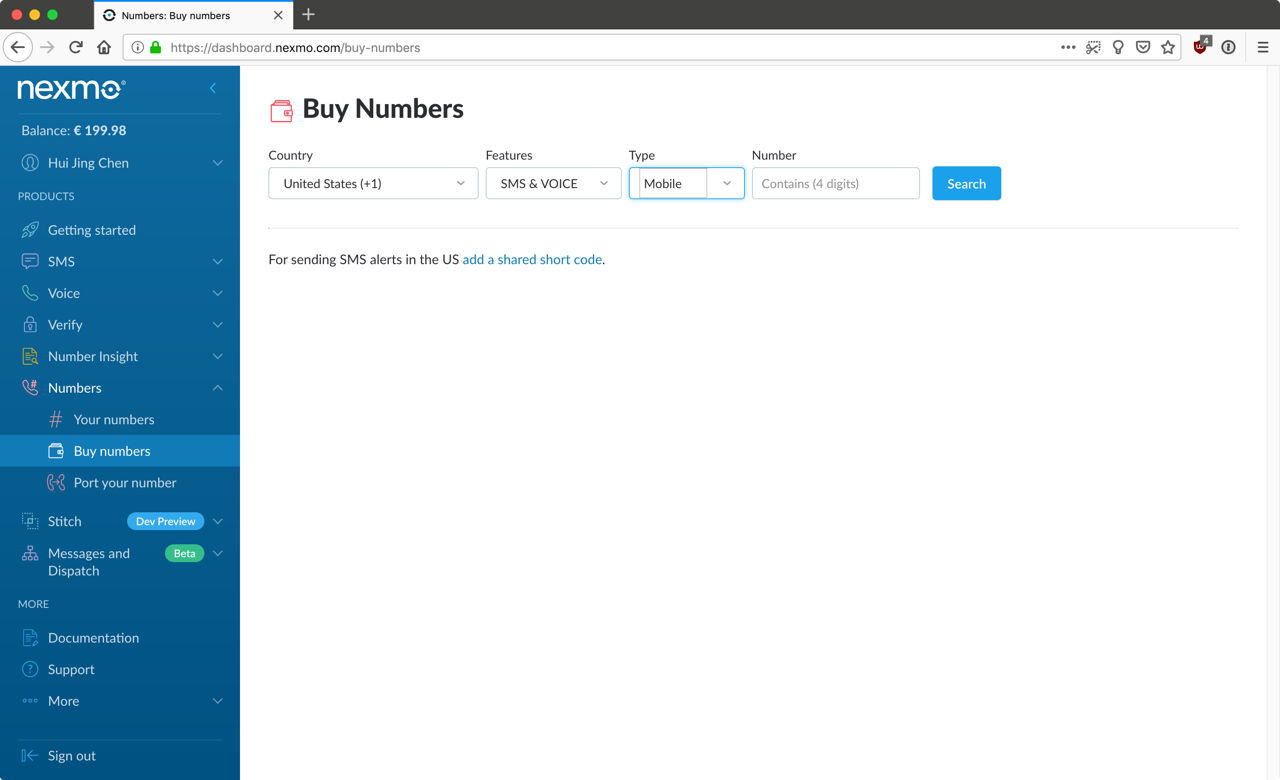 Buy numbers
Once you have your number, it will show up in the Your numbers section. Click on the Pencil icon under the rightmost Manage column to configure your inbound webhook URL. This is required for receiving SMS. When an SMS is sent to your number, a POST request is sent to this URL with the message payload.
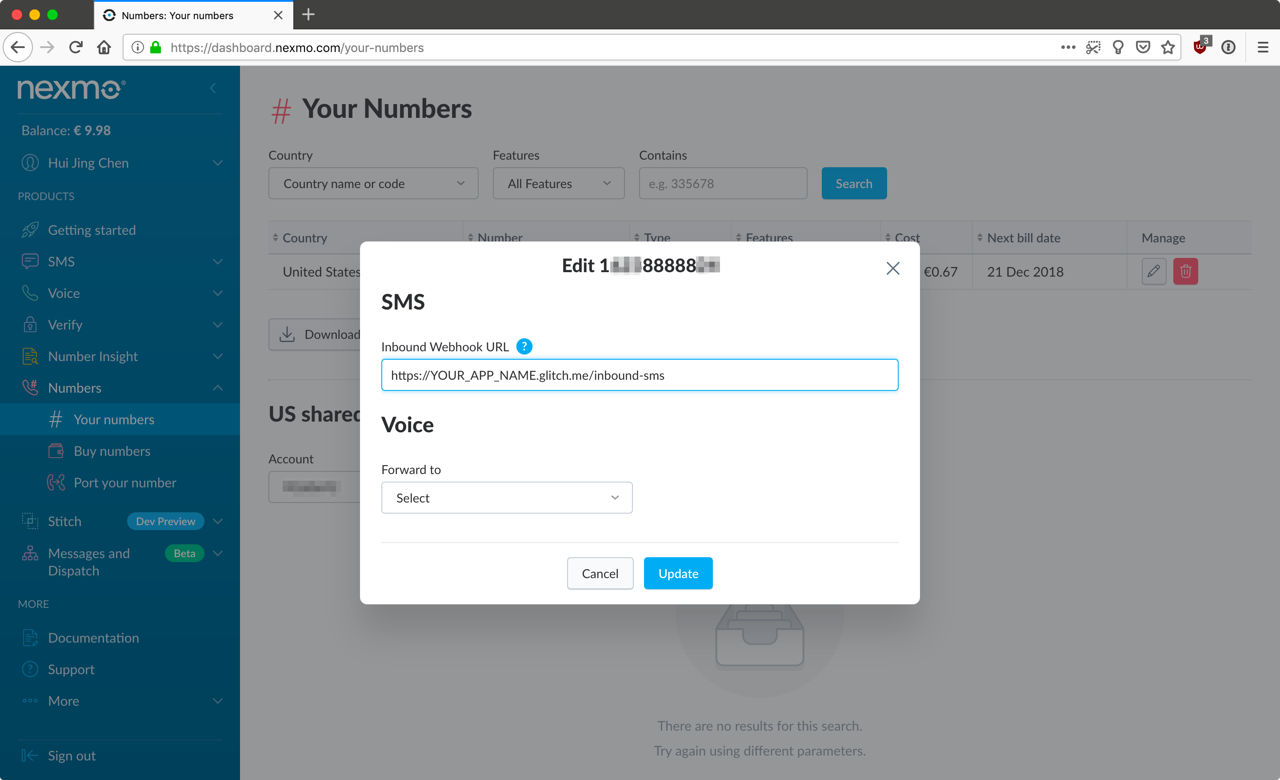 inbound webhook URL
Next, navigate to the Create an application page under the Messages and Dispatch section on the sidebar. Fill in your application name, and the webhook URLs with your Glitch app URL as the host. You will also need to generate a public/private key pair, which will prompt you to download the private.key file.
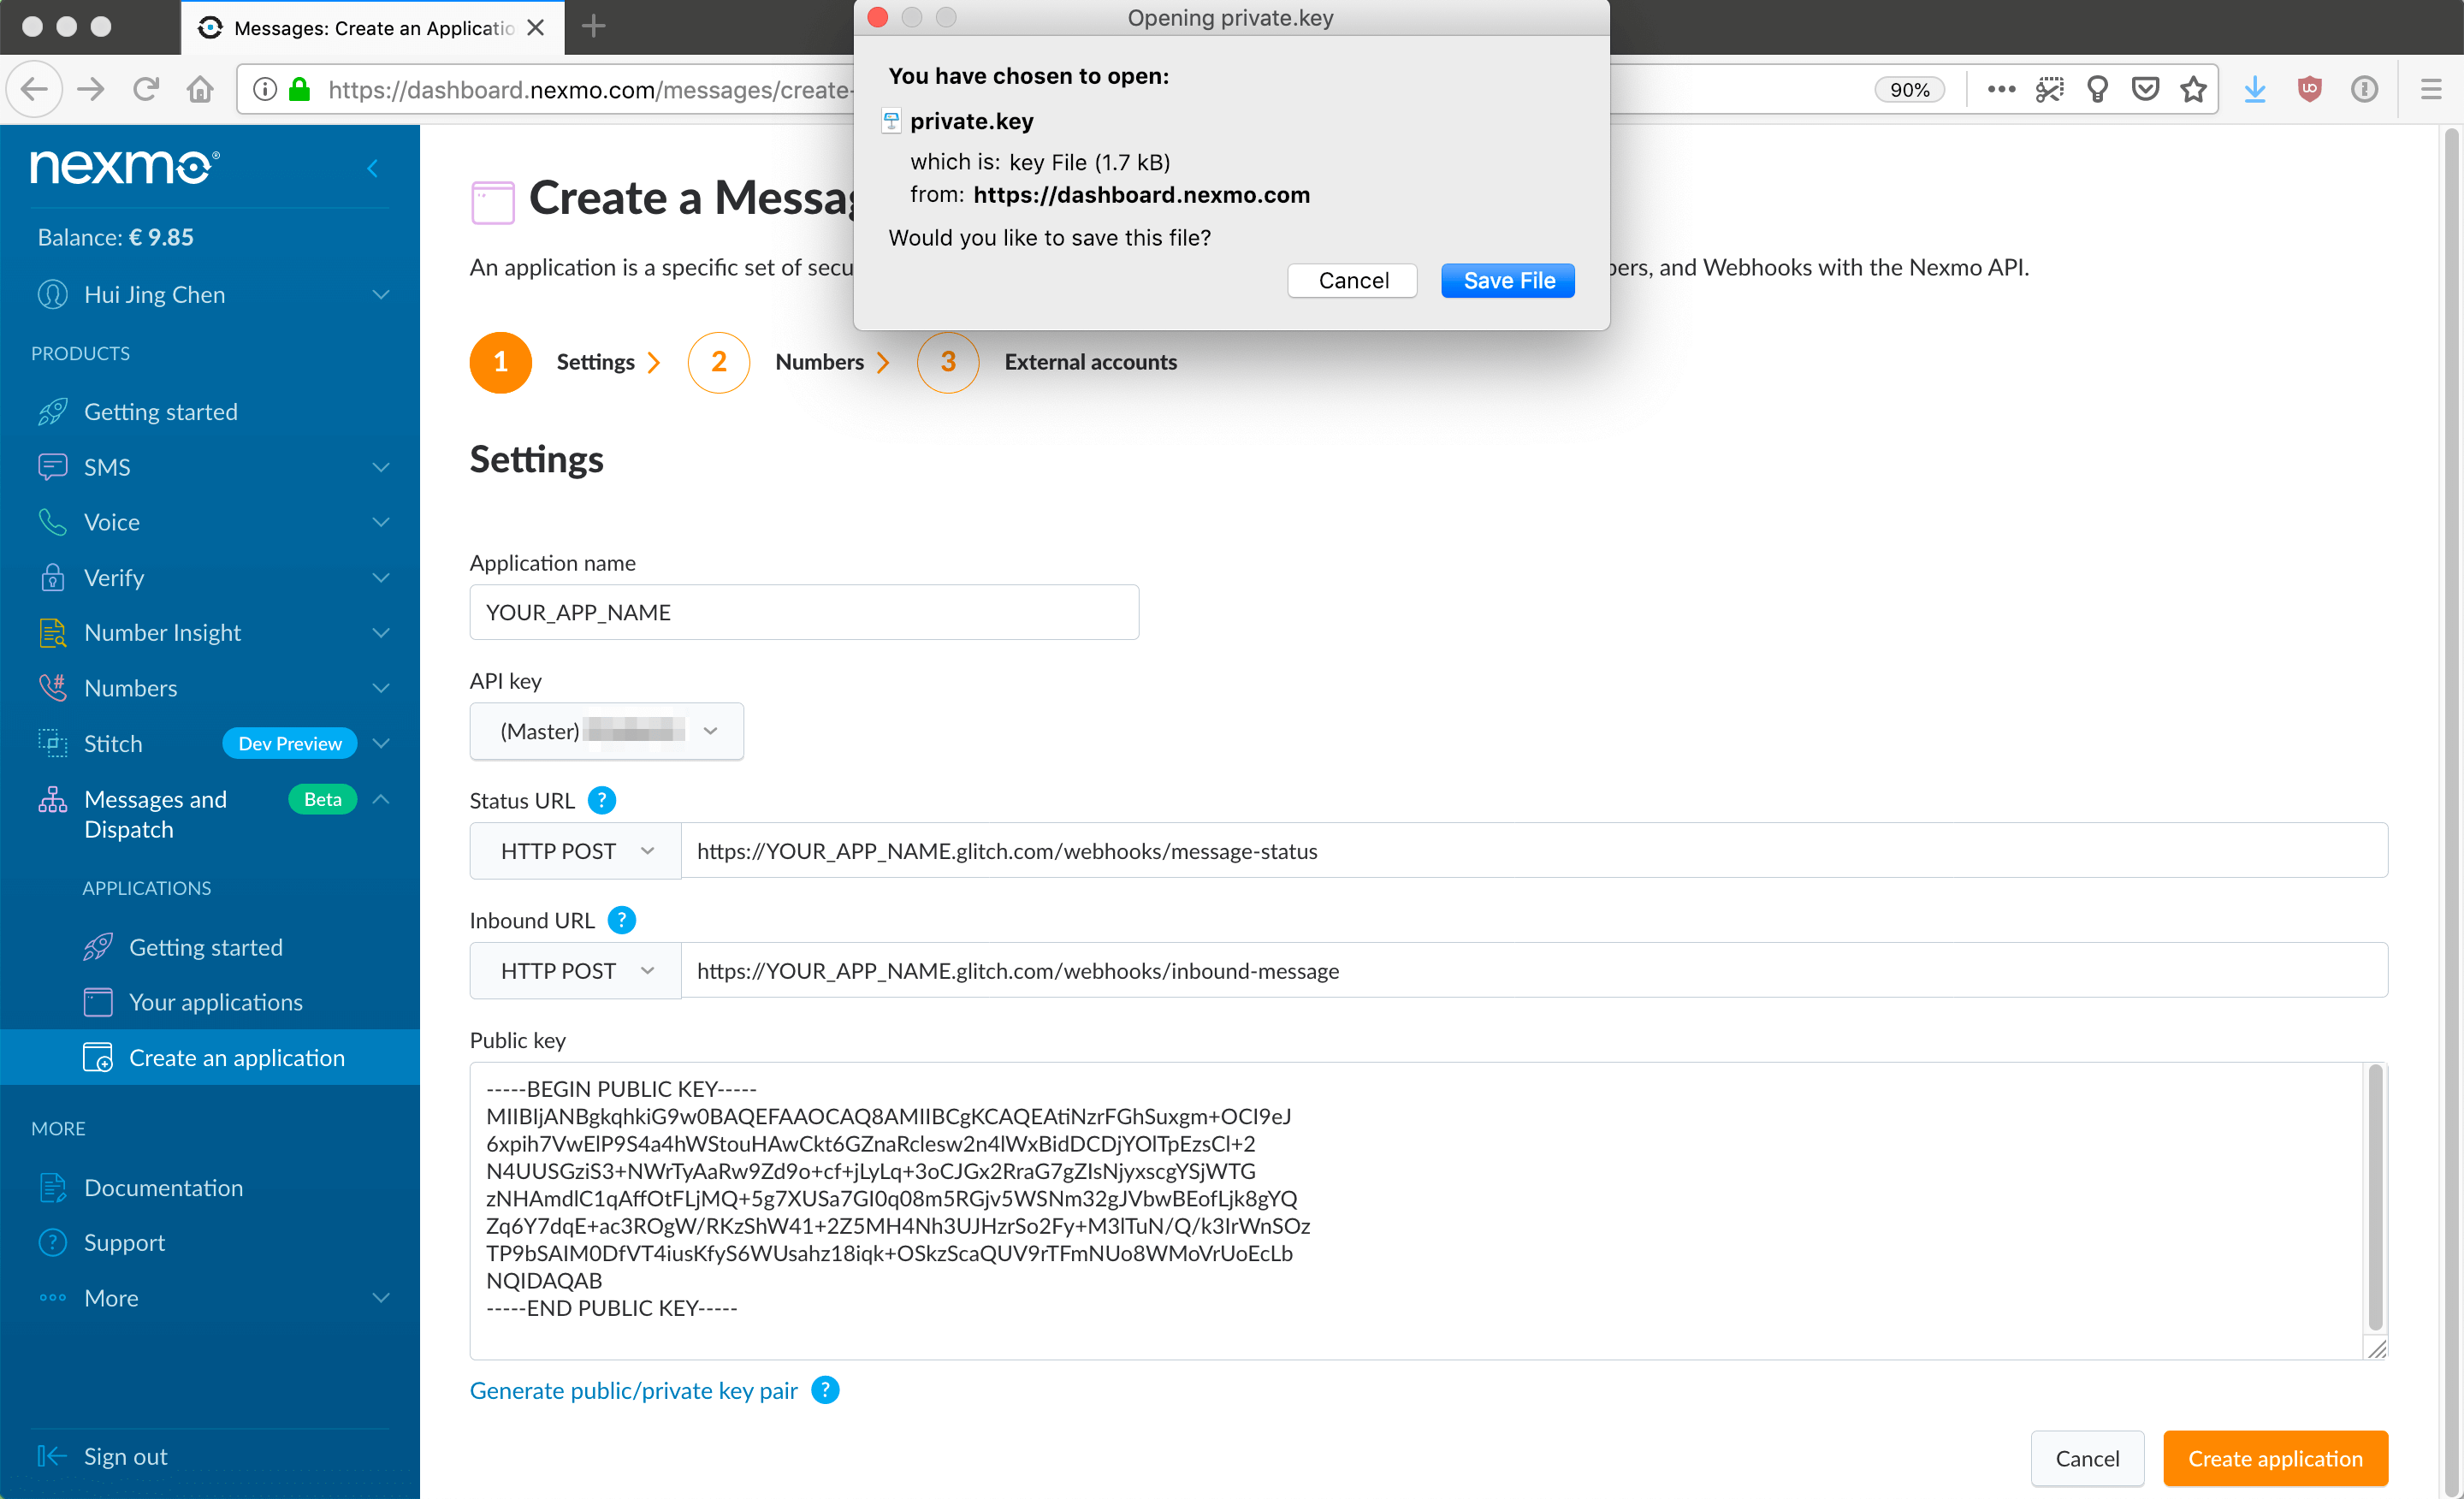 Generate key
Then, click on the orange Create application button. The next screen will allow you to link your virtual number to your application by clicking the Link button under the Manage column.
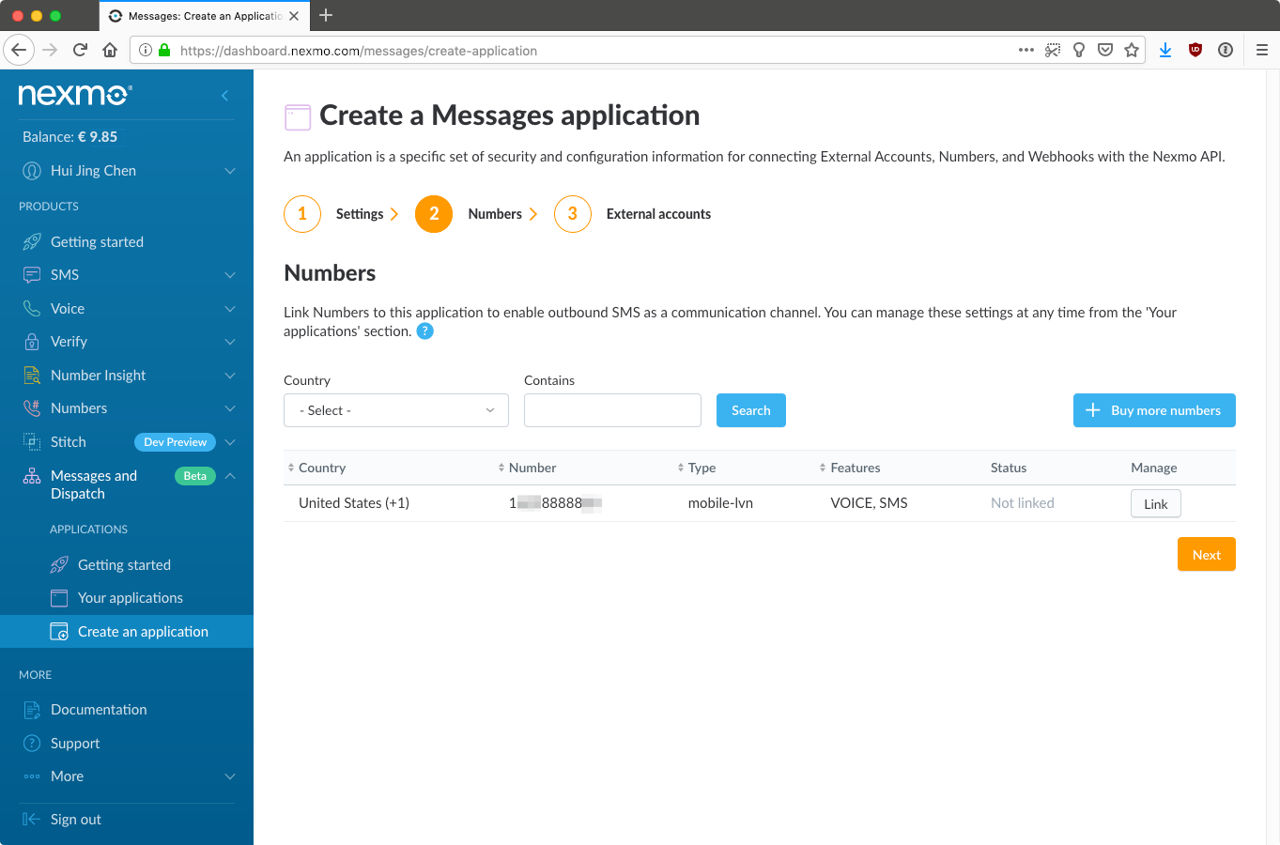 Create application
Finally, you will be asked if you would like to link any external accounts, but you can leave this for now.
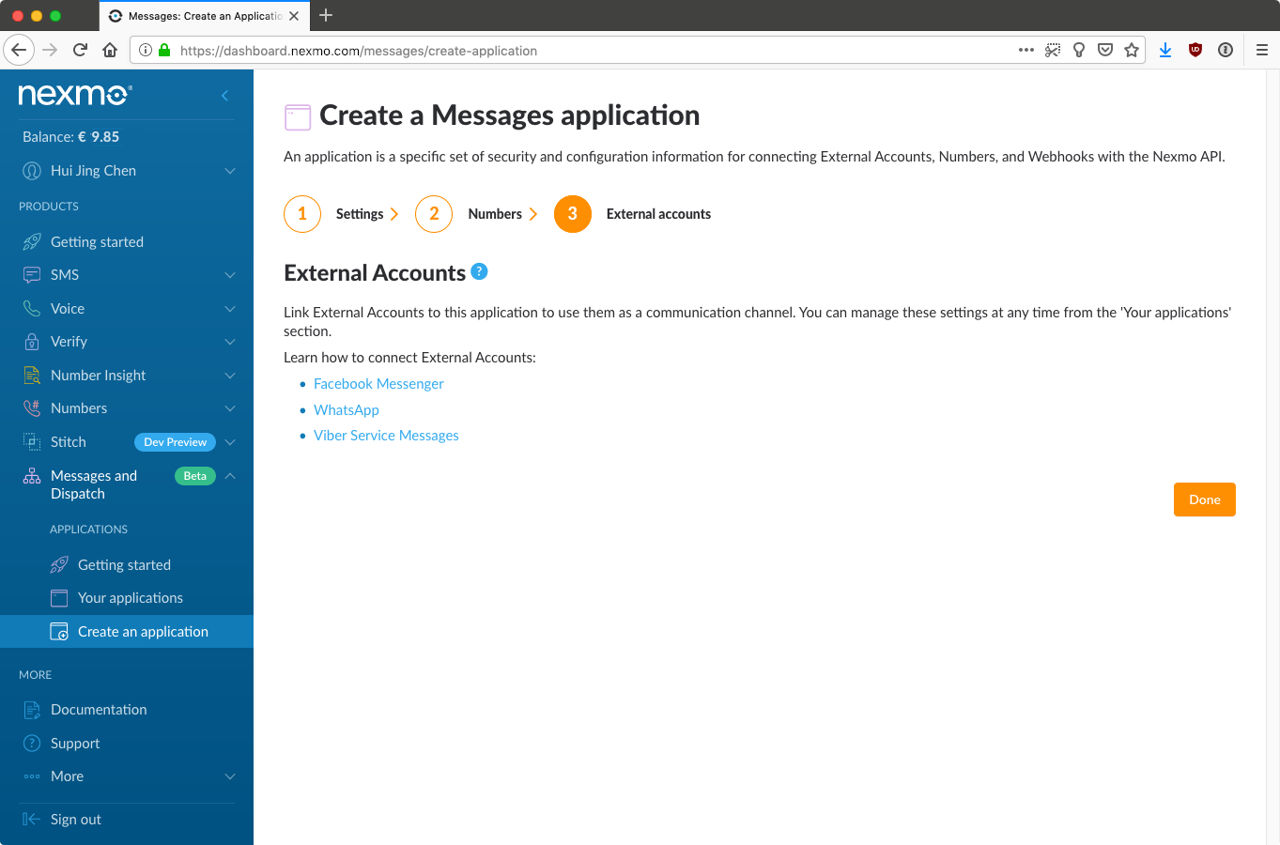 Link any external accounts
To upload the private.key file to Glitch and keep it secret, you can create the file in a .data folder. The contents of this folder will only be visible to you and any trusted collaborators you add to the project. Copy the contents of the private.key you downloaded earlier into this new file.
 Private Key
Glitch supports environment variables via the .env file, which is a secure way to store your API credentials and other private data for your project. Set up your API key, secret, Nexmo virtual number, Messages application ID and private key path in the .env file.
Be sure to enclose them in quotes as each value needs to be a string. We will be referencing them for initialising a new Nexmo instance, which we use to send SMS messages.
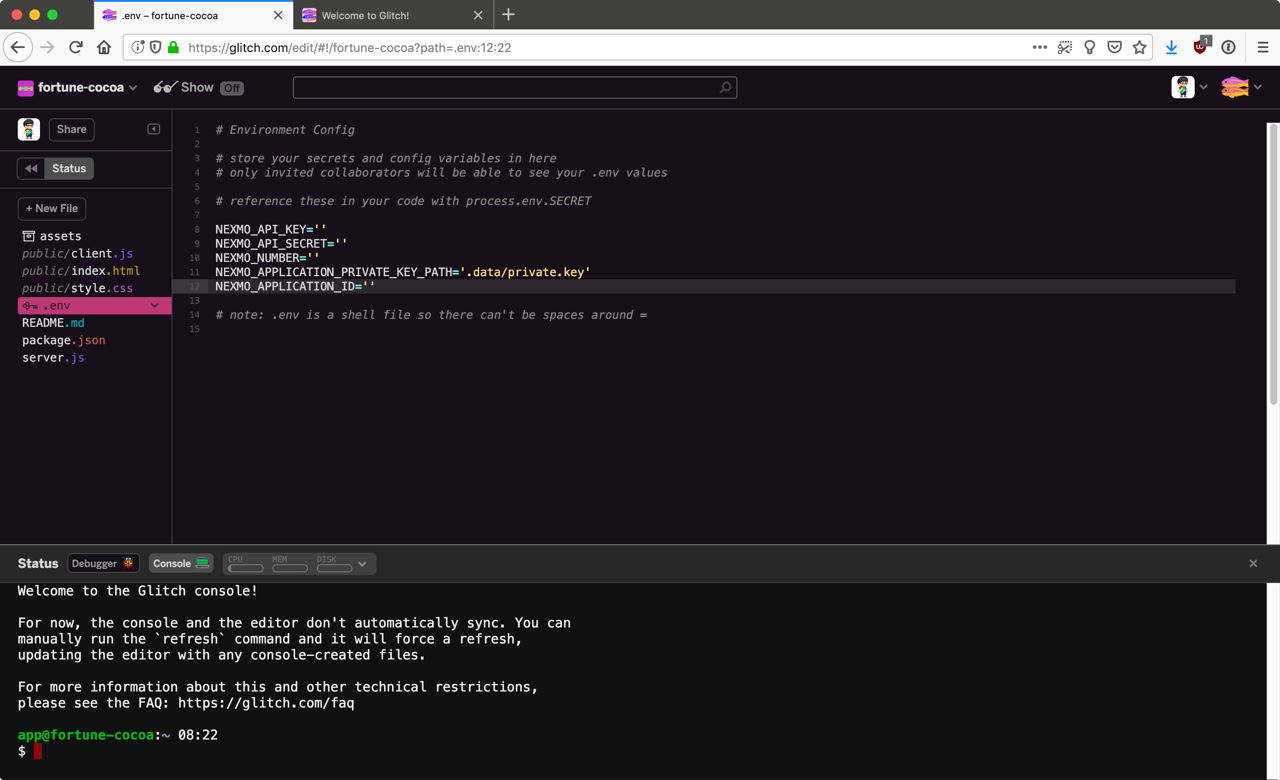 Set up .env file
Add your API credentials to the server.js file and initialise a new Nexmo instance.
const NEXMO_API_KEY = process.env.NEXMO_API_KEY;
const NEXMO_API_SECRET = process.env.NEXMO_API_SECRET;
const NEXMO_APPLICATION_ID = process.env.NEXMO_APPLICATION_ID;
const NEXMO_APPLICATION_PRIVATE_KEY_PATH = process.env.NEXMO_APPLICATION_PRIVATE_KEY_PATH;
const NEXMO_NUMBER = process.env.NEXMO_NUMBER;

const Nexmo = require('nexmo');

const nexmo = new Nexmo({
  apiKey: NEXMO_API_KEY,
  apiSecret: NEXMO_API_SECRET,
  applicationId: NEXMO_APPLICATION_ID,
  privateKey: NEXMO_APPLICATION_PRIVATE_KEY_PATH
});
To receive an inbound SMS, you'll need to add a route to handle the incoming POST request that is triggered when somebody sends an SMS to your virtual number. Add the following route to your server.js file:
server.route({
  method: 'POST',
  path: '/inbound-sms',
  handler: (request, h) => {
    const payload = request.payload;
    console.log(payload);
    return h.response().code(200);
  }
});
Note that the path parameter here must match the inbound webhook URL for your virtual number, which you set up earlier. To make sure everything is hooked up right, send an SMS to your virtual number. You should see the message payload printed in the status window.
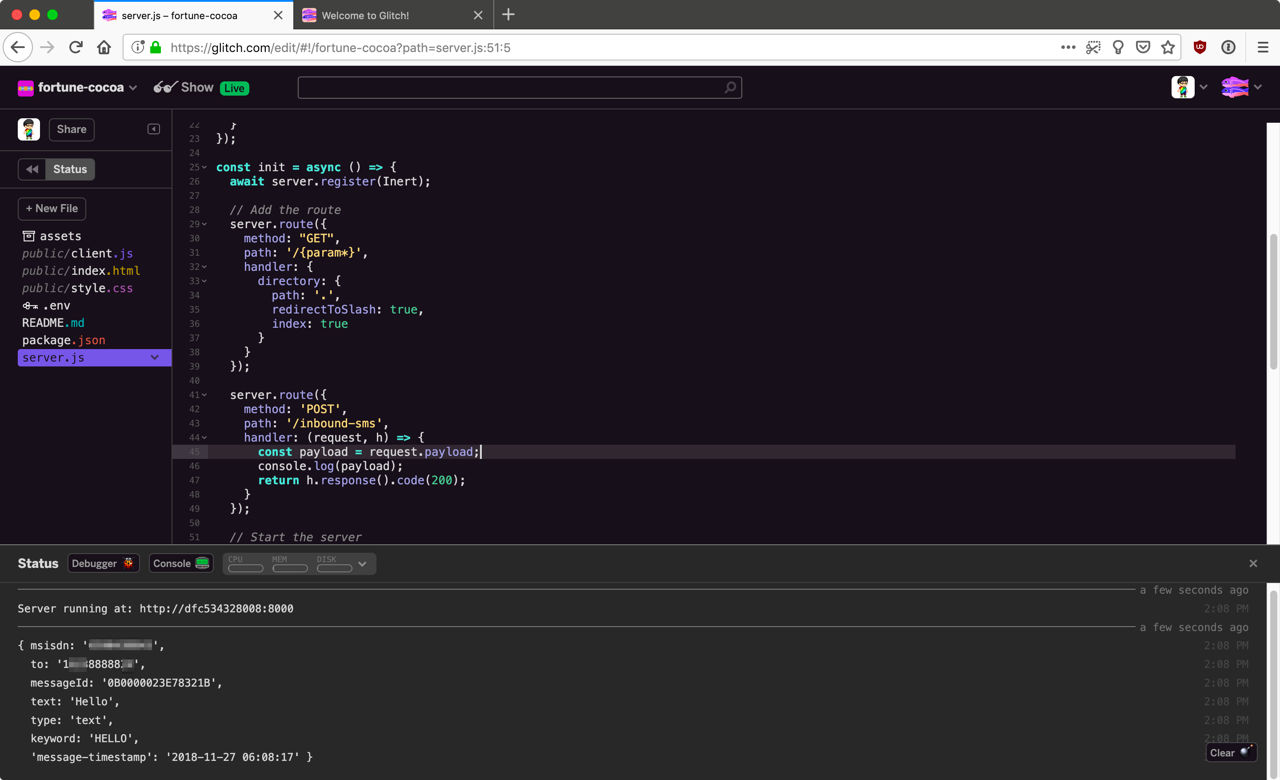 Message payload printed in the status window
Now you'll need to process the message payload by extracting the message content and using that to retrieve a random fact from NumbersAPI. You can write a function that checks if the content of the SMS is a number, if not, you can return a response that asks for a number.
function parseSms(payload) {
  const message = payload.text;
  const phone = payload.msisdn;

  const isNum = /^\d+$/.test(message);
  console.log(isNum);

  if (isNum) {
    getFactSms(message, phone);
  } else {
    smsResponse("Sorry, but Numbot can only give you facts about whole numbers. Try something like 42.", phone);
  }
}Replace the line that says console.log(payload) with a call to your new parseSms() function. You'll notice that if the message content is a number, I'm calling another function called getFactSms(). This will be the function that calls the Numbers API for the random fact you'll be sending back to your user.
For this, you'll need to make a basic GET request. There are a number of libraries that can do this, but given this is a relatively straightforward request, you can use the native Node.js http module .
const http = require('http');

function getFactSms(number, phone) {
  return http.get(
    {
      host: 'numbersapi.com',
      path: '/' + number
    },
    function(response) {
      let fact = '';
      response.on('data', function(d) {
        fact += d;
      });
      response.on('end', function() {
        smsResponse(fact, phone);
      });
    }
  );
}The last function smsResponse() will trigger the sending of the random fact back to your user.
function smsResponse(fact, phone) {
  nexmo.channel.send(
    { "type": "sms", "number": phone },
    { "type": "sms", "number": NEXMO_NUMBER },
    {
      "content": {
        "type": "text",
        "text": fact
      }
    },
    (err, data) => { console.log(data.message_uuid); }
  )
}
And that's it. You now have a basic SMS bot that responds with random facts about the number you send it.