
Share:
Adam is a developer and consultant who enjoys ultra-running, blogging/vlogging, and helping others tame technology to accomplish amazing things with an insatiable desire to mentor and help.
Sentiment Analysis using IBM Watson Tone Analyzer in PHP
Time to read: 12 minutes
In a world where data and text often take a front-row seat, it is increasingly important to understand the sentiment of communications we receive. It is also important to understand how words we use can convey a mistaken sentiment.
It is common to read an SMS text message and "think" they are angry, disappointed, or being sarcastic. Black and white text makes it hard to "feel" what is being shared, especially in political work environments or where passionate or opinionated ideas and visions may be shared.
Sentiment analysis is a great tool to help us bridge the gap between what we say and what we mean. And, though it may not be able to fix everything, it can help drive a more positive direction.
Let's take a look at how sentiment analysis could be used with Vonage SMS text messaging by leveraging the IBM Watson service with a simple PHP callback script.
To start with, in this example, we will run a PHP application locally with the PHP built-in web server. Though the built-in web server should not be used in a production environment, it is fine for sample scripts like this.
Then we will use ngrok to make the local application available on the Internet as a callback endpoint for the Vonage SMS service. Take a look at this page if you need help getting ngrok setup, but the basics are: Create an account at ngrok, download the executable, kick off a tunnel via CLI, and then use the URLs provided in the CLI after it is running.
One requirement is to have an account, and API credentials, with a service providing sentiment analysis. As of this post, there are few available, and you can check out this post to see a basic breakdown. However, for this example, we will use the IBM Watson Tone Analyzer service.
This will require an IBM Cloud account, creating a resource, and setting up credentials, which is all free until you reach a certain level of usage.
After setting up an account at IBM Cloud, and getting logged in, you will be presented with the Dashboard. From there you will click the Create resource button.
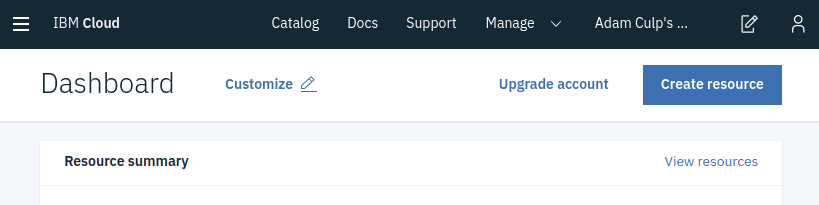 Create resource at IBM Cloud
Following that, scroll down to click the Tone Analyzer box.
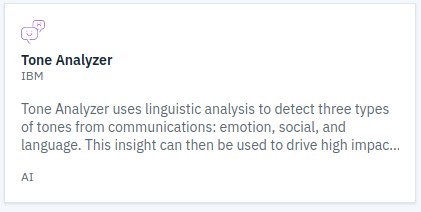 Tone Analyzer service at IBM Cloud
Complete the form with the required information, selecting a region nearby. After which an API Key and URL will be provided. Make a note of them, because they will be needed later.
At this point, we need to start organizing the application. We will assume an empty directory, and begin building the example callback app from there. We will also assume a local system with PHP already set up and running, and able to be used via CLI (Command Line Interface).
In this empty directory, create a new PHP file and name it index.php. At the moment, just type the word "test" in the file. This will create some output and allow us to test in the next step.
To begin with, we will start up the built-in PHP-webserver and get ngrok running. This will ensure the environment is running and ready from the start.
Using the system's terminal, navigate to the location of our directory. Once there, issue the command to start the PHP built-in web server, like so:
At this point, by entering "http://localhost:8080" we should see "test" as a response if that is what was entered in the index.php previously created.
Next, we get ngrok running to make the results of the webserver available over the Internet. In a terminal, navigate to the location where ngrok was installed previously, and enter the following command:
In return, ngrok will provide us with some important information, as in the screenshot below.
 ngrok information returned
This lets us know the service information, including the tunnel URLs to use for hitting our locally running script. We can enter the information provided in a web browser and should get the same results as when requesting via localhost above.
Note: It's recommended using https URLs to protect any credentials being shared between the services.
We will let the ngrok instance run throughout this example. When you are ready to shut it down, simply hit "Ctrl+c" in the terminal and it will close ngrok.
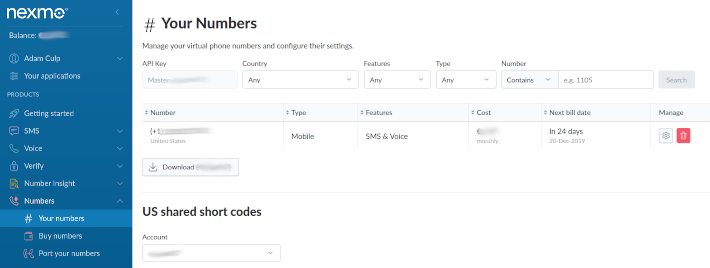
With the URLs provided by ngrok, we can update the Vonage provided SMS number.
In the Vonage Dashboard expand the Numbers menu item to expose "Your numbers".
Vonage Dashboard
Then click the Settings button to edit the Inbound Webhook URL for SMS.
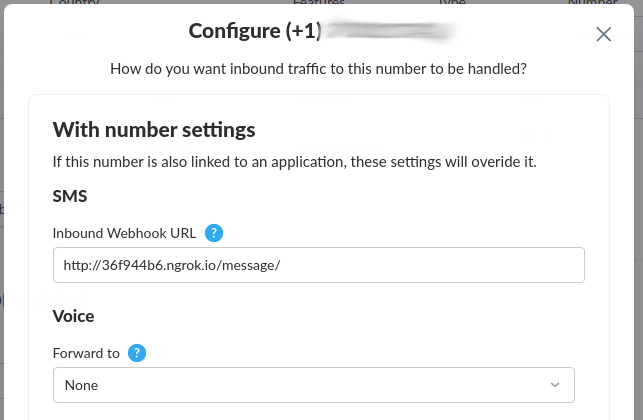 Vonage Hooks
For expedience sake, we will use Composer to install some packages and make life easier for us with its autoloader and dependency management.
We will assume Composer is already installed globally on our system, so it can be used easily whenever we need it, and to make it easier to keep it up to date.
In the project folder, we need to init Composer, enabling us to include a few packages/dependencies. So, navigate to the project directory, via CLI, and issue the following command.
The latest versions of Composer now perform a step-by-step process to help set up a project. Follow through the prompts and fill out as desired. Please use the packages in the following section of what should be required.
To complete the wizard in the previous section, or to manually set up a composer.json file, include the following dependencies for this example:
vlucas/phpdotenv - stores credentials in the superglobal $_ENV
slim/slim - light microframework that makes handling HTTP calls and callbacks easy
slim/psr7 - facilitates HTTP interoperability between libraries
guzzlehttp/guzzle - for handling HTTP calls rather than using cUrl
With all dependencies added to Composer, we are now ready to install them using the following command in the CLI.
Credentials for this sample app will be housed in an ENV file and parsed by phpdotenv.
Creating an .env file allows us to store credentials we will need when connecting to the outside service. In this case, it will be the IBM Watson API. Add the following content in the newly created file named .env in the project root:
NOTE: The URL may change, so ensure it is similar to what is provided by IBM Cloud. Be sure to swap out the values with what was received from the IBM Watson service.
In the index.php file created earlier, we start adding code to leverage the Composer autoloader, and the phpdotenv PHP package to inject the contents of the .env file into the $_ENV superglobal.
<?php

require('vendor/autoload.php');

Dotenv\Dotenv::create(__DIR__)->load();
NOTE: By convention, the above code will load the .env file from the current directory. If another location is desired, an additional method to open it will be necessary. (not shown)
We will also include Guzzle, a PHP package for handling HTTP requests instead of using cURL, for any calls to the outside IBM Watson service. We will import it with a use statement after the requirement of Composer above.
use GuzzleHttp\Client;
To set up slim in our sample callback script, we will import with a use statement, immediately following the Composer autoload require. Then we will call the create() function of Slim to create a Slim app and a function call to app->run at the end of the file to kick things off.
use Psr\Http\Message\ServerRequestInterface as Request;
use Psr\Http\Message\ResponseInterface as Response;
use Slim\Factory\AppFactory;

$app = AppFactory::create();

//... call to Dotenv

$app->run();
The desire is to use Slim functionality to catch HTTP requests and respond with JSON. We will be including the PSR compliant Request and Response interfaces to help us stay interoperable with HTTP communications, thus we import them with use statements along with the Slim import shown above.
After injecting the environment variables and the creation of the Slim app, we will add an any() method call to handle the HTTP endpoint routing, like so.
$app->any('/message[/]', function (Request $request, Response $response) {

// {{body of the app here}}

});
Notice we are allowing the ability to make any HTTP call to this script. (GET, POST, PUT, DELETE, etc.) I like to do this on purpose and allow me to return valid HTTP status codes as needed. Which will be the first thing we add into the body of the anonymous function above.
Basically, if any type of HTTP request other than a POST request comes in, the script should respond with a 405 status code. We only want POST requests.
if ($request->getMethod() != 'POST') {
        return $response->withStatus(405);
}
The Vonage service will send a JSON payload within the POST request. We will parse the JSON to an object we can use in future calls to IBM Watson Sentiment service.
$body = json_decode($request->getBody());
Using the $body object, we make a request to IBM Watson to analyze the sentiment of the message. We do this with a new Guzzle Client instance to handle the request.
Note: This is where $_ENV, created from the
.envfile comes into play.
$client = new Client();

$result = $client->request(
        'GET',
        $_ENV['TONE_ANALYZER_URL'] . '?version=2017-09-21&text=' . urlencode($body->text),
        ['auth' => ['apikey', $_ENV['TONE_ANALYZER_IAM_APIKEY']]]
    );
And finally, we use the Content-Type returned from IBM, or set it manually. Following this, we return the sentiment analysis provided by the service as a new JSON object.
$contentType = $result->getHeaderLine('Content-Type') ?: 'application/json';

$response = $response->withHeader('Content-Type', $contentType);

return $response->withBody($result->getBody());
As shown in this example, it is straightforward to include sentiment analysis in applications to clarify communication intent. Understanding the sentiment of what others are sharing can be a huge factor in reducing politics and stress in our daily lives. More and more services are starting to incorporate this level of functionality in their apps, and I hope you find this example of using it with SMS handy.
For a completed code example go to https://github.com/nexmo-community/sms-ibm-sentiment-php.