
Share:
Lorna is a software engineer with an incurable blogging habit. She tries to tame words and code in equal measure.
Sending SMS from PHP with Failover: The Cupcake Bakery
Time to read: 11 minutes
Staying in touch with customers is key for any organisation. In this post, we'll explore the Vonage Messages API and how it can be used to make sure that a business can get messages to its customers in a manner that suits them. The case study is an imaginary "Cupcake Bakery" business that needs the ability to send messages to its customers. This post shows how to use the cornerstone of modern communication, SMS, in your PHP web application. It also demonstrates how the Messages API can use other communication channels to send your message if your first attempt fails, to give you the best chance of reaching your customer.
If you're a web developer ready to implement modern messaging features in your application, then this tutorial is for you!
Before we start, we'll need to gather the following ingredients:
PHP on a publicly-accessible webserver, or PHP on a development platform with a tool such as ngrok to make your web site available. Vonage sends responses by webhook so it needs to be able to reach your application.
Vonage CLI if you don't have it already.
It's more fun if you have two phone numbers you can send SMS to :)
Vonage has long been known for its SMS capabilities, but the Messages API is new (it's still in Beta). Using the Messages API you can send messages to a number of different channels using a single interface. It's often cheaper to send a message to Facebook Messenger or WhatsApp rather than SMS, and the Messages API means you only need to integrate one tool to cover all of these. There will also be more message channels added over time, so it's an investment that saves you having to add more integrations for every new messaging platform to come into fashion.
Complementing the Messages API is the Dispatch API which gives extra reliability to the task of getting the message to its intended recipient. With the Dispatch API, you can set rules about what to do if a message isn't delivered within a particular time window - and then also say what to do next. So if you have another contact method for that user, an alternative phone number for example, or you've interacted with them on Facebook then you can send a second message via another method. This post shows an example of sending to an alternative phone number, a feature I often wish for myself when I'm using different numbers in different countries when I travel!
Visit the Messages and Dispatch page on the dashboard to create an application and set up the webhooks we'll use for this project:
The status URL should be
[YOUR URL HERE]/statusfor example with ngrok, it would be something likehttps://abcdef1.ngrok.io/status.The inbound message URL should be
[YOUR URL HERE]/inboundfor example with ngrok, it would be something likehttps://abcdef1.ngrok.io/inbound.
These two routes, /status and /inbound, can be called anything you like, but the examples here match what is in the sample code that you'll be using from GitHub in just one moment ...
On the dashboard, make a note of the application ID you create and make sure that you have the private key file as well (there's a handy click-to-create-a-key that will generate a public/private key pair, putting the public one into your application settings and downloading the private one for you to use with your application)
(are we taking this baking metaphor too far? Sorry!)
Code for a working application is available on GitHub. Visit https://github.com/nexmo-community/bakery-messaging-with-dispatch and either clone the repository or download the code.
Once you have it, there are some dependencies we need to install. To keep things as simple as possible, this project uses the Slim microframework. To make the API calls (since Messaging and Dispatch APIs are still in Beta, they aren't supported in our PHP library quite yet), the project uses GuzzleHTTP.
To install the dependencies, use Composer:
composer installThe Messages API and Dispatch API use JSON Web Tokens (JWTs) for authentication. Take the application ID you created in the dashboard and use it with the Vonage CLI to run a command like this (assuming your private key is called private.key):
vonage jwt --application_id=VONAGE_APPLICATION_IDThe output of this command is your JWT that you will use for access with this application; copy it to your clipboard now. Beware that it expires every 24 hours so you may need to repeat this process when your perfectly working application suddenly starts returning "Invalid token" errors.
The application needs the JWT, the application ID, and also some contact details for the messages it will send. There is a configuration template in config.php.sample, copy this file and call it config.php, then edit the values to suit your platform. You will need:
The application ID again.
The JWT you just generated.
The phone number to send messages from.
Two phone numbers to send messages to.
After this, the ingredients are ready and we can start making something awesome!
At this point, the preparations are complete and the application is ready to use. Set up your webserver with the public/ directory as the webroot. I'm using a local development platform with ngrok so my setup commands are php -S localhost:8080 public/index.php in one terminal and ngrok http 8080 in another.
If Ngrok gives you a new URL (you can't reserve URLs on a free account), then don't forget to go back to the dashboard and update those webhook URLs
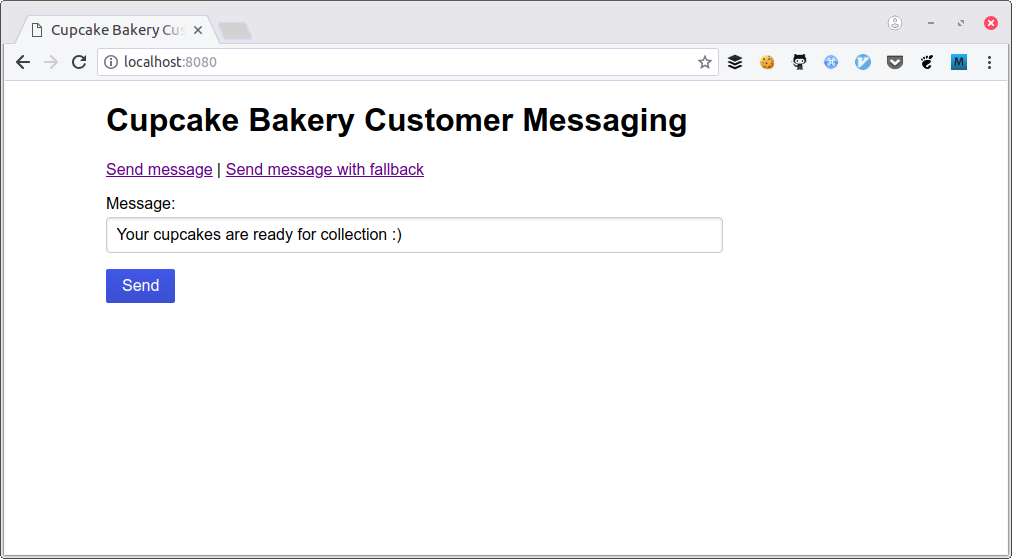
Now let's load up the homepage of the project. You should see a very simple form for sending a message. Before you do that, let's take a moment to see how this will work.
The process of sending a message with the Messages API goes like this:
We write the message! This goes in the input form you can see on the homepage.
We send the details of the phone number the message is from, the number it is to and the message itself, in JSON format. Check the API docs for detailed information on what you can send here.
The response for a successful message is a status code of 202, which means "Accepted" and a
message_uuidfield in the JSON body of the response.All further communication from Nexmo is via
POSTrequest webhooks to the/statusendpoint of our application. Every incoming request will include the message ID that the status relates to, and a timestamp. This is in JSON format.A status webhook indicates that the message was submitted. There's more information about message statuses in the API documentation.
Another status webhook indicates that the message was delivered (if it was) and how much it cost.
Clearly it is very important that we can read the status updates, so let's look at the code for that first.
When anything interesting happens regarding the status of the message, a webhook is sent to the webhook you configured in the dashboard at the start. For this application it's /status. Here is the code for that route:
$app->post('/status', function (Request $request, Response $response) {
    error_log($request->getBody());
    print_r($request->getParsedBody());
});
In this example application it doesn't do a lot at all, but it does capture all the responses and put them in your server logs. It also outputs them, which can be useful later when debugging some more advanced features.
 Cupcake Bakery Custom Message
At this point, feel free to go ahead and type a message into the box. Mine reads "Your cupcakes are ready for collection", because I am always happy to receive this message. Press send and the message should quickly arrive on your phone. Was it magic? No, let's look at the code.
$app->map(['GET', 'POST'], '/', function (Request $request, Response $response, array $args) {
    $config = $this->get('config');
    $information = [];
    $title = "Cupcake Bakery Customer Messaging";

    if($data = $request->getParsedBody()) {
        $message = $data['message'];
        $client = new \GuzzleHttp\Client(['base_uri' => "https://api.nexmo.com/v0.1/messages"]);

        try {
            $apiResponse = $client->request('POST', '/v0.1/messages', [
                'headers' => [
                    'Authorization' => 'Bearer ' . $config['jwt'],
                    'Content-Type' => 'application/json',
                    'Accept' => 'application/json'
                ],
                'json' => [
                    'from' => $config['from'],
                    'to' => $config['customer1'][0],
                    'message' => [
                        'content' => [
                            'type' => 'text',
                            'text' => $message
                        ]
                    ]
                ]
            ]);

            $information['statusCode'] = $apiResponse->getStatusCode();
            $information['body'] = $apiResponse->getBody();
        } catch (Exception $e) {
            $response = $e->getResponse();
            $responseBodyAsString = $response->getBody()->getContents();
            echo $responseBodyAsString;
            error_log($responseBodyAsString);
        }

    }

    $response = $this->view->render($response, 'index.html', ['information' => $information, 'title' => $title]);
    return $response;
});
This route is available for both GET and POST verbs because the form is loaded at first with GET and then when it is submitted we use POST. If there's POST data then the message data is used along with the configuration you set up earlier to build an API request. The response status code and body are captured and output to the page as well, as this can be useful when working with this demo application or adapting it to build your own. Using that debug output, you can grab the message_uuid of the message you just sent.
This example uses the Slim Framework, but most of the code is not specific to Slim and would work in any PHP application. To learn more about Slim, visit https://www.slimframework.com/ - I'd especially recommend their "First Application" tutorial.
Since the /status endpoint is already set up to receive the webhooks, you can go there to check what's happening. If you have sent more than one message, the message ID becomes even more important but at this stage, it's probably obvious which message the status updates relate to.
For a successful message, you will see two status updates. The first one just confirms that the message was submitted:
{
    "message_uuid": "a5587e33-c304-4bf9-85a3-823e379e8a68",
    "to": {
        "number": "447700900001",
        "type": "sms"
    },
    "from": {
        "number": "	447700900000",
        "type": "sms"
    },
    "timestamp": "2018-10-17T10:17:02.889Z",
    "status": "submitted"
}After the message arrives on my phone, I get a second status update showing information about the message delivery:
{
    "message_uuid": "a5587e33-c304-4bf9-85a3-823e379e8a68",
    "to": {
        "number": "447700900001",
        "type": "sms"
    },
    "from": {
        "number": "	447700900000",
        "type": "sms"
    },
    "timestamp": "2018-10-17T10:17:05.480Z",
    "status": "delivered",
    "usage": {
        "price": "0.0333",
        "currency": "EUR"
    }
}Other messaging channels such as Facebook Messenger can also return a "read" status to let you know that the user has actually seen the message.
You will also receive status updates if there are errors with your message. In this case, there will be an errors field at the top level of the JSON data and details of your error including a code and a reason for the error. Keep an eye on the /status endpoint as you work with the Messages API as there is lots of key information here that will help you to develop your own applications.
This is next-level customer communication: if the message doesn't reach the user then detect that and try some other contact details that you hold for that user. The really nice side of this is that while users often prefer the WhatsApp or Facebook Messenger approach (and these can be cheaper for you to send), SMS more reliably reaches people even if they have run out of data or are in a low signal area. As developers, we don't need to work hard at detecting the message statuses, adding retry logic, or building code that can handle many different messaging platfroms. Dispatch API does all of this for us, so it's very, very easy.
Check out the Dispatch API documentation for any information beyond this specific example
The example application uses an alternative SMS number (something I often find useful when travelling and one phone package works better than another in some locations), but you could configure multiple "from" details and support any number of different contact methods for a user in exactly the same way as the try-another-SMS-example shown here.
To add this extra level, you use the Dispatch API on top of the Messages API. In the sample application you can see this in action in the /message-with-dispatch action which is behind the "Send message with fallback" link you noticed in the web interface of the sample application. The code doesn't change much but the request that we send has some differences:
    $apiResponse = $client->request('POST', '/v0.1/dispatch', [
        'headers' => [
            'Authorization' => 'Bearer ' . $config['jwt'],
            'Content-Type' => 'application/json',
            'Accept' => 'application/json'
        ],
        'json' => [
            'template' => 'failover',
            'workflow' => [
                [
                    'from' => $config['from'],
                    'to' => $config['customer1'][0],
                    'message' => [
                        'content' => [
                            'type' => 'text',
                            'text' => $message
                        ]
                    ],
                    'failover' => [
                        'expiry_time' => 15, // in seconds, 15 is the minimum
                        'condition_status' => 'delivered'
                    ]
                ],
                [
                    'from' => $config['from'],
                    'to' => $config['customer1'][1],
                    'message' => [
                        'content' => [
                            'type' => 'text',
                            'text' => 'Message retry. ' . $message
                        ]
                    ]
                ]
            ]
        ]
    ]);
The structure has changed, we now specify a template at the top level and then a workflow which is an array of contact methods and details with some criteria for the template to use. This example uses the failover template (currently the only option) to ensure that if the SMS isn't delivered within 15 seconds (it's only a demo, how long do you want to wait?) then we send another message to the other number that we have for that customer.
Exactly like the Messages API, the Dispatch API simply returns a status code of 202 Accepted and a dispatch_uuid so that we can tie up events relating to this API request.
Like the previous example using the Messages API, you receive updates when the message is submitted as well as when it either is delivered/read or when the dispatch state changes. Here is the sequence of data I see when Dispatch API can't deliver to the first phone number and falls back to the second one.
First of all: submit the first message to the first number.
{
    "message_uuid": "afb5f546-97e7-44ba-97cd-bb7706a93f4e",
    "to": {
        "number": "447700900001",
        "type": "sms"
    },
    "from": {
        "number": "	447700900000",
        "type": "sms"
    },
    "timestamp": "2018-10-19T11:33:07.118Z",
    "status": "submitted",
    "_links": {
        "dispatch": {
            "href": "v0.1/dispatch/de8d9eaf-8d10-407f-840b-53473f26c173",
            "dispatch_uuid": "de8d9eaf-8d10-407f-840b-53473f26c173"
        }
    }
}When it can't deliver it (I test by putting the "first" phone into airplane mode), then exactly the same status arrives again but with the "second" phone number in the data:
{
    "message_uuid": "e083fc2e-dffc-42c9-a7b3-446ee5fe67ba",
    "to": {
        "number": "447700900002",
        "type": "sms"
    },
    "from": {
        "number": "	447700900000",
        "type": "sms"
    },
    "timestamp": "2018-10-19T11:33:25.071Z",
    "status": "submitted",
    "_links": {
        "dispatch": {
            "href": "v0.1/dispatch/de8d9eaf-8d10-407f-840b-53473f26c173",
            "dispatch_uuid": "de8d9eaf-8d10-407f-840b-53473f26c173"
        }
    }
}The second message got delivered, yay!
{
    "message_uuid": "e083fc2e-dffc-42c9-a7b3-446ee5fe67ba",
    "to": {
        "number": "447700900002",
        "type": "sms"
    },
    "from": {
        "number": "	447700900000",
        "type": "sms"
    },
    "timestamp": "2018-10-19T11:33:27.385Z",
    "status": "delivered",
    "usage": {
        "price": "0.0333",
        "currency": "EUR"
    },
    "_links": {
        "dispatch": {
            "href": "v0.1/dispatch/de8d9eaf-8d10-407f-840b-53473f26c173",
            "dispatch_uuid": "de8d9eaf-8d10-407f-840b-53473f26c173"
        }
    }
}If the first message also gets delivered at some later point, you'll get a very similar status update for that, I won't paste that as well. Usually I get it about ten minutes later when I realise my phone is still in airplane mode ...
For statuses like this where the SMS delivery also marks the successful completion of the Dispatch request, you may find that the incoming webhooks arrive in either order so take care not to rely on exactly which one comes in first.
Since successful delivery of the second message marks successful Dispatch, there's also a "completed" status update for that:
{
    "template": "failover",
    "status": "completed",
    "timestamp": "2018-10-19T11:33:27.450Z",
    "usage": {
        "price": "0.0353",
        "currency": "EUR"
    },
    "dispatch_uuid": "de8d9eaf-8d10-407f-840b-53473f26c173",
    "_links": {
        "messages": [
            {
                "message_uuid": "afb5f546-97e7-44ba-97cd-bb7706a93f4e",
                "href": "v0.1/messages/afb5f546-97e7-44ba-97cd-bb7706a93f4e",
                "channel": "sms",
                "status": "submitted"
            },
            {
                "message_uuid": "e083fc2e-dffc-42c9-a7b3-446ee5fe67ba",
                "href": "v0.1/messages/e083fc2e-dffc-42c9-a7b3-446ee5fe67ba",
                "channel": "sms",
                "usage": {
                    "price": "0.0333",
                    "currency": "EUR"
                },
                "status": "delivered"
            }
        ]
    }
}Since it can take some time to deliver the messages, these asynchronous updates are a key way to interact with the API. In this example you set up the /status endpoint first, and this is something I'd recommend to any developer working with these APIs.
In this tutorial you have worked with an application that can send a message to a customer using a simple SMS API that also offers integration with other message types using the same code and API calls (you just send different from and to data). You have also seen how we can add resilience by detecting when a message didn't reach a customer and using an alternative channel to contact them.
If you're keen to do more with these APIs, here are some places you might like to visit next:
The documentation for the Messages API and the Dispatch API on the developer portal
In-depth tutorial Sending SMS Messages with Messages API that includes code examples in NodeJS and cURL
Building Blocks are code snippets in your language for performing a variety of tasks with the Messages API.
If you need us, try the Nexmo Community Slack channel