Share:
An English teacher turned empathetic software engineer. A curious optimist with a passion for creating accessible content and helping developers level up their skills.
Create Custom Video Chat with React Components and Vonage
Time to read: 9 minutes
Please note that React is not officially supported by the Vonage Video API
I've recently started tinkering around with Vonage's Video API platform and building a few starter apps with video chat.
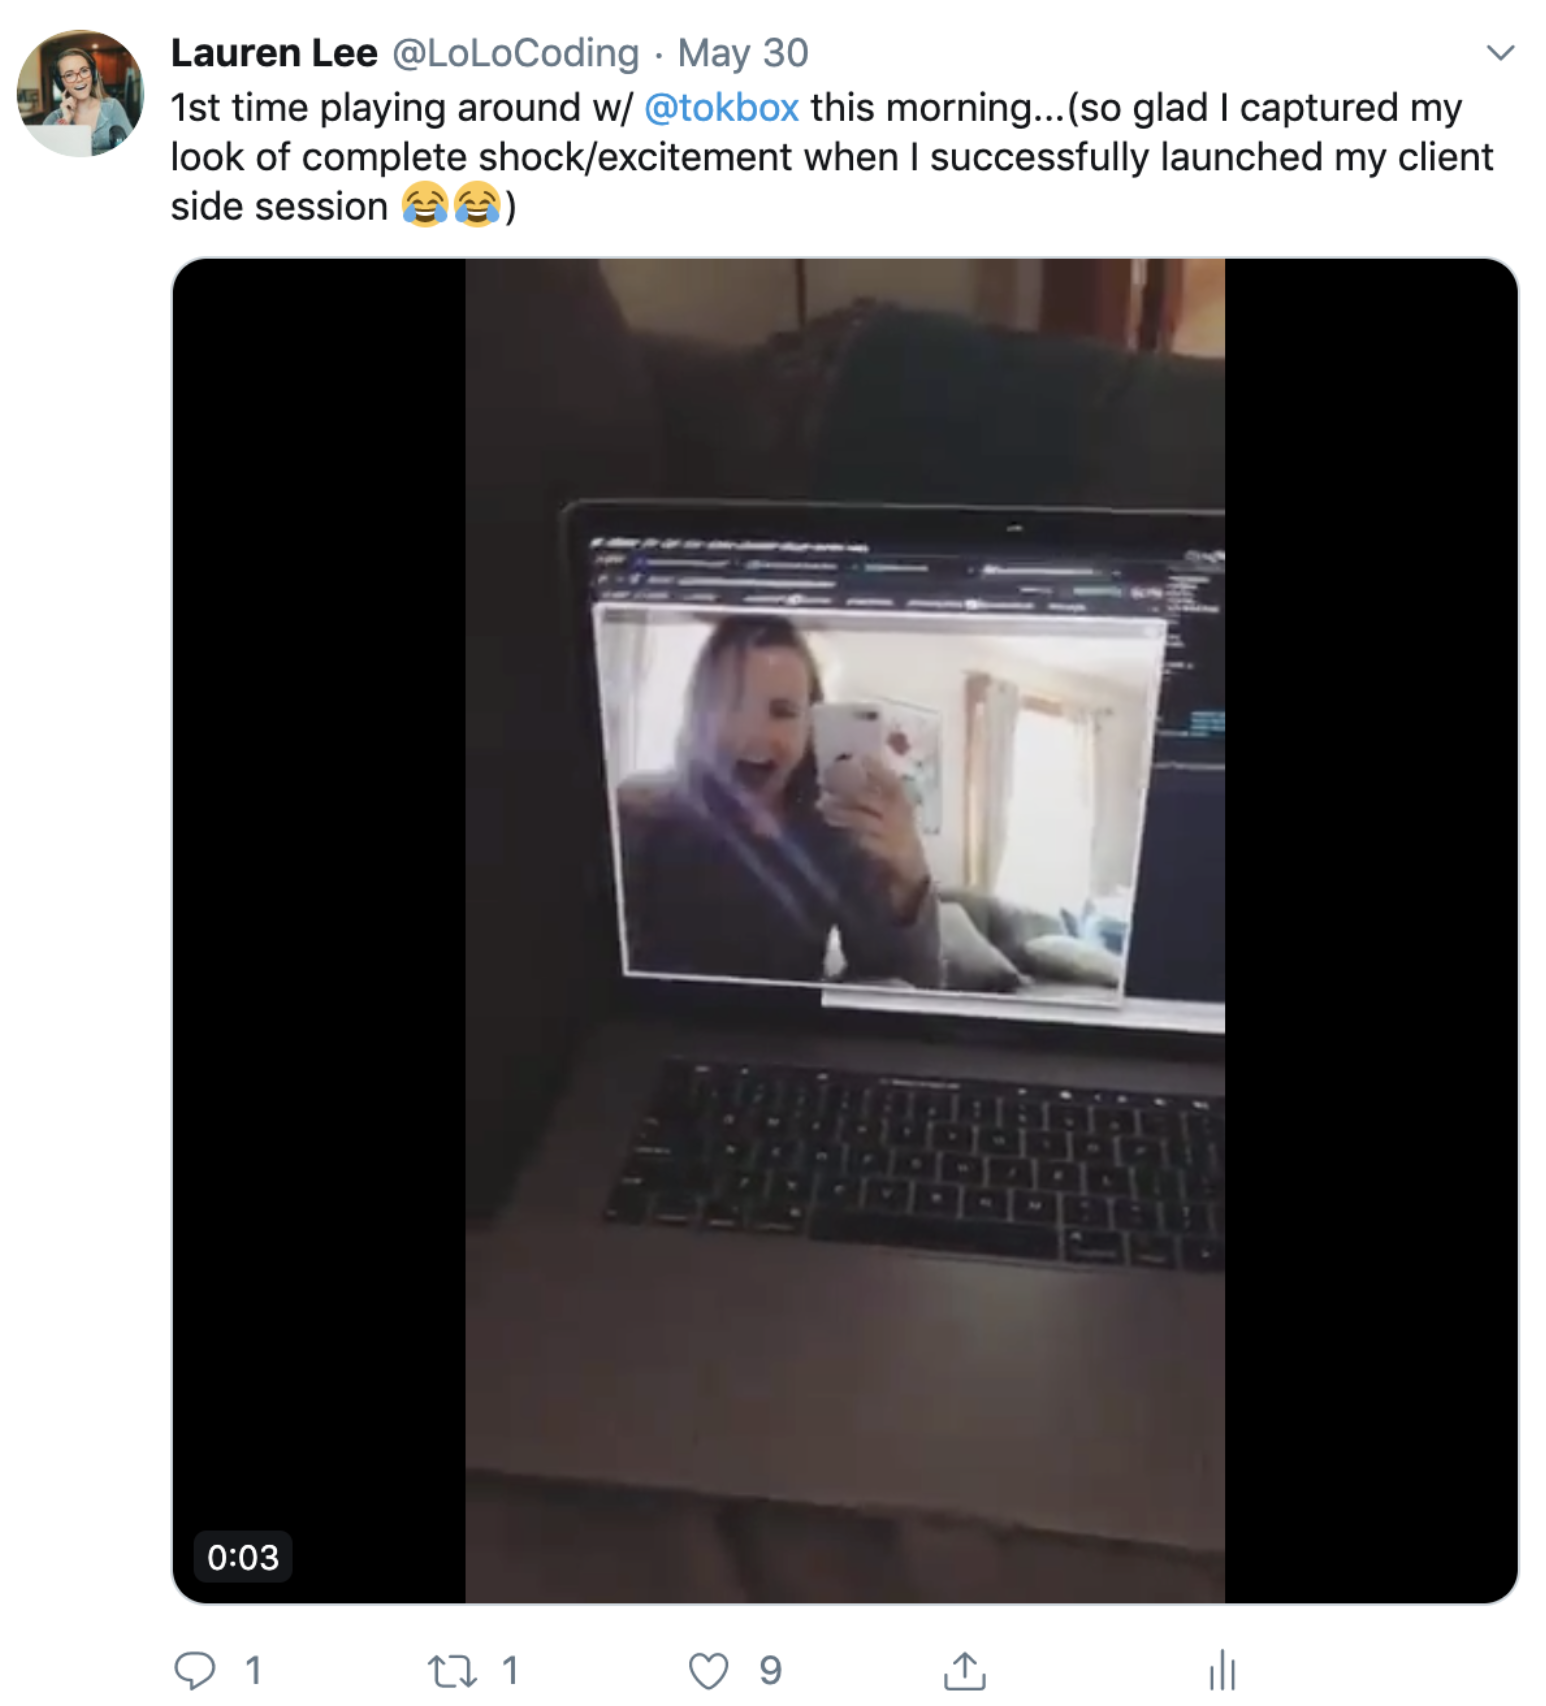 tweet of playing with Vonage Video API for first time
And while it's fun and sort of silly to quickly add a live-stream of my face to an app I'm working on, I soon became curious of other use cases. Or rather, what's the benefit of building it out myself as opposed to using one of the many other video-conferencing options out there?
To explore the full functionality of the API, I thought I'd create an app for the students of the bootcamp I attended, Ada Developers Academy.
Ada is a tuition-free, year-long program for women and gender diverse folks to learn to code. I feel ridiculously fortunate to have attended and been given the tools to transition from being an English teacher to a software engineer in just a year. So I thought a great way to give back would be to create a portal for students to get in touch with tutors and get real-time, face-to-face help from industry mentors. Plus I'd be able to learn more about the Vonage Video API at the same time!
While building out that portal, I soon discover what so many engineers have before: how awesome it is to have complete ownership and control over the functionality of the code within your app. I could tailor the app and my code to the needs of the students and tutors, which felt super powerful. I was specifically playing around with the Video API's React wrapper called, OpenTok React, which is essentially a web component for the JavaScript SDK. It makes it incredibly simple to integrate high-quality video and audio streaming into any React app. It provides customizable components that are flexible enough to embed within any of my React apps quite easily.
This is a tutorial on how to use that React Wrapper and break the code up into modularized and reusable React components to embed into any or all of your future React apps!
Node.js installed
Register for a Vonage Video API account
You are going to accomplish the following tasks to create your app:
Create a Video API Project
Create a React App with
create-react-appBuild out Reusable React Components:
Publisher
Subscriber
ConnectionStatus
CheckBox
Run Your Video Chat App
This tutorial will take you through the process from scratch. Although if you’d like to see the finished code, you can clone the git repository for this project.
Once signed in to your Vonage Video API account, in the left hand corner of your page, select Projects and, from the dropdown, click Create New Project.
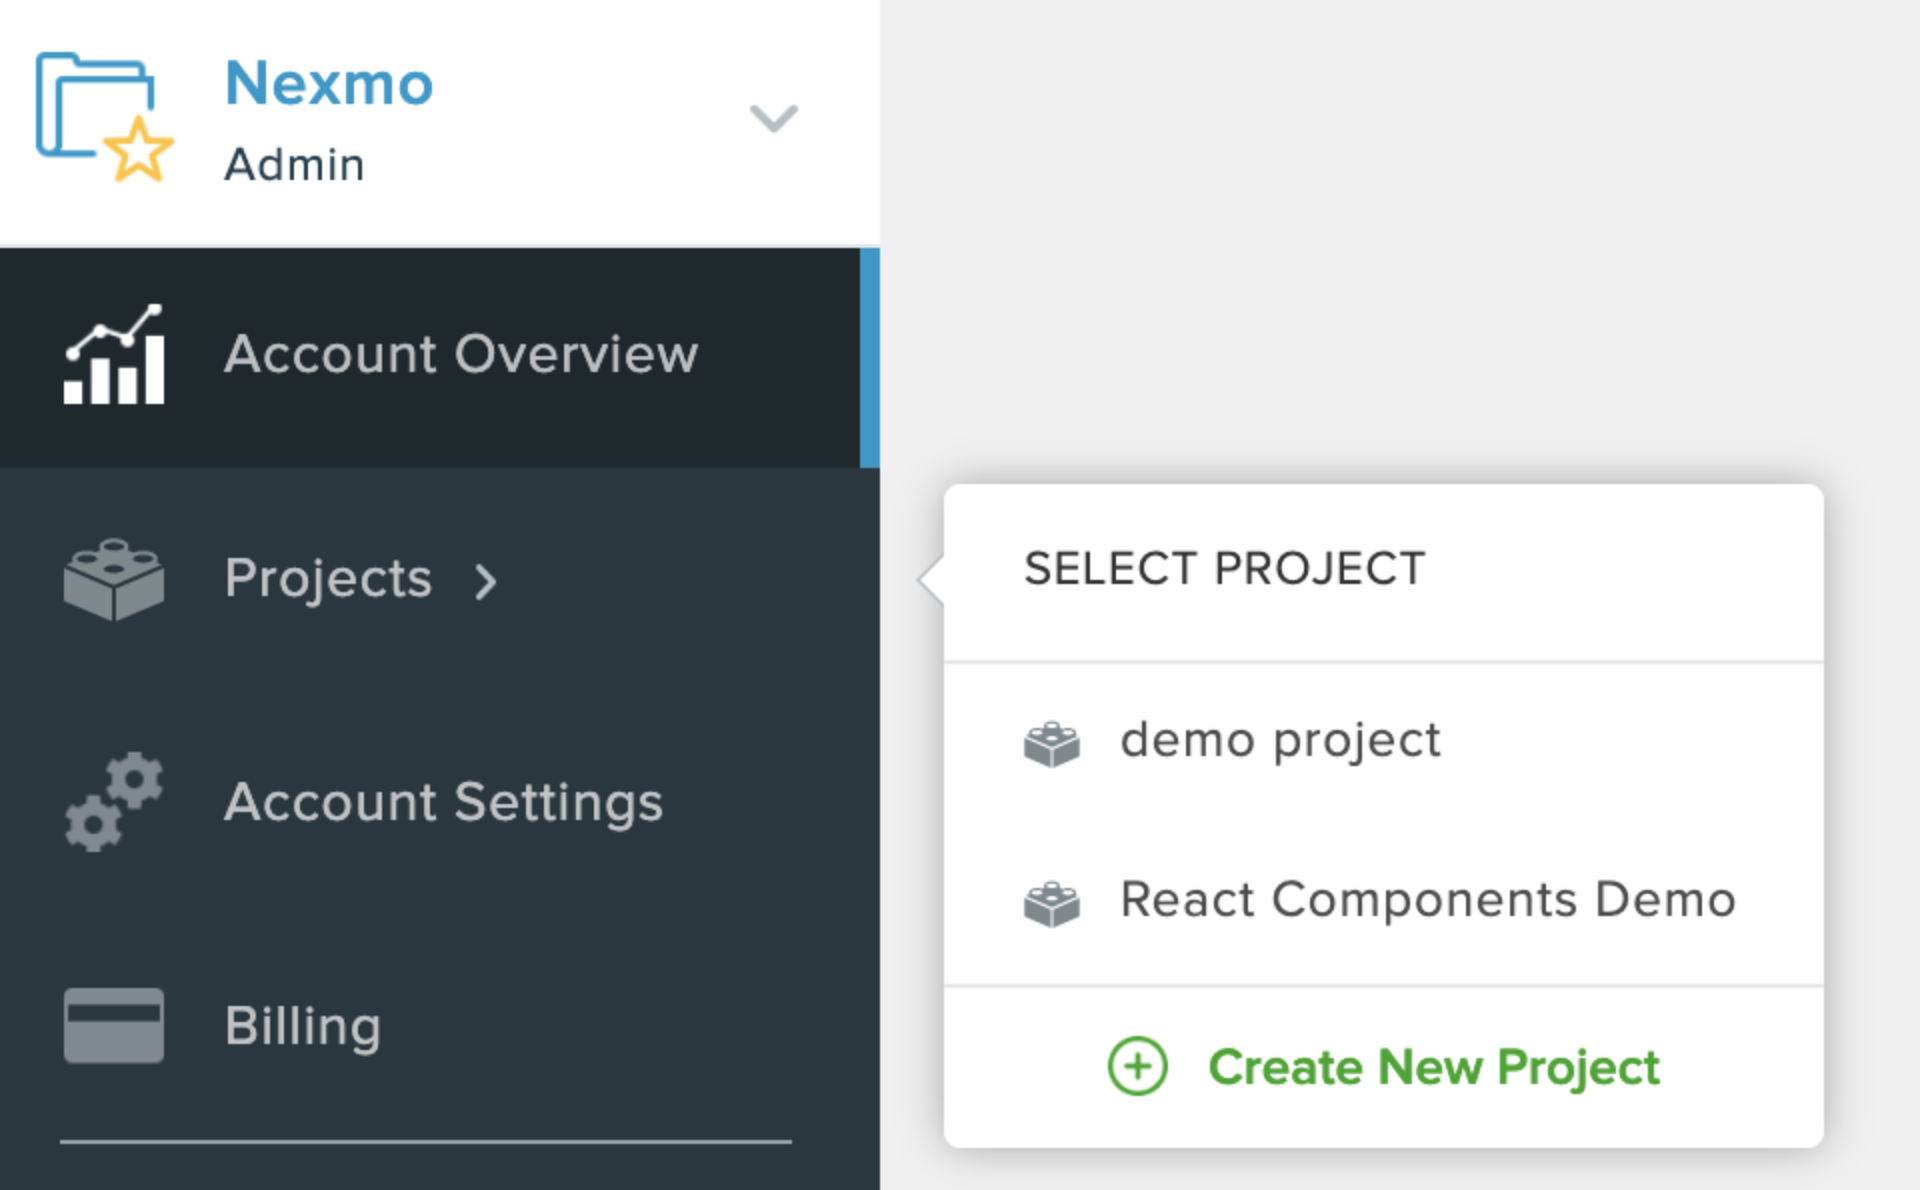 where to click new project demo
From there, select Create Custom Project and name it whatever you like. Once you've created the project, click View Project and save the API key up at the top.
Next, scroll down to the section titled Project Tools and click the blue button to Create Session ID.
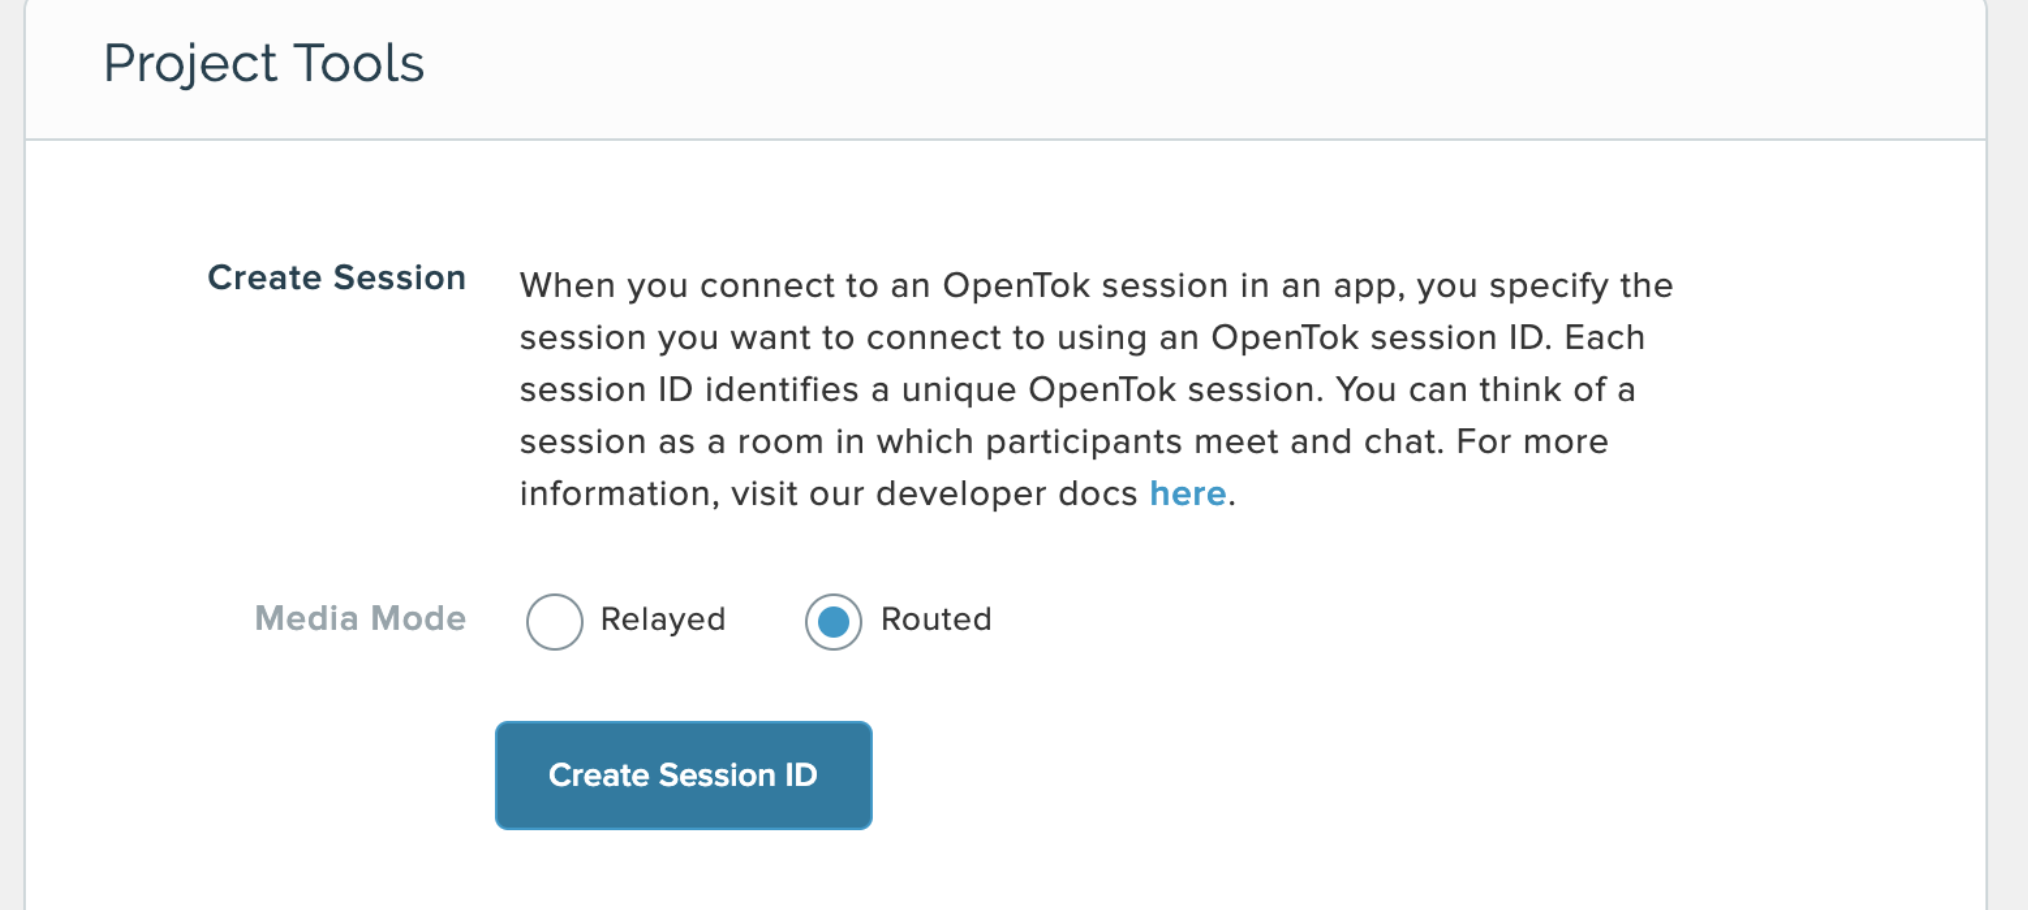 what to click to generate a sessionID
Copy and paste that sessionID into the section below Generate Token. Feel free to prolong the expiration time beyond the default 1 hour if you'd like.
Next, click the blue Generate Token button and save the generated token.
create-react-app
Before we dive in, be sure to verify that you have an updated version of Node installed on your machine (5.2 at the minimum) by running node -v in your terminal.
Next, in the directory you'd like this project to live run the command:
I've called my project react-components-tokbox, but you can name it whatever you like.
Move into your project and install the two dependencies that we'll use for this project:
The opentok-react library is a React wrapper that is comprised of a few components that we'll use today:
OTSession Component
OTPublisher Component
OTStreams Component
OTSubscriber Component
createSession Helper
preloadScript Higher-Order Component
Run npm start to ensure that everything installed correctly. localhost:3000 should automatically open up and be running the boilerplate React starter code.
Move into the src folder and create a config.js file:
Open up that new file and add the credentials you generated just now when you created a TokBox project:
// src/config.js
export default {
  API_KEY: 'XYZ',
  SESSION_ID: 'XYZ',
  TOKEN: 'XYZ'
};Now, open up the src/index.js file and import the congfig.js file:
// src/index.js
import React from 'react';
import ReactDOM from 'react-dom';
import App from './App';
import config from './config';Now, to actually use those credentials, be sure to pass them to the <App /> component:
// src/index.js
ReactDOM.render(<App
  apiKey={config.API_KEY}
  sessionId={config.SESSION_ID}
  token={config.TOKEN}
/>, document.getElementById('root'));In the src/App.js file, let's import some of the components from the React wrapper:
// src/App.js
import { OTSession, OTStreams, preloadScript } from 'opentok-react';
Create a new components folder within src. In that folder, create your components:
Now again in your src/App.js file, import three of those components:
// src/App.js
import ConnectionStatus from './components/ConnectionStatus';
import Publisher from './components/Publisher';
import Subscriber from './components/Subscriber';Let's change the <App /> component in that file to be class-based as opposed to functional.
// src/App.js
class App extends React.Component {
  constructor(props) {
    super(props);
    this.state = {};
  };
  render() {
    return (
      <div>
        TokBox
      </div>
    );
  }
}
export default preloadScript(App);Within the constructor, add in some state and two sessionEvents to detect connectivity status:
// src/App.js
constructor(props) {
  super(props);
  this.state = {
    error: null,
    connected: false
  };
  this.sessionEvents = {
    sessionConnected: () => {
      this.setState({ connected: true });
    },
    sessionDisconnected: () => {
      this.setState({ connected: false });
    }
  };
}
Outside of the constructor, create a function onError():
// src/App.js
  onError = (err) => {
    this.setState({ error: `Failed to connect: ${err.message}` });
  }
Within the render() function, add in the <OTSession /> component that passes the credentials from the src/index.js file:
// src/App.js
render() {
  return (
      <OTSession
        apiKey={this.props.apiKey}
        sessionId={this.props.sessionId}
        token={this.props.token}
        eventHandlers={this.sessionEvents}
        onError={this.onError}
        >
      </OTSession>
    );
}Now, within the <OTSession /> let's preemptively handle errors and call the components, <ConnectionStatus />, <Publisher />, and <Subscriber />:
// src/App.js
  {this.state.error ? <div id="error">{this.state.error}</div> : null}
  <ConnectionStatus />
  <Publisher />
  <OTStreams>
    <Subscriber />
  </OTStreams>
In the src/components/ConnectionStatus.js file, let's think about the best way to display the Connection Status to the user:
// src/components/ConnectionStatus.js
import React from 'react';

class ConnectionStatus extends React.Component {
  render() {
    let status = this.props.connected ? 'Connected' : 'Disconnected';
    return (
      <div className="connectionStatus">
        <strong>Status:</strong> {status}
      </div>
    );
  }
}
export default ConnectionStatus;
Now back in the src/App.js file, pass the state to the <ConnectionStatus /> component:
// src/App.js
<ConnectionStatus connected={this.state.connected} />
Now, at the top of your src/components/Publisher.js file, import the files and the OTPublisher from opentok-react:
// src/components/Publisher.js
import React from 'react';
import { OTPublisher } from 'opentok-react';
import CheckBox from './CheckBox';Below that, let's create a class-based component Publisher:
// src/components/Publisher.js
class Publisher extends React.Component {
  constructor(props) {
    super(props);
    this.state = {
      error: null,
      audio: true,
      video: true,
      videoSource: 'camera'
    };
  }
  setAudio()
  setVideo()
  setVideoSource()
  onError()

  render() {
    return (
      <div>
        <OTPublisher />
      </div>
    );
  }
}
export default Publisher;Let's fill in those functions with some state:
// src/components/Publisher.js
  setAudio = (audio) => {
    this.setState({ audio });
  }

  setVideo = (video) => {
    this.setState({ video });
  }

  changeVideoSource = (videoSource) => {
    (this.state.videoSource !== 'camera') ? this.setState({videoSource: 'camera'}) : this.setState({ videoSource: 'screen' })
  }

  onError = (err) => {
    this.setState({ error: `Failed to publish: ${err.message}` });
  }
And within the <OTPublisher /> let's pass in publishAudio, publishVideo, and videoSource to the properties prop and the function onError() to the onError prop:
// src/components/Publisher.js
render() {
  return (
    <div className="publisher">
      Publisher
      {this.state.error ? <div id="error">{this.state.error}</div> : null}
      <OTPublisher
        properties={{
          publishAudio: this.state.audio,
          publishVideo: this.state.video,
          videoSource: this.state.videoSource === 'screen' ? 'screen' : undefined
        }}
        onError={this.onError}
      />
    </div>
  };
Now, in the src/components/Subscriber.js file, let's import the files and components and create a class-based component Subscriber with subscribeToAudio and subscribeToVideo as properties within the <OTSubscriber />:
// src/components/Subscriber.js
import React from 'react';
import { OTSubscriber } from 'opentok-react';
import CheckBox from './CheckBox';

class Subscriber extends React.Component {
  constructor(props) {
    super(props);

    this.state = {
      error: null,
      audio: true,
      video: true
    };
  }

  setAudio = (audio) => {
    this.setState({ audio });
  }

  setVideo = (video) => {
    this.setState({ video });
  }

  onError = (err) => {
    this.setState({ error: `Failed to subscribe: ${err.message}` });
  }

  render() {
    return (
      <div className="subscriber">
        Subscriber
        {this.state.error ? <div id="error">{this.state.error}</div> : null}
        <OTSubscriber
          properties={{
            subscribeToAudio: this.state.audio,
            subscribeToVideo: this.state.video
          }}
          onError={this.onError}
        />
      </div>
    );
  }
}
export default Subscriber;
We'll use the <CheckBox /> component within both the <Publisher /> and <Subscriber /> components:
// src/components/CheckBox.js
import React from 'react';
import { uniqueId } from 'lodash';

class CheckBox extends React.Component {
  constructor(props) {
    super(props);
    this.state = {
      id: uniqueId('Checkbox'),
      isChecked: this.props.initialChecked
    };
  }

  onChange = (event) => {
    let isChecked = event.currentTarget.checked;
    this.setState({ isChecked });
  }

  componentDidUpdate(prevProps, prevState) {
    if (
      prevState.isChecked !== this.state.isChecked &&
      typeof this.props.onChange === 'function'
    ) {
      this.props.onChange(this.state.isChecked);
    }
  }

  render() {
    return (
      <div>
        <label htmlFor={this.state.id}>
          {this.props.label}
        </label>
        <input
          type="checkbox"
          checked={this.state.isChecked}
          id={this.state.id}
          onChange={this.onChange}
        />
      </div>
    );
  }
}
export default CheckBox;Let's now use both the <CheckBox /> component in the src/components/Publisher.js file:
// src/components/Publisher.js
<CheckBox
  label="Share Screen"
  onChange={this.changeVideoSource}
/>
<CheckBox
  label="Publish Audio"
  initialChecked={this.state.audio}
  onChange={this.setAudio}
/>
<CheckBox
  label="Publish Video"
  initialChecked={this.state.video}
  onChange={this.setVideo}
/>And also in the src/components/Subscriber.js file:
// src/components/Subscriber.js
<CheckBox
  label="Subscribe to Audio"
  initialChecked={this.state.audio}
  onChange={this.setAudio}
/>
<CheckBox
  label="Subscribe to Video"
  initialChecked={this.state.video}
  onChange={this.setVideo}
/>And lastly, let's add in some simple CSS for the app in the src/App.css file:
/* src/App.css */
body, html {
  background-color: pink;
  height: 100%;
  font-family: Verdana, Geneva, sans-serif
}
.connectionStatus {
  padding-top: 20px;
  margin-left: 5%;
  font-size: 1.5em;
}
.subscriber {
  margin-left: 10%;
}
.publisher {
  float: right;
  margin-right: 10%;
}
.OTPublisherContainer {
  width: 80vh !important;
  height: 80vh !important;
}
#error {
  color: red;
}
You now have created all 4 React components:
Publisher
Subscriber
ConnectionStatus
CheckBox
You can test out your app by running npm start from the root of your project in your terminal.
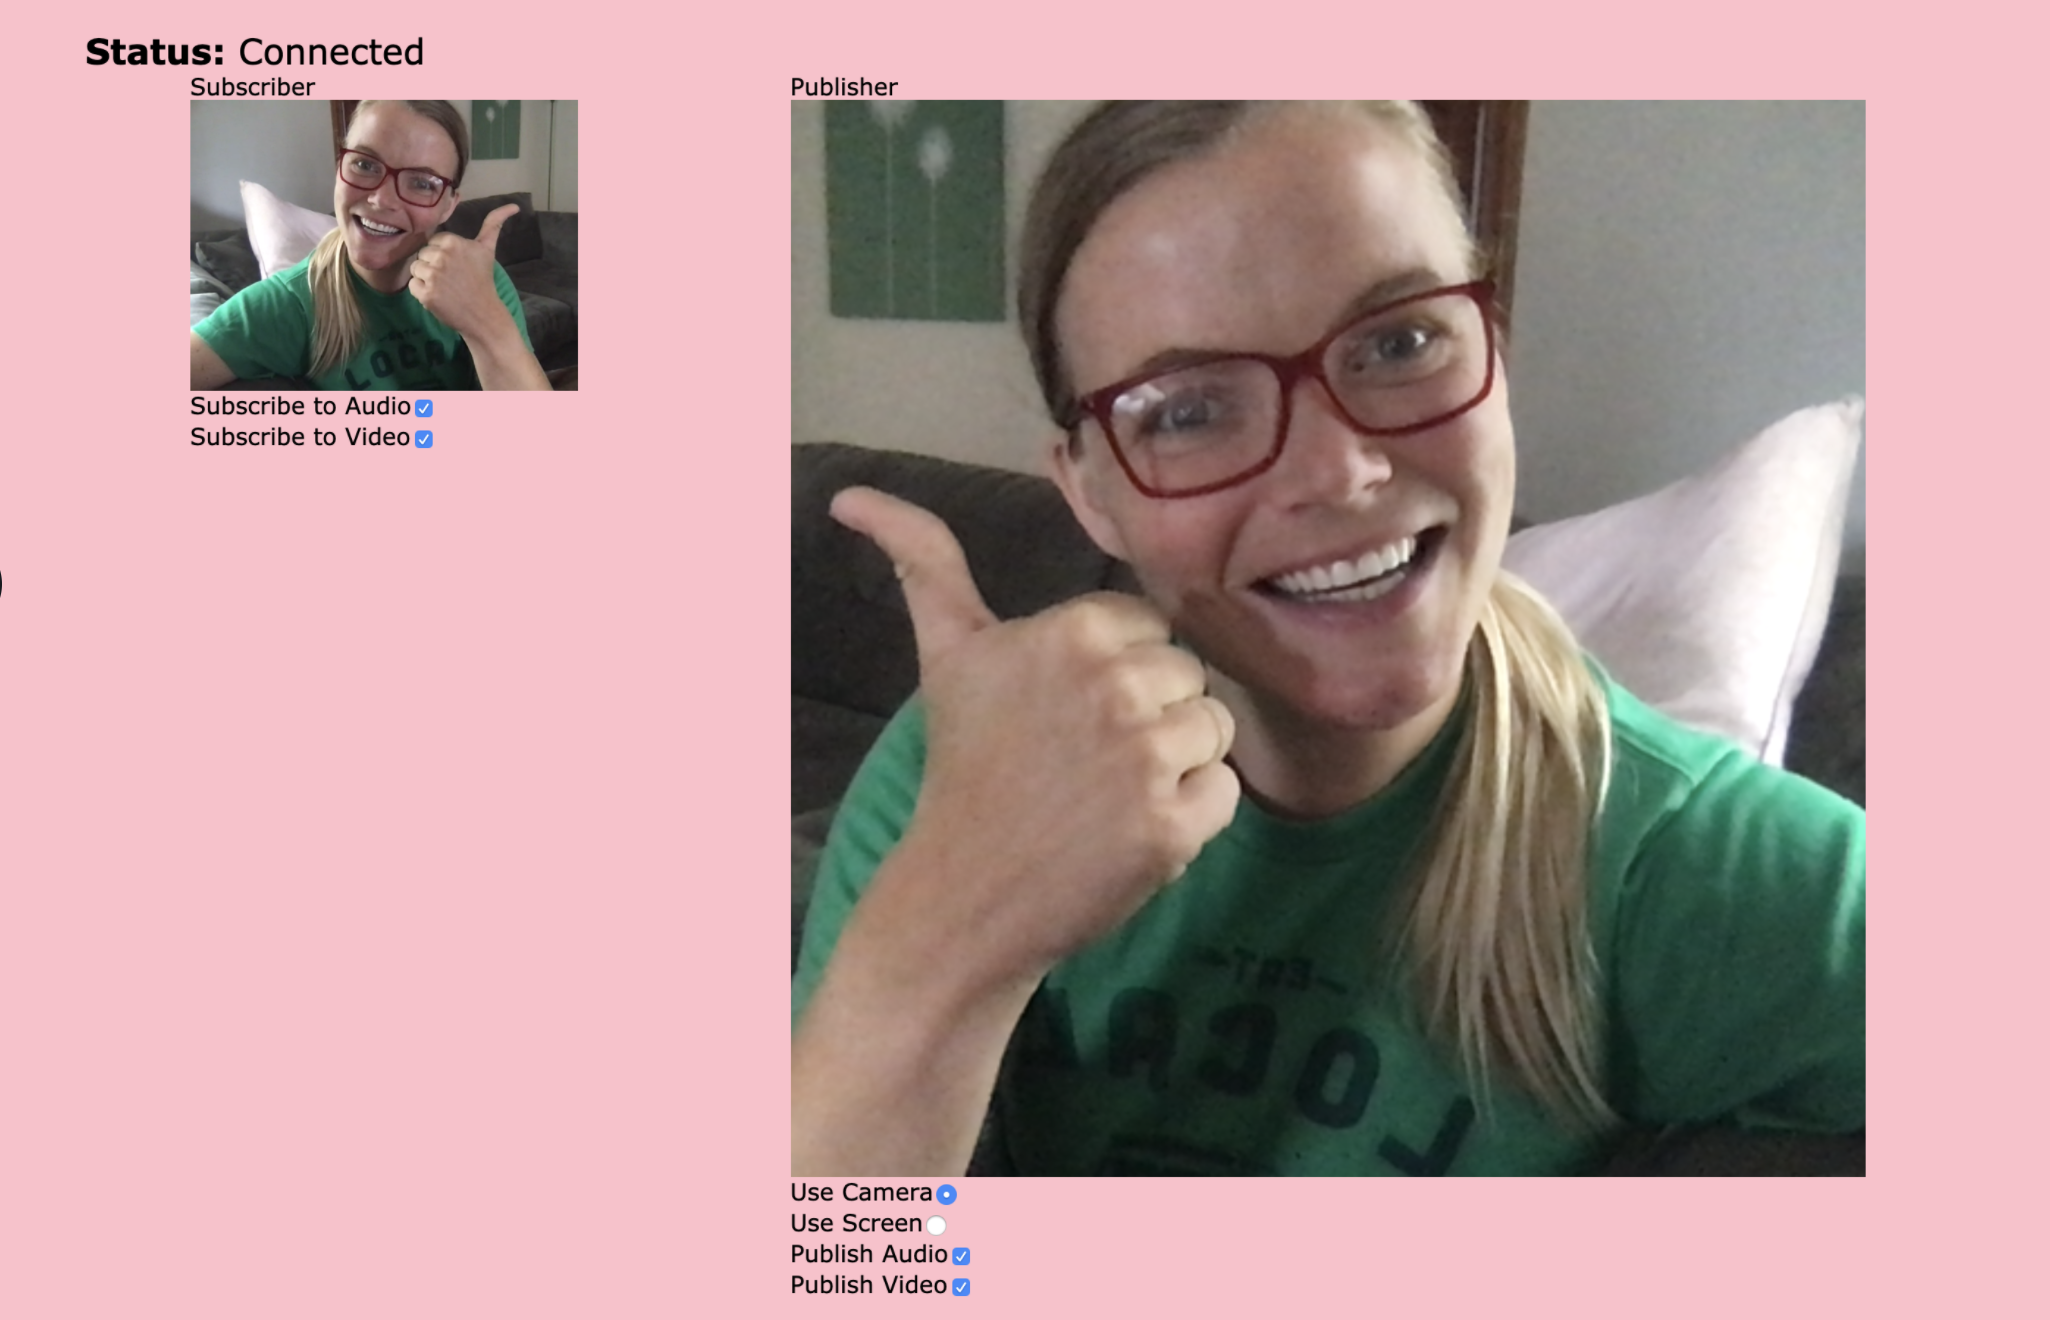 view after running npm start
Congrats! These components are modularized and reusable for any future React app.
You can now easily and quickly plug them into your app to enable video chat capability. How neat is that?! I'm for one, pretty obsessed 😆 and have begun searching for any and all opportunities in my day-to-day life in which to add video chat!
If you have a creative, new, silly, or innovative idea for how to use video chat, please share!
I'd be SUPER excited to collaborate and create new apps together.