Share:
Steve is a self-proclaimed Mathlete, and King of Snark. He is also a lover of Greyhounds, twisty puzzles, and European Board Games. When not talking math to non-math people, and Java to non-Java people, he can be found sipping coffee and hacking on code.
Make Text-to-Speech Phone Call with Java
Time to read: 5 minutes
In a previous tutorial, we showed you how to Receive a Phone Call with Java and respond using Text-to-Speech. In addition to receiving a phone call, you can also make outgoing phone calls.
In this tutorial, you will create an application that can make outgoing text-to-speech phone calls utilizing Java and the Vonage Voice API.
You will be using Gradle to manage your dependencies and run your application. Additionally, you'll need to make sure you have a copy of the JDK installed. I will be using JDK 11, which is the current LTS, in this tutorial.
Finally, you’ll need the Vonage CLI installed. You’ll use it to configure your Vonage account to point at your new application.
This tutorial will walk you through the following steps:
Signup for a Vonage account and get a phone number and create an application.
Using Gradle to initialize a new Java application.
Using the Vonage Java Client Library to initiate a phone call and execute text-to-speech.
If you do not have an application, you can use the Vonage CLI to create one. You will need to define the name of the application, and an answer and event URL that the Voice API will use by default:
The Vonage Voice API will make a request to your answer URL when a phone number linked to your application receives a phone call.
The Vonage Voice API will make requests to your event URL when various status changes occur.
To learn more about applications see our Vonage Concepts Guide.
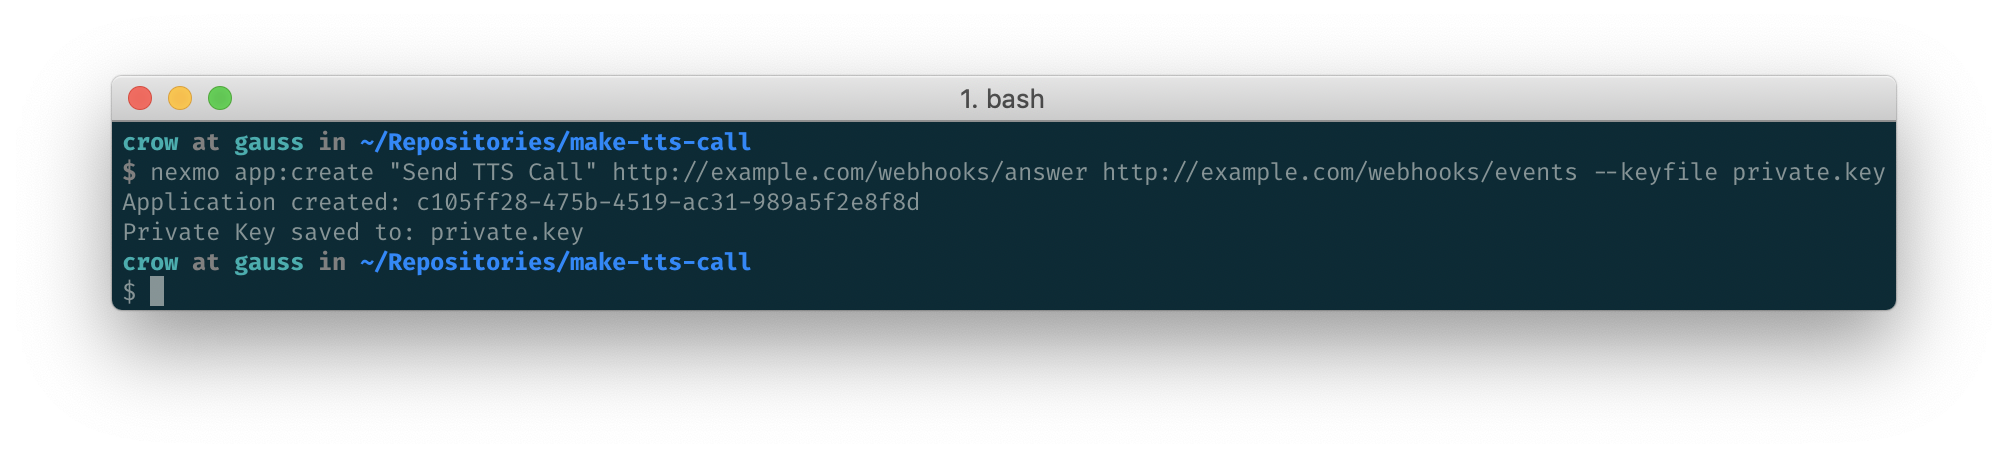
Use the following command to create an application using the Vonage CLI:
This command will also create a file called private.key which you will need to authenticate with the Vonage Voice API to make calls. This file will be saved to the directory you run the command inside of. Also make a note of the Application ID that is returned, as you will need it later.
You will be using Gradle to manage your dependencies and to create and run your Java application.
The gradle init --type=java-application command will create all of the folders you need as well as a sample class where you will be writing your code.
From the command line, create a new Java project with the following command and accept the default values at the interactive prompts:
Gradle will create the App class in the src/main/java/make/tts/call folder. Inside of this class is a getGreeting and main method. You won't need the getGreeting method, so feel free to remove it.
Your App class should look like this:
/*
 * This Java source file was generated by the Gradle 'init' task.
 */
package make.tts.call;

public class App {
    public static void main(String[] args) {
        // Future Code Goes Here
    }
}
You will be using the Vonage Java Library to communicate with the Vonage Voice API. Add the following to the dependencies block in your build.gradle file:
// Nexmo Java Client
implementation 'com.nexmo:client:4.2.0'
The Vonage Java Library contains a NexmoClient class which gives you access to the various Vonage APIs. You will use your Application ID, and the path to your private.key file from a previous step. The NexmoClient will use this information to authenticate to the Vonage Voice API.
Add the following to the main method of the App class, resolving any imports:
NexmoClient nexmoClient = NexmoClient.builder()
        .applicationId(APPLICATION_ID)
        .privateKeyPath(PRIVATE_KEY_PATH)
        .build();

VoiceClient voiceClient = nexmoClient.getVoiceClient();The NexmoClient throws an Exception if the private key file cannot be loaded. For the sake of convenience, modify your main method signature to throw any exceptions. Your main method should now look like this:
public static void main(String[] args) throws Exception {
    NexmoClient nexmoClient = NexmoClient.builder()`
            .applicationId(APPLICATION_ID)
            .privateKeyPath(PRIVATE_KEY_PATH)
            .build();

    VoiceClient voiceClient = nexmoClient.getVoiceClient();
}
The Vonage Voice API is controlled using Nexmo Call Control Object (NCCO). An NCCO is a JSON array which contains a set of actions that the Voice API will execute.
The following NCCO will instruct the Vonage Voice API to speak to the recipient when they answer the call:
[
    {
        "action": "talk",
        "text": "This is a text-to-speech call from Vonage"
    }
]The Vonage Java Client Library provides classes that allow you to construct an NCCO. You will use the Ncco and TalkAction classes to build the NCCO.
Add the following to the main method, resolving any imports:
TalkAction intro = TalkAction.builder("This is a text-to-speech call from Vonage").build();
Ncco ncco = new Ncco(intro);
The VoiceClient contains a method called createCall which expects a com.nexmo.client.voice.Call. The Call object is used to define which number you're calling from, the recipient you wish to call, and the NCCO to control the call.
Create a new Call object in the main method and invoke the createCall method with the created object, resolving any imports:
Call call = new Call(TO_NUMBER, NEXMO_NUMBER, ncco);
voiceClient.createCall(call);
Start your application with the gradle run command inside of your make-tts-call directory. You should receive a phone call from your Vonage number.
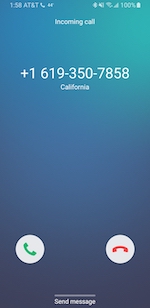
Once you answer this call, the Vonage Voice API will speak the message, "This is a text-to-speech call from Vonage."
In a few lines of code, you have created an application that can call a recipient and speak a message.
Check out our documentation on Vonage Developer where you can learn more about call flow or Nexmo Call Control Objects. See our Nexmo Code Snippets for Java for full code examples on this tutorial and more.