Share:
IOS Developer turned Data Science / Machine Learning enthusiast. I want people to understand what machine learning is and how we can use it in our applications.
Building an Image Classifier in Tensorflow
Time to read: 9 minutes
In this post, you are going to build a basic image classification model for processing images sent by members of a conversation in an iOS app integrated with Nexmo In-App Messaging. After a user uploads an image, a caption describing the image will be displayed.
We're going to use Python to build our image classification model. Don't worry if you have not worked with Python or you have no prior knowledge into machine learning.
Image classification in machine learning is when you have a photo, and the machine learning model will be able to tell what subject is in the photo. For example, if you take a picture of a dog, the machine learning model will be able to say "This is a dog".
First, in order to build a machine learning model, we need to have data in order to train it.
A machine learning model uses training data for the model to learn. To start, we'll need to choose the training data. For this post, we'll use the CIFAIR-10 data set.
This dataset contains images in 10 classes, with 6000 images per class. Its a well used data set for machine learning, and it will be a good start for our project. Since the data set is fairly small, we can train the model quickly.
This notebook is hosted on Google Colab. Colaboratory is a free Jupyter notebook environment that requires no setup and runs entirely in the cloud.
Note, you will need to have a Google account to run the notebook.
Running the notebook is super easy. In every cell that contains code, there is a run button to the left of the cell. Tap the run button to run the code. You can also use the keyboard command Shift then Enter.
The first thing we need to do is import our packages. These packages are pre-installed on Google Colab so we don't need to install them.
import tensorflow as tf
from tensorflow import keras
import matplotlib.pyplot as plt
import numpy as npNotice, we're using Tensorflow and Keras as a frontend to Tensorflow. Keras is a great framework that allows you to build models easier, without having to use the more verbose methods in Tensorflow.
Next, we'll load the CIFAR data set. Using Keras, we're able to download the dataset very easily.
We split the dataset into 2 groups, one for training (x_train, y_train), the other for testing (x_test, y_test).
Splitting the dataset allows the model to learn from the training set. Then, when we test the model, we want to see how well it learned by using the test set. This will give us our accuracy- how well the model did.
from keras.datasets import cifar10

(x_train, y_train), (x_test, y_test) = cifar10.load_data()
print('x_train shape:', x_train.shape)
print(x_train.shape[0], 'train samples')

print('y_train shape', y_train.shape)
print(x_test.shape[0], 'test samples')

print('x_test shape', x_test.shape)
print(y_test.shape[0], 'test samples')Using TensorFlow backend.
Downloading data from https://www.cs.toronto.edu/~kriz/cifar-10-python.tar.gz
170500096/170498071 [==============================] - 75s 0us/step
x_train shape: (50000, 32, 32, 3)
50000 train samples
y_train shape (50000, 1)
10000 test samples
x_test shape (10000, 32, 32, 3)
10000 test samplesNext, we'll declare some constants.
batch_sizeis the number of samples that going to be propagated through the network.epochsare how many times we train on the full dataset.class_namesis a list of all the possible labels in the CIFAR-10 dataset.
batch_size = 32
epochs = 100
class_names = ["airplane","automobile","bird","cat","deer","dog","frog","horse","ship","truck"]We'll use these constants later when converting our model into CoreML.
def plot_images(x, y, number_of_images=2):
  fig, axes1 = plt.subplots(number_of_images,number_of_images,figsize=(10,10))
  for j in range(number_of_images):
      for k in range(number_of_images):
          i = np.random.choice(range(len(x)))
          title = class_names[y[i:i+1][0][0]]
          axes1[j][k].title.set_text(title)
          axes1[j][k].set_axis_off()
axes1[j][k].imshow(x[i:i+1][0])First, let's have a look a few images. We have a function that plots 4 random images and their corresponding label.
plot_images(x_train, y_train)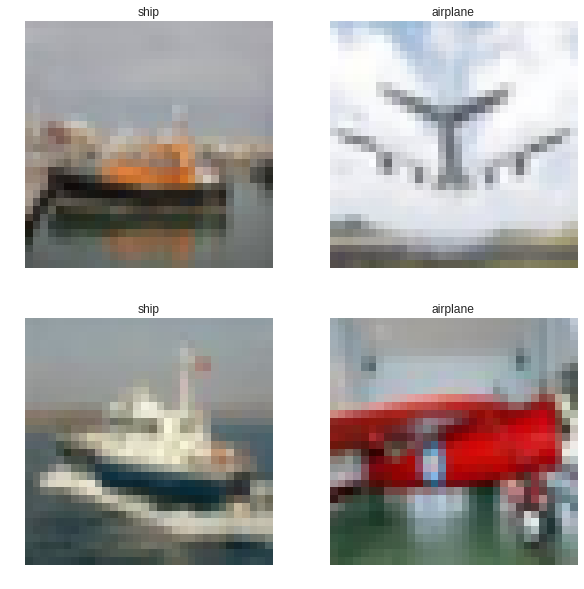 Image recognition Tensorflow CoreML
Now, we'll setup a simple model. We are creating a deep neural network using convolutions, dropout, and max pooling.
In the end, we'll flatten the network and use Relu, followed by a Softmax.
This will give us a vector (1-dimension matrix), filled with mostly 0's.
It will look like this.
[0,0,0,0,0,0,1,0,0,0]This vector corresponds to the given label from the image So in this example, the 1 in the seventh place would be a frog, since 'frog' is at the seventh place in class_names list.
The following shows the entire network.
model = tf.keras.Sequential()

model.add(tf.keras.layers.Conv2D(32, kernel_size=(3, 3), activation='relu', input_shape=(32, 32, 3)))
model.add(tf.keras.layers.Conv2D(64, kernel_size=(3, 3), activation='relu'))
model.add(tf.keras.layers.MaxPooling2D(pool_size=(2, 2)))
model.add(tf.keras.layers.Dropout(0.25))

model.add(tf.keras.layers.Conv2D(128, kernel_size=(3, 3), activation='relu'))
model.add(tf.keras.layers.MaxPooling2D(pool_size=(2, 2)))
model.add(tf.keras.layers.Conv2D(128, kernel_size=(3, 3), activation='relu'))
model.add(tf.keras.layers.MaxPooling2D(pool_size=(2, 2)))
model.add(tf.keras.layers.Dropout(0.25))

model.add(tf.keras.layers.Flatten())
model.add(tf.keras.layers.Dense(1024, activation='relu'))
model.add(tf.keras.layers.Dropout(0.5))
model.add(tf.keras.layers.Dense(10, activation='softmax'))That's it!
First, we compile the model to get its loss. The loss is a measure of how well the model did during testing. A high loss means that the model did poorly.
Here you use Adam Optimizer, an algorithm extending to a stochastic gradient descent widely used for machine learning, to calculate the loss.
Then we'll call .fit which will train the model for 100 epochs. This means that the full training dataset will be trained 100 times, The batch_size of 32 is the number of samples that going to be propagated through the network.
We then see how well it did after every epoch using model.evaluate. It gives us a score for the model (higher numbers are better) and the loss (lower numbers are better).
Note, this took about 15 minutes running on Colab. If you want to see the results quicker, set the epochs parameter to 1 or 2. Its accuracy won't be as good, however.
# Compile the model
model.compile(loss='categorical_crossentropy',
              optimizer=tf.keras.optimizers.Adam(lr=0.0001, decay=1e-6),
              metrics=['accuracy'])

# Train the model
model.fit(x_train / 255.0, tf.keras.utils.to_categorical(y_train),
          batch_size=batch_size,
          shuffle=True,
          epochs=epochs,
          validation_data=(x_test / 255.0, tf.keras.utils.to_categorical(y_test))
          )

# Evaluate the model
scores = model.evaluate(x_test / 255.0, tf.keras.utils.to_categorical(y_test))

print('Loss: %.3f' % scores[0])
print('Accuracy: %.3f' % scores[1])Train on 50000 samples, validate on 10000 samples
Epoch 1/100
#Omitted for readability
50000/50000 [==============================] - 30s 603us/step - loss: 0.1378 - acc: 0.9518 - val_loss: 0.7136 - val_acc: 0.8116
10000/10000 [==============================] - 2s 151us/step
Loss: 0.714
Accuracy: 0.812Our final accuracy was 81%, and our loss was 0.7, which is pretty good.
To reiterate, accuracy is how well the model was able to classify each image, while loss indicates how bad the model's predictions were.
For more information, check out this definition of loss and accuracy on Google's Machine Learning crash course.
After we have trained the model, we can save it, then convert into the Core ML format.
Released at WWDC 2018, Core ML enables iOS developers to integrate a broad variety of machine learning model types into an iOS app. Here you use this technology with Nexmo In-App Messaging to facilitate your own deep learning for processing images.
First, we need to save the trained model.
model.save('cifar-model.h5')We'll use coremltools, which will convert the model into a format that our Stitch app can use.
Note, the Core ML package is not pre-installed on Colab, so we need to install it using pip
From above, you can see that the package was installed in our notebook.
Next, we'll convert the saved model into Core ML.
Since we have used Keras to train our model, It's really easy to convert to Core ML. However, this varies based on how you built your model. Core ML tools have other functions to use for other machine learning packages including Tensorflow and Scikit Learn. See the coremltools repo for more info.
from keras.models import load_model
import coremltools

model = load_model('cifar-model.h5')
coreml_model = coremltools.converters.keras.convert(model,
	input_names="image",
	image_input_names="image",
	image_scale=1/255.0,
	class_labels=class_names)

coreml_model.save('CIFAR.mlmodel') 0 : conv2d_input, <keras.engine.topology.InputLayer object at 0x7fa7c829fac8>
1 : conv2d, <keras.layers.convolutional.Conv2D object at 0x7fa7c829f358>
2 : conv2d__activation__, <keras.layers.core.Activation object at 0x7fa7c75bf198>
3 : conv2d_1, <keras.layers.convolutional.Conv2D object at 0x7fa7c80e40b8>
4 : conv2d_1__activation__, <keras.layers.core.Activation object at 0x7fa7c75bf438>
5 : max_pooling2d, <keras.layers.pooling.MaxPooling2D object at 0x7fa7c80e4550>
6 : conv2d_2, <keras.layers.convolutional.Conv2D object at 0x7fa7c77434a8>
7 : conv2d_2__activation__, <keras.layers.core.Activation object at 0x7fa7c73f9240>
8 : max_pooling2d_1, <keras.layers.pooling.MaxPooling2D object at 0x7fa7c7743f28>
9 : conv2d_3, <keras.layers.convolutional.Conv2D object at 0x7fa7c87ad1d0>
10 : conv2d_3__activation__, <keras.layers.core.Activation object at 0x7fa7c7262dd8>
11 : max_pooling2d_2, <keras.layers.pooling.MaxPooling2D object at 0x7fa7c7743f60>
12 : flatten, <keras.layers.core.Flatten object at 0x7fa7c76fac50>
13 : dense, <keras.layers.core.Dense object at 0x7fa7c76b42b0>
14 : dense__activation__, <keras.layers.core.Activation object at 0x7fa7c71ff390>
15 : dense_1, <keras.layers.core.Dense object at 0x7fa7c7670358>
16 : dense_1__activation__, <keras.layers.core.Activation object at 0x7fa7c71ff898>The output above shows all the layers inside the model. These directly correlate to how we created the model in this cell.
Take a look at the parameters for the convert function. Here, we'll set the input to be an image for both the input_names and image_input_names parameters. This will help the Core ML model know what type of input it is expecting, which is an image.
Then, we scale the images down in the image_scale parameter to a number between 0 and 1.
Next, we set the class_labels parameter to class_names constant that we created previously.
When we use this model in Xcode, the result will be a String, corresponding to the predicted label of the image.
Now, we can have a look at the Core ML model.
print(coreml_model)input {
name: "image"
type {
imageType {
width: 32
height: 32
colorSpace: RGB
}
}
}
output {
name: "output1"
type {
dictionaryType {
stringKeyType {
}
}
}
}
output {
name: "classLabel"
type {
stringType {
}
}
}
predictedFeatureName: "classLabel"
predictedProbabilitiesName: "output1"You can see that our input is a 32x32 pixel image, and our output is a String, called classLabel
Next, we save the mlmodel locally using a Google Colab package to download the file to our machine.
from google.colab import files
files.download('CIFAR.mlmodel')
Once our model is saved, we can now import it into our app. To do this, just drag the model that was just saved into Xcode.
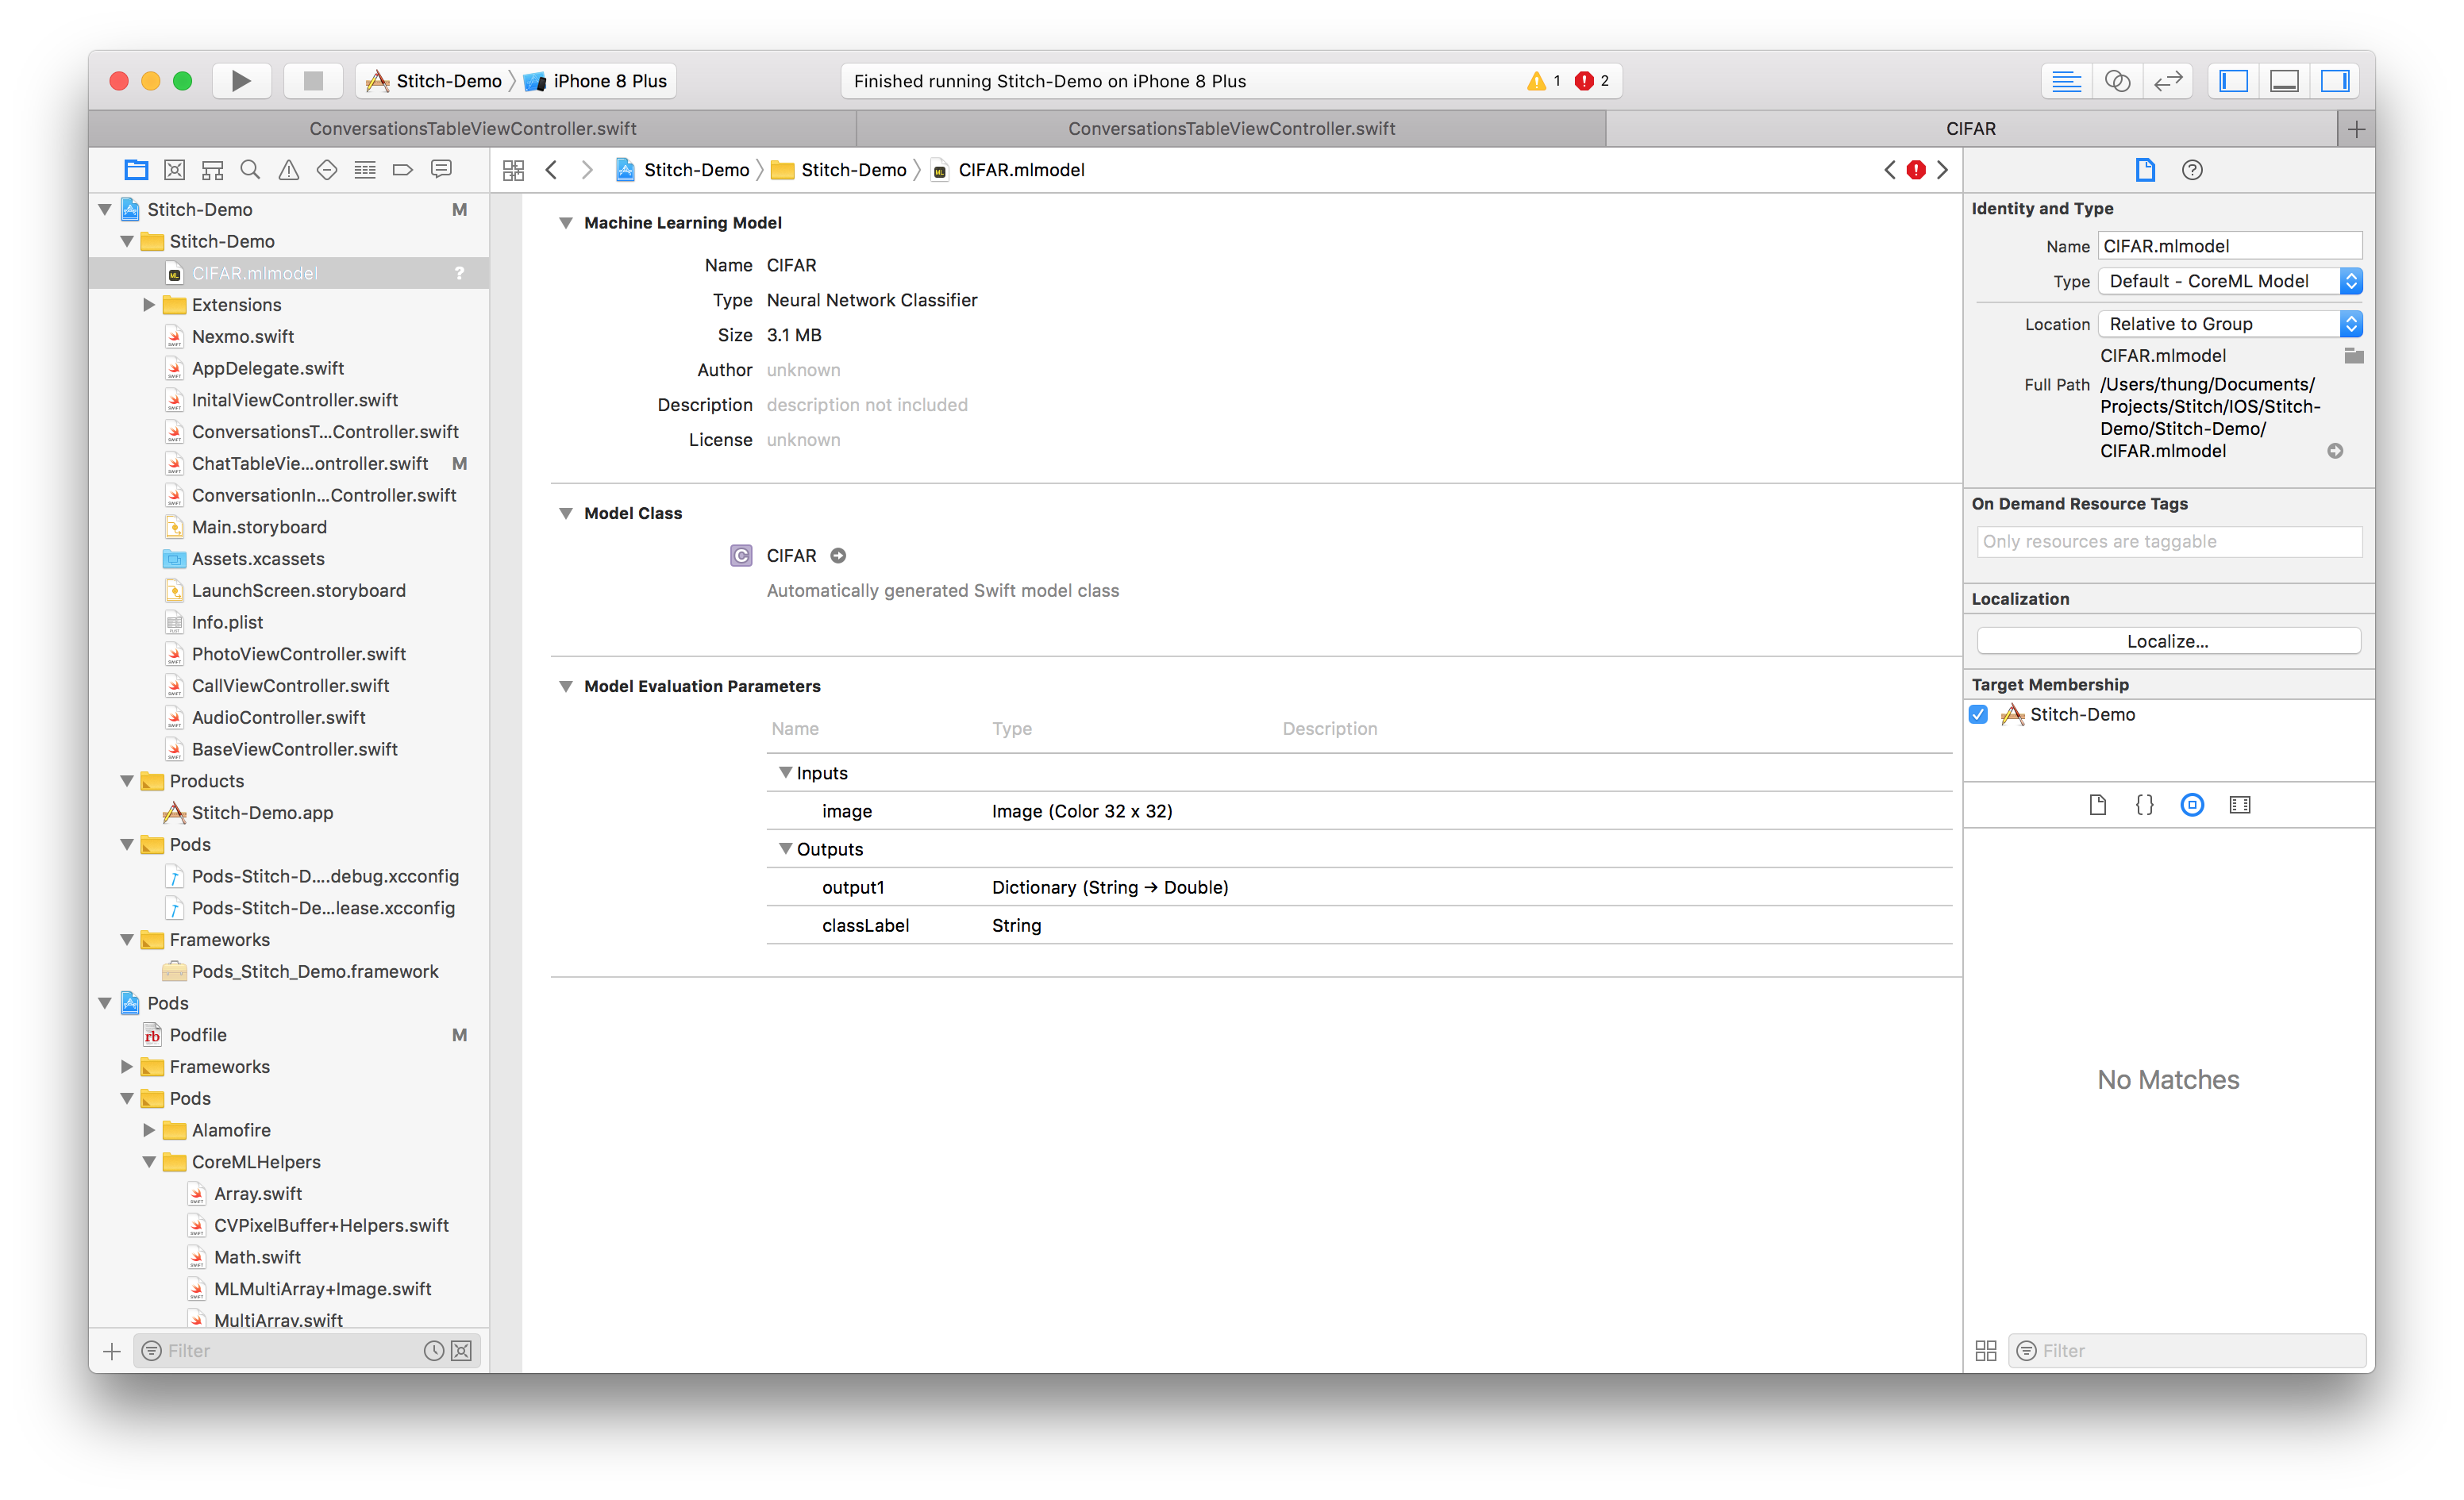 CIFAR xcode
Make sure the model is included in the target by verifying that Target Membership is selected.
Next, we'll write the code in our iOS application that will use this model.
In our Stitch Demo Application, users are able to upload a photo into an existing Conversation.
Nexmo's In-App Messaging enables users, as members of a conversation, to trigger not just TextEvents but ImageEvents by uploading a photo into an existing conversation. For this sample, we'll try to predict the contents of the photo that a user uploaded.
You integrate the functionality for observing ImageEvents for Core ML directly into your ViewController. An example of how this can be done can be found on the source code for this sample.
In our ViewController, we will instantiate the model.
let model = CIFAR()Now, inside of the cellForRowAtPath method, we'll check if the event is an ImageEvent, and if so, then display the photo from the ImageEvent. Then, we take the image, convert it to a PixelBuffer, at a size of 32x32 pixels, then feed it into the model.
The reason why we have to resample the image is because the model is trained on images of 32x32 pixels, so if we don't resize the images, the model won't be able to give a prediction (We'll see an error in Xcode saying that the image size is incorrect).
func tableView(_ tableView: UITableView, cellForRowAt indexPath: IndexPath) -> UITableViewCell {
        let cell = tableView.dequeueReusableCell(withIdentifier: "cell", for: indexPath)

        let event = conversation?.events[indexPath.row]
        switch event {
        case is ImageEvent:
            //get the image from the ImageEvent
            let imageEvent = (event as! ImageEvent)
            guard let imagePath = imageEvent.path(of: IPS.ImageType.thumbnail), let image = UIImage(contentsOfFile: imagePath) else {
                break
            }
            cell.imageView?.image = image

            //convert the image to a pixelBuffer
            //using https://github.com/hollance/CoreMLHelpers.git
            if let pixelBuffer = image.pixelBuffer(width: 32, height: 32) {
                let input = CIFARInput(image: pixelBuffer)

                //perform the prediction
                if let output = try? model.prediction(input: input)  {
                    cell.textLabel?.text = (imageEvent.from?.name)! + " uploaded a photo of a \(output.classLabel)"
                }
                else {
                    cell.textLabel?.text = (imageEvent.from?.name)! + " uploaded a photo"
                }
            }
            break;

        default:
            cell.textLabel?.text = ""
        }

        return cell;
}The model will then return a classLabel. This will be the name of the image that the model predicted, which could be one of the following labels: "airplane", "automobile", "bird", "cat", " deer", "dog", "frog", "horse", "ship" or "truck"
After looking at our predictions, we can tell that the model will only be able to recognize only 10 labels. The full notebook is available on GitHub.
This is good for a demo, but not for a production application. In a future post, we'll look at building an image recognition model with more data. We'll look into the popular ImageNet database, which contains 14,197,122 labeled images.
It's a 150gb download, so we'll look at how to download, train, and integrate it into our Stitch demo app.