Share:
Nahrin was a Developer Educator for Vonage. She is passionate about building inclusive communities, addressing real-world needs with pragmatic software solutions, and creating technical content that is accessible to all skill levels.
How to Send SMS Confirmations for New Stripe Charges with Zapier
Although Stripe can make collecting payments feel seamless, there are some extra things you can do to fully streamline the purchasing process and enhance communication with your customers. If your goal is to improve customer experience and brand perception, automating paperless receipts is worth considering. While Stripe can send customers a standard email receipt for each successful payment, it does not currently allow for SMS confirmations. Providing your customers with the option to choose how they want to be communicated with makes a profound impact on the end-user and demonstrates how much your company values their experience. And if there's a way that implementing that seamless experience can save money in developer resources, you’re looking at a win-win.
In this tutorial, we will learn how to send SMS payment confirmations (including a link to the receipt) for each new Stripe charge with Zapier, the workflow automation platform. Follow along to find out how you can improve your purchasing process in a matter of minutes—no code required!
To get started, you will need the following:
A Zapier account. The free Zapier plan allows for workflows containing two steps, which is all we’ll need for this tutorial.
An activated Stripe account. If you are new to Stripe and activation is pending, you can still follow this tutorial and get the workflow configured.
Log in to your Zapier account and click the Make a Zap button on the sidebar.
Note: Zapier workflows are called Zaps, so you’ll see that term used often.
Then, name your Zap by replacing the placeholder text in the header.
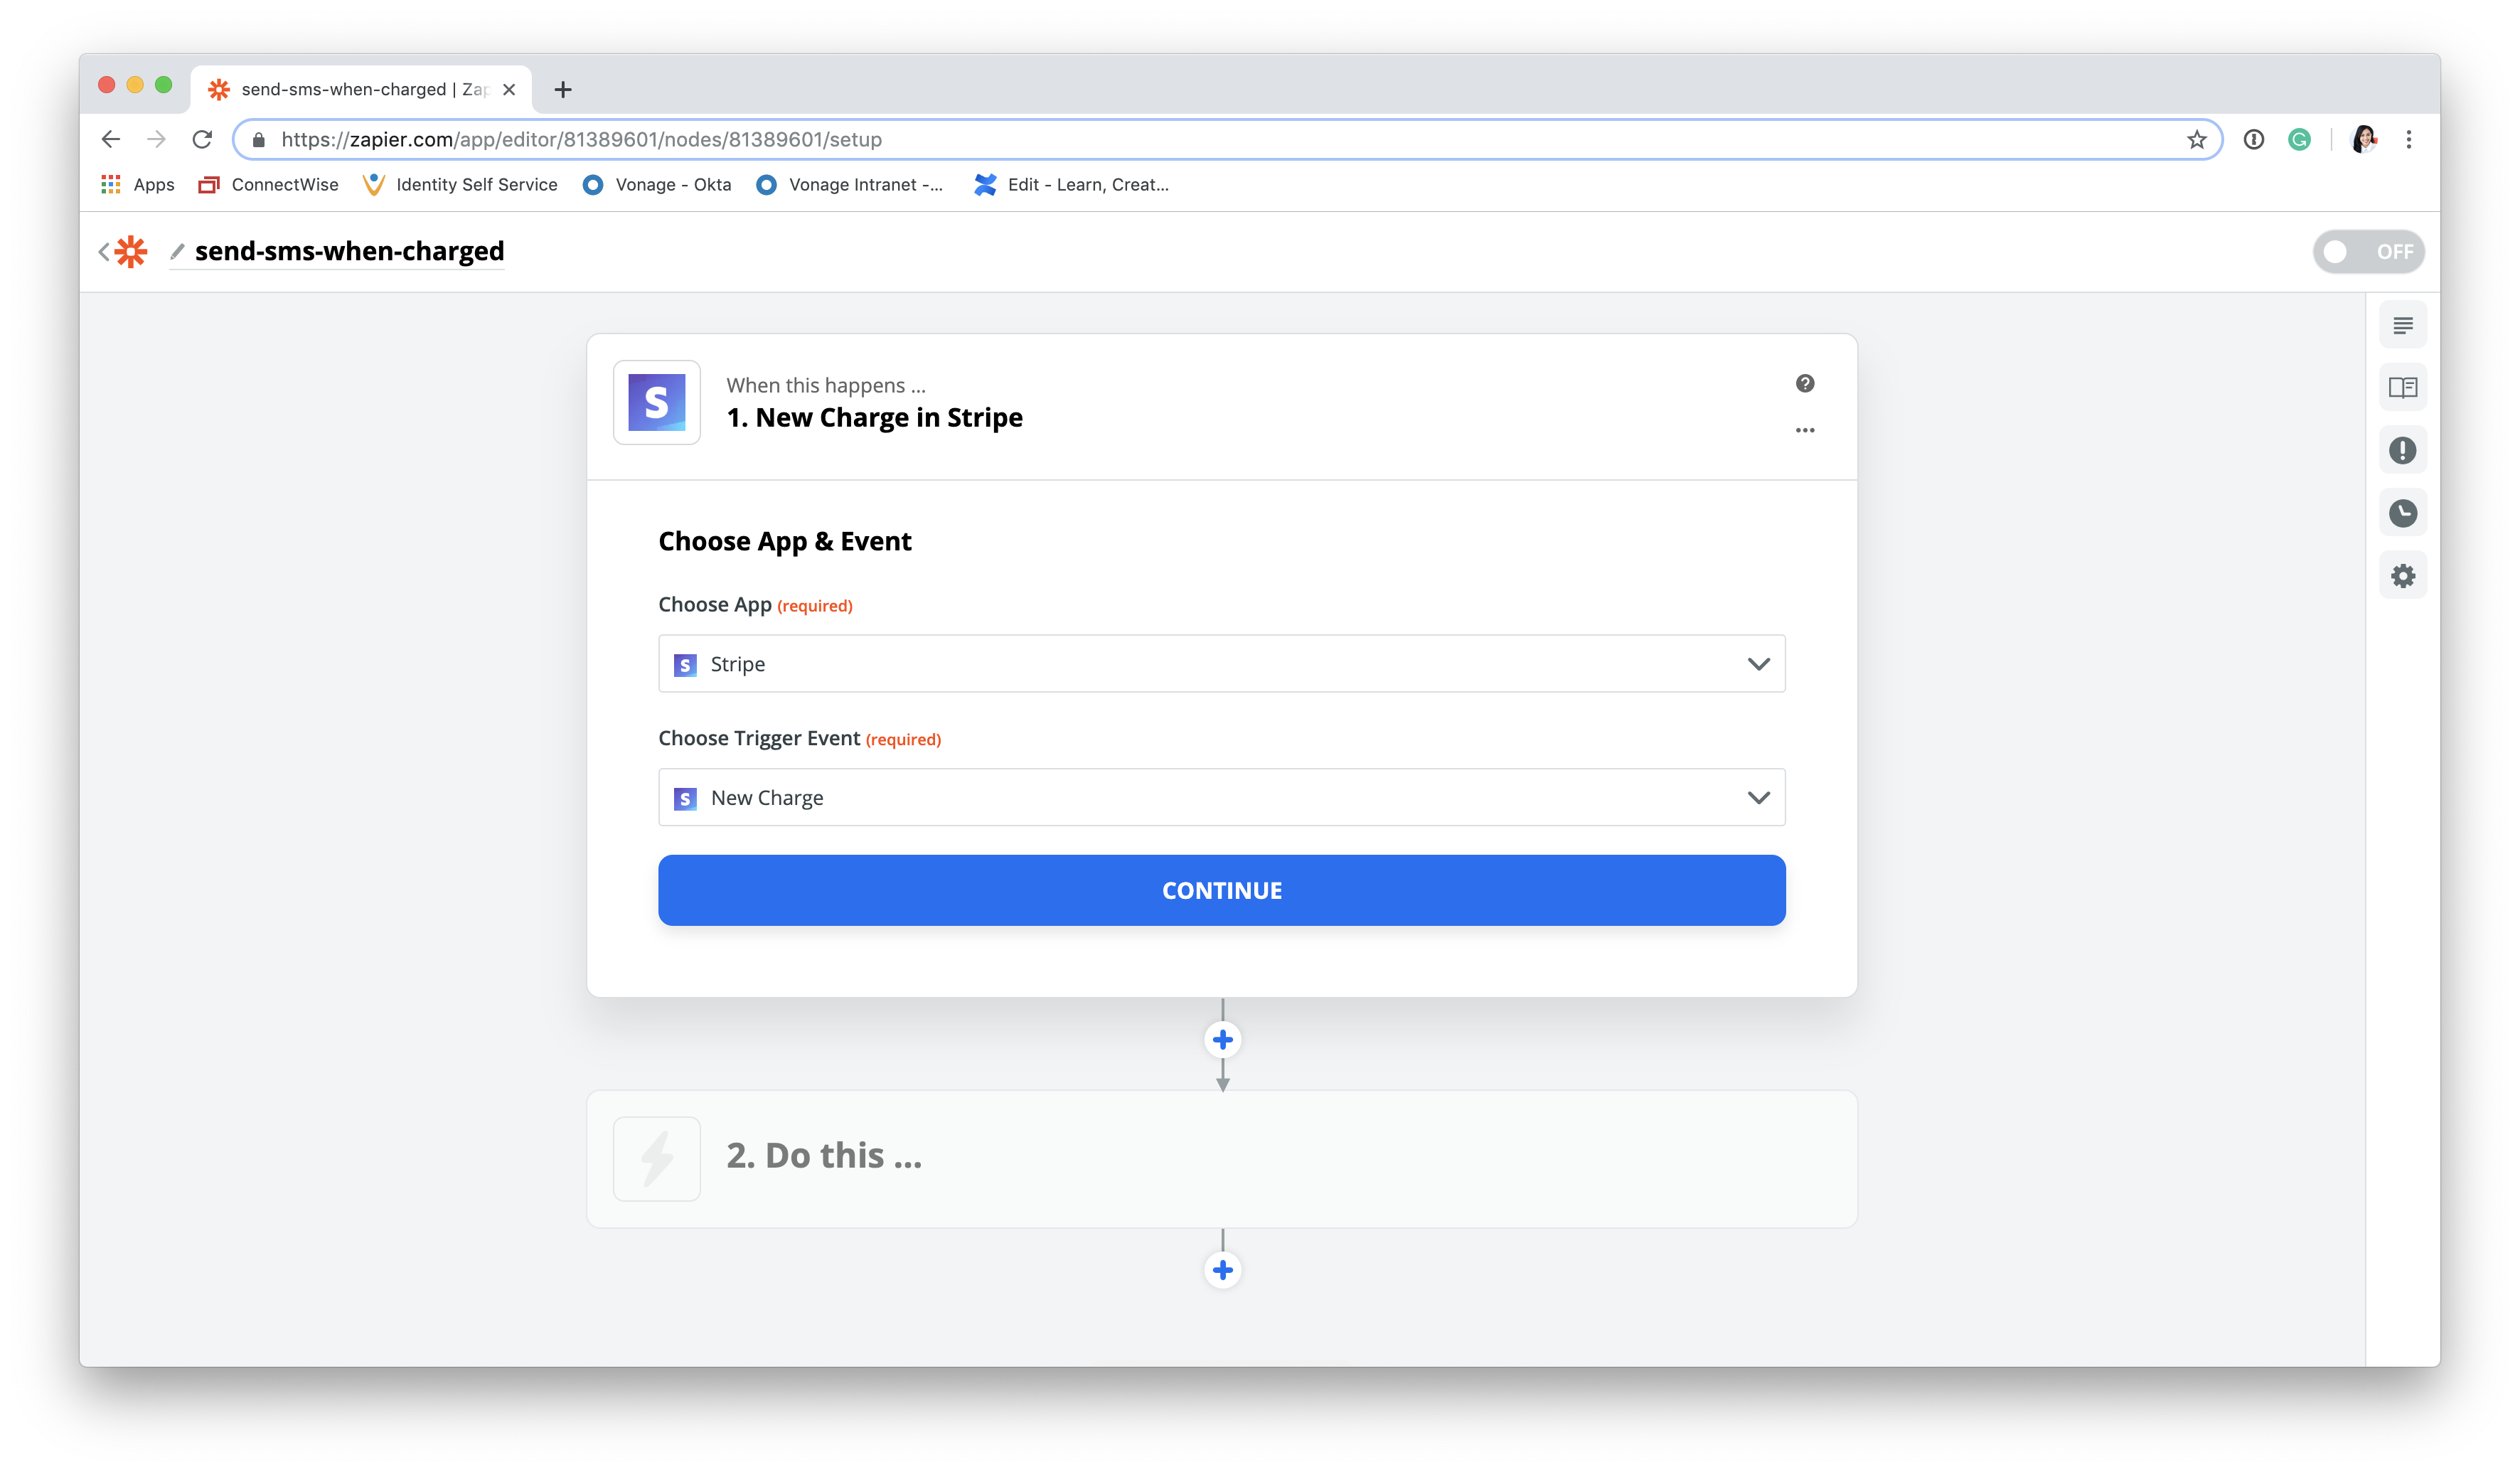
Under Choose App & Event, search for and select Stripe. Next, open up the list of options under Choose Trigger Event and select New Charge. This ensures our action (the SMS) will take place when a charge has been incurred.
Now, connect to your Stripe account. To do so, you will need to enter the API key from your Stripe dashboard when prompted.

As seen below, two sets of API keys are provided by Stripe—a test key and a live key. The live API key must be used for Zapier to pull in real data. However, as this key is only released after your Stripe account has gone through the activation process, use the test API key as a placeholder if needed. This will allow you to continue configuring the Zap for now.
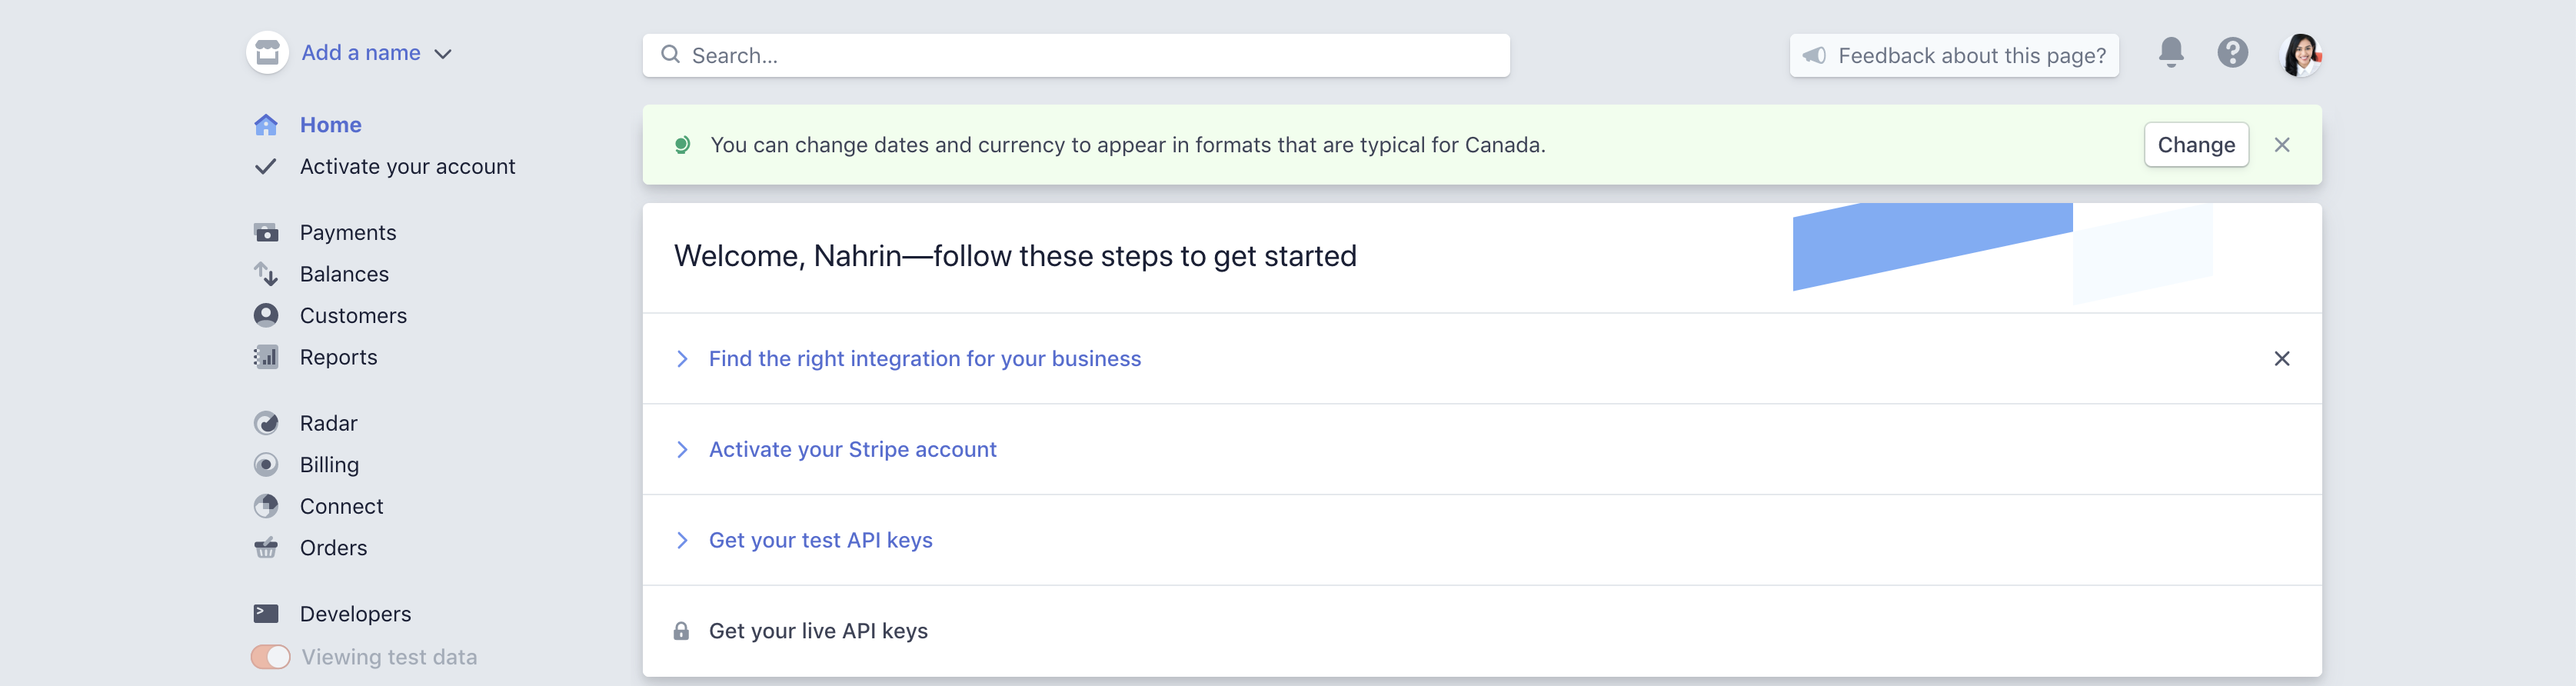
Note: Don’t forget to replace the test key once your account has been activated.
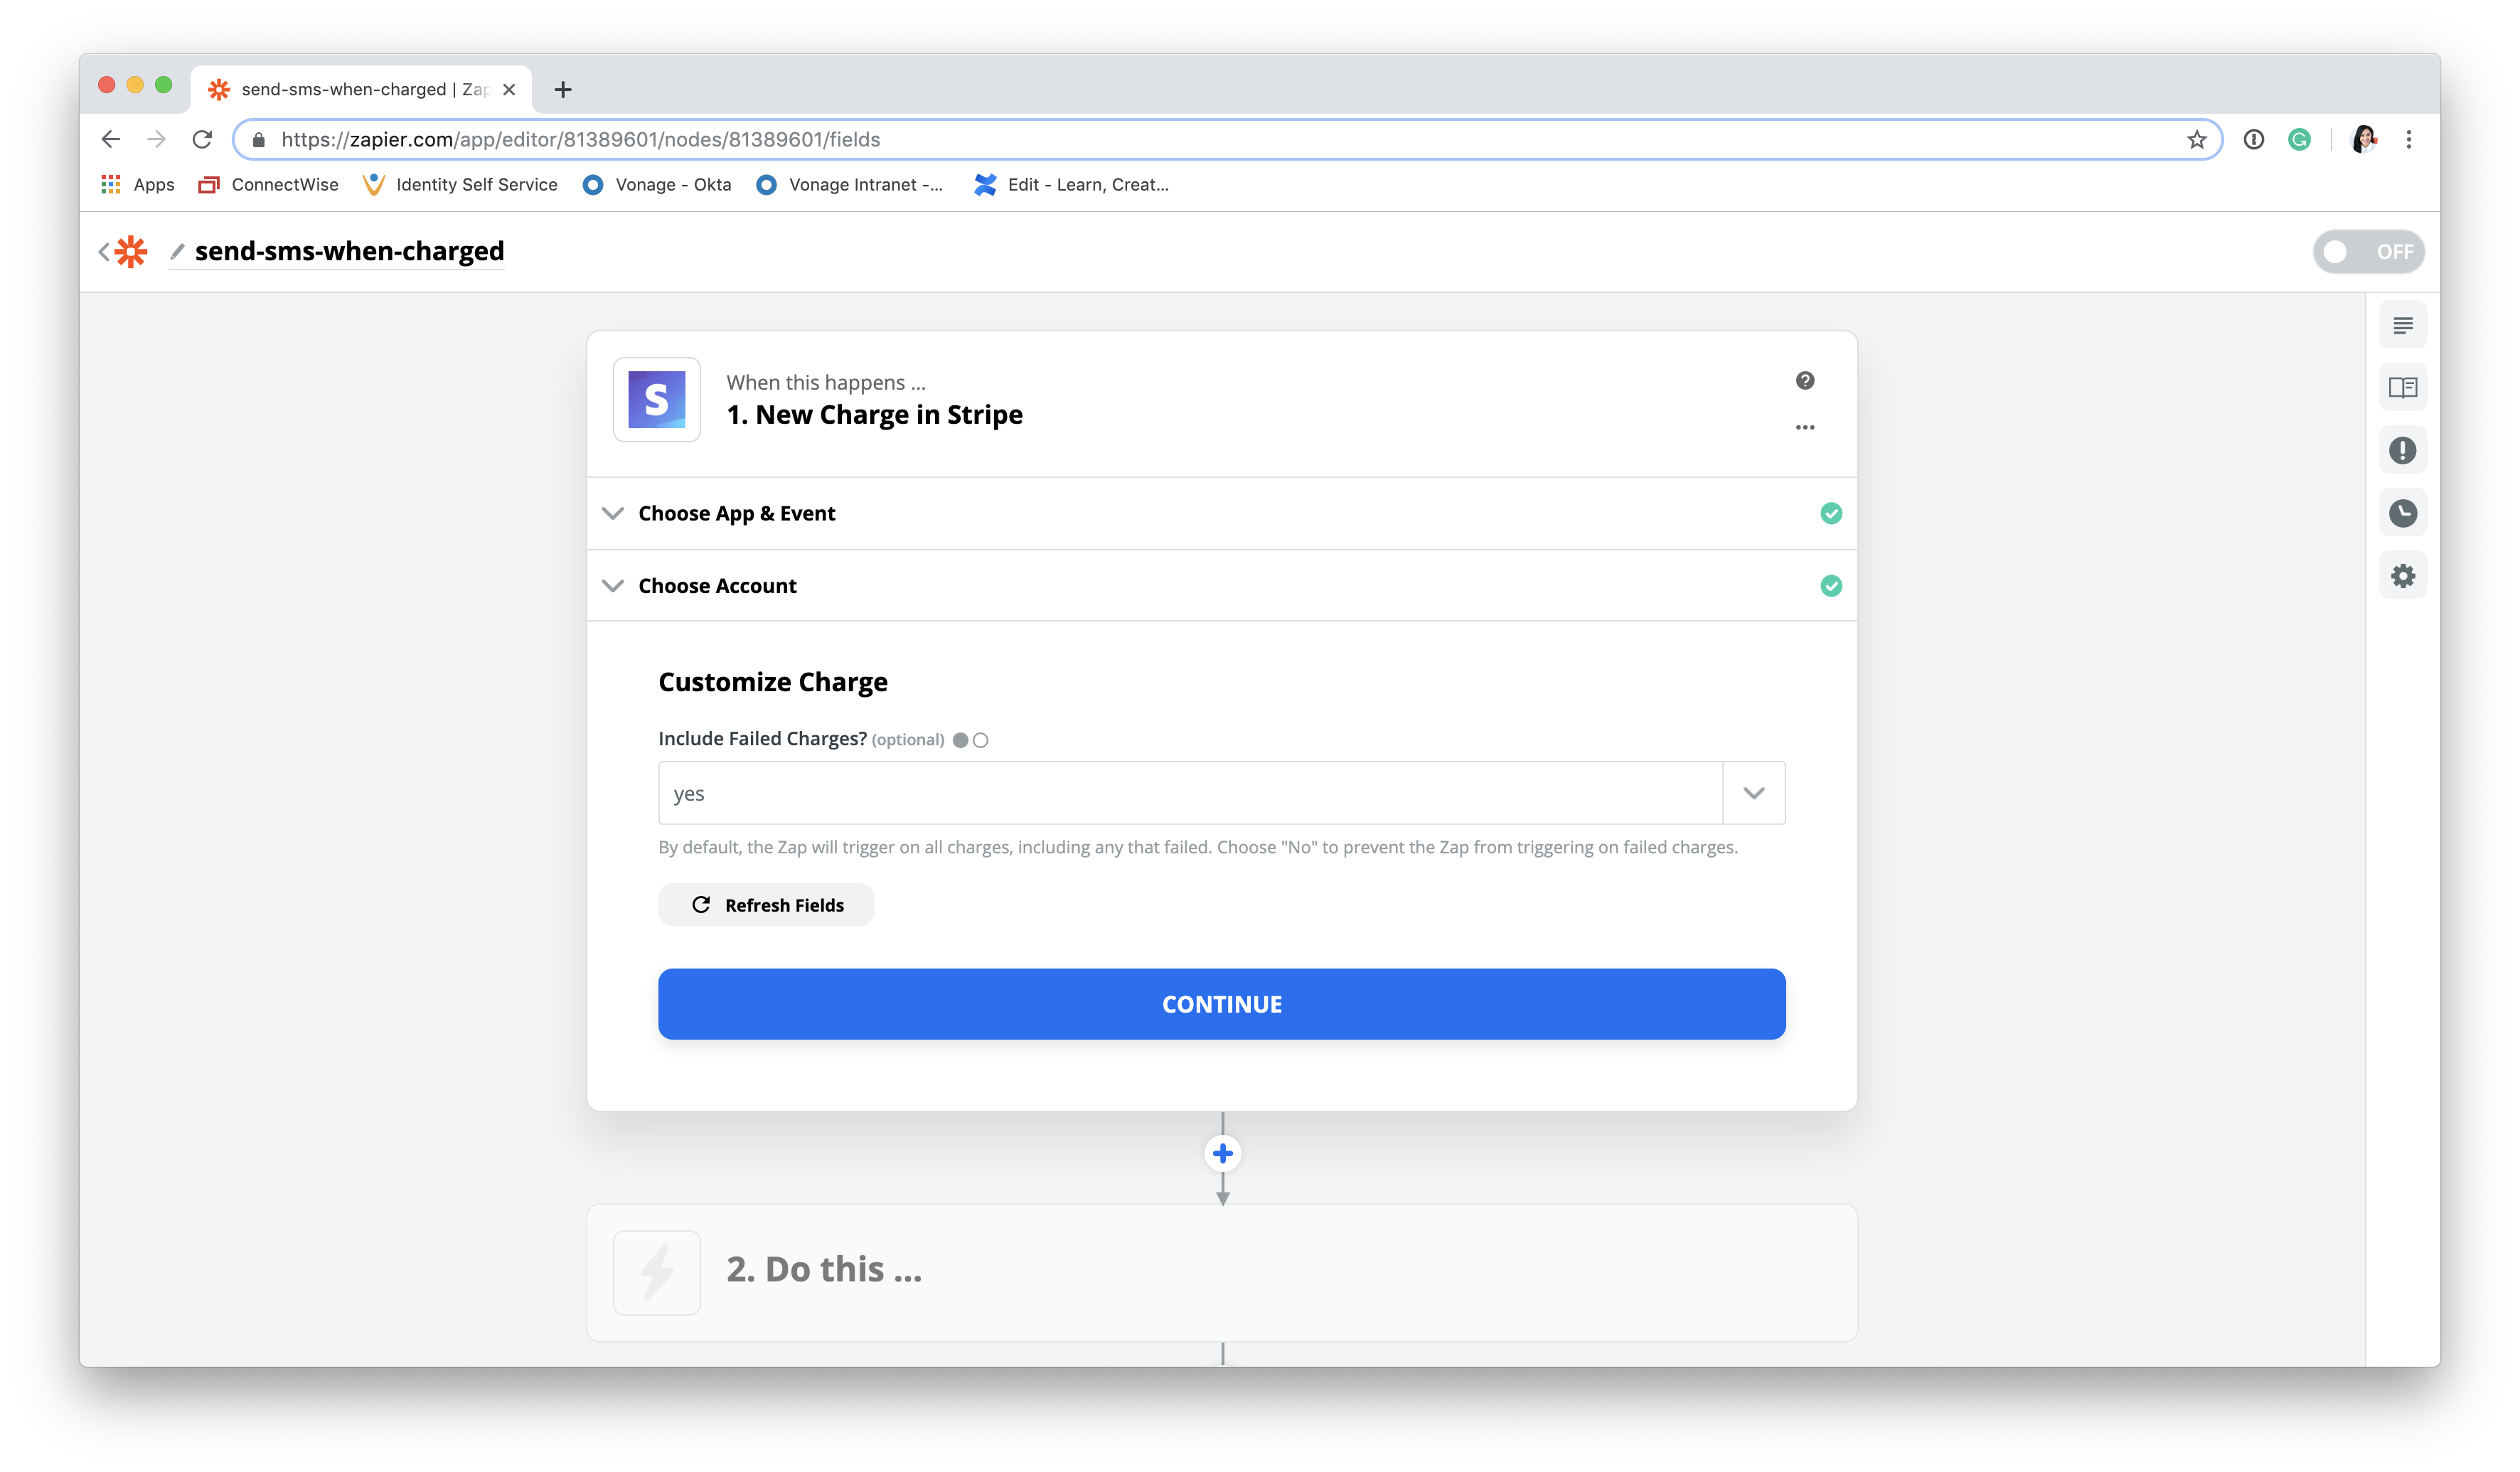
You will then be prompted to choose the type of charges that will act as an SMS trigger. As seen below, the default setting triggers an SMS for both new and failed charges. Be sure to update this setting according to your needs.
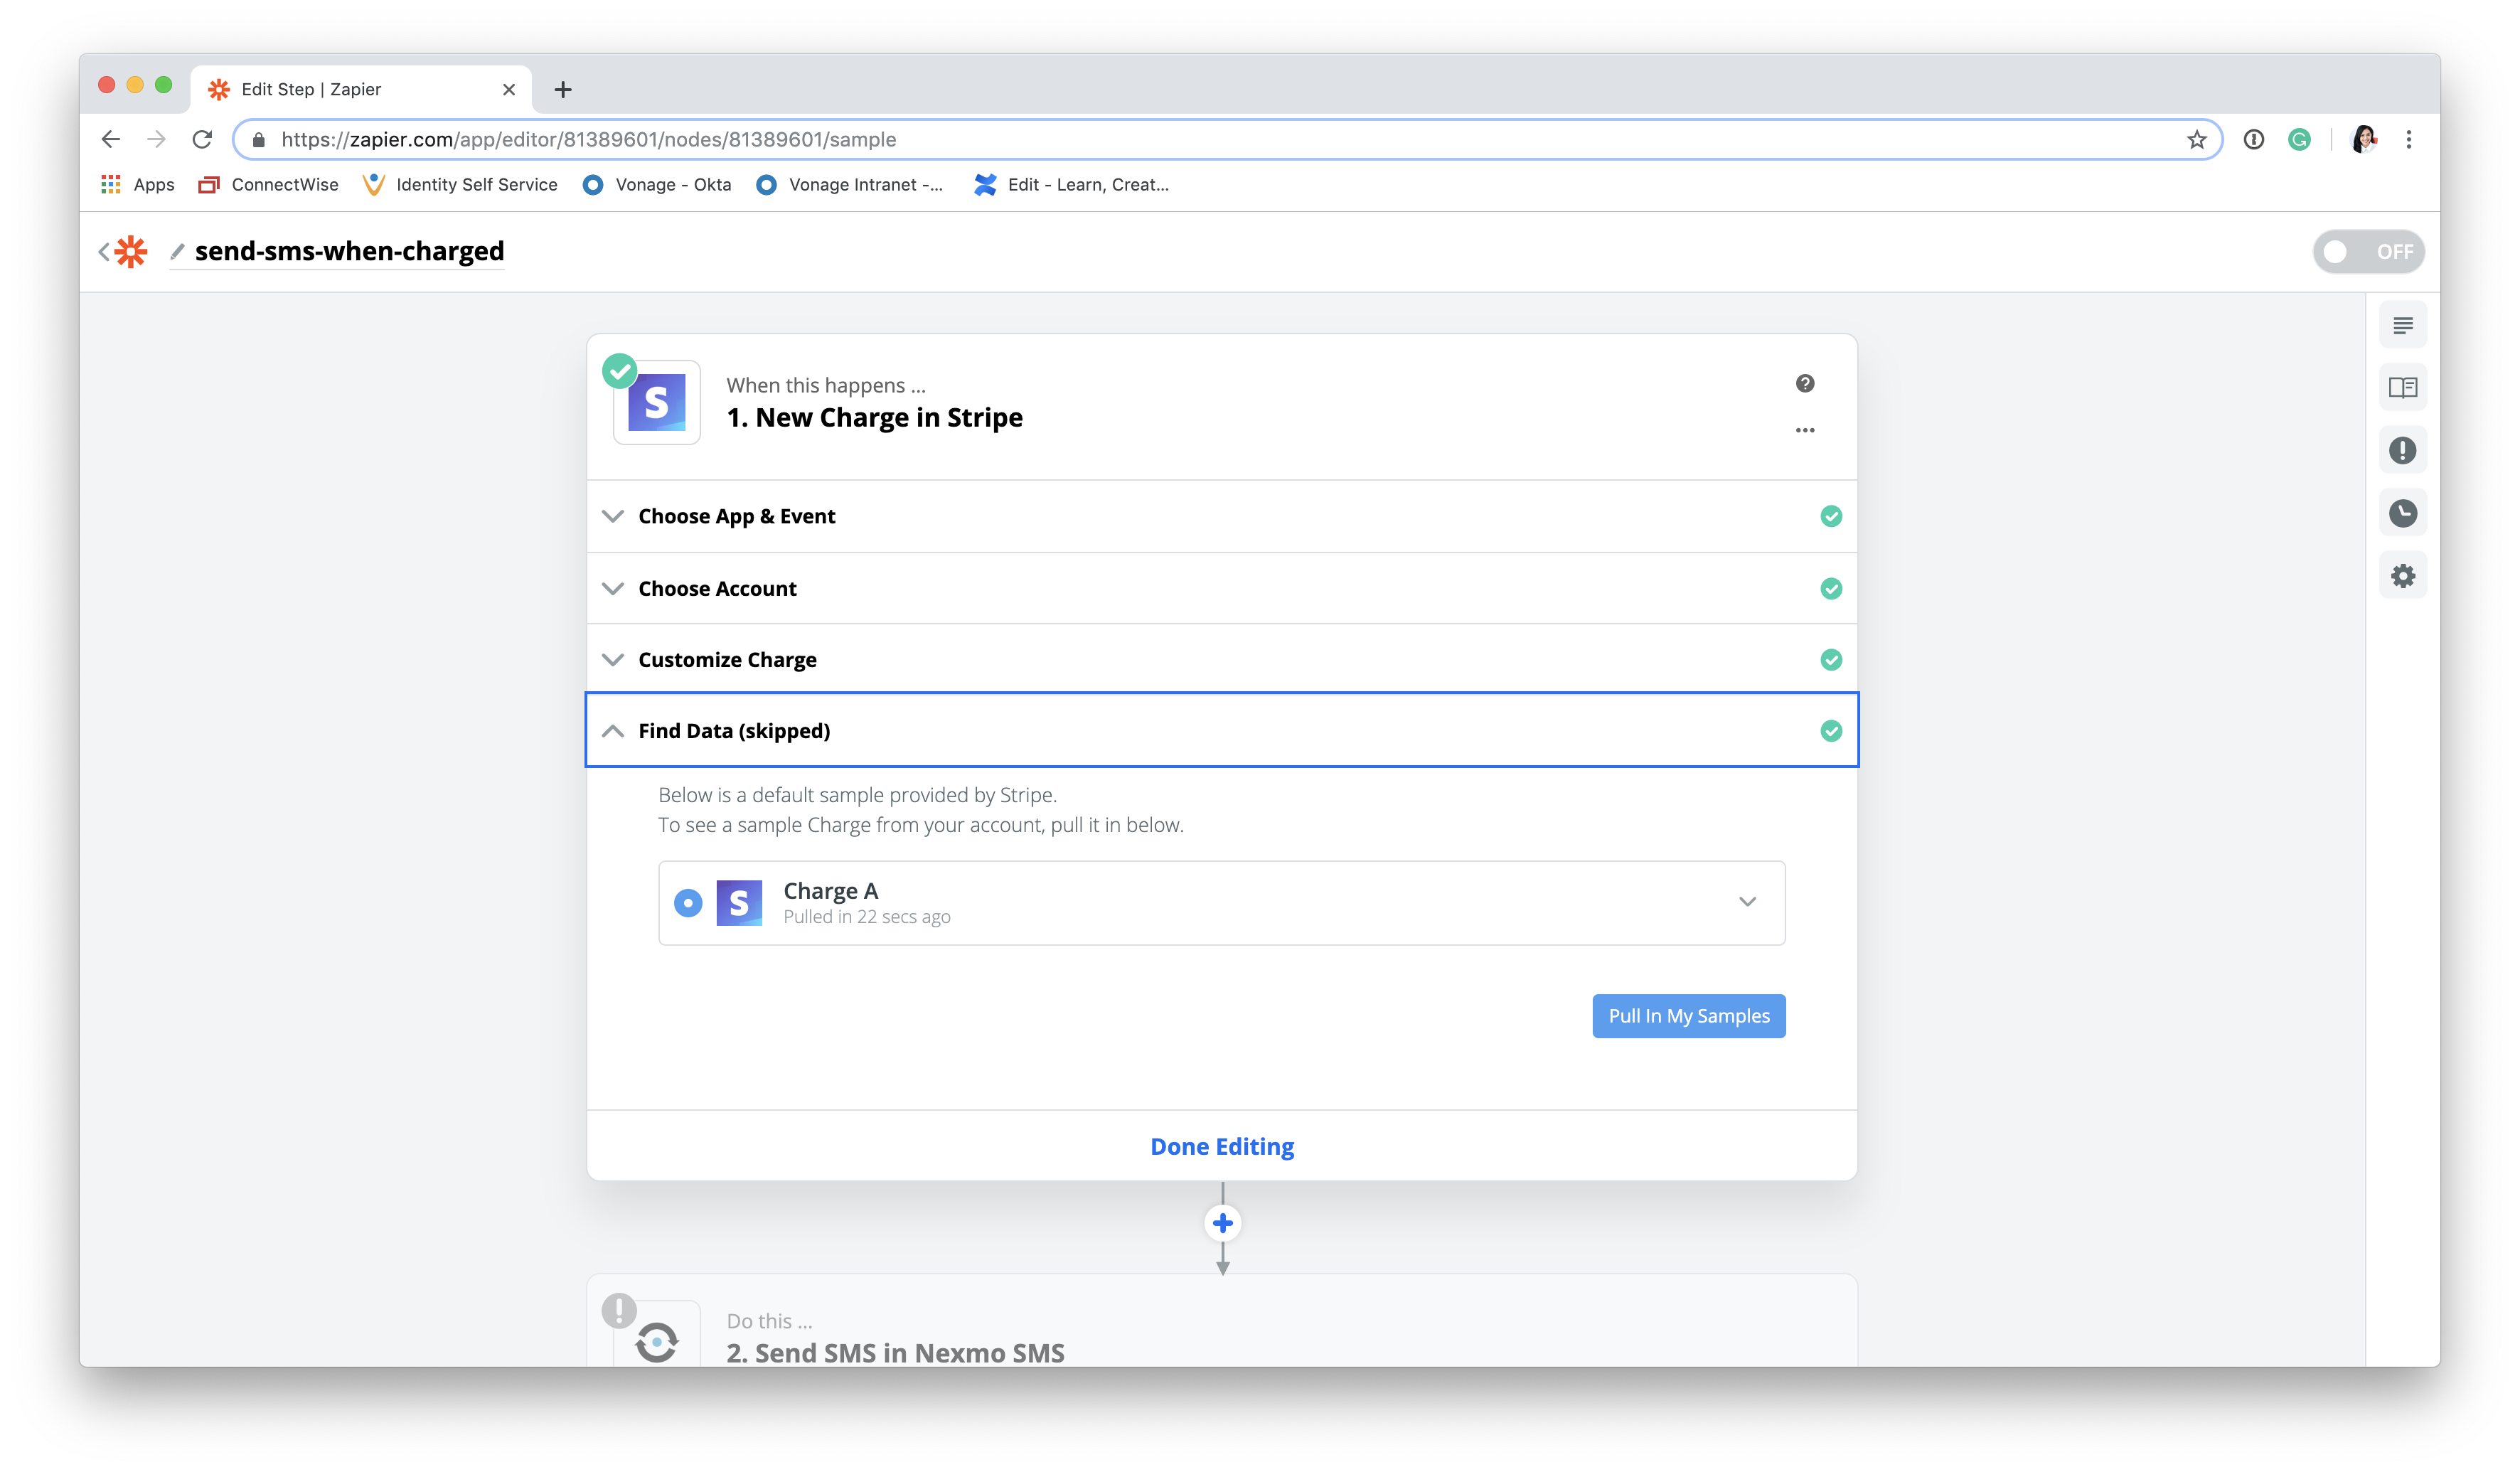
Next, Zapier will attempt to find sample data from Stripe to help set up and test the Zap. If a live API key was used to connect Stripe, you should see real data samples. If not, Zapier will create sample charges to use for testing purposes.
Note: Zapier can take up to a few minutes to create sample charges.
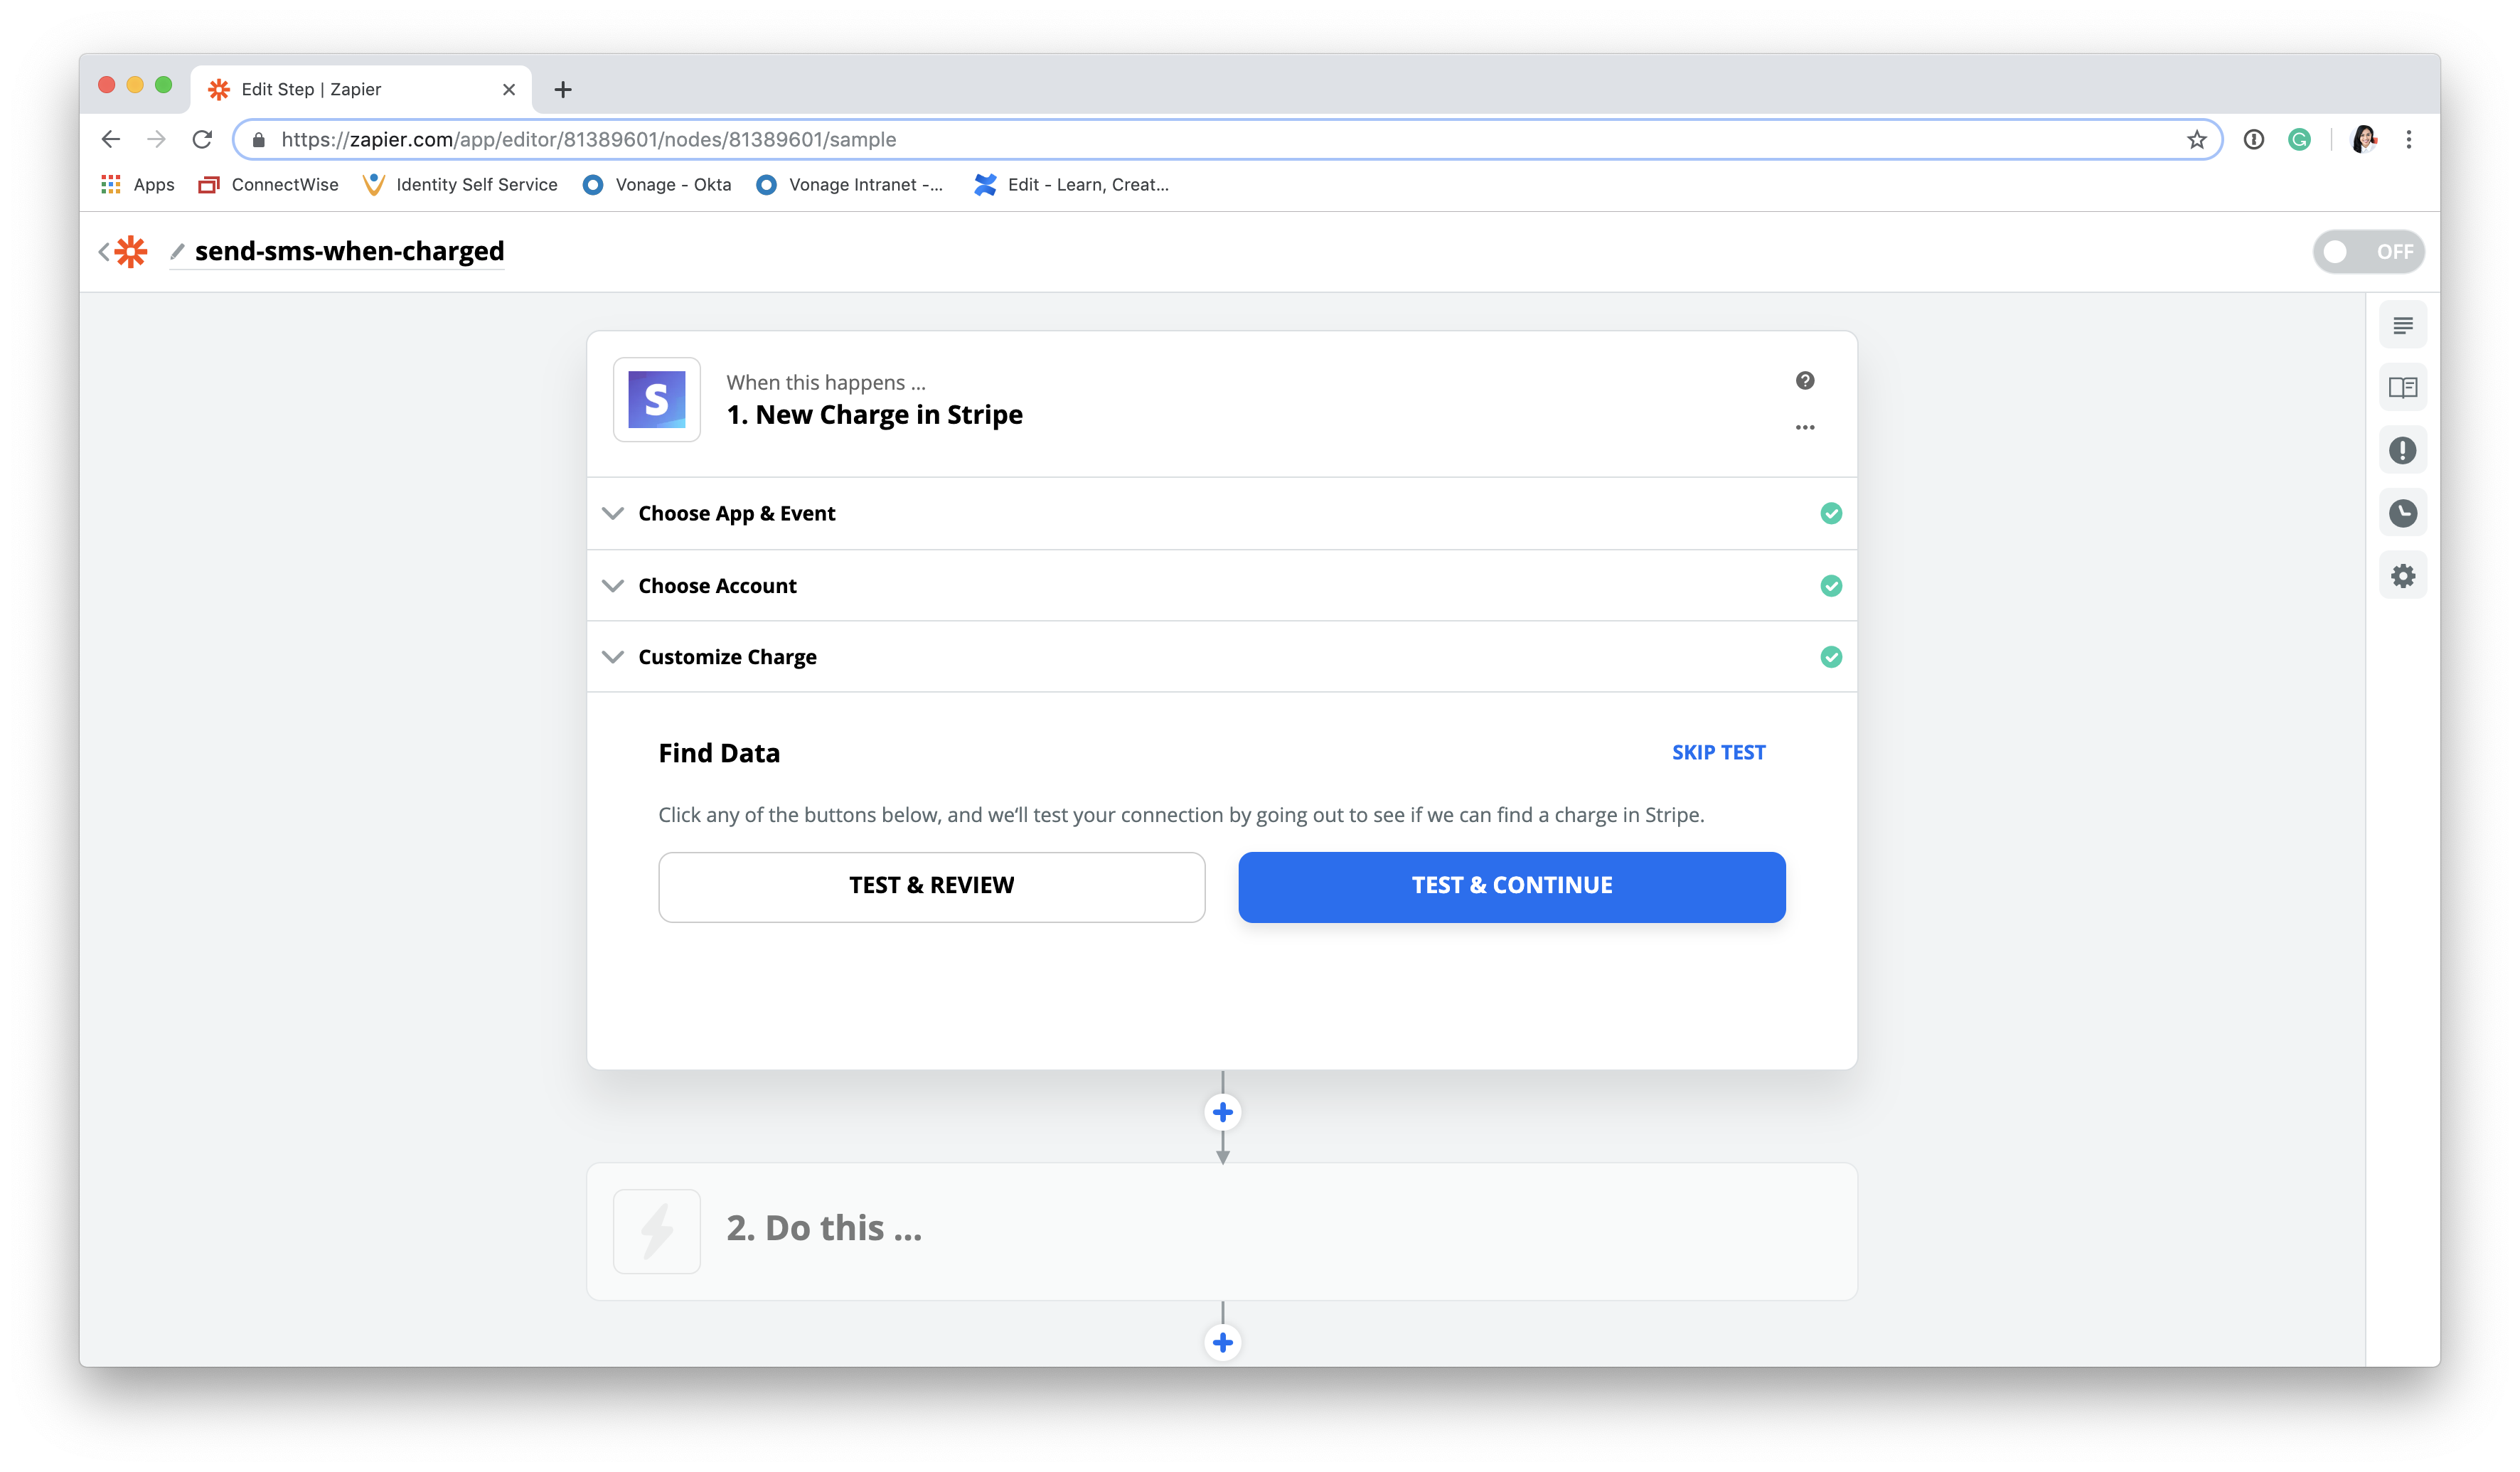
Select a charge and click Done Editing to proceed to the next step.
With Stripe configured, we are now ready to add the SMS action to the workflow! To start, search for Nexmo SMS in Choose App & Event.
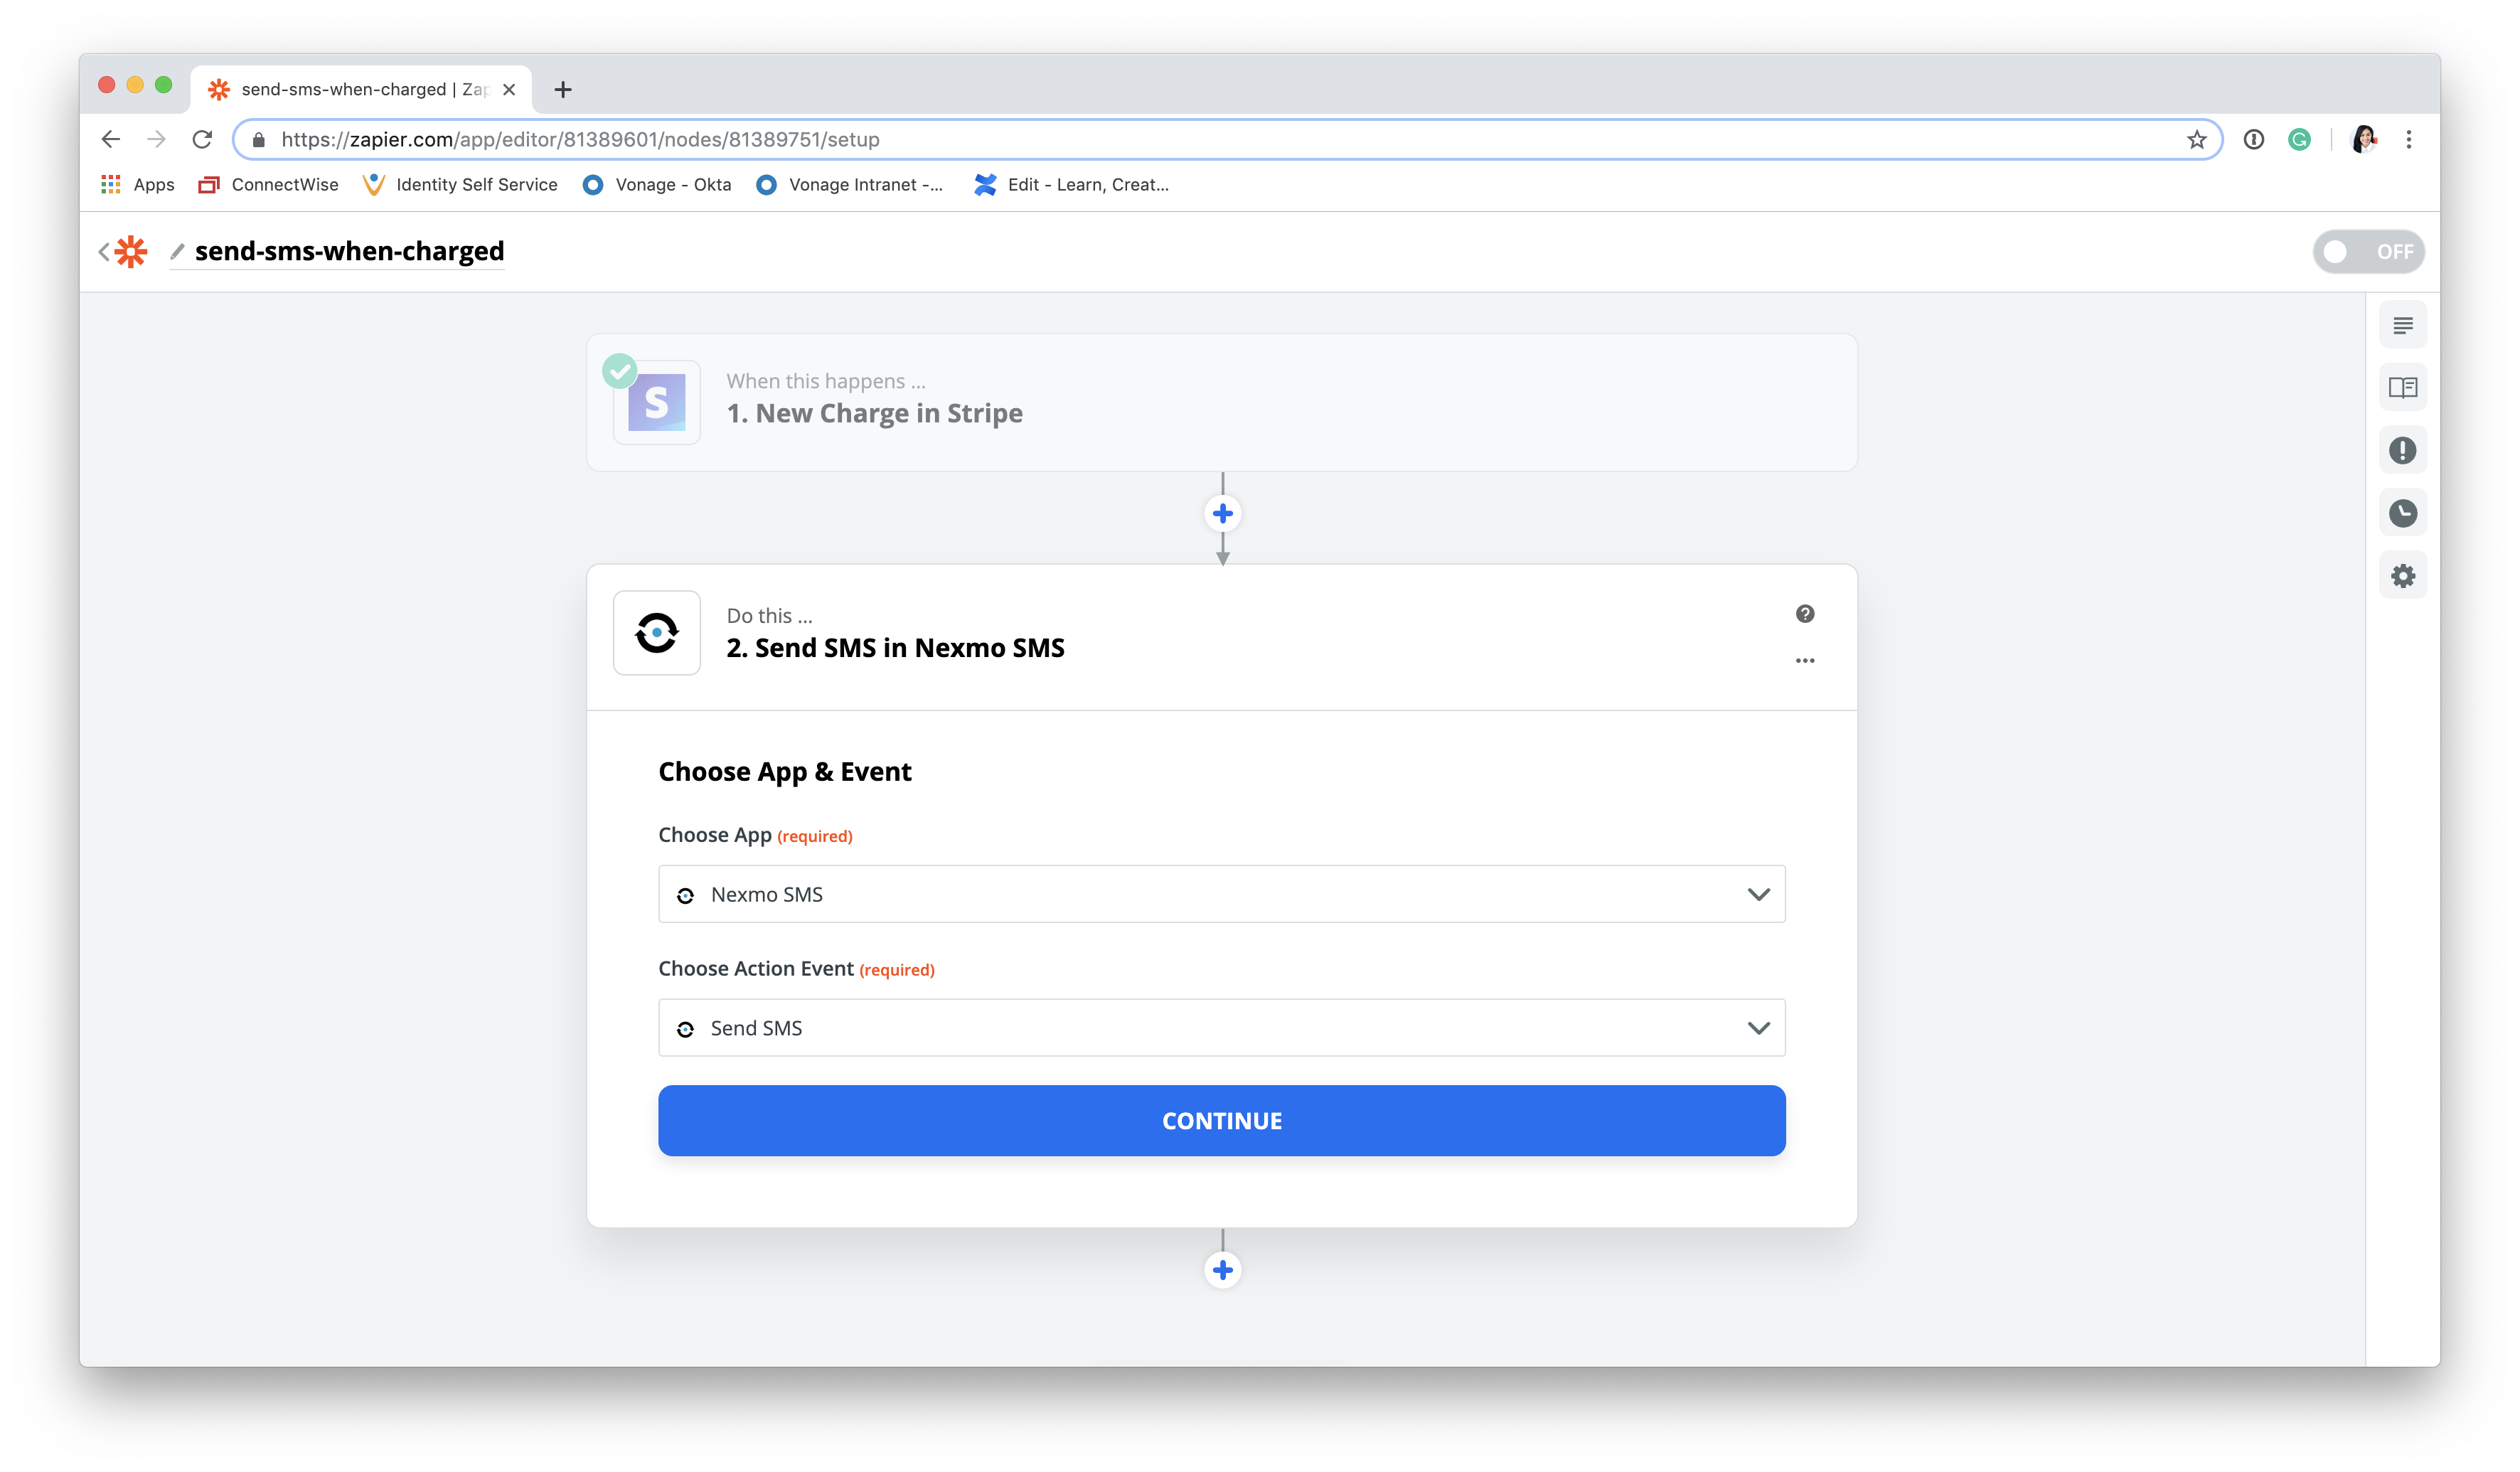
Proceed with the default Send SMS action event.
Now, connect your Nexmo account to Zapier. If you’ve already used Nexmo in another Zap, your account details will prepopulate the dropdown.
If this is your first time creating a Nexmo workflow, enter the API key and API secret found at the top of your Nexmo dashboard when prompted.
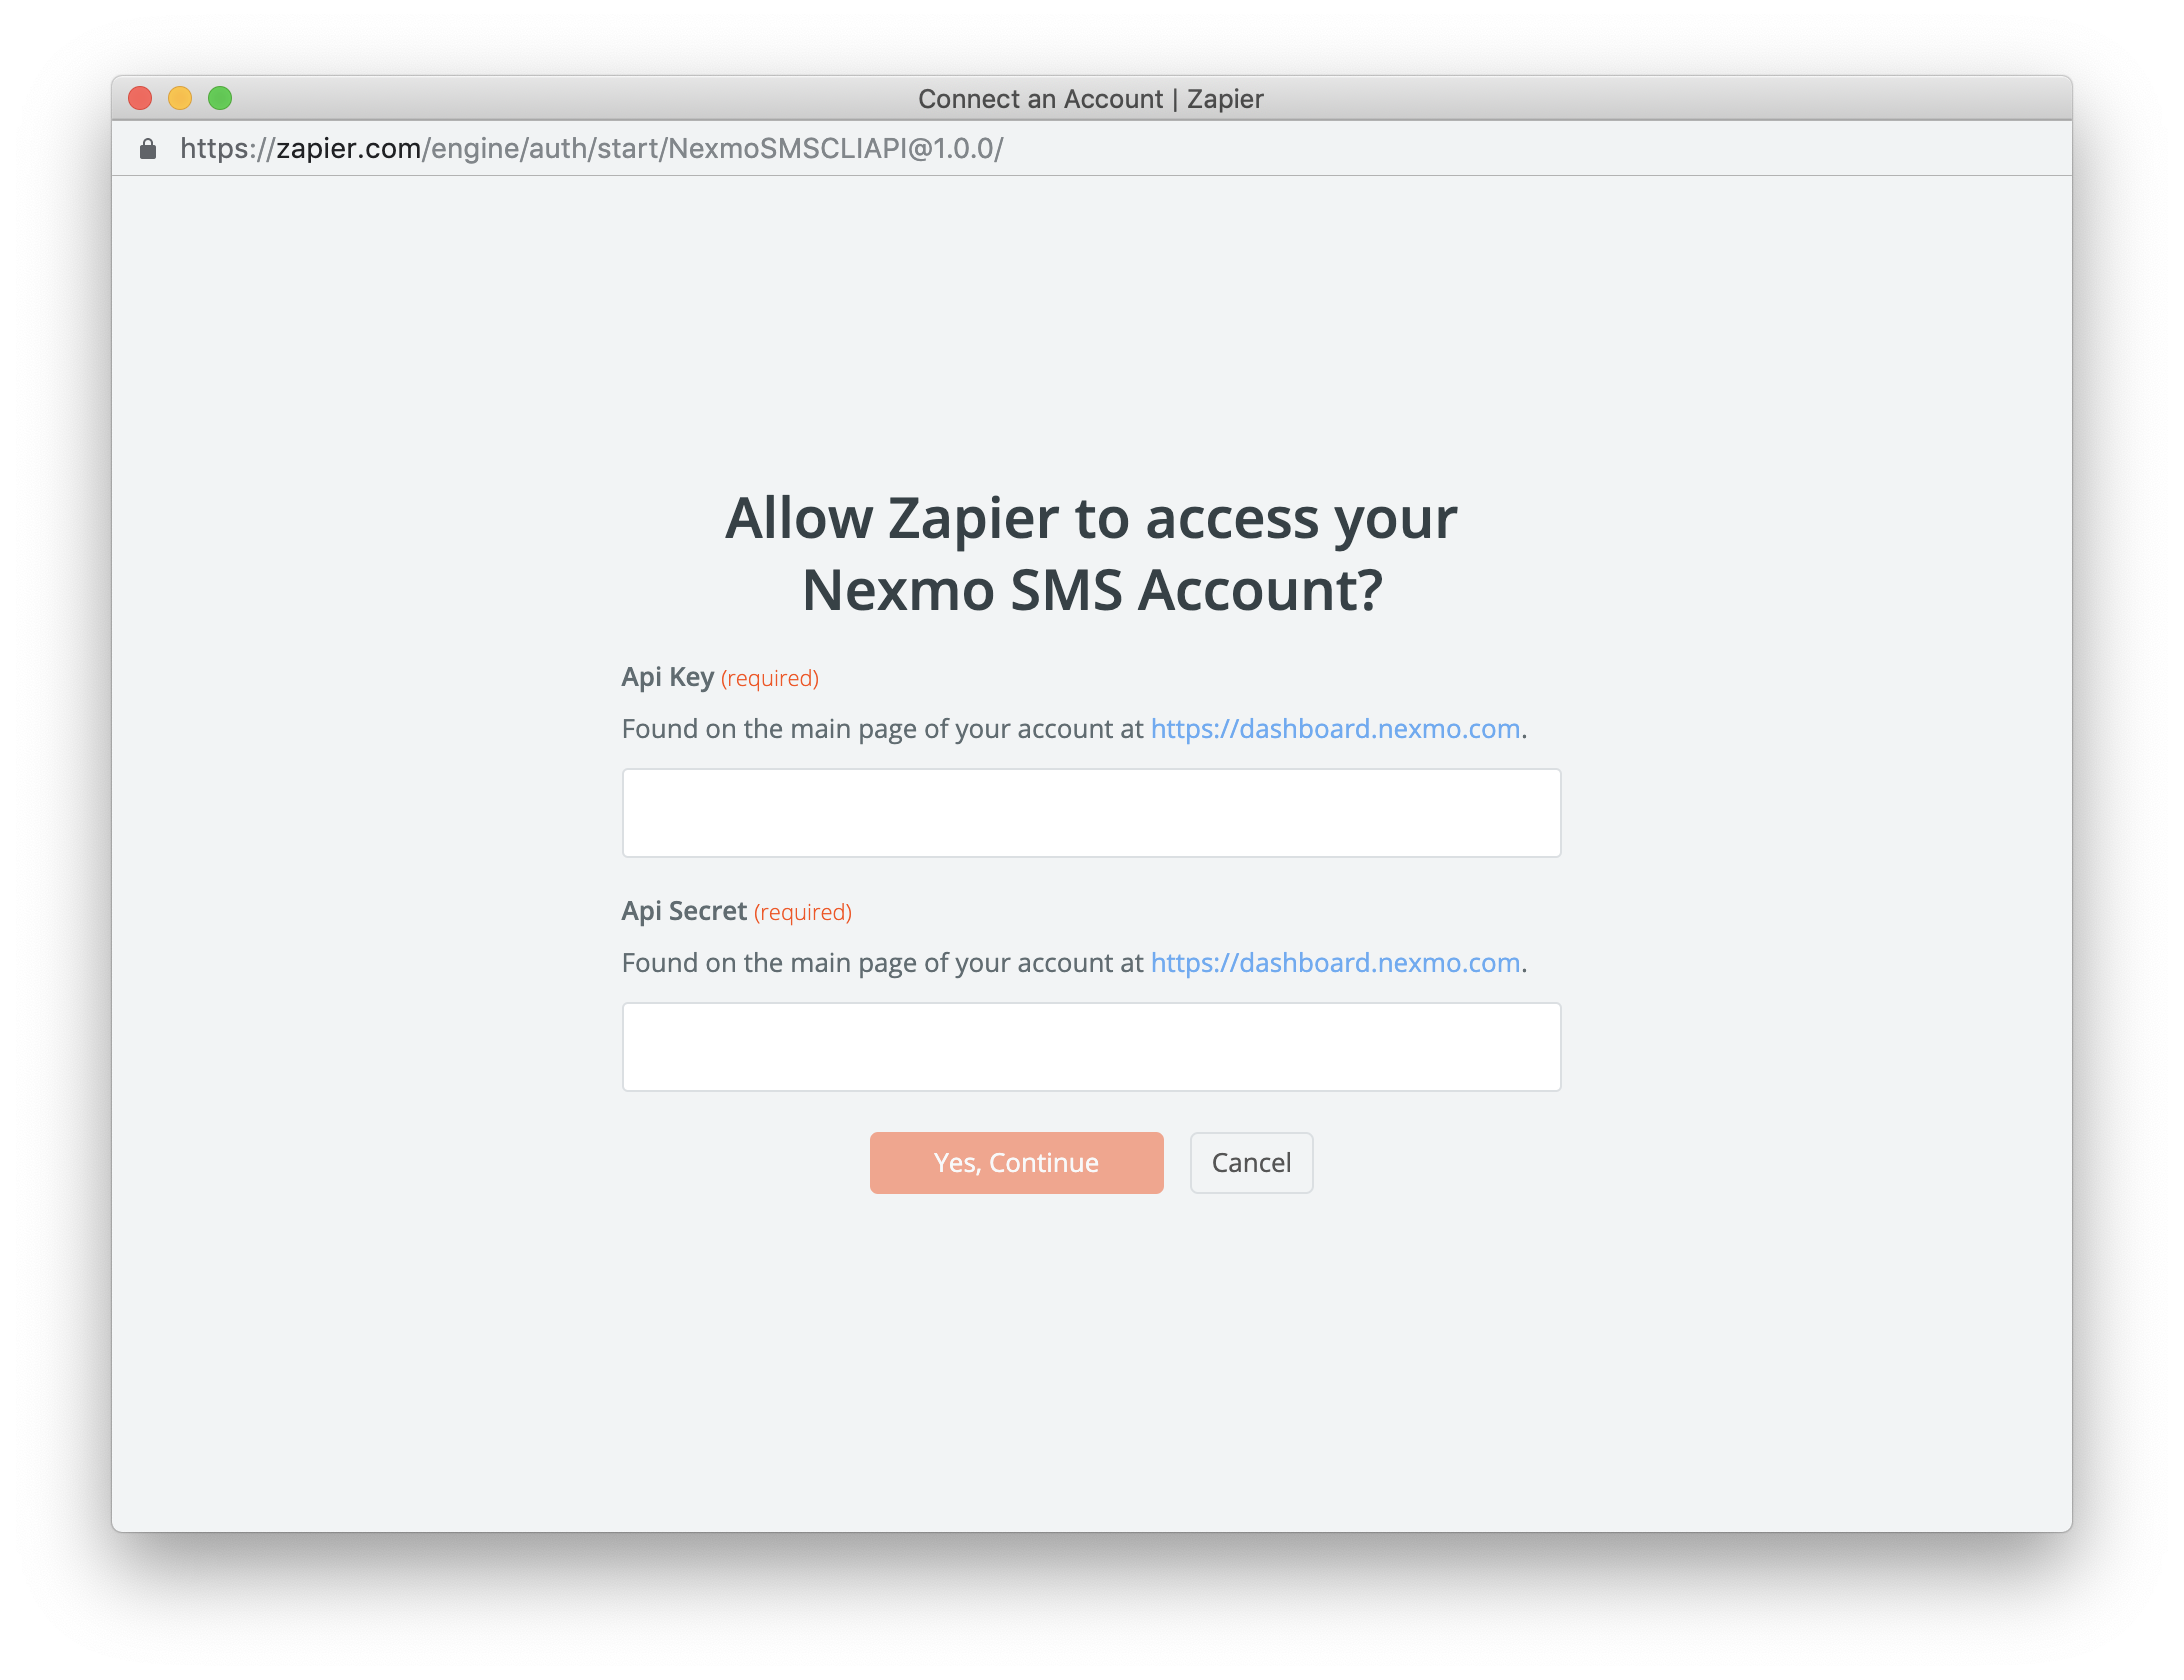
Once added, your account will appear as an option to select on the dropdown.
With that, we are ready to customize the SMS!
As your Nexmo account is connected, Zapier will pull in any SMS enabled numbers on your account and use them to prepopulate the From dropdown with options to select. If you haven't purchased a number yet, use the complimentary credit to do so on the Nexmo dashboard now.
Next, add the phone number you would like the SMS reminders to be sent to, including the area code. Then, construct the SMS template with as many details as you please. Zapier will pull in all sorts of data from Stripe that may be included in the message. Integrate the data directly within the Text field like so:
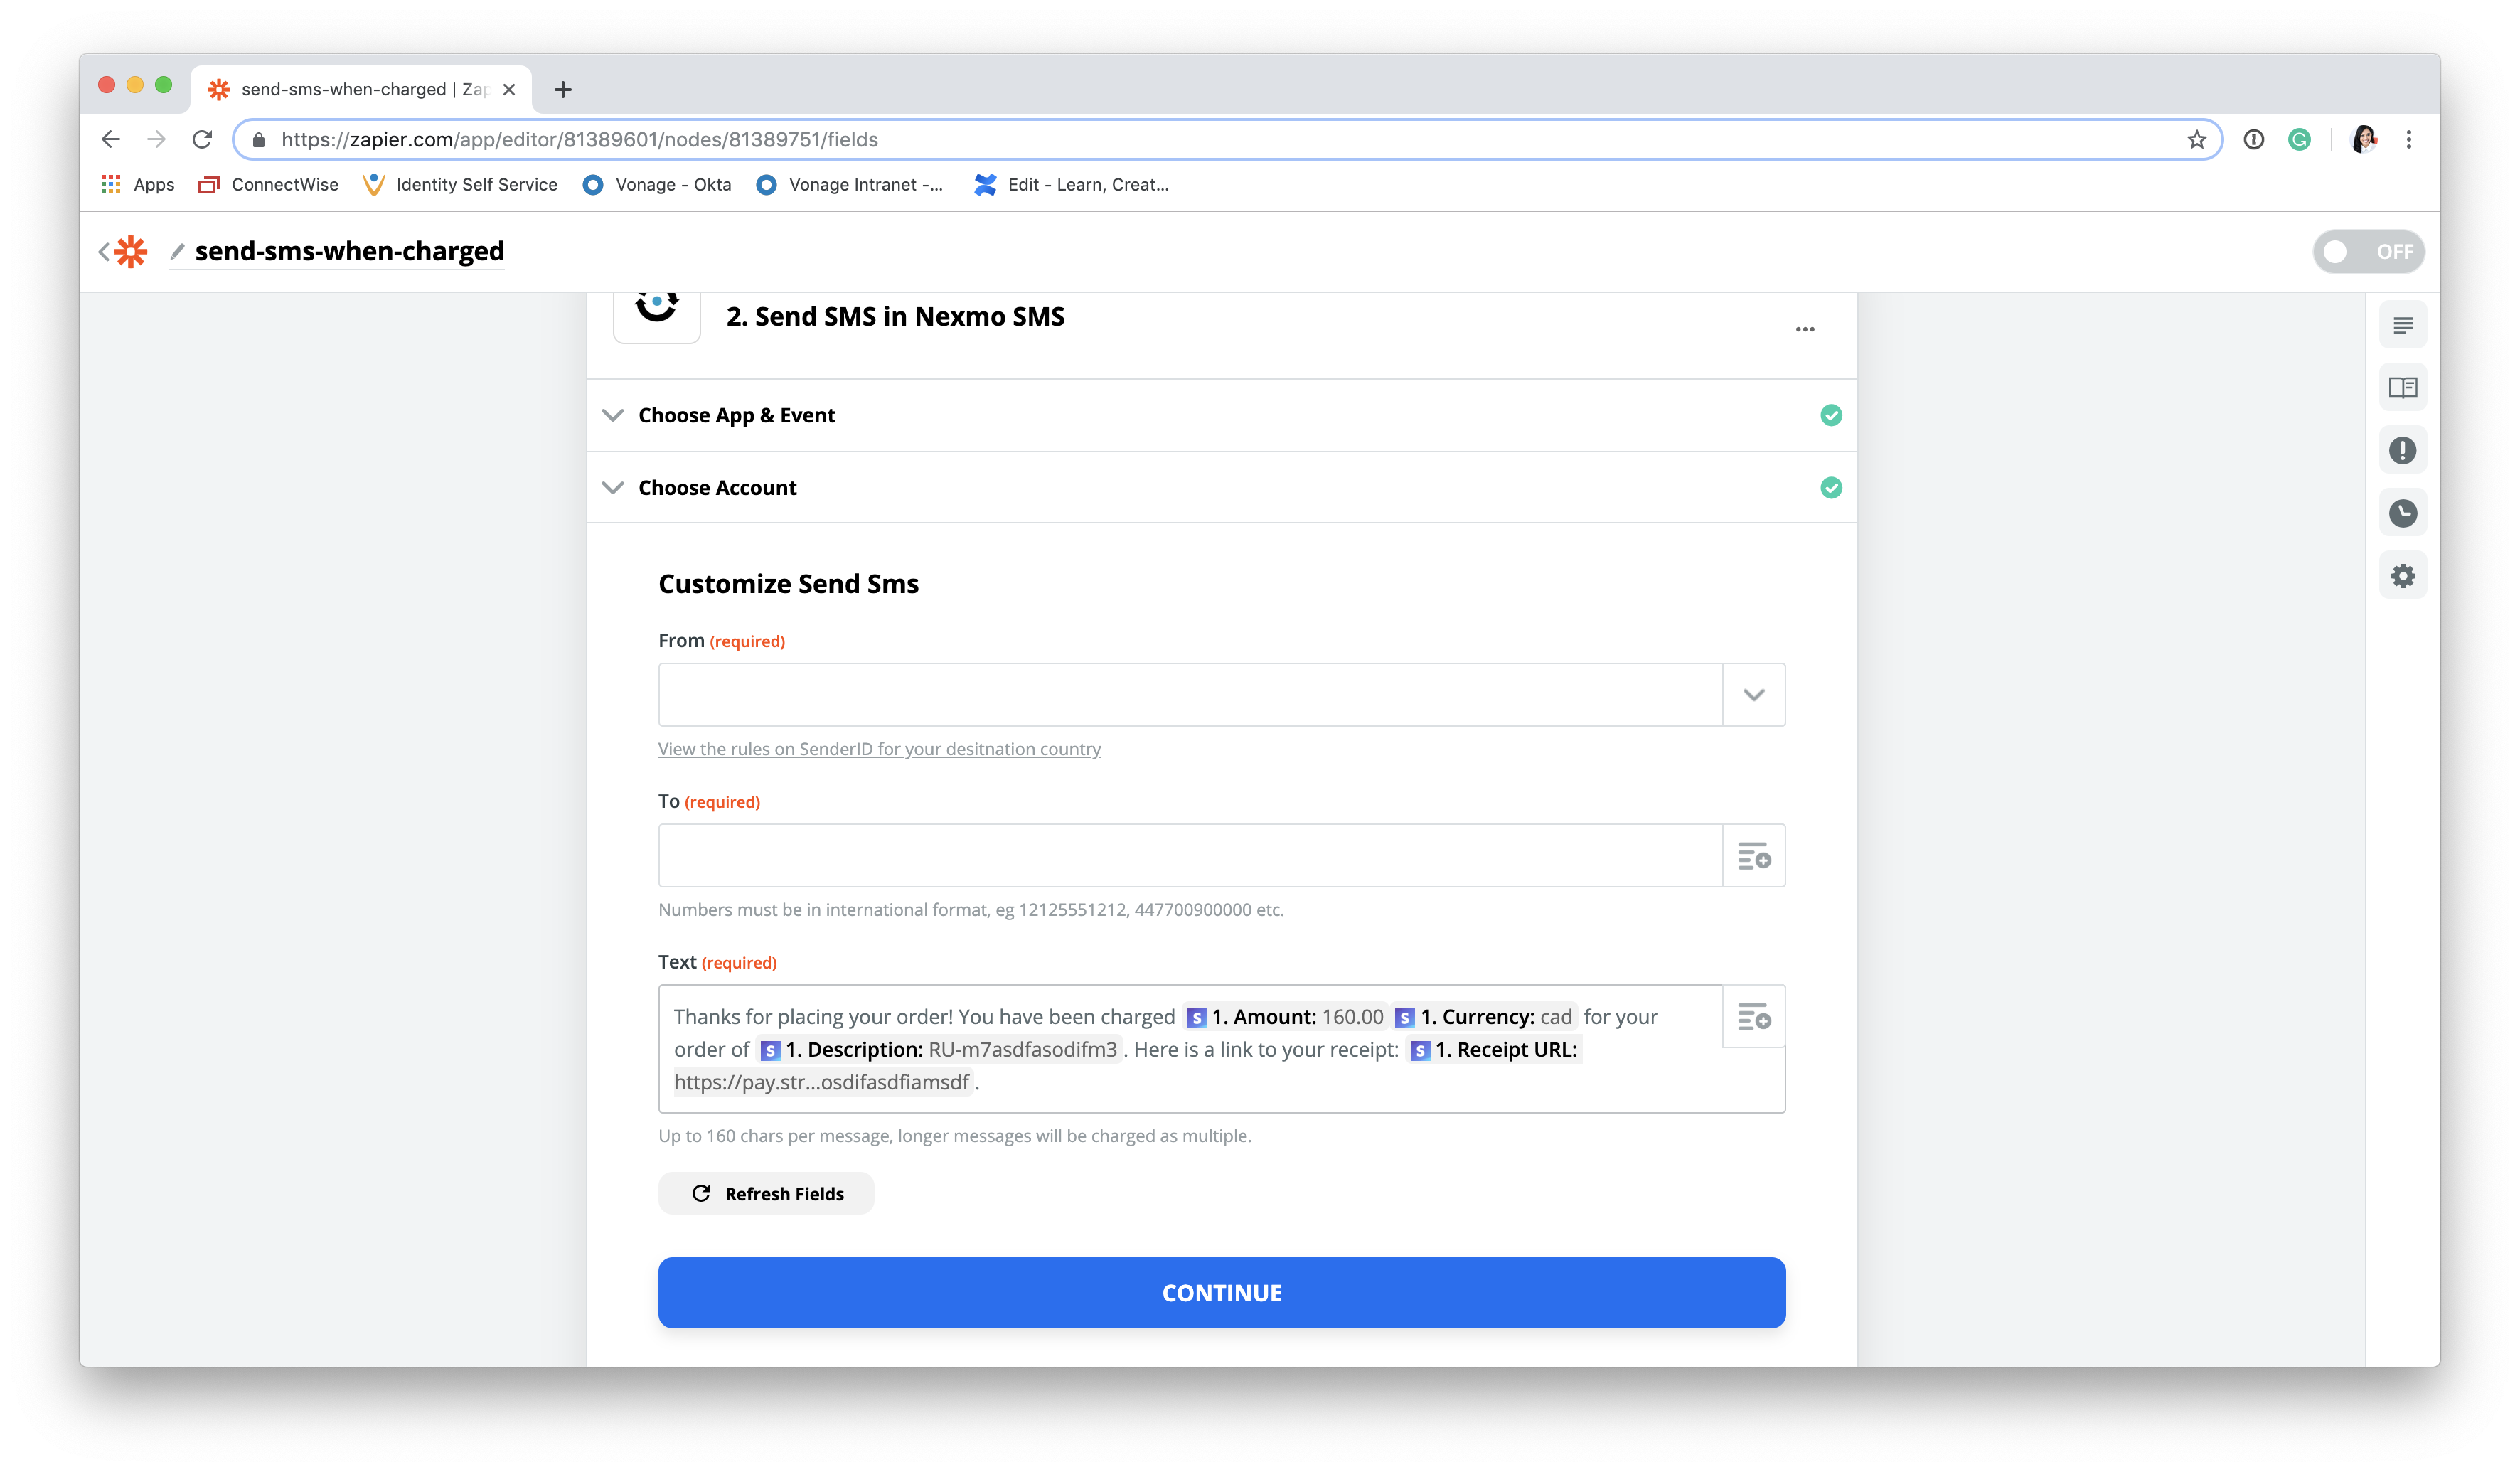
Don’t forget to incorporate the Receipt URL parameter in the message template!
Send Data to Test & Review the Zap and ensure it’s functioning correctly.
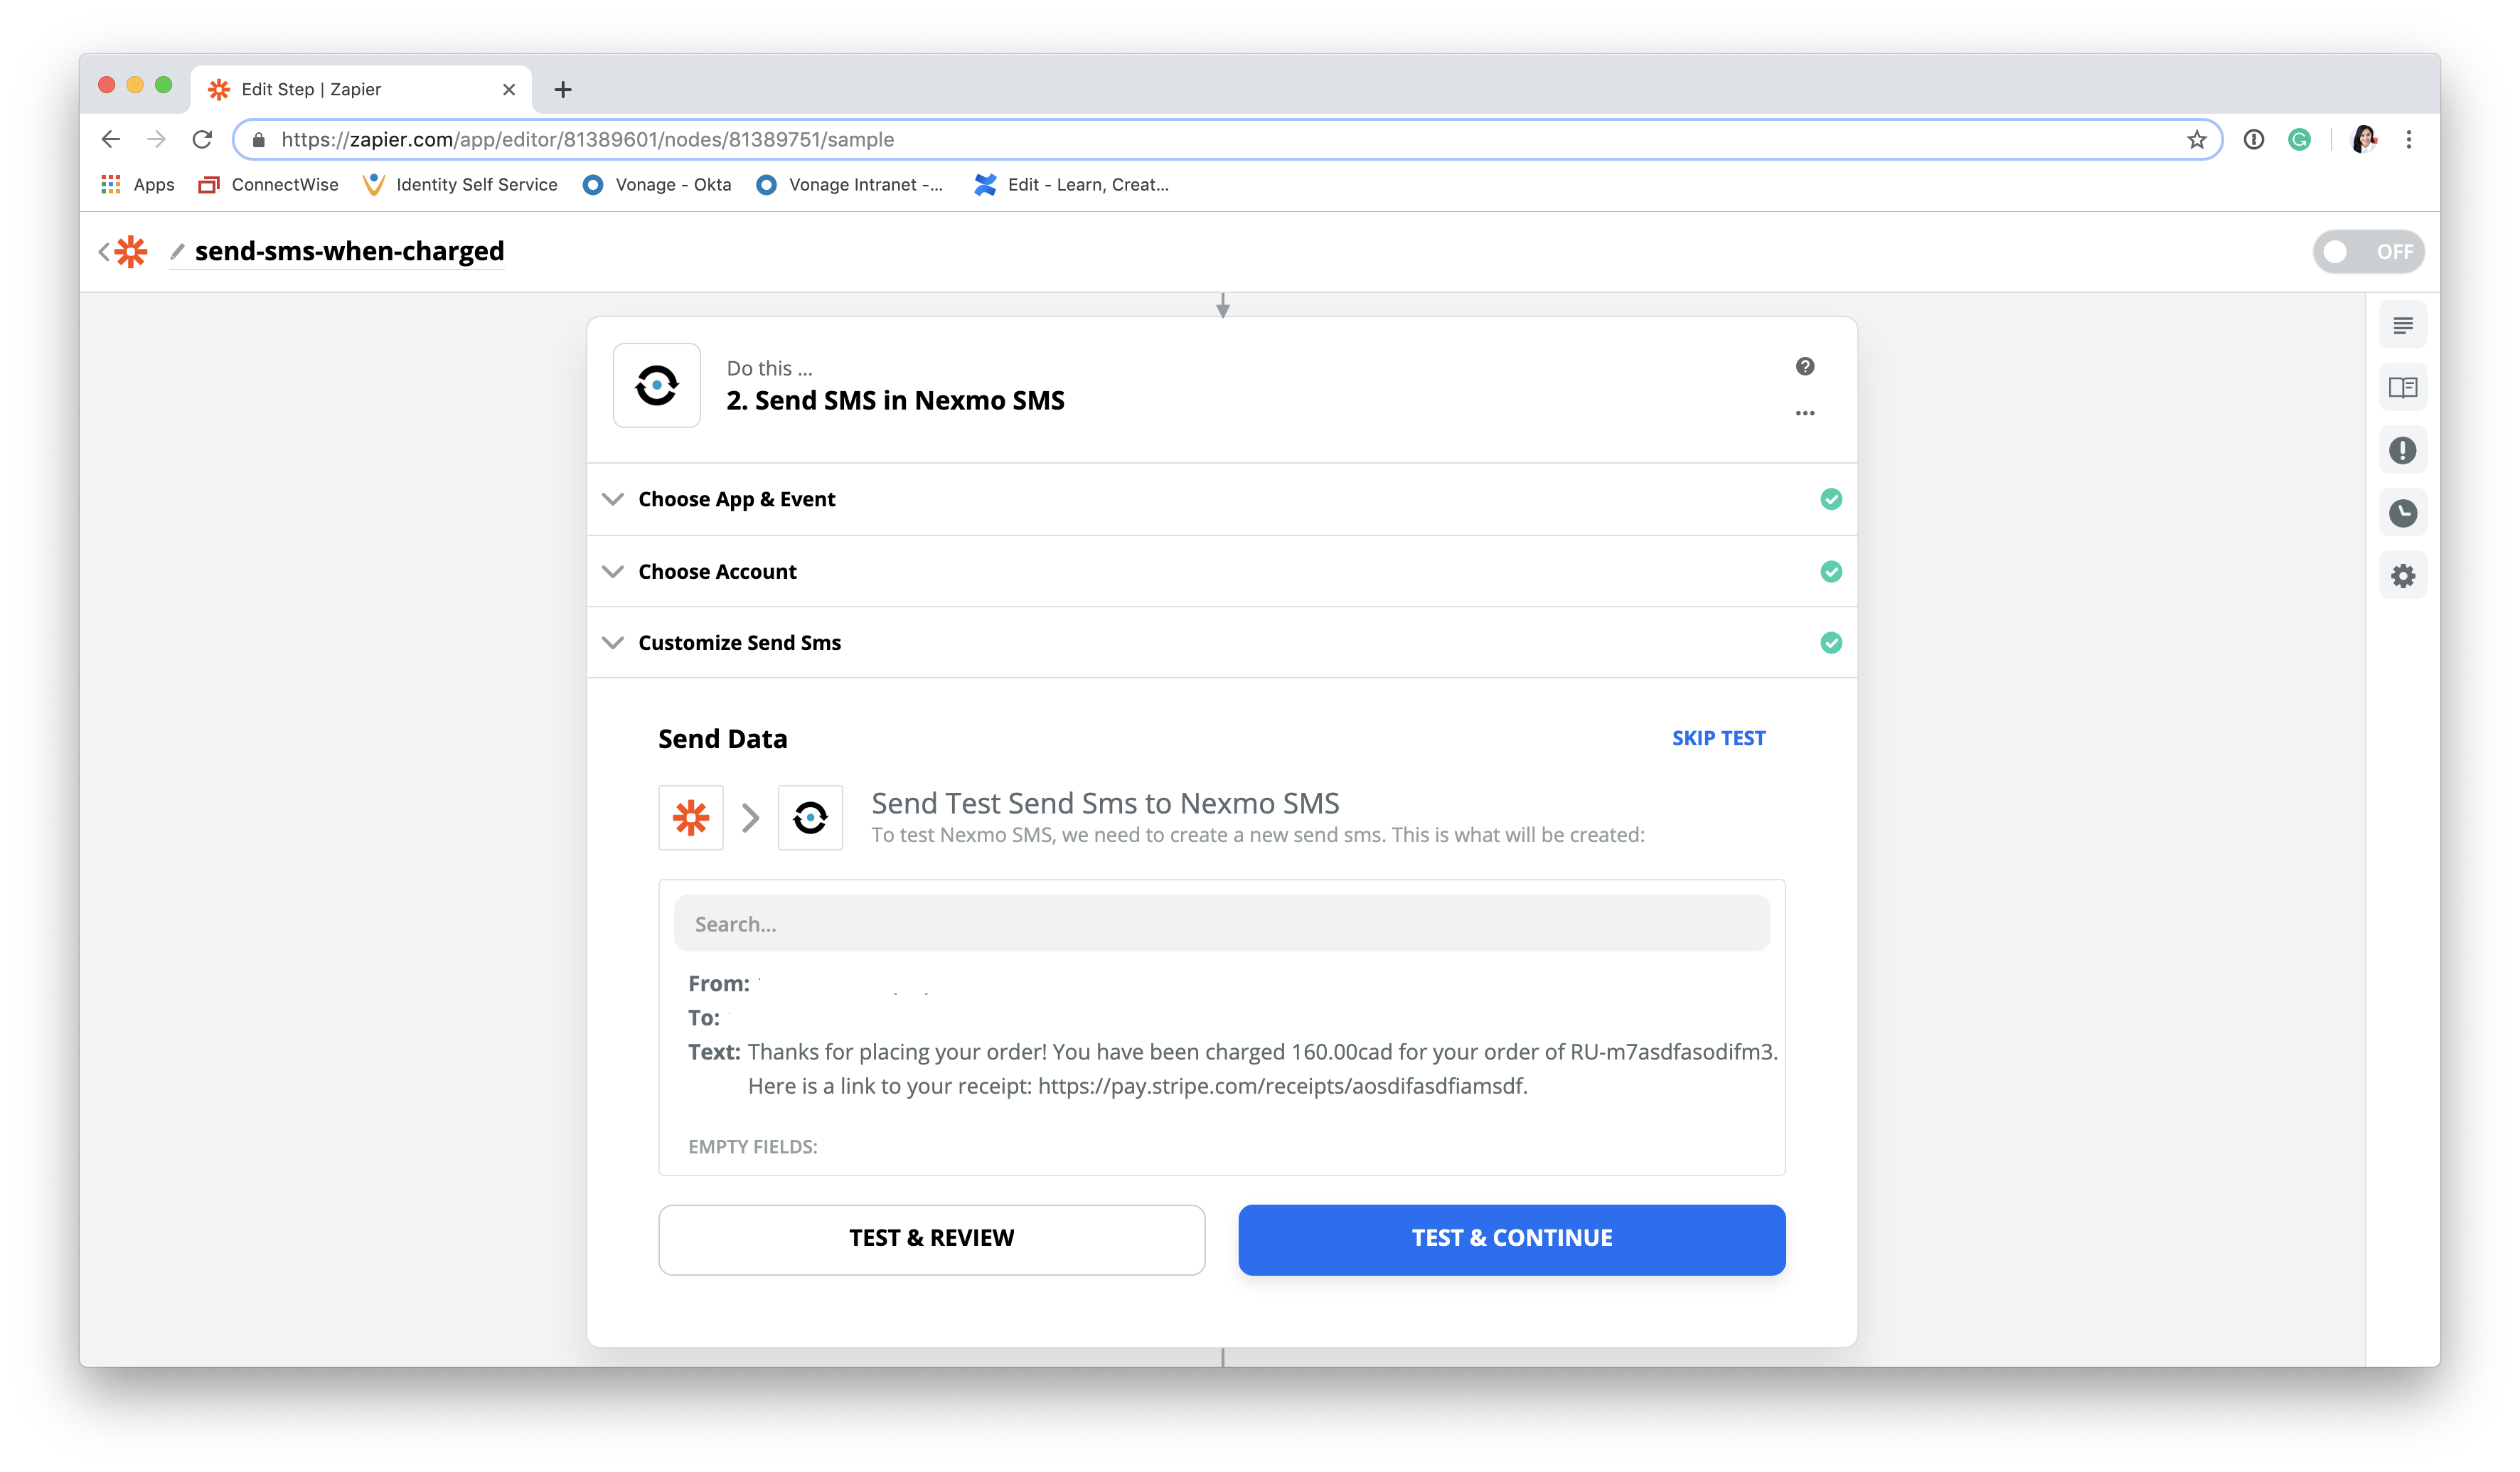
If the test is successful, an SMS confirmation message will be delivered momentarily.
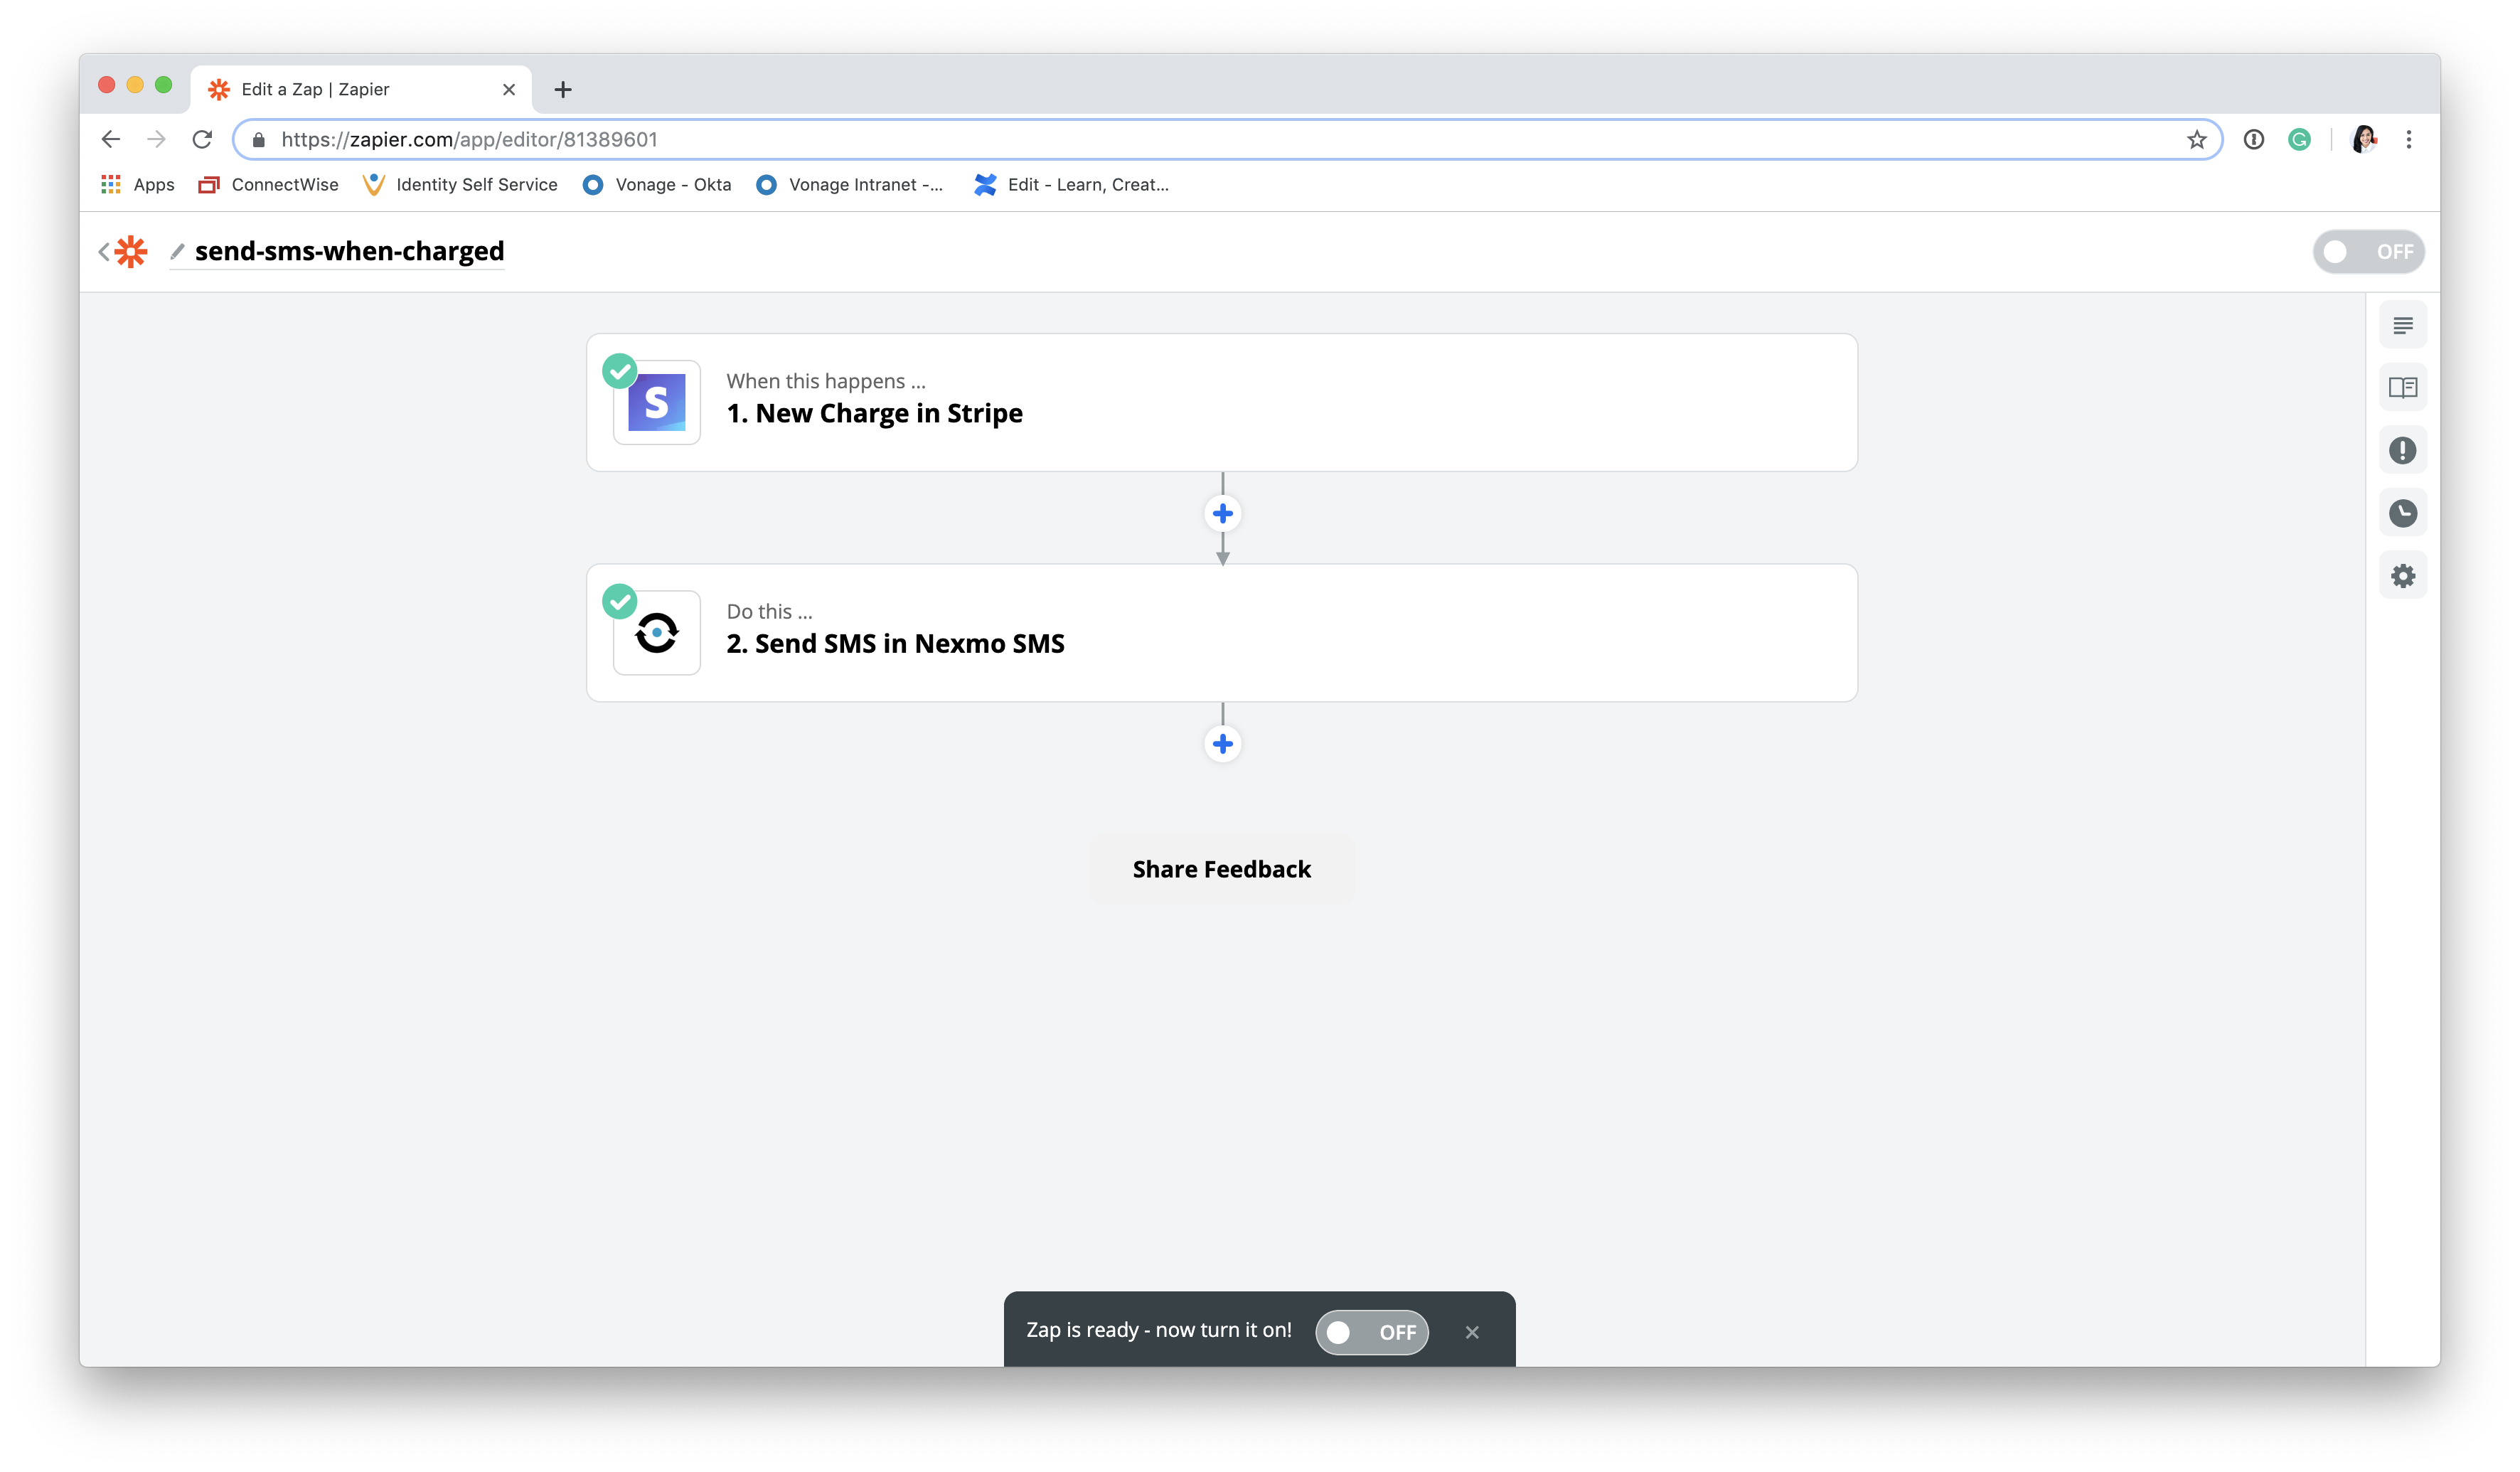
Lastly, toggle the Zap on to make it live.

Congratulations, you did it! Your Zap will now send SMS confirmation messages containing a link to the receipt after each Stripe charge.
There will always be more ways to enhance communication in your business and never enough time in the day. Choosing to automate workflows with our new SMS integration removes manual work from your team’s task list and saves money on developer resources.
With a few simple adjustments to this tutorial, you can improve and automate other purchasing-related business processes, such as:
Send an SMS when a new invoice is created
Notify your sales team when an invoice payment fails, so they can follow up with the customer
Send an SMS when a new event like a subscription, dispute, or transfer is added
If you have a favorite workflow you’d like to share or one you’d like to see us write about, let us know on Twitter or our Community Slack!