Share:
An English teacher turned empathetic software engineer. A curious optimist with a passion for creating accessible content and helping developers level up their skills.
How to Add Video to Your React Chat App with Nexmo
Time to read: 10 minutes
At Nexmo, we’re really excited about the ability to create customer journeys through conversations with our new Conversation API. It allows users to not only deploy an omnichannel experience leveraging voice, messaging, and video all within one experience but also maintains the context of those conversations to deliver a superior customer experience.
The possibilities of what this API will unveil feel endless and thus I’ve had a blast exploring the different ways to incorporate it into my applications the past few weeks.
Omnichannel communication allows you to do all— voice, messages, and custom events— at once and in real-time
It’s a robust model— everything is built on top of it, meaning that you can add any custom channel or event you might want to it
We retain the context for you, making the history of your conversations accessible
Today, we’ll build something off of the chat application that was built in this introductory tutorial. That original app uses Nexmo’s Client SDK and connects to the Conversation API. And today, we are going to add video chat to that React application using the TokBox API.
 demo of app
Imagine that you are chatting with a customer on your website. Maybe they’re reaching out because they are frustrated with a service and to make them feel heard and seen, extra support is needed. This tutorial will walk you through the steps of how to easily add the ability to resolve the problem with them face-to-face with video chat!
To keep things short, let’s assume you have followed the React and Express tutorial. To start, you’ll again need a Vonage account and Node installed in your development environment. If you’d like to skip to a working project, you can remix the code here in Glitch. Otherwise, in just a few steps you can create your own video chat app from scratch!
In your terminal, run:
The first item in the output is the Application ID, which you should save somewhere safe. We'll refer to this as YOUR_APP_ID later. The last value in the output is a private key location. The private key is used to generate JWTs that are used to authenticate your interactions with Nexmo.
Create a conversation within the application:
The output is the Conversation ID. Save this as this is the unique identifier for the conversation that has been created. We'll refer to this as YOUR_CONVERSATION_ID later.
Create a user who will participate in the conversation:
The output is the User ID. Again, save this id as this is the unique identifier for the user that has been created. We'll refer to this as YOUR_USER_ID later.
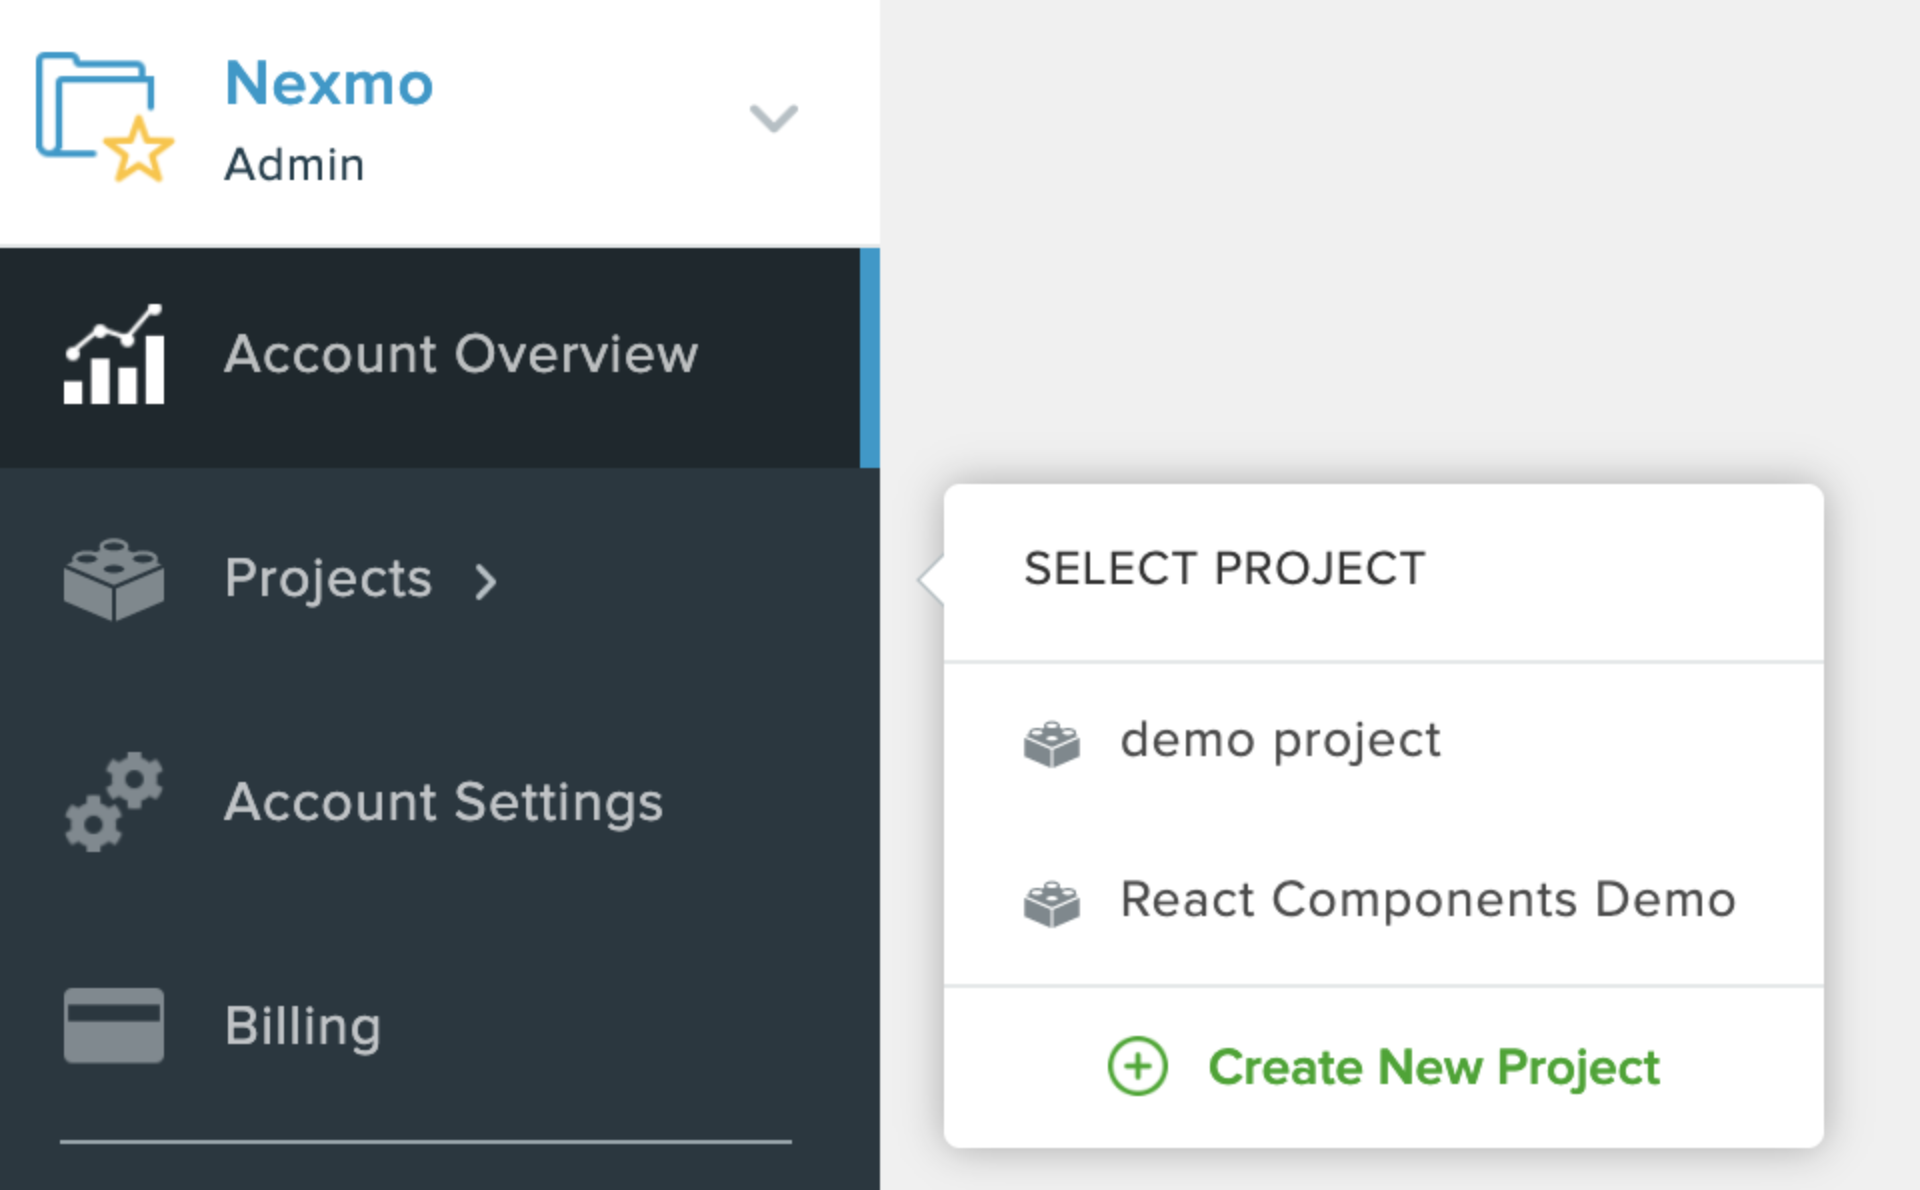
Once signed in to your TokBox account, in the left-hand corner of your page, select Projects and, from the dropdown, click Create New Project.
 New project tok-box
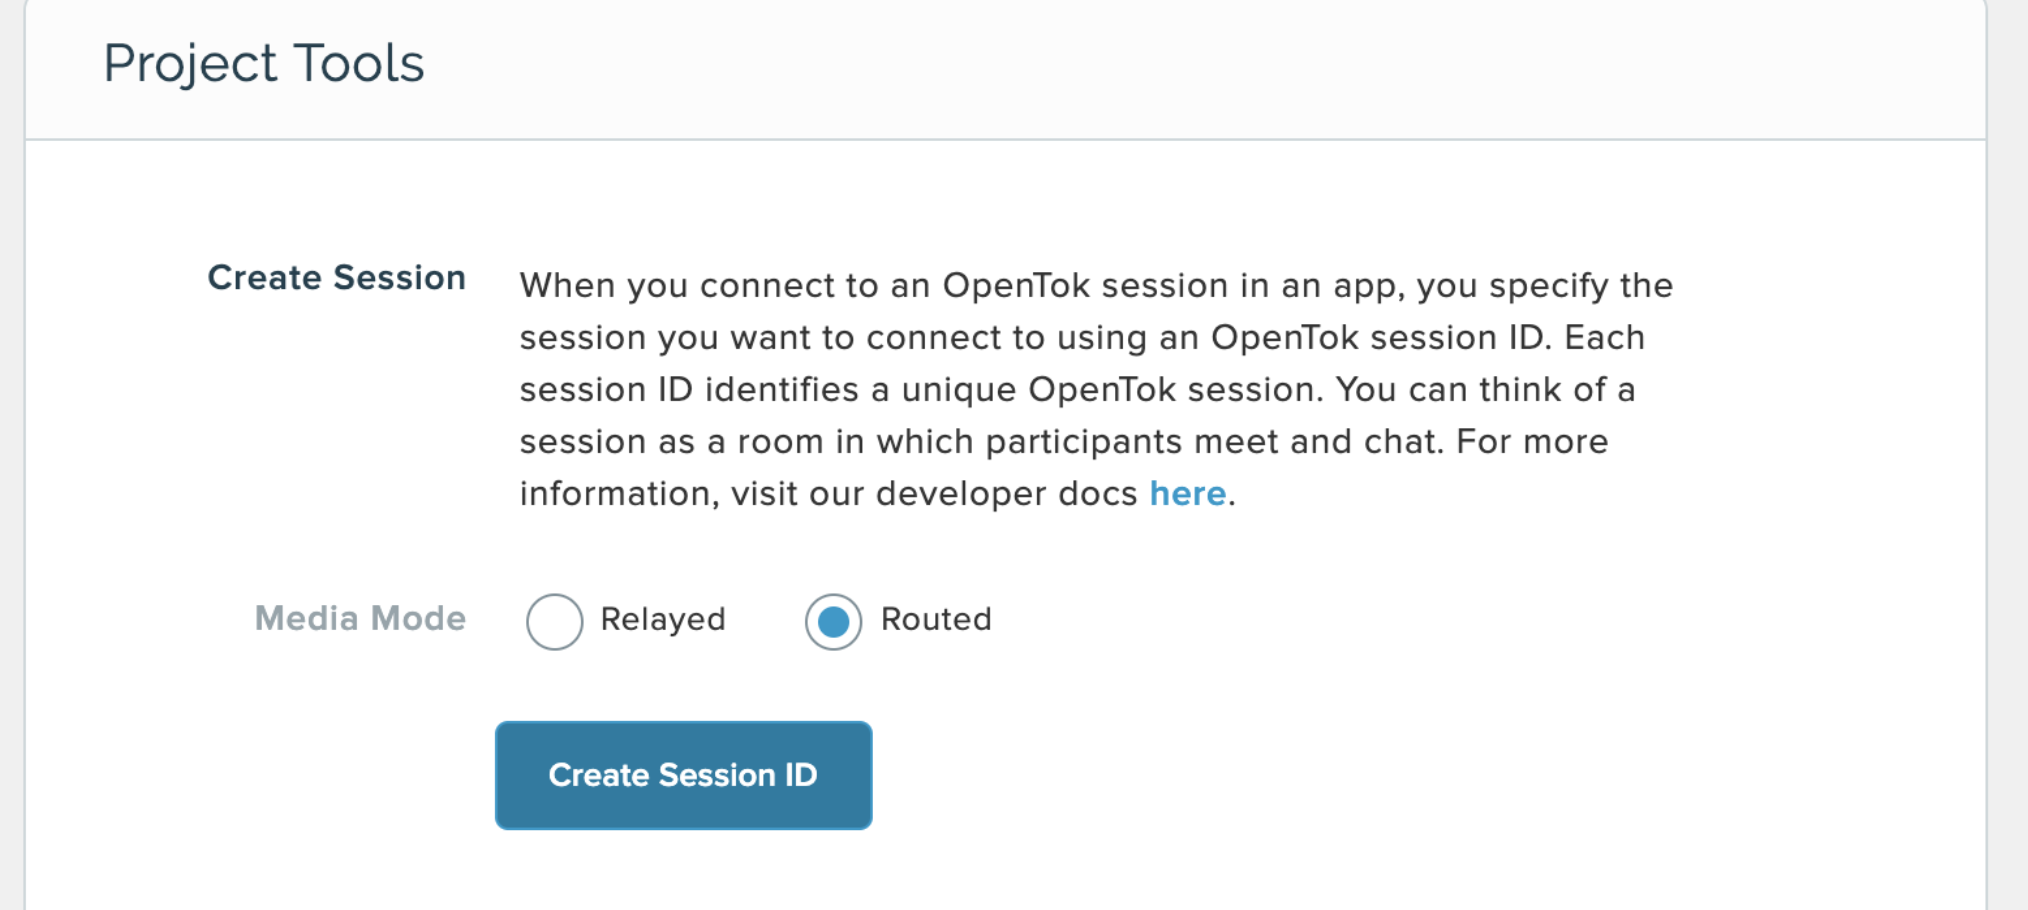
From there, select Create Custom Project and name it whatever you like. Once you’ve created the project, click View Project and save the API key up at the top. Next, scroll down to the section titled Project Tools and click the blue button to Create Session ID.
 session ID
Copy and paste that sessionID into the section below Generate Token. Feel free to prolong the expiration time beyond the default 1 hour if you’d like. Next, click the blue Generate Token button and save the generated token.
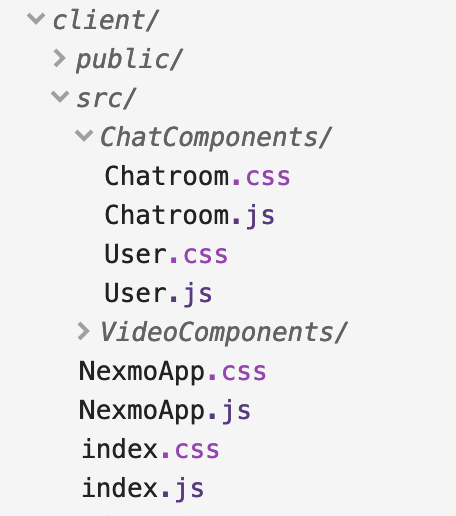
Picking up where the last tutorial left off, let’s move all of the chat components into a ChatComponents folder and create a new VideoComponents folder for our new files.
 Directory structure
In the NexmoApp.js file, swap one of the conversation IDs out with YOUR_CONVERSATION_ID that we just generated in the terminal.
Install the TokBox API by running in your terminal:
Within the VideoComponents folder create the files: CheckBox.js ConnectionStatus.js Publisher.js Subscriber.js VideoComponent.js
In the Chatroom.js, import the VideoComponent at the top and call <VideoComponent /> underneath the Chat button within the return statement.
You will call the Publisher, Subscriber, and ConnectionStatus components your VideoComponent.js:
// VideoComponent.js

import React from 'react';
import { OTSession, OTStreams, preloadScript } from 'opentok-react';
import ConnectionStatus from './ConnectionStatus';
import Publisher from './Publisher';
import Subscriber from './Subscriber';

class VideoComponent extends React.Component {
  constructor(props) {
    super(props);
    this.state = {
      error: null,
      connected: false
    };
    this.sessionEvents = {
      sessionConnected: () => {
        this.setState({ connected: true });
      },
      sessionDisconnected: () => {
        this.setState({ connected: false });
      }
    };
  }
 onError = (err) => {
    this.setState({ error: `Failed to connect: ${err.message}` });
  }

  render() {
    return (
      <OTSession
        apiKey=YOUR_TOKBOX_API_KEY
        sessionId=YOUR_TOKBOX_SESSION_ID
        token=YOUR_TOKBOX_TOKEN
        eventHandlers={this.sessionEvents}
        onError={this.onError}
        >
        {this.state.error ? <div id="error">{this.state.error}</div> : null}

        <ConnectionStatus connected={this.state.connected} />

        <Publisher />
        <OTStreams>
          <Subscriber />
        </OTStreams>
      </OTSession>
    );
  }
}

export default preloadScript(VideoComponent);Fill in the apikey, sessionId, and token with the credentials we created when creating the TokBox application.
The Publisher will be a class-based component and will look like this:
// Publisher.js

import React from "react";
import { OTPublisher } from "opentok-react";
import CheckBox from "./CheckBox";

class Publisher extends React.Component {
  constructor(props) {
    super(props);

    this.state = {
      error: null,
      audio: true,
      video: true,
      videoSource: "camera"
    };
  }

  setAudio = audio => {
    this.setState({ audio });
  };

  setVideo = video => {
    this.setState({ video });
  };

  changeVideoSource = videoSource => {
    this.state.videoSource !== "camera"
      ? this.setState({ videoSource: "camera" })
      : this.setState({ videoSource: "screen" });
  };

  onError = err => {
    this.setState({ error: `Failed to publish: ${err.message}` });
  };

  render() {
    return (
      <div className="publisher">
        Publisher
        {this.state.error ? <div id="error">{this.state.error}</div> : null}
        <OTPublisher
          properties={{
            publishAudio: this.state.audio,
            publishVideo: this.state.video,
            videoSource:
              this.state.videoSource === "screen" ? "screen" : undefined
          }}
          onError={this.onError}
        />
        <CheckBox label="Share Screen" onChange={this.changeVideoSource} />
        <CheckBox
          label="Publish Audio"
          initialChecked={this.state.audio}
          onChange={this.setAudio}
        />
        <CheckBox label="Publish Video" initialChecked={this.state.video} onChange={this.setVideo} />
      </div>
    );
  }
}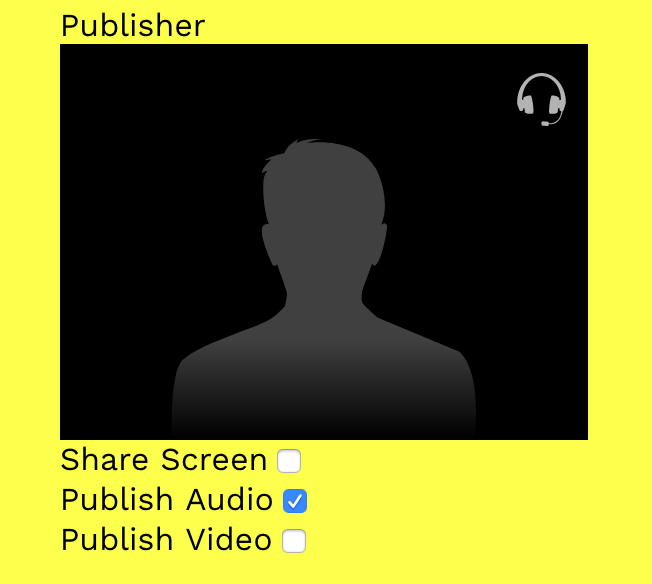
export default Publisher;Notice that within the <OTPublisher /> we’re passing in publishAudio, publishVideo, and videoSource to the properties prop and the function onError() to the onError prop.
Now the Publisher component will show an avatar until the user gives OpenTok permission to access the computer's camera.
The Subscriber will also be a class-based component with subscribeToAudio and subscribeToVideo as properties within it:
// Subscriber.js

import React from "react";

import { OTSubscriber } from "opentok-react";
import CheckBox from "./CheckBox";

class Subscriber extends React.Component {
  constructor(props) {
    super(props);

    this.state = {
      error: null,
      audio: true,
      video: true
    };
  }

  setAudio = audio => {
    this.setState({ audio });
  };

  setVideo = video => {
    this.setState({ video });
  };

  onError = err => {
    this.setState({ error: `Failed to subscribe: ${err.message}` });
  };

  render() {
    return (
      <div className="subscriber">
        Subscriber
        {this.state.error ? <div id="error">{this.state.error}</div> : null}
        <OTSubscriber
          properties={{
            subscribeToAudio: this.state.audio,
            subscribeToVideo: this.state.video
          }}
          onError={this.onError}
        />
        <CheckBox
          label="Subscribe to Audio"
          initialChecked={this.state.audio}
          onChange={this.setAudio}
        />
        <CheckBox
          label="Subscribe to Video"
          initialChecked={this.state.video}
          onChange={this.setVideo}
        />
      </div>
    );
  }
}
export default Subscriber;
We’ll use the ConnectionStatus.js file as a way to display the Connection Status to the user:
// ConnectionStatus.js

import React from "react";

class ConnectionStatus extends React.Component {
  render() {
    let status = this.props.connected ? "Connected" : "Disconnected";
    return (
      <div className="connectionStatus">
        <strong>Status:</strong> {status}
      </div>
    );
  }
}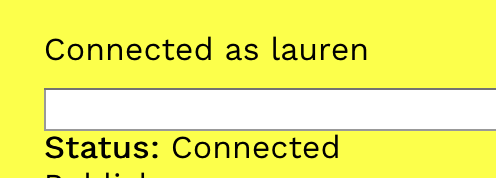
export default ConnectionStatus;Creating this helps your user understand if the video has successfully connected or not:
 Connection status
We’ll use the <CheckBox /> component within both the <Publisher /> and <Subscriber /> components:
// CheckBox.js

import React from "react";
import { uniqueId } from "lodash";

class CheckBox extends React.Component {
  constructor(props) {
    super(props);

    this.state = {
      id: uniqueId("Checkbox"),
      isChecked: this.props.initialChecked
    };
  }

  onChange = event => {
    let isChecked = event.currentTarget.checked;
    this.setState({ isChecked });
  };

  componentDidUpdate(prevProps, prevState) {
    if (
      prevState.isChecked !== this.state.isChecked &&
      typeof this.props.onChange === "function"
    ) {
      this.props.onChange(this.state.isChecked);
    }
  }

  render() {
    return (
      <div>
        <label htmlFor={this.state.id}>{this.props.label}</label>

        <input
          type="checkbox"
          checked={this.state.isChecked}
          id={this.state.id}
          onChange={this.onChange}
        />
      </div>
    );
  }
}
export default CheckBox;Adding the CheckBox component helps make the UI of the app function the way users might expect:
 checkbox gif
You now have created all 5 React components:
VideoComponent
Publisher
Subscriber
ConnectionStatus
CheckBox
Running npm start from the root of your project should get your app up and running. When you select the drop-down next to User Name, you should see the name lauren prepopulated.
Try adding in your name into the text box and click the Create user button. Select the synced chat from the drop-down.
You can now verify that the app is synced to your conversation correctly by running this request in your terminal:
In addition to lauren, your name should be now visible in that list:
name                                     | user_id                                  | user_name | state
---------------------------------------------------------------------------------------------------------
MEM-aaaaaaaa-bbbb-cccc-dddd-0123456789ab | USR-aaaaaaaa-bbbb-cccc-dddd-0123456789ab | lauren     | JOINED
MEM-vvvvvvvv-eeee-ffff-eeee-3456789ab012 | USR-bbbbbbbb-cccc-dddd-eeee-3456789ab012 | your-name | JOINEDAllow the browser permission to access your camera and microphone and you should now see the video component on the screen! If you open up another browser with the same code and join the chat as a different user, you will see another video component added as well.
 demo of app
.env file.
Congrats! You successfully have added video to your chat application. How neat is that?! I’m for one, pretty obsessed and have begun searching for any and all opportunities in my day-to-day life in which to add video chat to my conversations!
If you have an interest in playing with our new Conversation API, please share 🤩
We are always trying to brainstorm creative or innovative use cases for it and thus I’d be SUPER excited to collaborate and create new apps together.
It’s important to note that the Conversation API is currently in beta and is ever-evolving based on your input and feedback. As always, we are happy to help with any questions in our community slack or support@nexmo.com.