Share:
Benjamin Aronov is a developer advocate at Vonage. He is a proven community builder with a background in Ruby on Rails. Benjamin enjoys the beaches of Tel Aviv which he calls home. His Tel Aviv base allows him to meet and learn from some of the world's best startup founders. Outside of tech, Benjamin loves traveling the world in search of the perfect pain au chocolat.
Generate JWTs With Vonage’s Online JWT Generator
Time to read: 2 minutes
Discover the untapped potential of the Vonage developer portal, a treasure trove of resources for developers. In addition to our documentation and insightful blog posts, the portal offers a range of powerful tools. One such gem is the Online JWT Generator, enabling seamless creation of JSON Web Tokens (JWTs) for Vonage applications. Unleash the power of JWTs in your development workflow with ease!
The online JWT Generator is an intuitive tool that empowers developers to instantly generate JWTs for Vonage applications, streamlining the setup process. This can be super useful when setting up Vonage applications. For instance, if you’re building with the Messages API, you can quickly test that you’ve set everything up properly just by sending SMS from your virtual number with a bash script like this:
curl -X POST https://api.nexmo.com/v1/messages \
  -H 'Authorization: Bearer '$JWT\
  -H 'Content-Type: application/json' \
  -H 'Accept: application/json' \
  -d $'{
          "message_type": "text",
          "text": "Testing Vonage Messages API.",
          "to": "'$TO_NUMBER'",
          "from": "'$FROM_NUMBER'",
          "channel": "sms"
}'But notice that we need to add a $JWT to this operation to let Vonage know that this is a legitimate request, i.e. authenticated.
JWTs play a vital role in secure authentication for your Vonage applications. Learn best practices for secure authentication with JWTs in our comprehensive guide.
To create a JWT for your Vonage application, follow these simple steps:
Open your Vonage Dashboard and navigate to the desired application. Once you’ve opened your application it should look something like this:
 application-in-vonage-dashboard.png
Copy the APPLICATION ID from the dashboard and enter it into the generator:
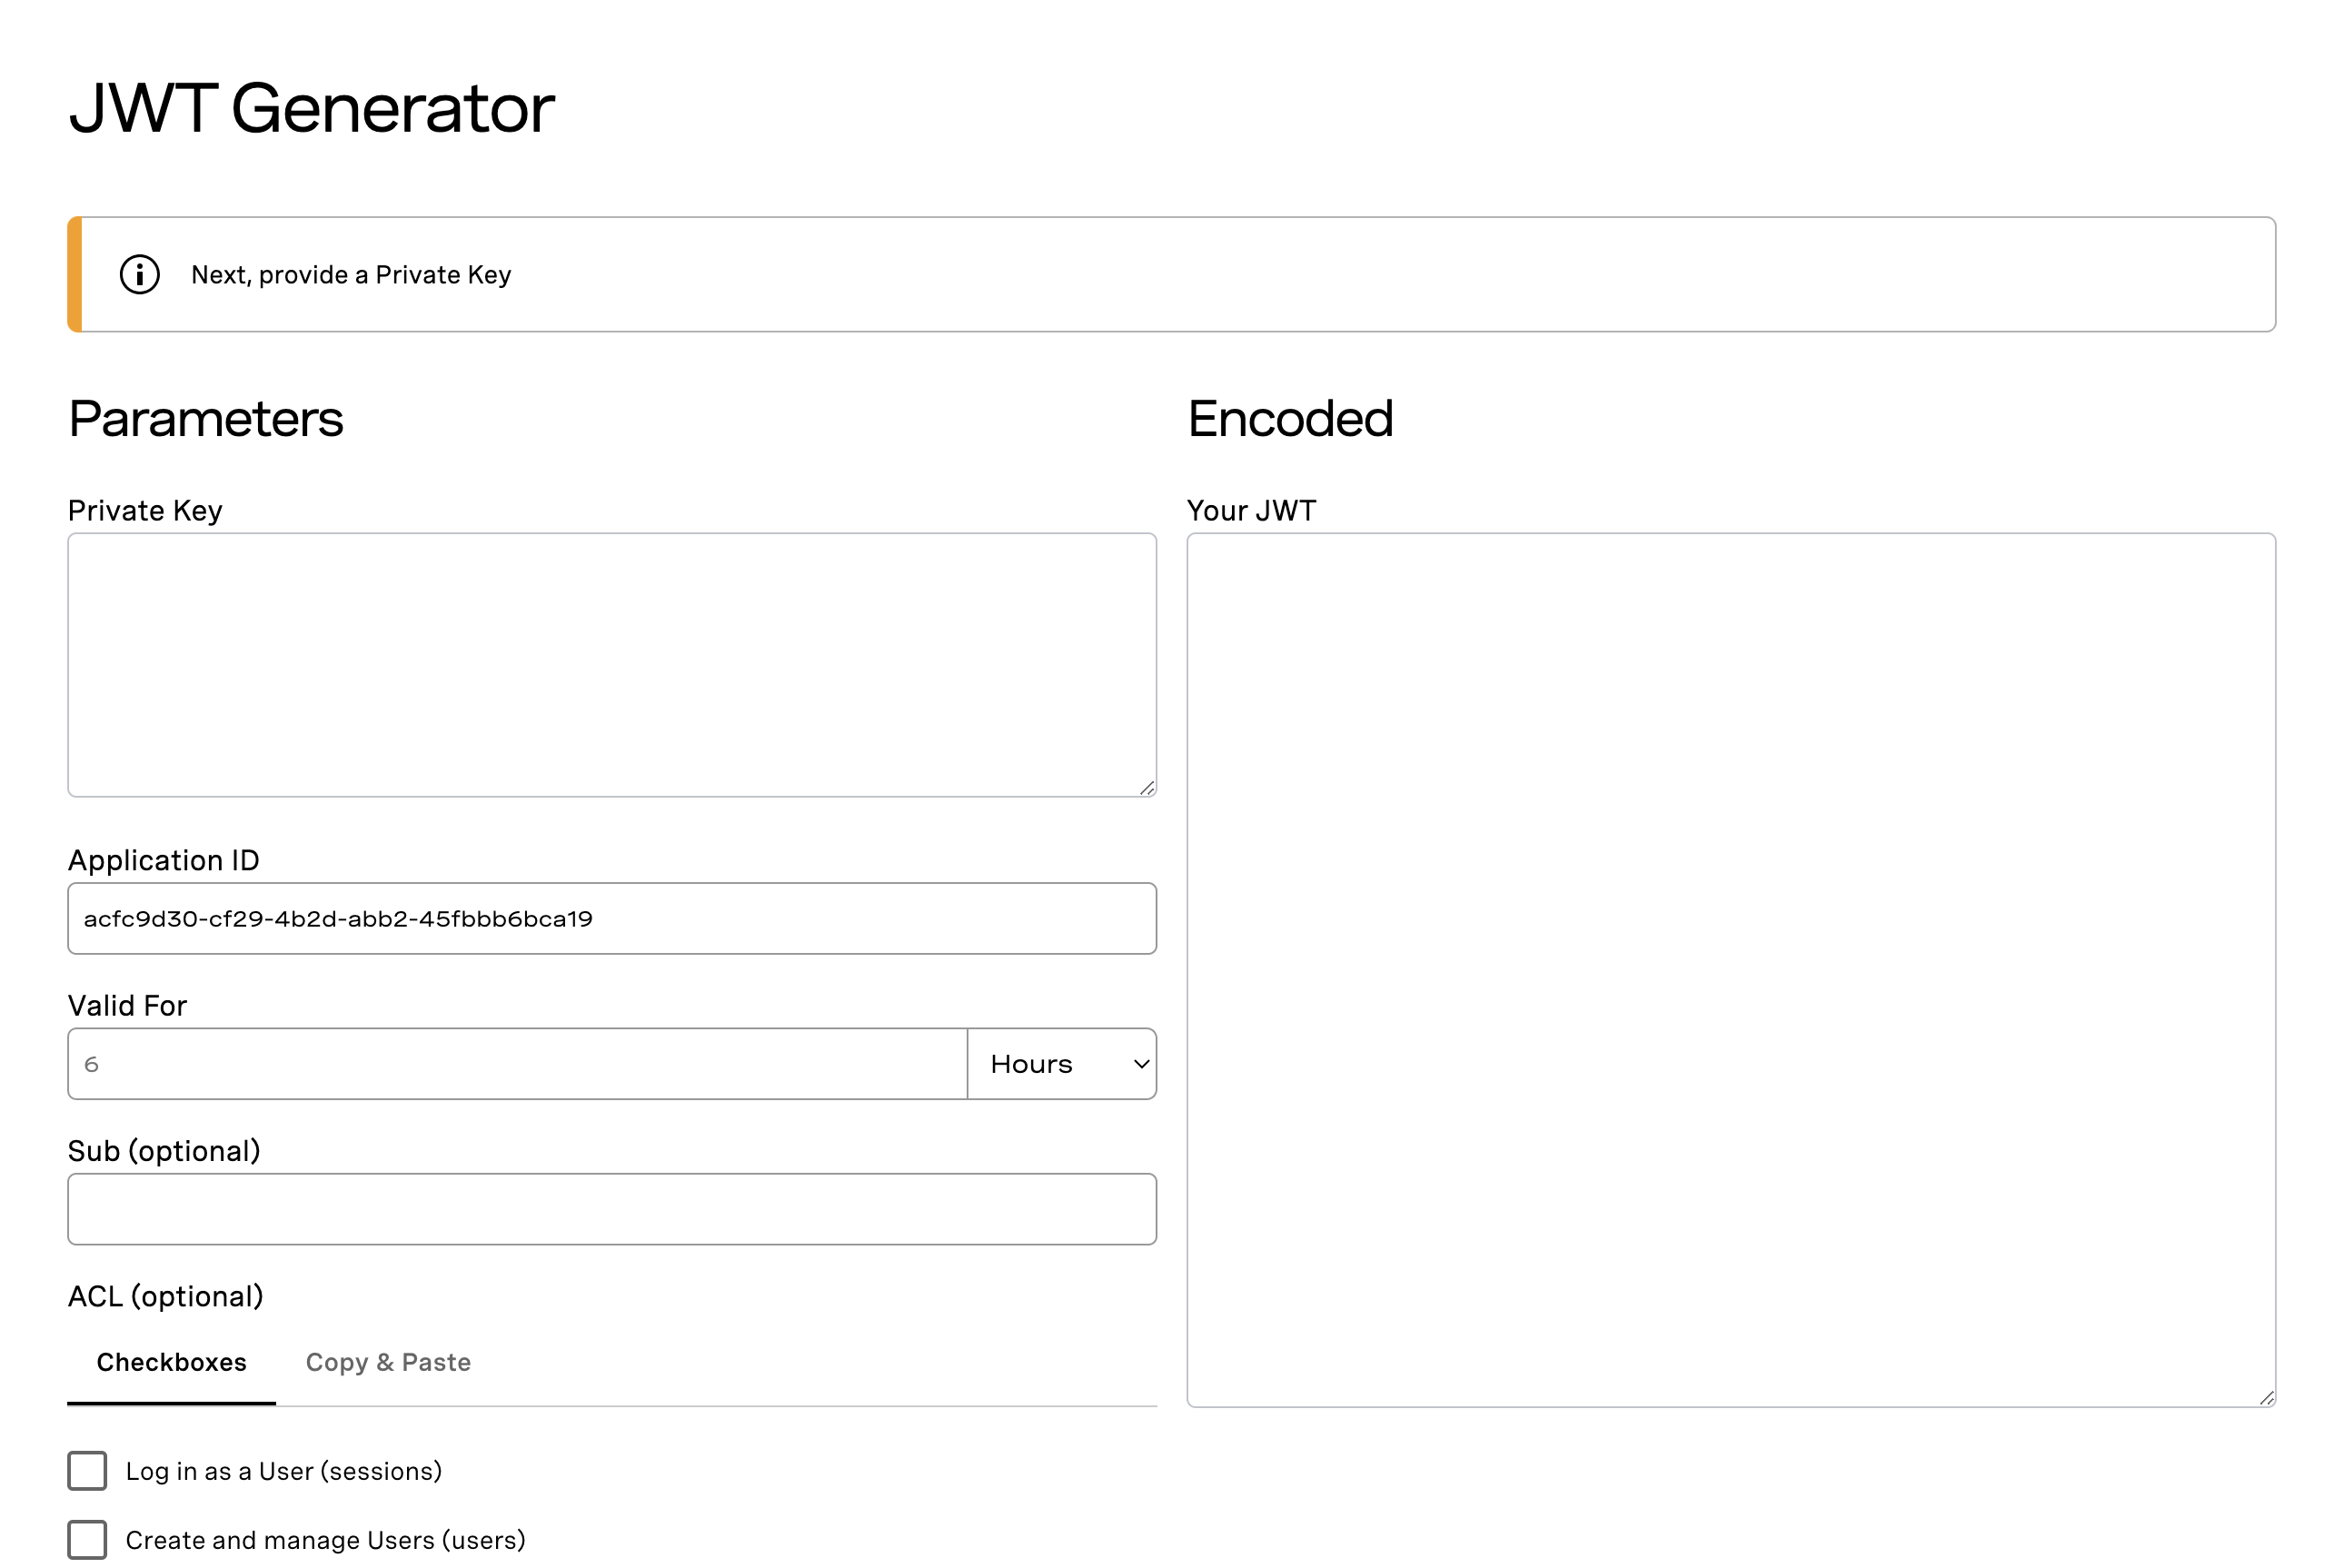 vonage-jwt-generator-with-application-id.png
The little prompt is already telling us that we’re missing something: our private key! What is a private key? This a unique alphanumeric code that is used to encrypt access.
In order to get the private.key, we need to generate it. So click on “edit”. This will then open a page similar to this one.
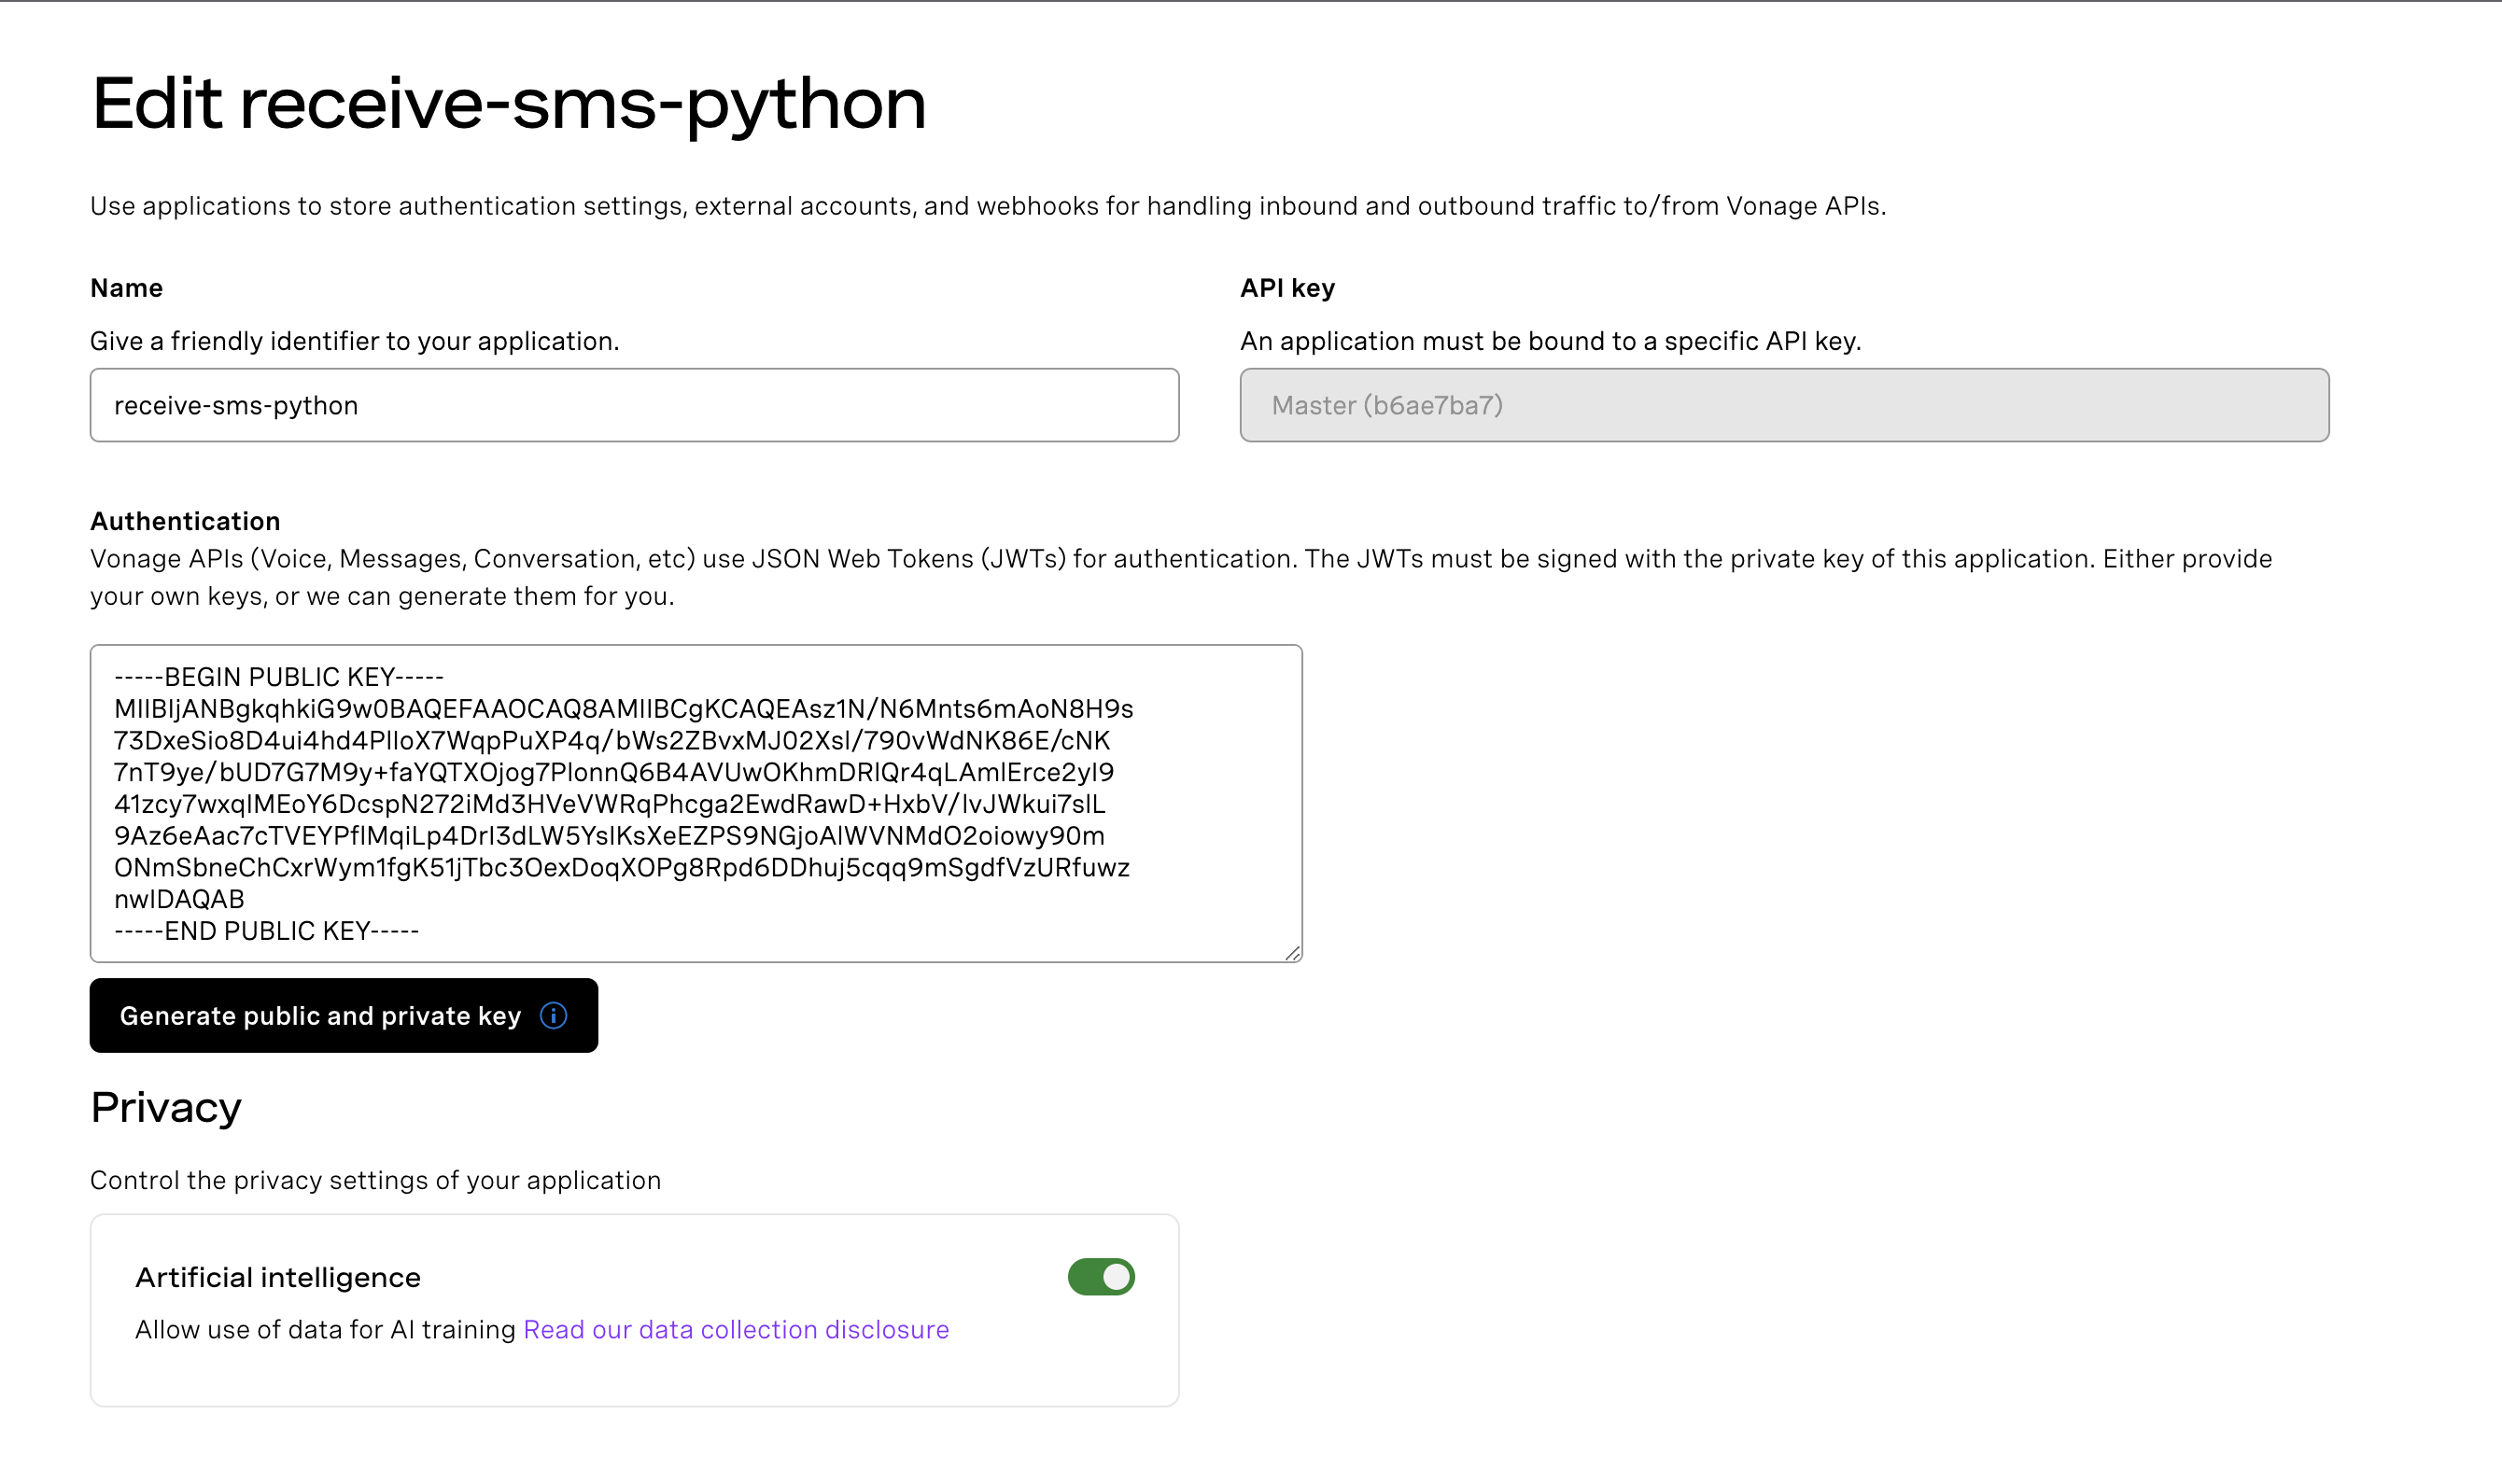 vonage-application-private-key-generation.png
Now under the authentication section, we can see that it talks about JWTs and using keys as signatures. We’ll want to click the button “Generate public and private key”. This will download a file called “private.key” to our computer. Be sure to save it securely where you will remember it.
It’s very important that even though you’ve downloaded your private.key, you need to save the new status of the application! Scroll to the bottom and click save. Each time a new key is generated, the old key is no longer valid. So you must be using the current, valid key.
Open the private key file using a text editor (like VS Code or Sublime Text), ensuring no extraneous spaces or line breaks. The private key serves as a secure key to unlock access to your application's API endpoints. It should look something like this:
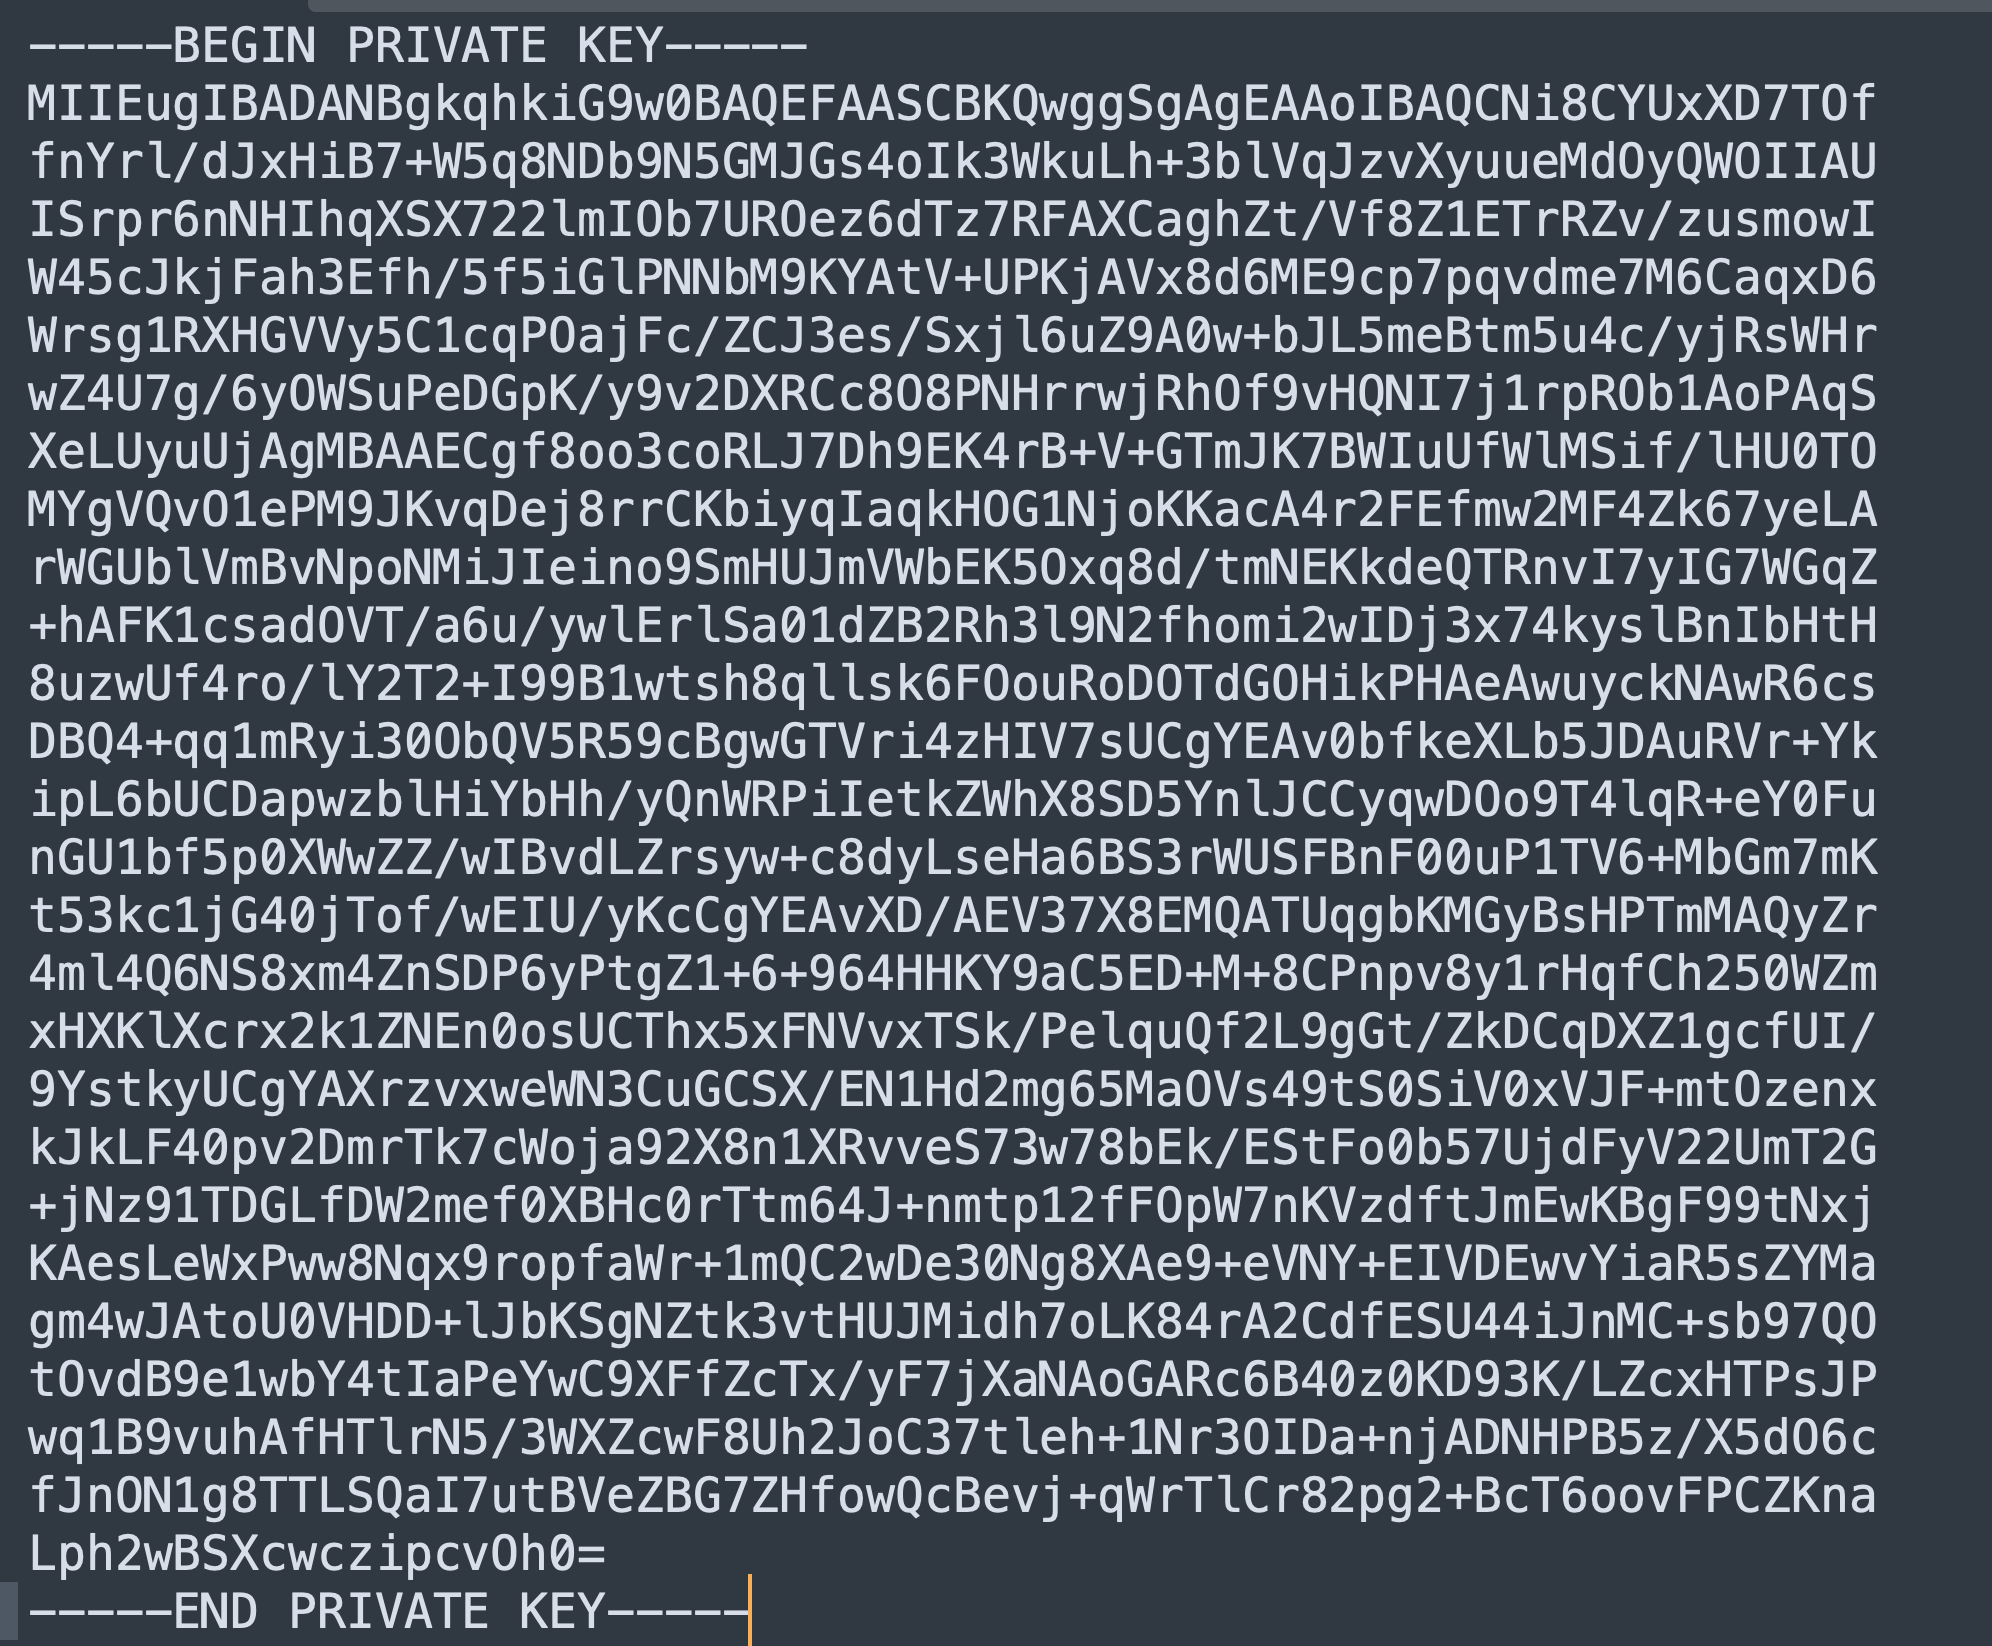 vonage-private-key-example.png
We can now add the private key to the generator:
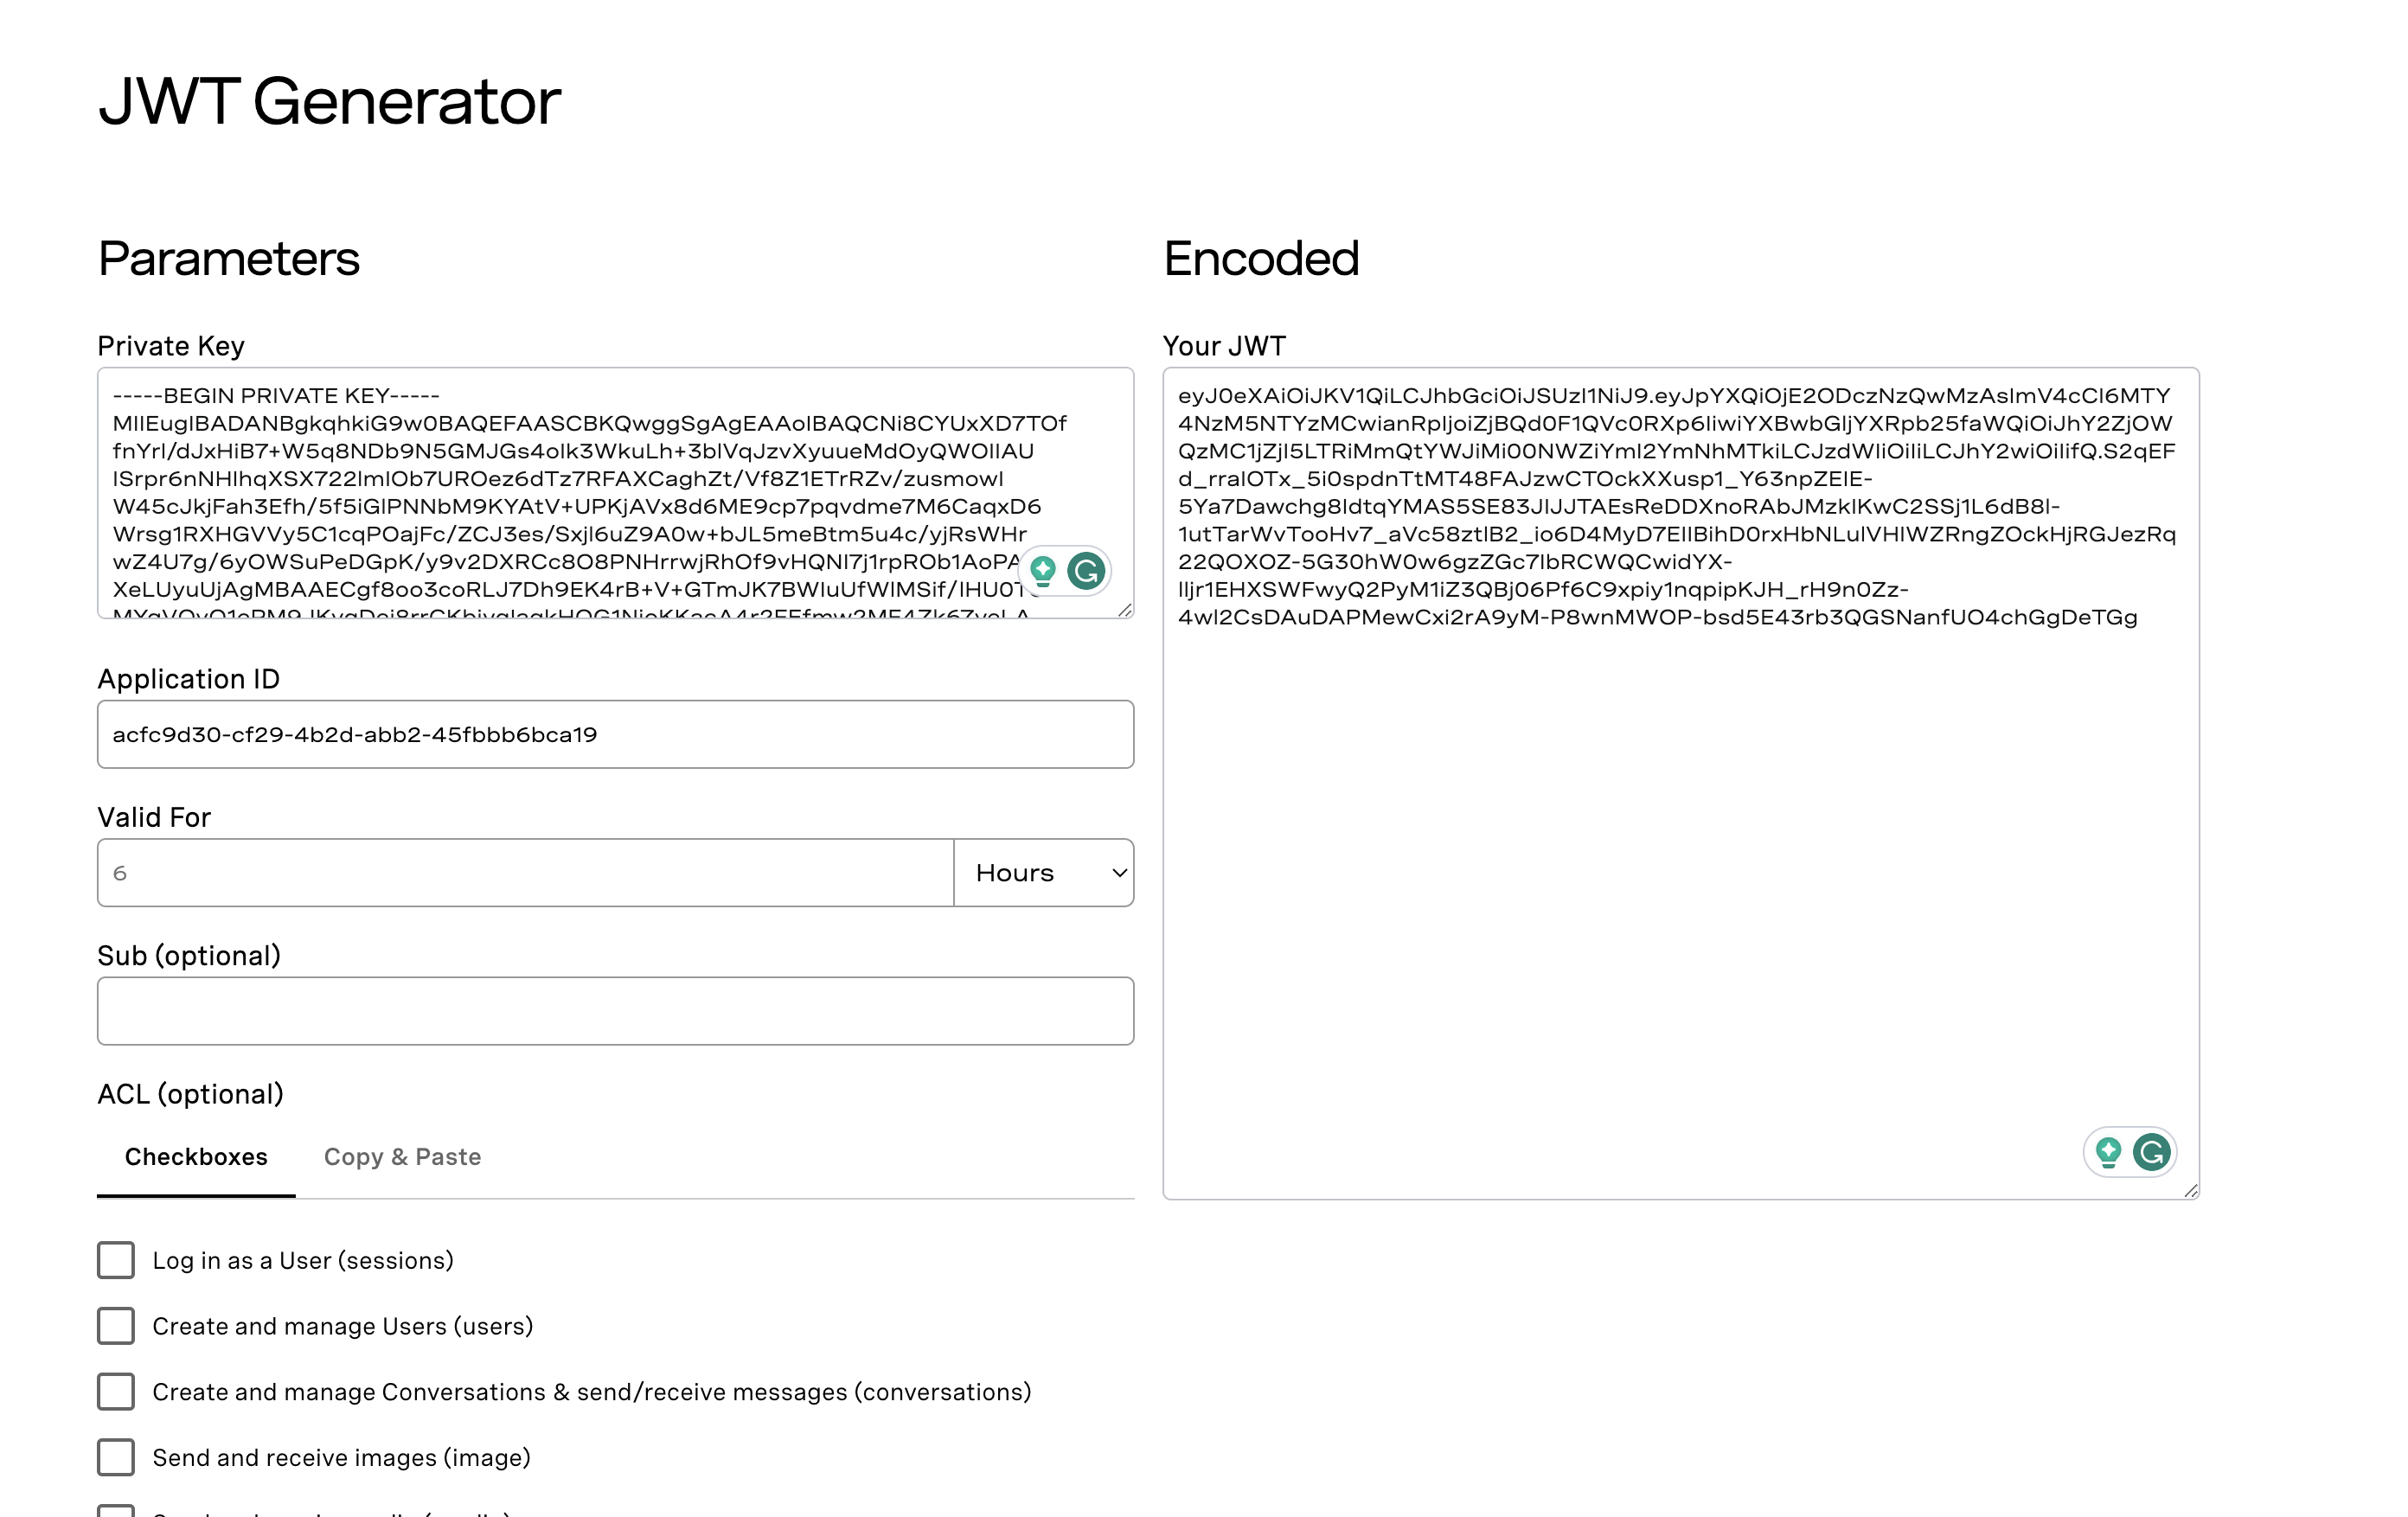 vonage-jwt-generator-complete-example.png
And now the generator will create a JWT instantly!
To validate the integrity of your JWT, you can use jwt.io. These tools offer comprehensive JWT analysis and debugging capabilities, ensuring your tokens are valid and secure.
If you'd like to grant certain permissions for a user, you can set the ACL in the JWT Generator. For example, to allow a user to be able to create/manage conversations as well as send/receive texts. images, and audio, the ACL would look like this:
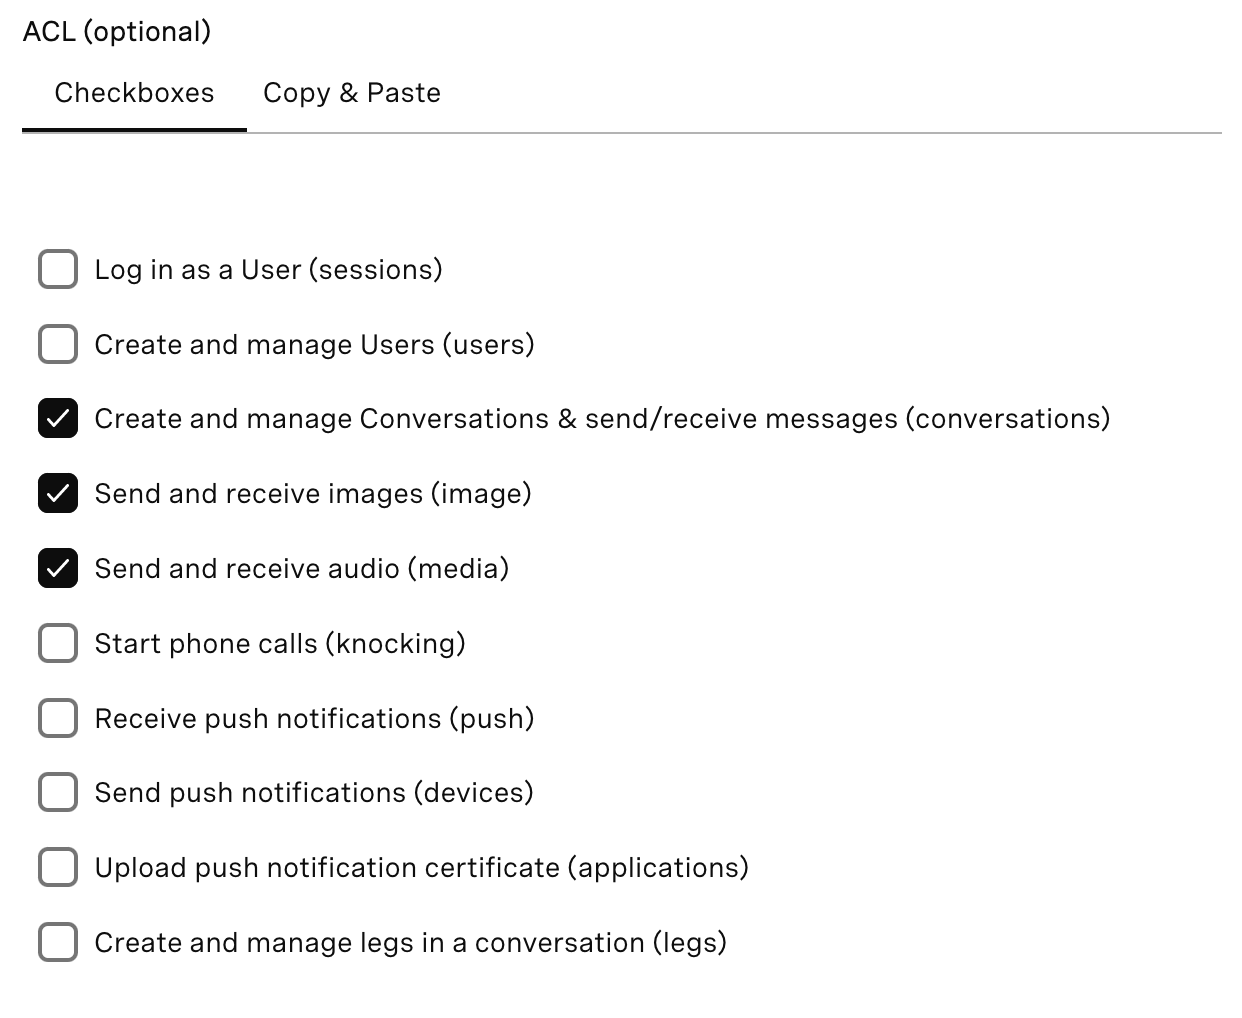 acl-options-example.png
There are many options for your JWTs, which you can explore here.
Join the Vonage developer community on the Vonage Community Slack. Collaborate with fellow developers, share insights, and exchange knowledge. Connect with us on Twitter for further assistance or inquiries.
Share:
Benjamin Aronov is a developer advocate at Vonage. He is a proven community builder with a background in Ruby on Rails. Benjamin enjoys the beaches of Tel Aviv which he calls home. His Tel Aviv base allows him to meet and learn from some of the world's best startup founders. Outside of tech, Benjamin loves traveling the world in search of the perfect pain au chocolat.