Share:
Julia is committed to empowering fellow developers by creating tutorials, guides, and practical resources. With a background in outreach and education, she aims to make technology more accessible and enhance the overall developer experience. You can often find her at local community events.
Build a Voice Proxy with PHP and Vonage
Time to read: 7 minutes
This Vonage call forwarding tutorial shows you how to proxy a voice call so that it appears to come from another number.
This is not as dubious as it sounds: there are many compelling business reasons why you might want to hide a caller's real number from other parties in the call.
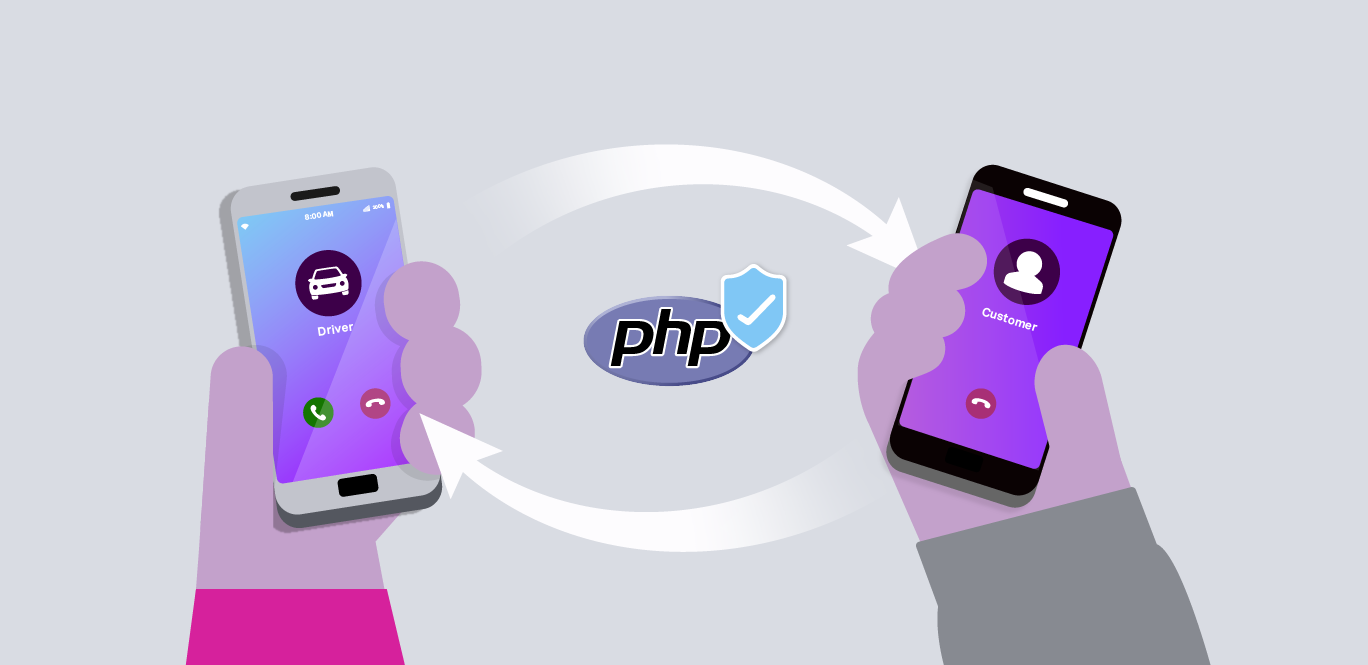
A classic example is an online taxi service. To make the booking experience as smooth as possible, you want your customer and driver to be able to communicate with each other. But you don't want the driver to know the customer's real number (to protect the customer's privacy), and you don't want the customer to know the driver's number either, so they can’t book rides directly without using your service.
Luckily, this can be implemented in just a few steps using the Vonage Voice API in PHP, so let's get to it!
TLDR; the complete source code is available on GitHub.
Create a directory that will contain your code, and then use Composer to generate a new project:
composer initYou can skip all interactive questions by hitting return, which will use the default values. Refuse adding packages interactively; we’ll add everything we need for this project in the next step.
Composer will generate its configuration file composer.json, and a dependency folder, vendor.
To work with inbound calls using Vonage’s Voice API, you will have to provide webhooks so that Vonage can send data to your application.
In this example, we'll use Slim—a lightweight PHP web framework—to implement these webhooks. So next, let’s pull in the Slim framework and a PSR-7 compatible interface for the request/response classes, then vlucas/phpdotenvfor handling environment variables.
composer require slim/slim
composer require slim/psr7
composer require vlucas/phpdotenvNow that all dependencies are sorted, we can move on to writing our code.
In your working directory, create a public/index.php file with the following code:
<?php
use Psr\Http\Message\ResponseInterface as Response;
use Psr\Http\Message\ServerRequestInterface as Request;
use Slim\Factory\AppFactory;


require __DIR__ . '/../vendor/autoload.php';


$app = AppFactory::create();


$app->addBodyParsingMiddleware();
$app->addRoutingMiddleware();
$app->addErrorMiddleware(true, true, true);


// Forward a call via proxy
$app->get('/webhooks/answer', function (Request $request, Response $response) {
   // Code to process the inbound call
});


$app->post('/webhooks/events', function (Request $request, Response $response, array $args) {
   // Code that executes when an event is received
   error_log('event received: ' . $request->getBody());
   return $response->withStatus(204);
});


$app->run();
This code creates a new Slim application and defines two routes. These routes correspond to the following webhook endpoints:
/webhooks/answer: Vonage makes aGETrequest to this endpoint when you receive an inbound call on your virtual number.
/webhooks/events: Vonage makes aPOSTrequest to this endpoint whenever a significant event occurs (such as call ringing, being answered, and completed) to update your application on the call’s status.
See the Webhook Reference for more details.
When you receive an inbound call, Vonage’s API makes a GET request to your /webhooks/answer endpoint and expects the response to contain instructions on how to process the call.
You provide these instructions as a Call Control Object (NCCO) in JSON format. The NCCO defines the various "actions" the call needs to take, such as input to collect any digits the user might press on their telephone keypad or stream to play audio into the call. You can find the full list of actions in the NCCO Reference.
Before we concern ourselves with the proxy logic, let's first ensure we can receive inbound calls on our Vonage number.
Test your application with a talk action that uses text-to-speech (TTS) to read a message to your caller. Define and return the following NCCO in your /webhooks/answer route handler:
$app->get('/webhooks/answer', function (Request $request, Response $response) {
    $ncco = [
        [
            'action' => 'talk',
            'text' => 'Thank you for calling. Everything appears to be working properly'
        ]
    ];

    $response->getBody()->write(json_encode($ncco));
    return $response->withHeader('Content-Type', 'application/json');
});
For the Vonage APIs to make requests to your webhook endpoints, they must be accessible over the Internet.
A great tool for exposing your local development environment to the public Internet is ngrok. Our tutorial shows you how to install and use it.
Launch ngrok using the following command:
ngrok http 8080Make a note of the public URL that ngrok created for you.
https://123example.ngrok-free.app -> http://localhost:8080On the free plan, ngrok generates a new URL each time it restarts, and you will have to update your Voice API application configuration. So leave it running for the duration of this tutorial.
Next, let’s set things up on the Vonage side!
To buy a virtual phone number, go to your API dashboard and follow the steps shown below.
 Purchase a phone number
Go to your API dashboard
Navigate to BUILD & MANAGE > Numbers > Buy Numbers.
Choose the attributes needed and then click Search
Click the Buy button next to the number you want and validate your purchase
To confirm you have purchased the virtual number, go to the left-hand navigation menu, under BUILD & MANAGE, click Numbers, then Your Numbers
You now need to create a Voice-enabled Vonage Application. An application in this context is not the same as the application you have just written the code for. Instead, it is a container for the configuration and security information you need to use the Voice API.
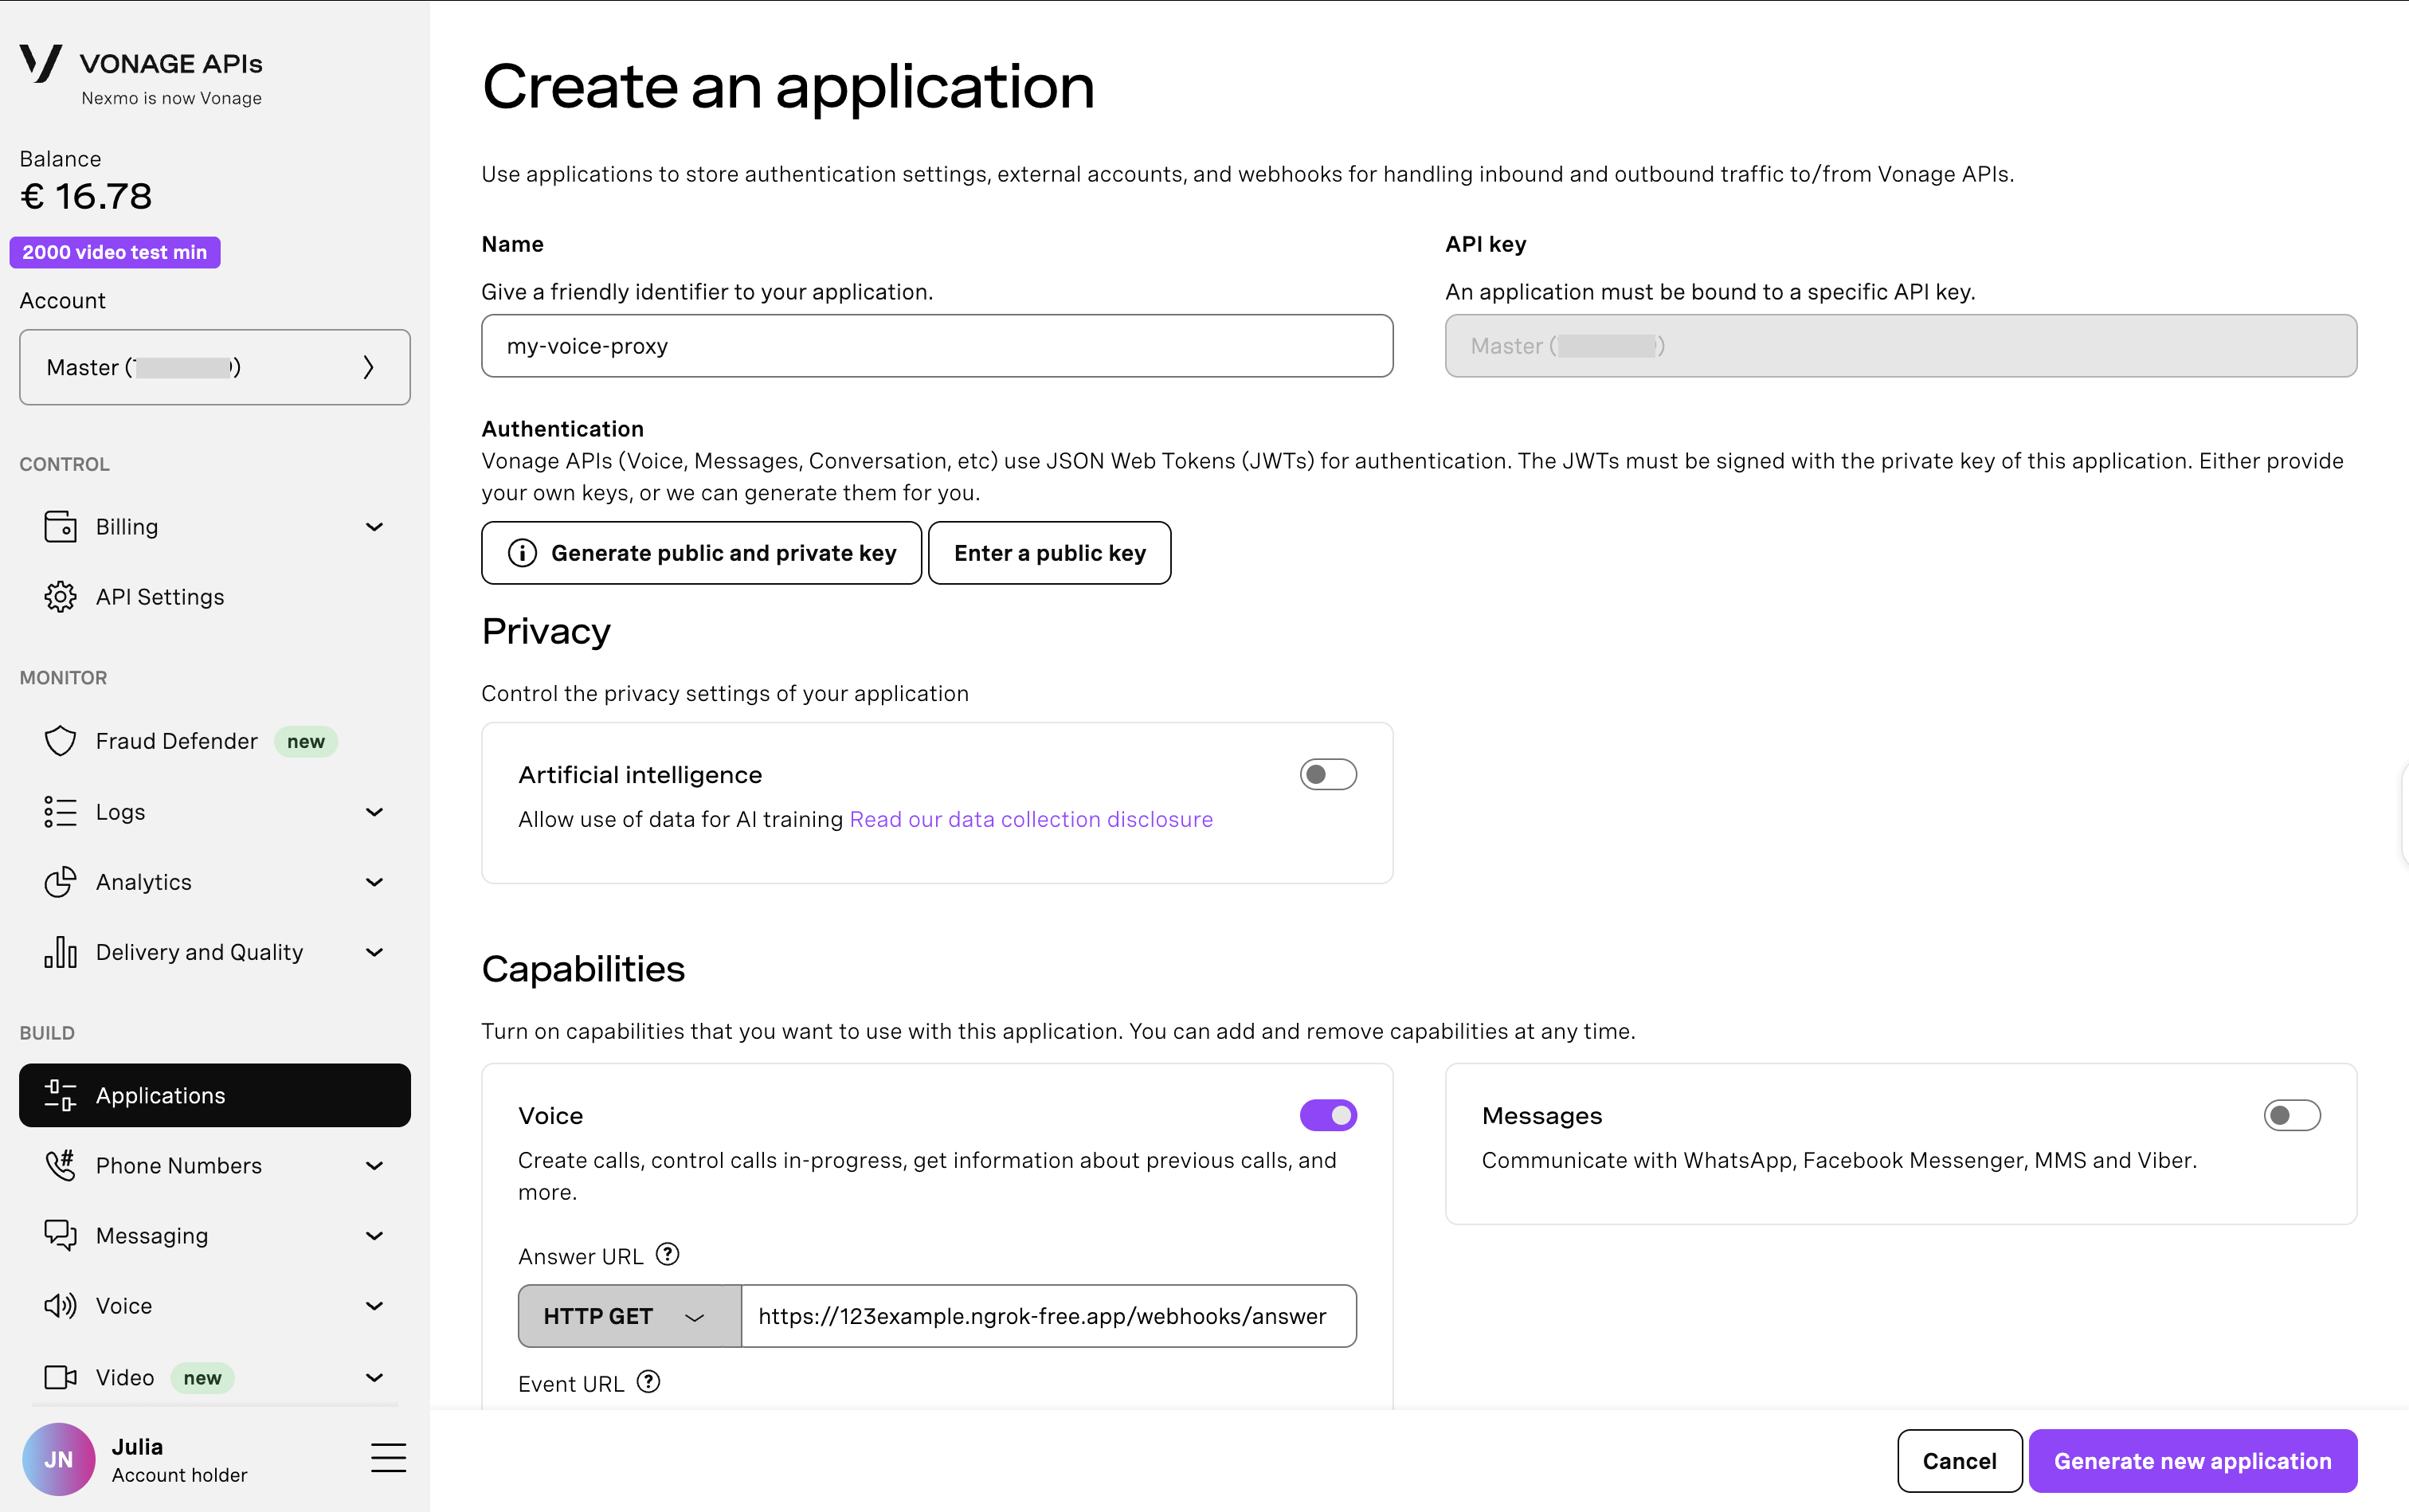
To create an application, go to the Create an Application page on the Vonage Dashboard, and define a Name for your Application.

If you intend to use an API that uses Webhooks, you will need a private key. Click “Generate public and private key”, your download should start automatically. Store it securely; this key cannot be re-downloaded if lost. It will follow the naming convention private_<your app id>.key. This key can now be used to authenticate API calls. Note: Your key will not work until your application is saved.
Choose the capabilities you need (e.g., Voice, Messages, RTC, etc.) and provide the required webhooks (e.g., event URLs, answer URLs, or inbound message URLs). These will be described in the tutorial.
To save and deploy, click "Generate new application" to finalize the setup. Your application is now ready to use with Vonage APIs.
Before clicking Generate new application, ensure you have enabled the Voice capability and have defined the Answer and Event URLs as shown below, using your ngrok link from the steps above.
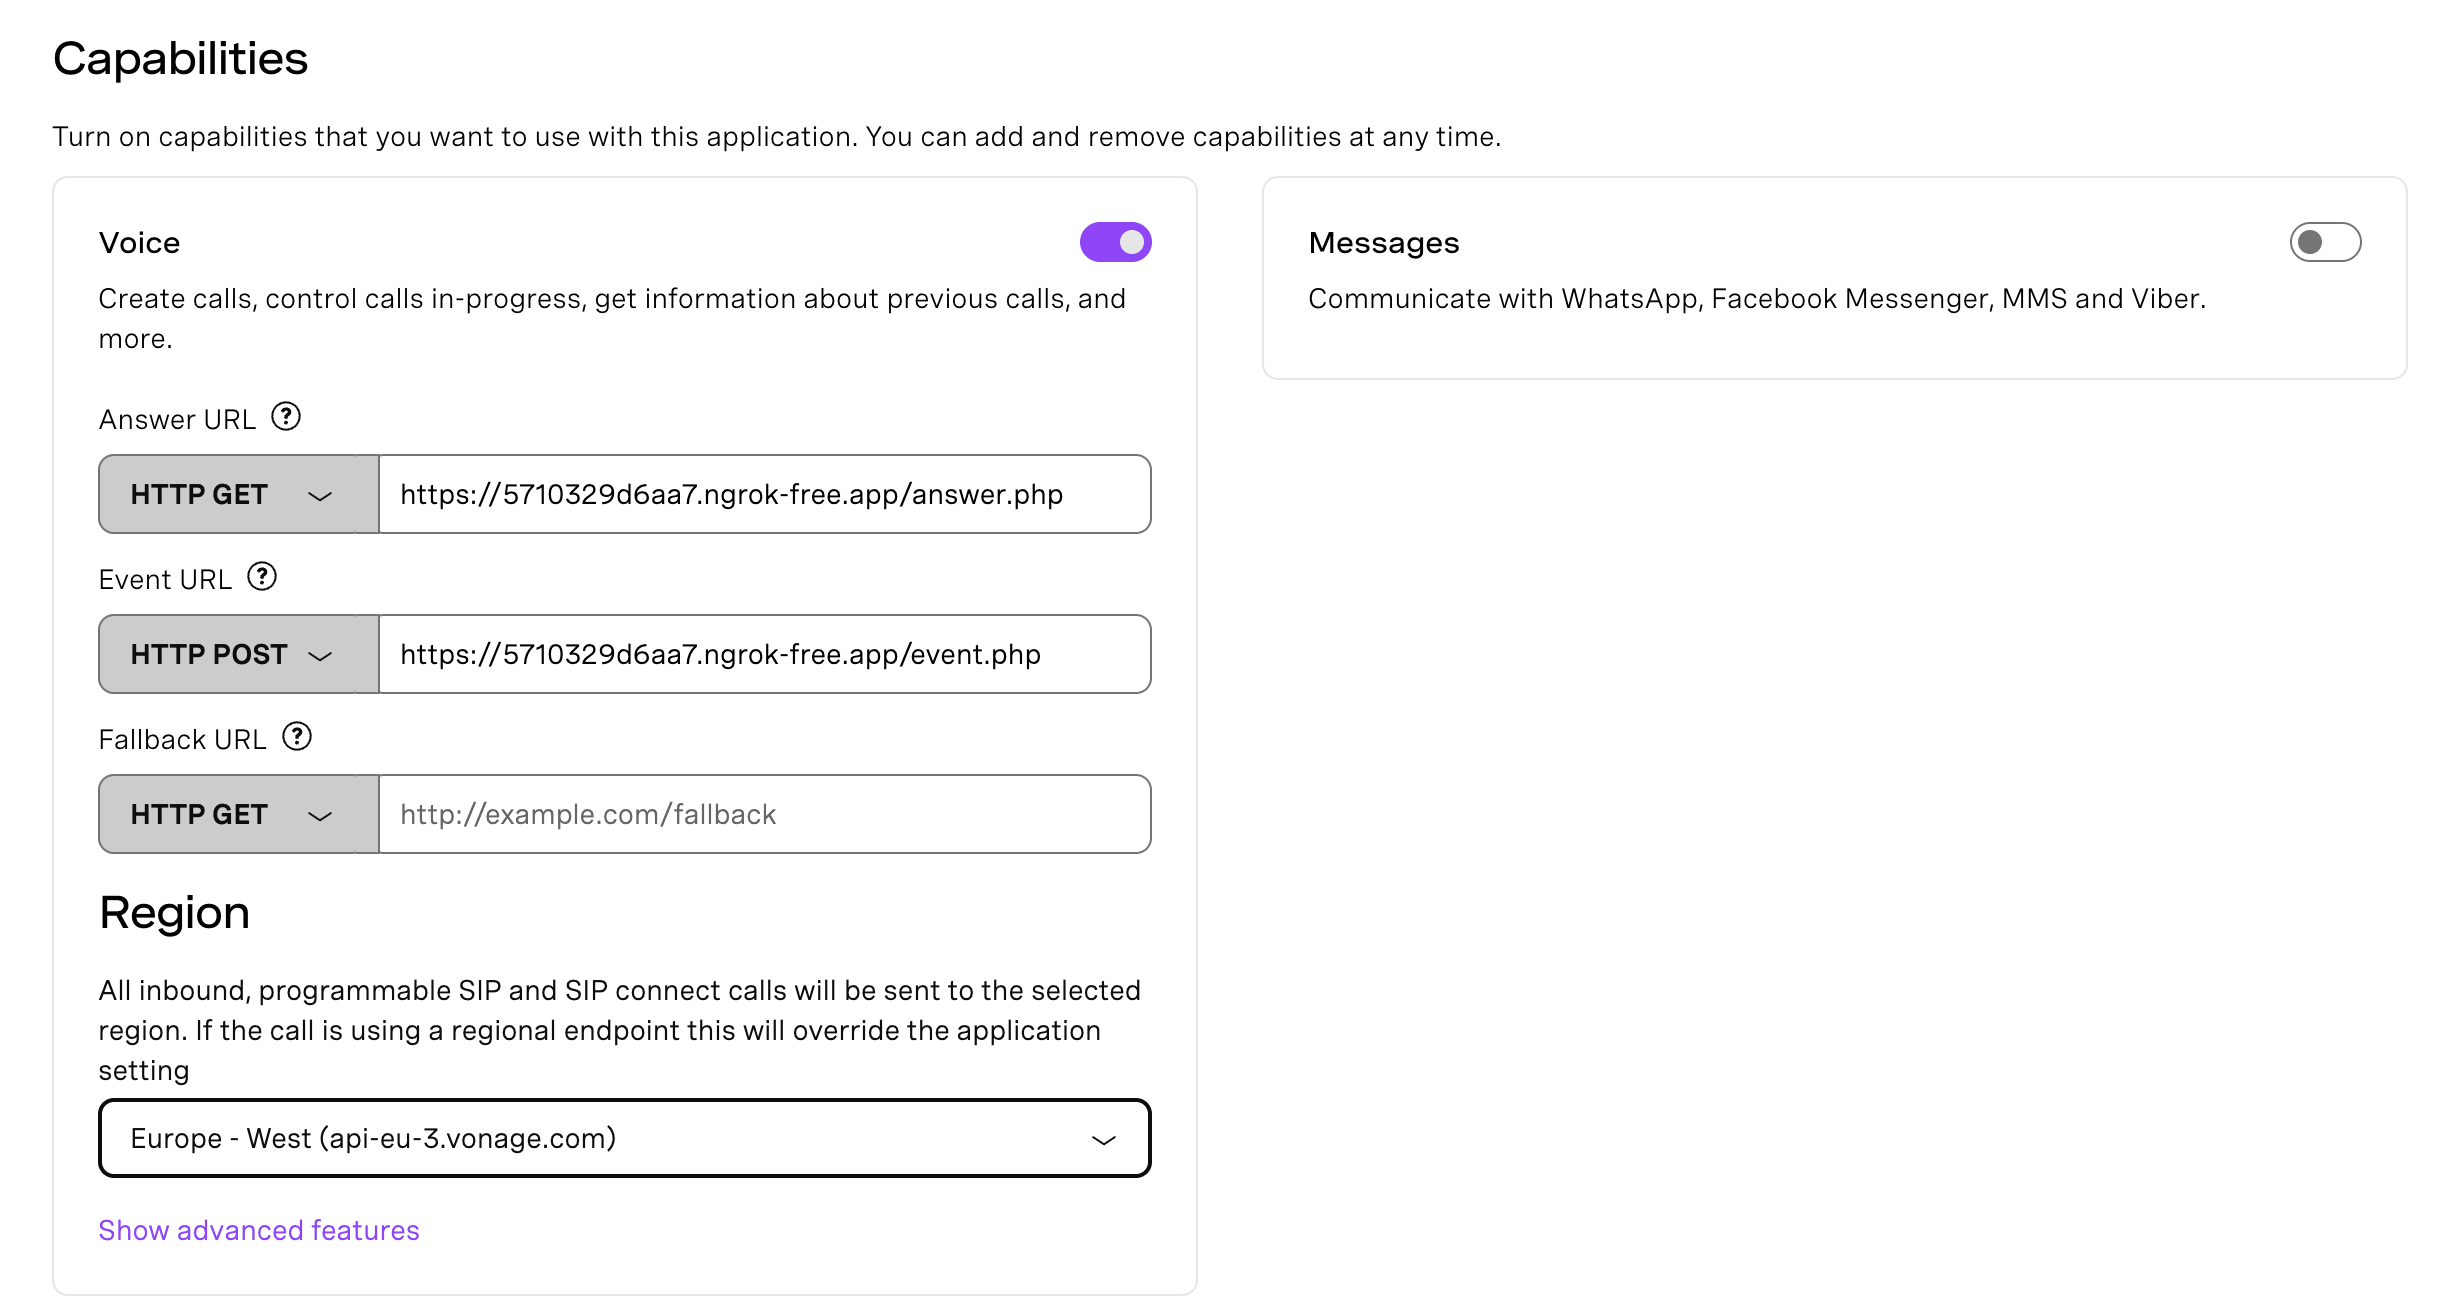 Correct configuration for a voice-enabled Vonage ApplicationNote that we’re using HTTP GET for the Answer URL and HTTP POST for the Event URL.
Once you’re happy with your setup, go ahead and Generate new application.
 Screenshot of Create Application
With your Vonage Application now created, your available virtual numbers will appear at the bottom of the screen, including the one you purchased in the previous step.
Select the number you’d like to use for this tutorial, then click the Link button next to it to link your virtual number and Vonage Application together.
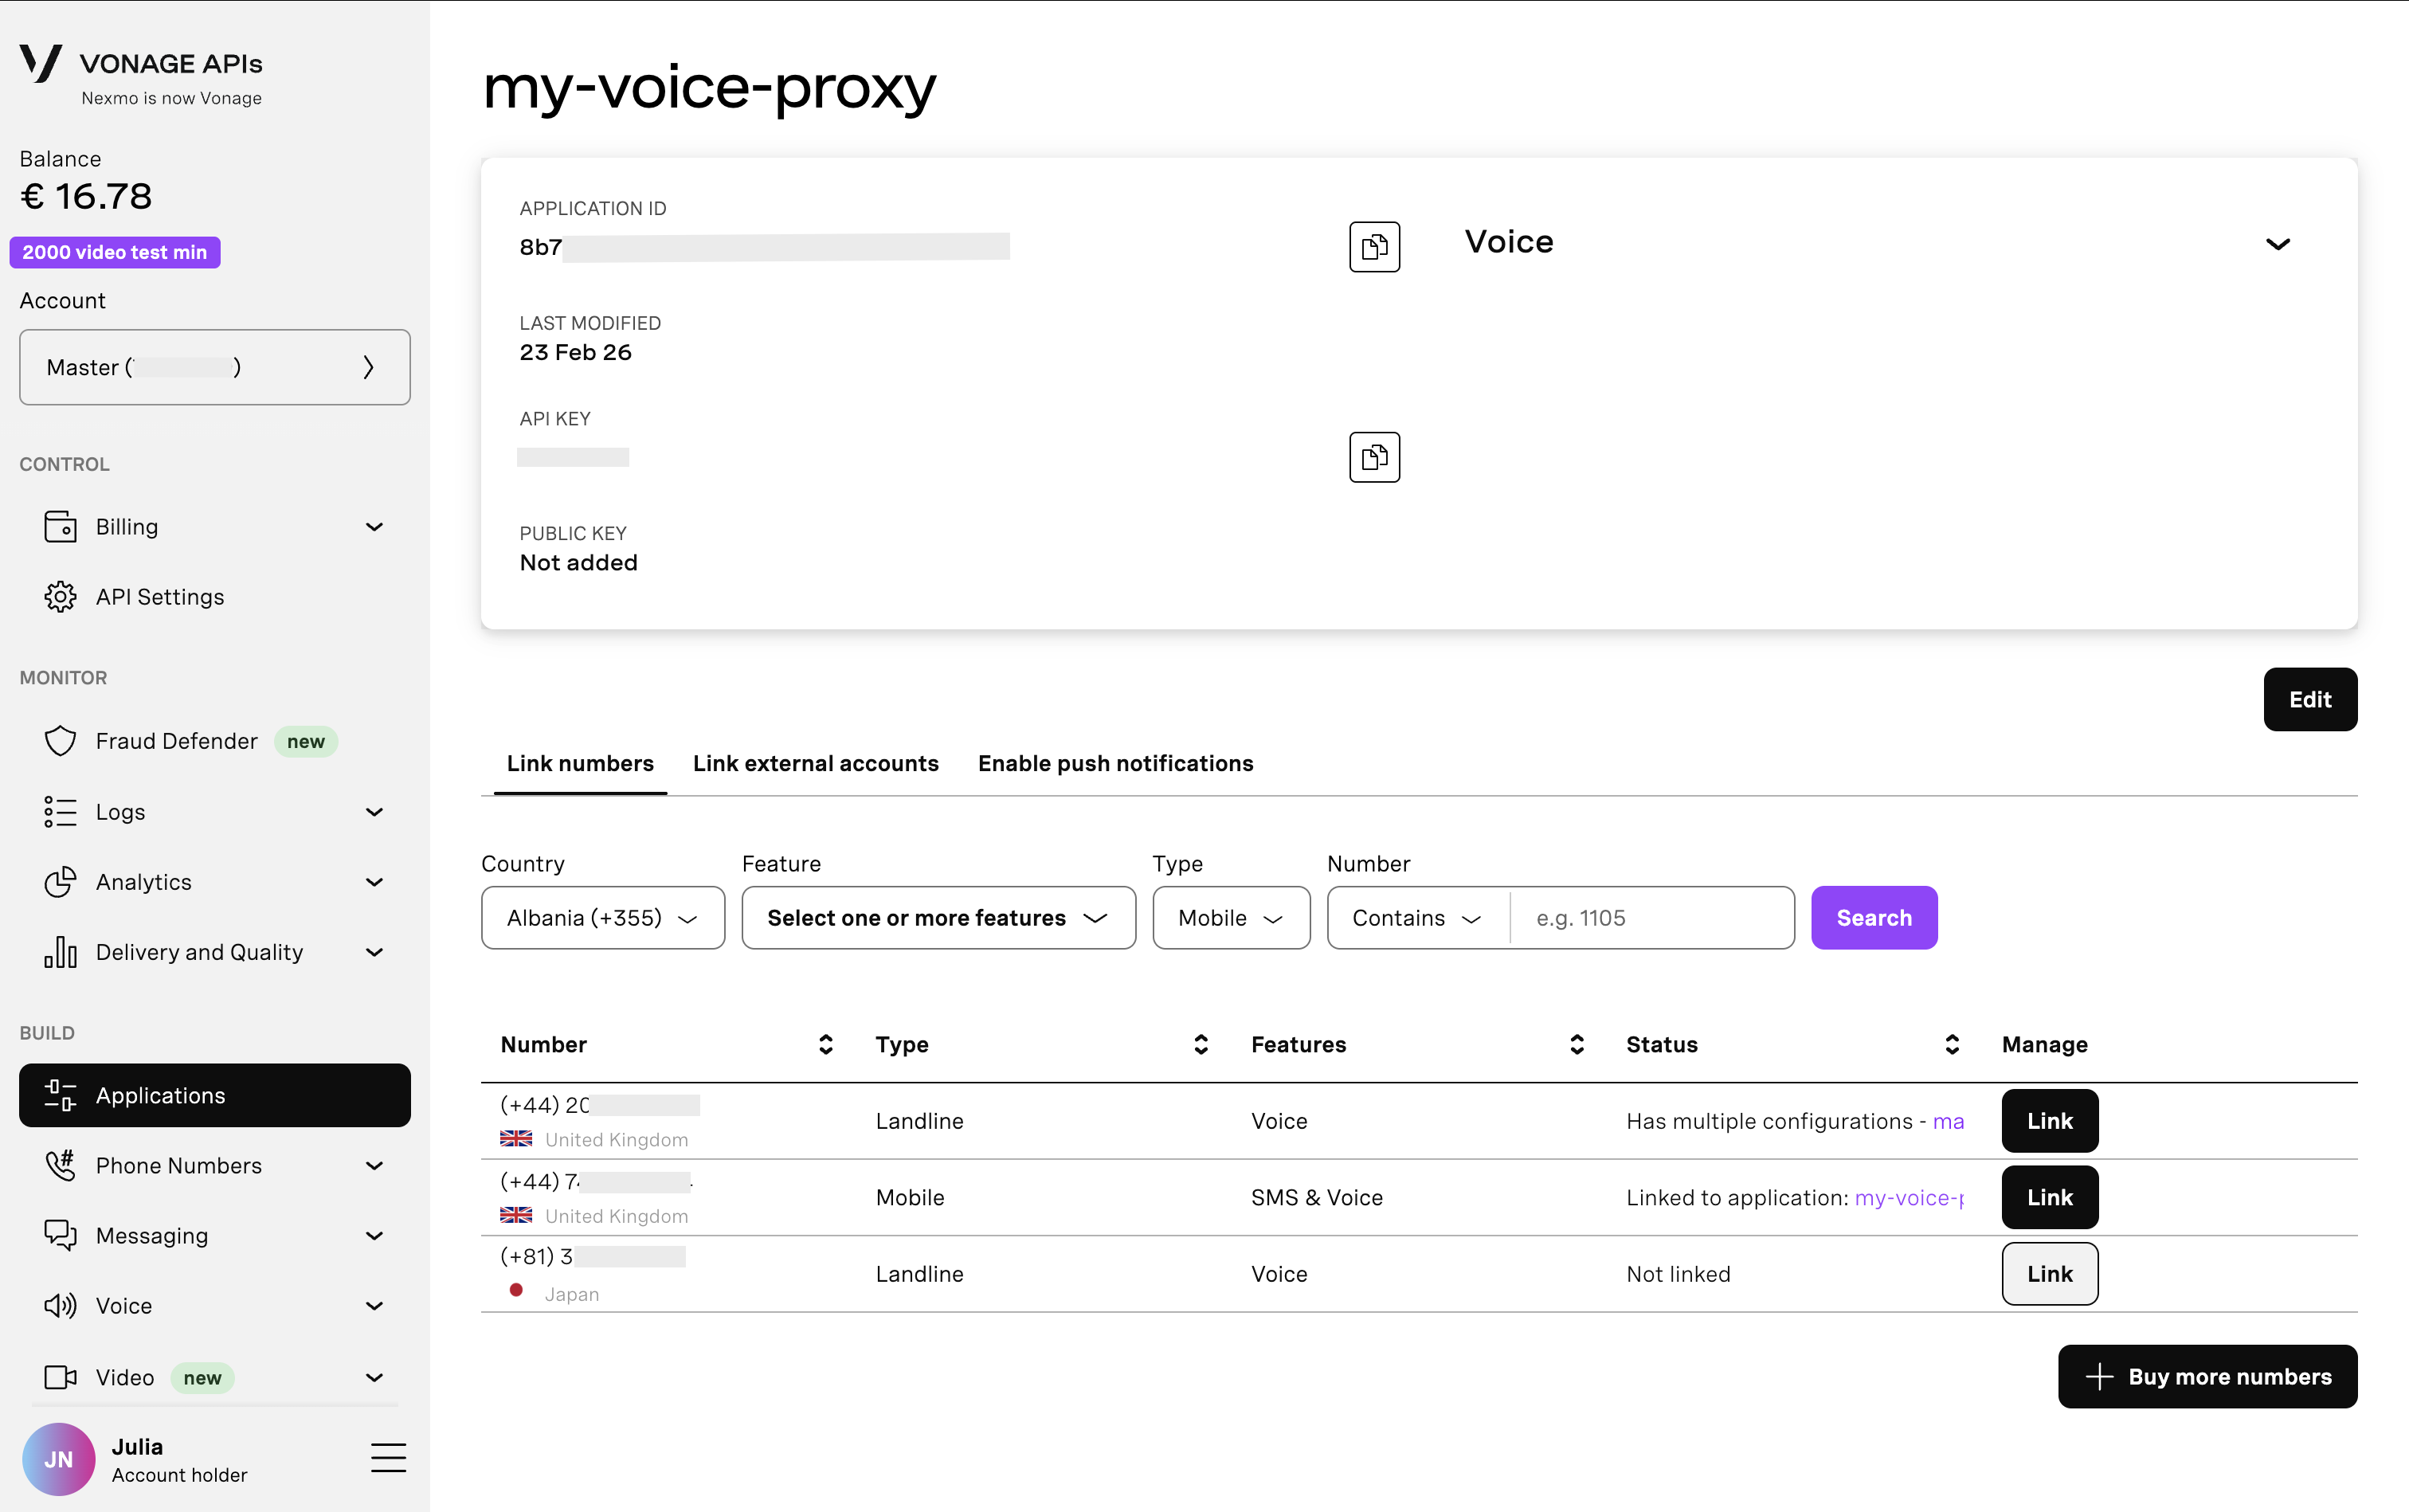 Screenshot of the Vonage Dashboard showing available phone numbers to link to the application we createdAs a result, when you now call your virtual number, Vonage will look for call flow instructions at the URL you specified as Answer URL, and send event webhooks to your Event URL.
Next, let’s check that everything we’ve done so far is working well.
With ngrok running on port 8080 in one terminal window, launch your PHP application on the same port in another:
cd public
php -S localhost:8080Call your Vonage number. If everything is working OK, you should hear the message you defined in your NCCO, and then the call terminates.
To mask the caller ID, we will connect an inbound call to our target recipient's number and use our Vonage virtual number to hide the inbound caller's real number.
In your index.php file, create two string constants to store the FROM_NUMBER and TO_NUMBER. The code snippet below pulls these values from the environment, which is a good practice to follow.
$dotenv = Dotenv\Dotenv::createImmutable(__DIR__ . '/../');
$dotenv->load();

define('FROM_NUMBER', $_ENV['FROM_NUMBER']);
define('TO_NUMBER', $_ENV['TO_NUMBER']);Next, create a .env file in the root of your working directory and assign the values for these two constants. Both numbers should include the country code and omit any leading zeroes. For example, in the UK the country code is 44. So if my mobile number is 07700900004, the correct format is 447700900004.
// Your Vonage virtual number

FROM_NUMBER=4474example01

// A landline or mobile number you can use for testing. This should differ from the number you will use to make the initial call.

TO_NUMBER=4478example02
Finally, let’s update the NCCO to include a connect action that instructs Vonage to connect the inbound caller to the recipient. In your index.php file, update the /webhooks/answer endpoint with the following:
// Forward a call via proxy
$app->get('/webhooks/answer', function (Request $request, Response $response) {
    $ncco = [
        [
            'action' => 'connect',
            'from' => FROM_NUMBER,
            'endpoint' => [
                [
                    'type' => 'phone',
                    'number' => TO_NUMBER,
                ]
            ]
        ]

    ];

    $response->getBody()->write(json_encode($ncco));
    return $response->withHeader('Content-Type', 'application/json');
});
Ensure that ngrok is still running in one terminal window and re-launch your PHP application in another:
cd public
php -S localhost:8080Call your Vonage virtual number. When the call is answered, it should ring your second number immediately. That call should originate from your Vonage number rather than the number you used to place the call.
That's it! You have now implemented a simple voice proxy that hides a caller's real number.
If you want to learn more about the Voice API, check out the following resources:
In this tutorial, we built a voice proxy using PHP and the Vonage Voice API to forward calls while masking caller IDs. From here, you could extend this solution with call recording, dynamic routing, or database-backed number mapping.
Have a question or want to share what you're building?
Subscribe to the Developer Newsletter
Follow us on X (formerly Twitter) for updates
Watch tutorials on our YouTube channel
Connect with us on the Vonage Developer page on LinkedIn
Stay connected and keep up with the latest developer news, tips, and events.
Share:
Julia is committed to empowering fellow developers by creating tutorials, guides, and practical resources. With a background in outreach and education, she aims to make technology more accessible and enhance the overall developer experience. You can often find her at local community events.