
Share:
An English teacher turned empathetic software engineer. A curious optimist with a passion for creating accessible content and helping developers level up their skills.
Discover Your Twitter’s Positivity Score with React
Time to read: 16 minutes
In 2019, I challenged myself to spread positivity and kindness in my day-to-day life.
But I quickly realized that that goal felt a bit vague and rather nebulous. While it had nice intentions, I found it difficult to judge its success or impact.
So for a few months, I pondered on how I might measure my goal and was lucky enough to discover that Microsoft Azure’s Text Analytics API offers a way for me to track my positivity pledge!
Azure’s team has open sourced their machine learning algorithms, meaning that I can analyze any text’s sentiment score on a numeric scale from 0 to 1 (0 being negative and 1 being positive).
This means that I can score my language and see if I truly have been spreading kindness and positivity, especially when it comes to my social media posts!
So I thought I’d create a React app that uses the Twitter API to pull down my most recent tweet and analyze its sentiment to then use Nexmo’s Messages API to send myself a report!
To work through this tutorial, you will need a Vonage account. You can sign up now for free if you don't already have an account.
In addition, you will also need:
a Twitter Developers account
a Rapid API account
You are going to accomplish the following tasks to create your app:
Create a backend server with Express
Create a frontend app with React
Create a React component to receive a Twitter username
Retrieve the most recent tweet with the Twitter API
Calculate sentiment score with the Microsoft Azure API
Send that report to your phone with Nexmo’s Messages API
This tutorial will take you through the process from scratch. Though if you’d like to see the finished code, you can clone the git repository for this project.
To begin, in this project’s root directory run:
This creates a package.json file, allowing you to get started installing just a few dependencies.
To do that run:
So that you’ll be able to run your server and your client using a single command npm run dev, open up your package.json file and change the scripts to look like this:
// package.json
  "scripts": {
      "start": "node server.js",
      "server": "nodemon server.js",
      "client": "npm start --prefix client",
      "dev": "concurrently \"npm run server\" \"npm run client\""
},Next, create three more files in the base of your directory:.env, server.js and private.key:
Fill in your .env file with credentials for Nexmo and Twitter. It should look like this:
# .env

# Nexmo's credentials
API_KEY=*****
API_SECRET=*********
APPLICATION_ID=**********
NEXMO_NUMBER=***********
# Twitter's credentials
CONSUMER_KEY=*******
CONSUMER_SECRET=*******
ACCESS_TOKEN_KEY=**************
ACCESS_TOKEN_SECRET=*************To fill in the API key and secret, visit Nexmo’s Getting Started page of your Dashboard. And you can get the Application ID and private key from the Create an Application page.
When creating the app, you are given the option to link the app to your Nexmo phone number. Be sure to copy and paste that phone number and put it in your .env file as the NEXMO_NUMBER.
Be sure to also generate a public/private key pair. I’ve directly pasted the key into the private.key file.
To fill in the consumer and access keys and secrets, create a Twitter app and generate the keys and tokens.
Now in your server.js file, let’s initialize our Express app and attach a few requirements:
//  server.js
const dotenv = require('dotenv');
const express = require('express');
const bodyParser = require('body-parser');
const Nexmo = require('nexmo');
const Twitter = require('twitter');

dotenv.config();
const app = express();
app.use(bodyParser.json());

const port = 5000;

app.listen(port, () => console.log(`server started on port ${port}`));
Also add in the different credentials you’ll need to utilize the Nexmo and Twitter APIs:
//  server.js  continued:

// Nexmo credentials
const nexmo = new Nexmo({
  apiKey: process.env.API_KEY,
  apiSecret: process.env.API_SECRET,
  applicationId: process.env.APPLICATION_ID,
  privateKey: './private.key'
}, {debug: true});

// Twitter credentials
const client = new Twitter({
  consumer_key: process.env.CONSUMER_KEY,
  consumer_secret: process.env.CONSUMER_SECRET,
  access_token_key: process.env.ACCESS_TOKEN_KEY,
  access_token_secret: process.env.ACCESS_TOKEN_SECRET
});At the bottom of this server.js file, add the two signatures of the endpoints we will return to in a bit to write:
//  server.js  continued:
app.post('/userName', function(req, res) {});
app.post('/sendSMS', function(req, res) {});
Next, still within the root of your directory, create your React app by running:
I’ve named the app client but feel free to name it whatever you like. Once the React app has been created, move into it and start it up to ensure that everything worked correctly in your installation process:
So that you can run both ports simultaneously, in the client/package.json file add:
// package.json
"proxy": "http://localhost:5000",Running the create-react-app provides a bunch of boilerplate. Within the src/ folder there is an App.js file. In that file I added a call to a <TwitterName /> component which we will build out next.
My App.js file looks like this:
// client/src/App.js
import React from 'react';
import TwitterName from './components/twitterName';

class App extends React.Component {
  render() {
    return (
      <div>
        <TwitterName />
      </div>
    );
  }
}

export default App;Next let’s create a components folder within src/:
Within that folder create three files:
Inside of twitterName.js along with my boilerplate, let’s create two functions senduserName() and getTweet():
// client/src/components/twitterName.js

import React from 'react';
import SentimentCalculate from './sentimentCalculate';

class TwitterName extends React.Component {
  constructor(props) {
    super(props);
    this.state = {
      userName: '',
      tweetContent: '',
    };
  }
  senduserName();
  getTweet();
  render();
}

export default TwitterName;Into the render() add an <input /> to receive and store the Twitter user name as state from the user.
// client/src/components/twitterName.js

 render() {
    return (
      <div>
      <label>
        Enter a Twitter Handle and find the most recent tweet:
        <input
          placeholder="twitter name"
          type="text"
          value={this.state.userName}
          onChange={(e) => this.setState({ userName: e.target.value})}
        />
      </label>
        <button onClick={this.senduserName}>
          find most recent tweet
        </button>
      </div>
    )
  }
The senduserName() is called once a user has entered their username and hit the find most recent tweet button. That function sends information to the server.js backend and looks like this:
//client/src/components/ twitterName.js

senduserName = (event) => {
    event.preventDefault();
    fetch('/userName', {
      method: 'post',
      headers: {
        'Content-Type': 'application/json'
      },
      body: JSON.stringify({userName: this.state.userName})
    })
    this.getTweet()
  }
That function then calls the getTweet() function which looks like this:
// client/src/components/twitterName.js

  getTweet = (event) => {
    fetch('/twitter')
    .then(res => res.json())
    .then(tweetContent => this.setState({tweetContent}, () => console.log('tweet fetched: ', tweetContent)))
  }
This function receives the data from the server and then displays the most recent tweet on our React page.
The only thing left to do on this page is now call the next component, <SentimentCalculate /> and so at the bottom of the render() add that and pass the state (tweetContent and userName) to that component:
// client/src/components/twitterName.js
  render() {
    return (
      <div>
        <input
          placeholder="twitter name"
          type="text"
          value={this.state.userName}
          onChange={(e) => this.setState({ userName: e.target.value})}
        />
        <button onClick={this.senduserName}>
          find most recent tweet
        </button>

        <SentimentCalculate tweetContent={this.state.tweetContent} userName={this.state.userName} />
      </div>
    )
  }
Let’s go back to the server.js file in the root of our project and fill in the app.post('/userName'); function:
//server.js

// Receive input and call Twitter API
app.post('/userName', function(req, res) {
  userName = req.body.userName;
  app.get('/twitter', (req, res) => {
    // read most recent tweet
    var username = {screen_name: userName };
    client.get('statuses/user_timeline', username, function(error, tweets, response) {
      if (!error) {
        console.log(`most recent tweet: `, tweets[0].text);
        res.json(tweets[0].text)
      }
    });
  });
});
Here, the userName is passed in from the client and then sent to the Twitter API. The most recent tweet is then sent back to the client to be displayed in our React code.
Let’s build out our sentimentCalculate.js file now with two different functions calculateSentiment() and showTweet():
//client/src/components/sentimentCalculate.js

import React from 'react';
import unirest from 'unirest';
import PhoneNumber from './phoneNumber';
require('dotenv').config()

class SentimentCalculate extends React.Component {
  constructor(props) {
    super(props);
    this.state = {
      tweetContent: props.tweetContent,
      userName: props.userName,
      score: ''
    };
  }
  calculateSentiment();
  showTweet();
  render();
}
export default SentimentCalculate;Notice that I’m initializing state and loading in the tweetContent and userName as props from the <TwitterName /> component.
The showTweet() function will be quite simple and will display the tweet if it exists. It will also show a button to call the calculateSentiment() function:
//client/src/components/sentimentCalculate.js
  showTweet() {
    if (this.props.tweetContent) {
      return (
        <div>
          {this.props.tweetContent}
          <button onClick={this.calculateSentiment}>
            Calculate sentiment score
          </button>
        </div>
      )
    }
  }
That calculateSentiment() function will look like this:
//client/src/components/sentimentCalculate.js

  calculateSentiment = (event) => {
    console.log("calculating sentiment for: ", this.props.tweetContent)
    event.preventDefault();
    unirest.post("https://microsoft-azure-text-analytics-v1.p.rapidapi.com/sentiment")
    .header("X-RapidAPI-Host", "microsoft-azure-text-analytics-v1.p.rapidapi.com")
    .header("X-RapidAPI-Key", process.env.REACT_APP_RAPIDAPI_KEY)
    .header("Content-Type", "application/json")
    .send({"documents":[{"language":"en","id":"string","text":this.props.tweetContent}]})
    .end((result) => {
      const newScore = result.body.documents[0].score
      console.log("The score is:", newScore)
      this.setState({ score: newScore })
    });
  }
This function calls the Microsoft Azure’s Text Analytics via Rapid API. I like using Rapid API as it allows me to connect to a bunch of different APIs from a single login.
I keep the key within an .env file in the client folder. So be sure to create a new .env file to protect your credentials as well:
The calculateSentiment() function sends the tweetContent to the API and returns a score.
Add to the render() function a place to display that new state:
//client/src/components/sentimentCalculate.js

  render() {
    return (
      <div>
        {this.showTweet()}
        {this.state.score && `Tweet's sentiment score: ${this.state.score}`}
        <PhoneNumber score={this.state.score} tweetContent={this.props.tweetContent} userName={this.props.userName} />
      </div>
    )
}Notice that underneath the score, the final component is called: <PhoneNumber />. Be sure to also pass the state via props to that component.
Let’s build out our final phoneNumber.js file now with the functions sendSMS(), renderPhoneInput(), and renderSendButton() to build out the functionality to send our SMS message via Nexmo Messages API:
//client/src/components/phoneNumber.js

import React from 'react';

class PhoneNumber extends React.Component {
  constructor(props) {
    super(props);
    this.state = {
      score: props.score,
      tweetContent: props.tweetContent,
      userName: props.userName,
      number: ''
    };
    this.sendSMS = this.sendSMS.bind(this);
  }
  sendSMS();
  renderPhoneInput();
  renderSendButton();
  render() {
    return (
      <div>
        {this.renderPhoneInput()}
        {this.renderSendButton()}
      </div>
    )
  }

}
export default PhoneNumber;The first method called is renderPhoneInput(). Let’s build that out now:
//client/src/components/phoneNumber.js

  renderPhoneInput() {
    if (this.props.score) {
      return (
        <div>
          Phone number:
          <input
            placeholder="18005554444"
            type="tel"
            value={this.state.number}
            onChange={(e) => this.setState({ number: e.target.value})}
          />
        </div>
      );
    }
  }
If the component has received a score from the last component, this function will show an input for the user to provide their phone number to send the sentiment analysis report. Once the user has provided a valid number, the renderSendButton() function will be activated:
//client/src/components/phoneNumber.js

  renderSendButton() {
    if (this.state.number && this.state.number.match(/\d/g).length===11) {
        return (
          <div>
            <button onClick={this.sendSMS}>
            Send the tweet’s score to my phone
            </button>
          </div>
        );
      }
  }
This button then calls the final function, sendSMS(), which looks like this:
//client/src/components/phoneNumber.js

  sendSMS() {
    fetch('/sendSMS', {
      method: 'post',
      headers: {
        'Content-Type': 'application/json'
      },
      body: JSON.stringify({
        number: this.state.number,
        score: this.props.score,
        tweetContent: this.props.tweetContent,
        userName: this.props.userName
      })
    })
   .then(res => {
      alert('Your text was successfully sent!')
    })
    .catch(function(error){ console.log(error)});
  }
This function sends all of the state we’ve collected from the user to the server. And finally alerts the user once that function has successfully completed.
Our final step is to return back to the server.js and write the app.post('/sendSMS') function:
//server.js

// send SMS via Nexmo
app.post('/sendSMS', (req, res) => {
  res.send(req.body);
  let score = req.body.score;
  let scoreSign = '';

  // analyze the sentiment and assign emoji
  if (score > '.5') {
    scoreSign = '✅'
  } else if (score == '.5') {
    scoreSign = '😐'
  } else {
    scoreSign = '👿'
  }

  //  Nexmo Messages API
  nexmo.channel.send(
    { type: 'sms', number: req.body.number }, // To
    { type: 'sms', number: process.env.NEXMO_NUMBER }, // From
    {
      content: {
        type: 'text',
        text: `${req.body.userName}'s most recent tweet was: \"\ ${req.body.tweetContent}\"\ and the sentiment score is: ${scoreSign}`,
      }
    },
    (err, data) => {
      if (err) {
        console.log(err);
      } else {
        console.log(data);
      }
    }
  );
});
There is a bit of logic at the top to do some sentiment analysis based on the score. You may certainly remove that if you’d prefer to send the exact number as opposed to emojis.
It then sends the report as an SMS from your Nexmo number to whatever number the user has provided.
Here's what the structure of my final app looks like:
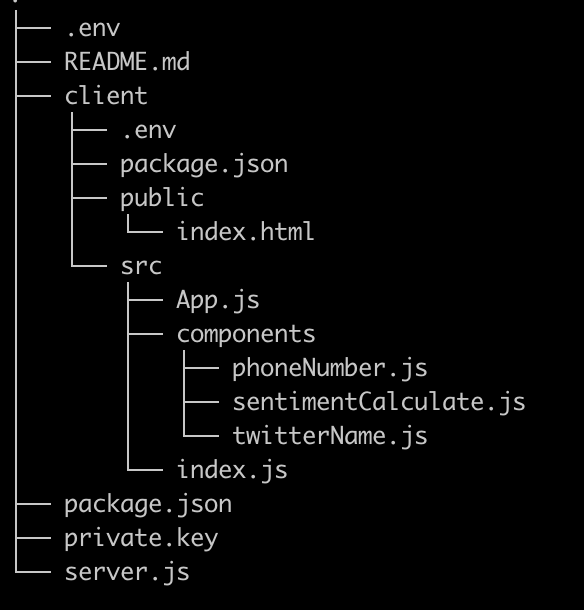 Structure of folders and files
The final step is to give the code a shot and see how things work! Move back into the root directory and run the command that will fire up the server and the client simultaneously:
Visiting localhost:3000 will display our React component that prompts the user for a Twitter handle.
That user's most recent tweet will then be retrieved and displayed on the page.
Click the calculate the sentiment button to call the Microsoft Azure Text Analytics API and display the tweet's score.
Enter your personal phone number and the SMS report will be sent to you via Nexmo's Message API.
🎉Voila!🎉 You've successfully created a React app to analyze the sentiment of your Twitter that is capable of sending an SMS report to anyone!
If this has piqued your interest in doing more with messages and sentiment analysis, here are some ideas for things to try next:
Nexmo's Dispatch API allows you to redirect your message depending on its delivery status. Play around with that and try sending your sentiment report to Viber or WhatsApp as well!
Play with Twitter's
/streamingcapability and consider sending a report every time a username tweets.