
Share:
Customer Solutions Engineer at Vonage. With a background in product management, network and systems operations, customer support, quality assurance, software development team manager, Tony is working in the Telecommunications industry formerly in France and now in the US. He helps global large and smaller companies develop solutions using programmable voice, messaging, video, and multi-factor authentication services.
Connecting Voice Calls to an Amazon Lex Bot
Time to read: 5 minutes
Today’s AI platforms offer advanced capabilities with voice and text bots, transcription engines, and sentiment analysis engines.
These capabilities help developers build bots that serve a multitude of functions, including supporting callers in placing orders, making a booking, getting assistance with issues, and much more.
In this tutorial, we will guide you on setting up a basic Amazon Lex bot, setting up a Lex reference connection, and a sample Vonage Voice API application, which will allow you to call a phone number and interact with the Lex bot via voice.
In the first section, we will set up an example Amazon Lex bot.
Next, we will set up a Lex reference connection. This Lex reference connection allows 2-way audio streaming of the caller’s voice and Lex bot responses via WebSockets. It also relays the transcriptions and sentiment scores from Lex bot to the Voice API application.
After that, we will set up a sample application using Vonage Voice API to handle an incoming call, establish the WebSocket, receive the caller and bot transcriptions, and the sentiment analysis scores of a caller’s sentences.
The diagram below shows an overview of this sample integration architecture.
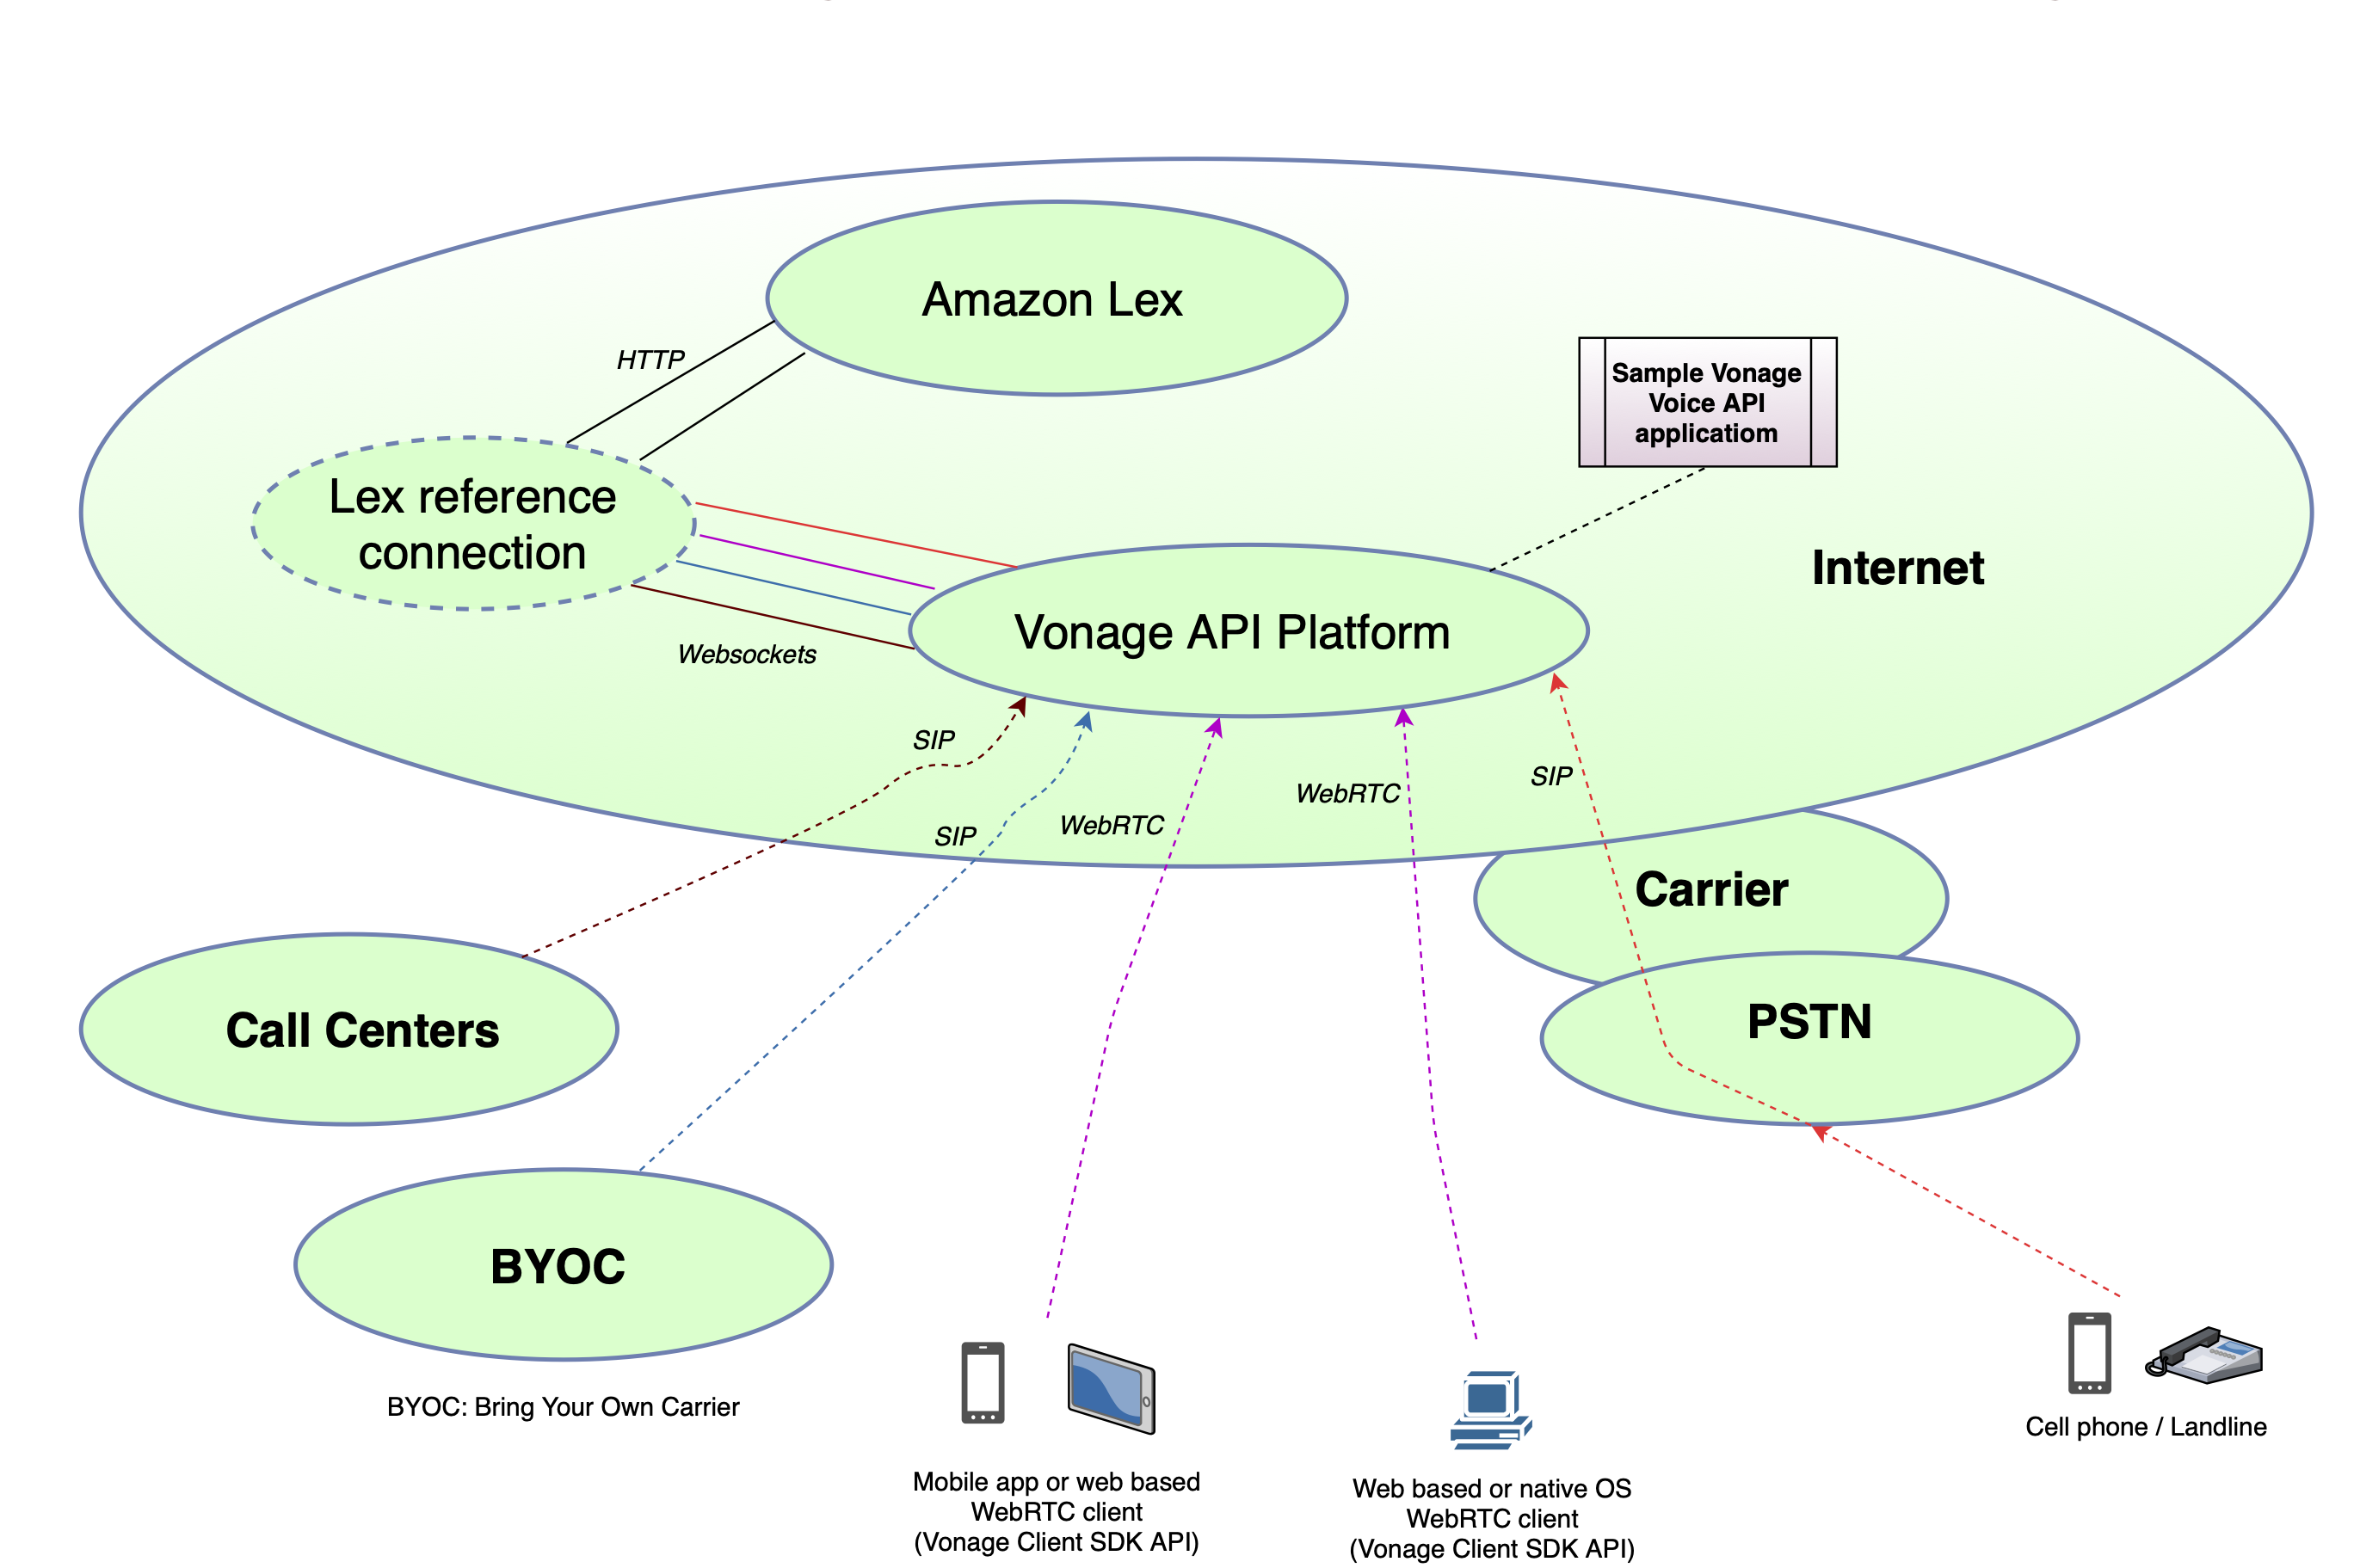 A diagram that outlines how Amazon Lex and the Vonage Voice API work together to create a voice bot
To perform the actions outlined in the following steps, you will need an Amazon Web Services account. If you don't have one, you can create one before getting started.
Log in to your AWS Management Console or create an AWS account if you do not yet have one.
Search for and then go to Amazon Lex service, click on Create to launch the bot setup process.
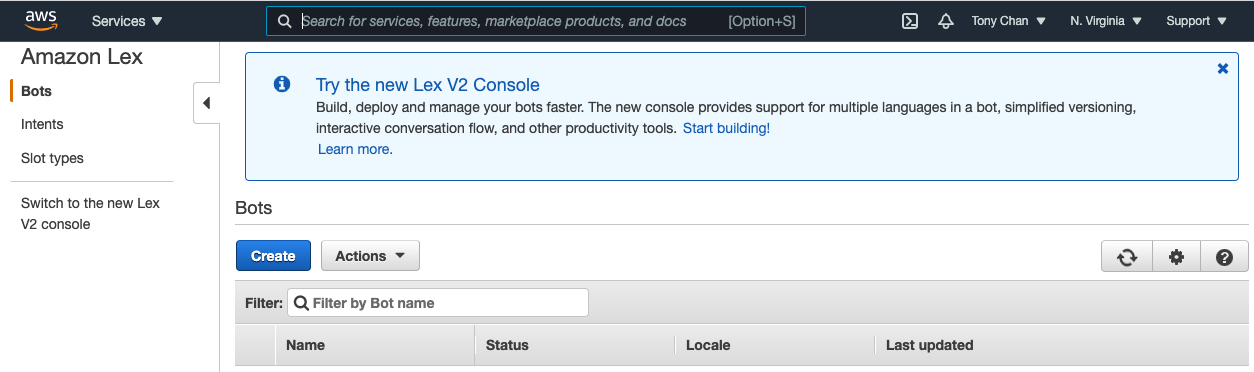 The Amazon Lex service dashboard
As part of the setup process, you will be presented with the option to Create Your Own bot or to Try a Sample. You'll need a sample bot for this example, so click on ScheduleAppointment.
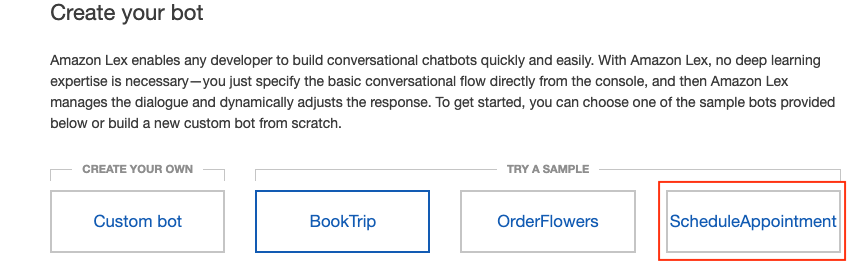 The Amazon Lex Bot Creation Dashboard
Next, you can set up the bot.
You may keep the pre-set bot name or enter a different one
make a note of the bot name (e.g. ScheduleAppointment), you will need it later
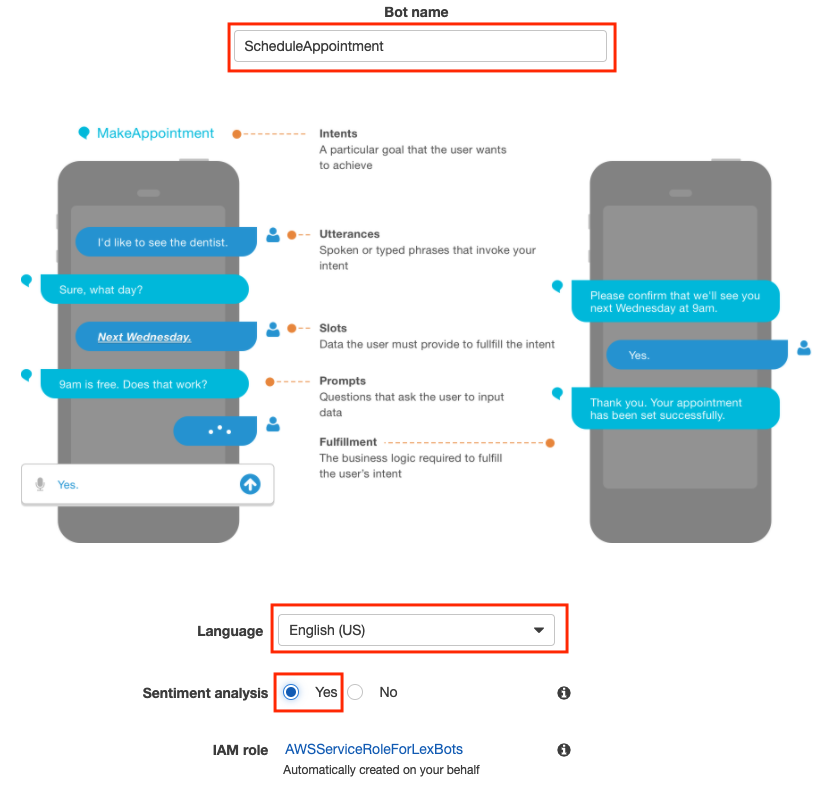 The Lex bot setup screen from Amazon Web Services
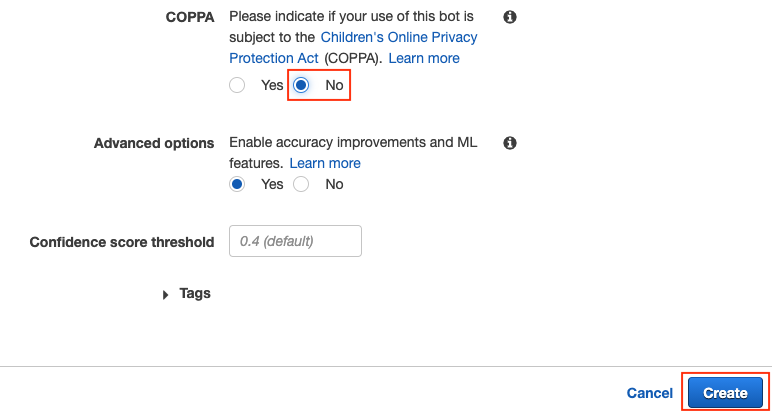
Select the desired language
Select Yes for Sentiment Analysis
For this specific bot example, you may select No for COPPA
Once the settings are completed, click on Create.
 Final steps in the bot setup process
When the bot creation process has completed, you will see a screen similar to the one shown below.
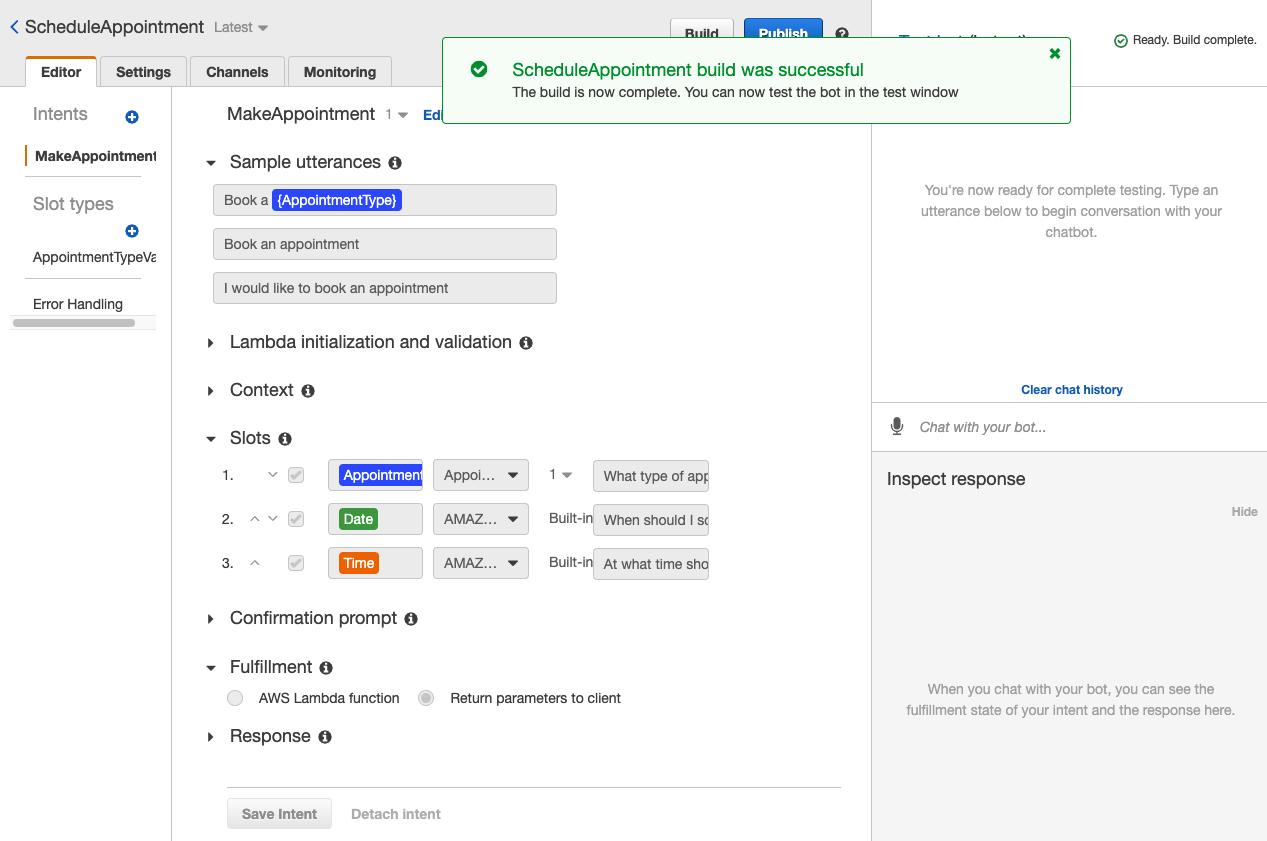 The bot has been created successfully
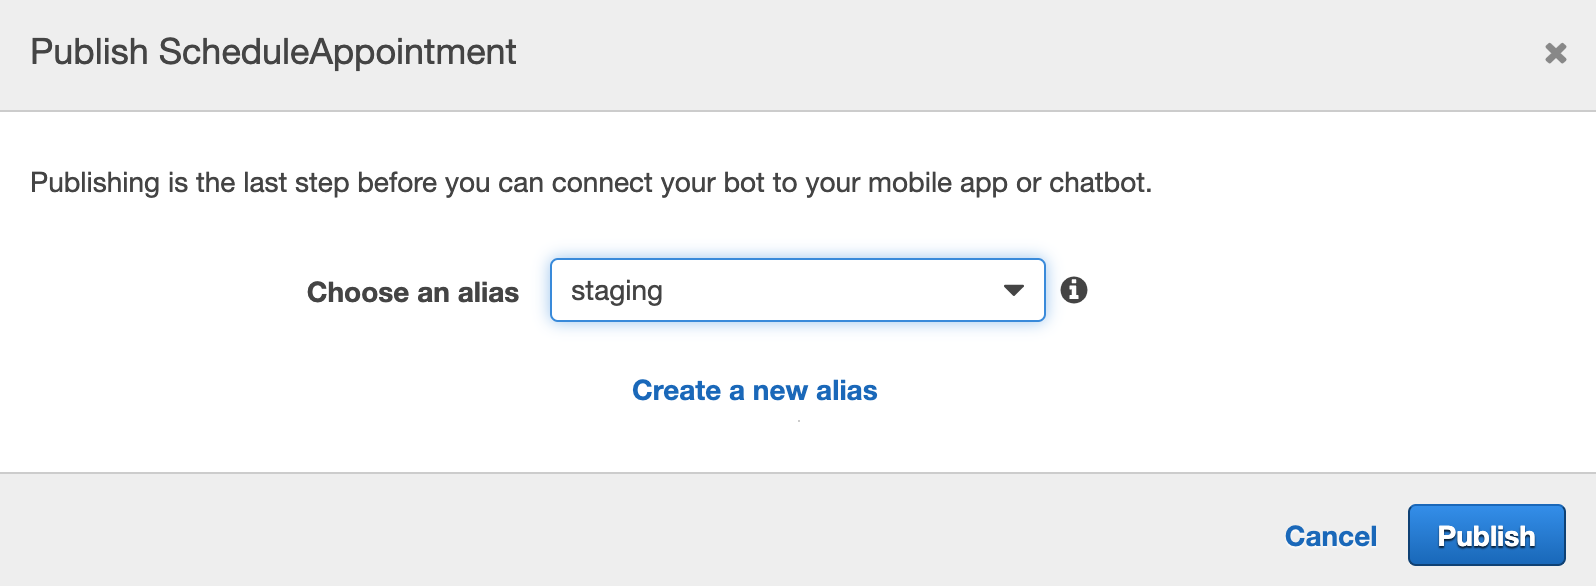
Next, to use your bot, you need to publish it by clicking Publish. You will then be asked to choose an alias for the bot. Aliases are good for naming different versions of your bot, such as the one you use for development or the one you use for production.
Make a note of the alias name you have entered (e.g. staging). You will need it later.
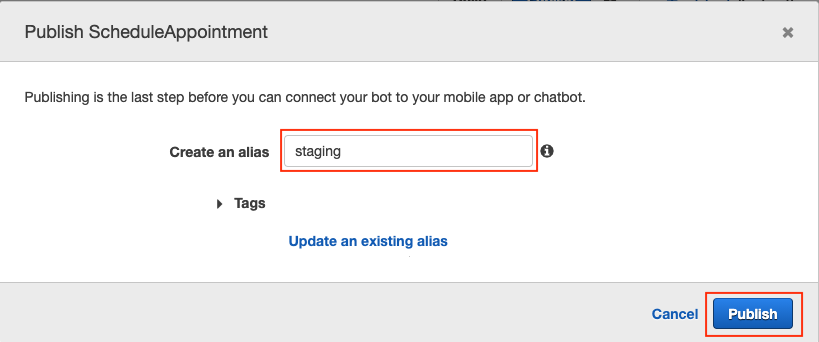 Adding an alias name to your Amazon Lex Bot
Clicking Publish once more will finalize the setup of your sample bot.
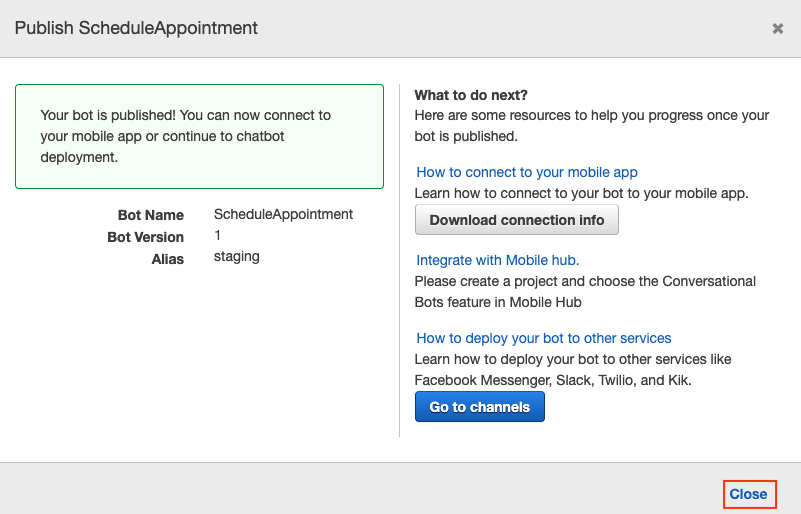 Notification that the bot has been published
Clone the lex-reference-connection repository from GitHub and follow instructions as described in the readme.
Select one of the deployment types as explained in the Running Lex reference connection code section.
make a note of the
LEX_REFERENCE_CONNECTIONargument (e.g. xxxx.ngrok.io, or myserver.mycompany.com:40000), as you will need it later.
Clone the lex-sample-voice-application repository on GitHub and follow the instructions as described in this repository.
Select one of the deployment types as explained in the Running Lex sample Voice API application section.
Make a note of the phone number linked to your Voice API application as explained in the Set Up Your Vonage Voice API Application Credentials and Phone Number section, as it will be needed for the next step.
Call the phone number linked to your Voice API application to interact with the Lex bot.
You will see on the Lex reference connection application console and the Lex sample voice API application console the transcriptions and sentiment analysis results.
When calling the Lex bot using the linked phone number, you may have noticed that the bot does not play a greeting, so the connected caller would be unsure when to start speaking.
Additionally, the bot does not play a confirmation message after you verbally confirmed that you want the appointment.
Let’s improve our example Lex bot by addressing both of those issues.
On your AWS console, go to Amazon Lex, then your Lex bot. Click on the [+] icon next to Intents.
 The Lex Dashboard
Next, click on Create Intent.
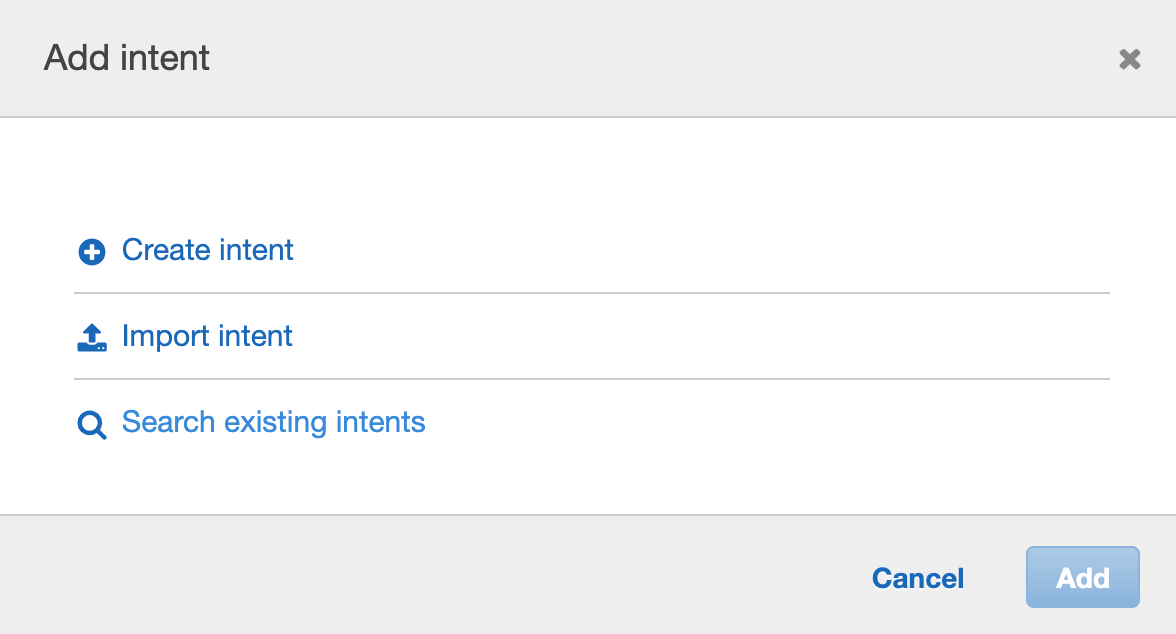 Creating an intent for a Lex bot
You'll be prompted to enter a name for your new intent. Once you've chosen one, you can click on Add to proceed to the next step.
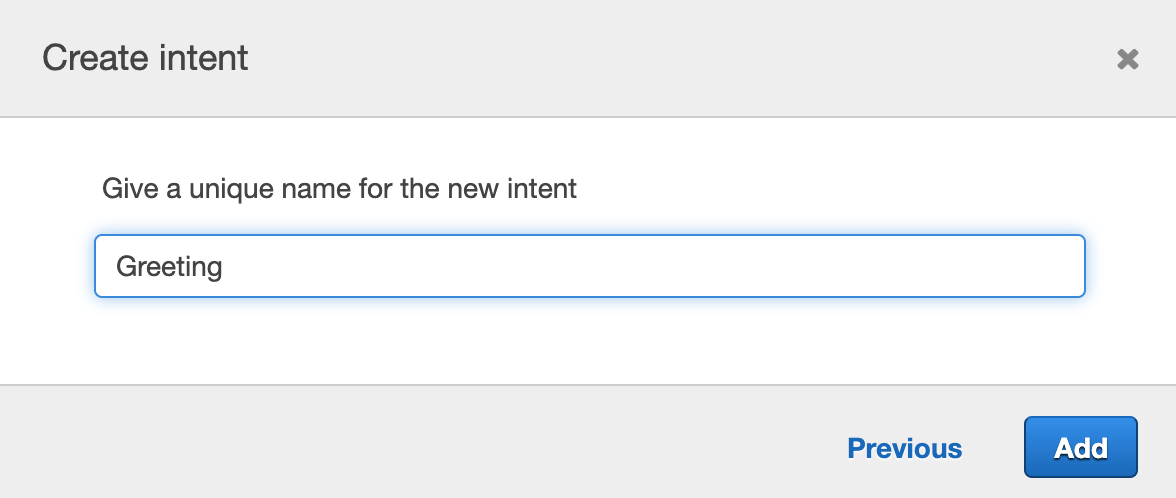 Entering a name for the intent
Under Sample utterances:
Enter exactly Good morning, which is currently coded in the Lex sample Voice API application as TTS played to Lex bot when the WebSocket is established.
Click on the [+] icon to add the new utterance.
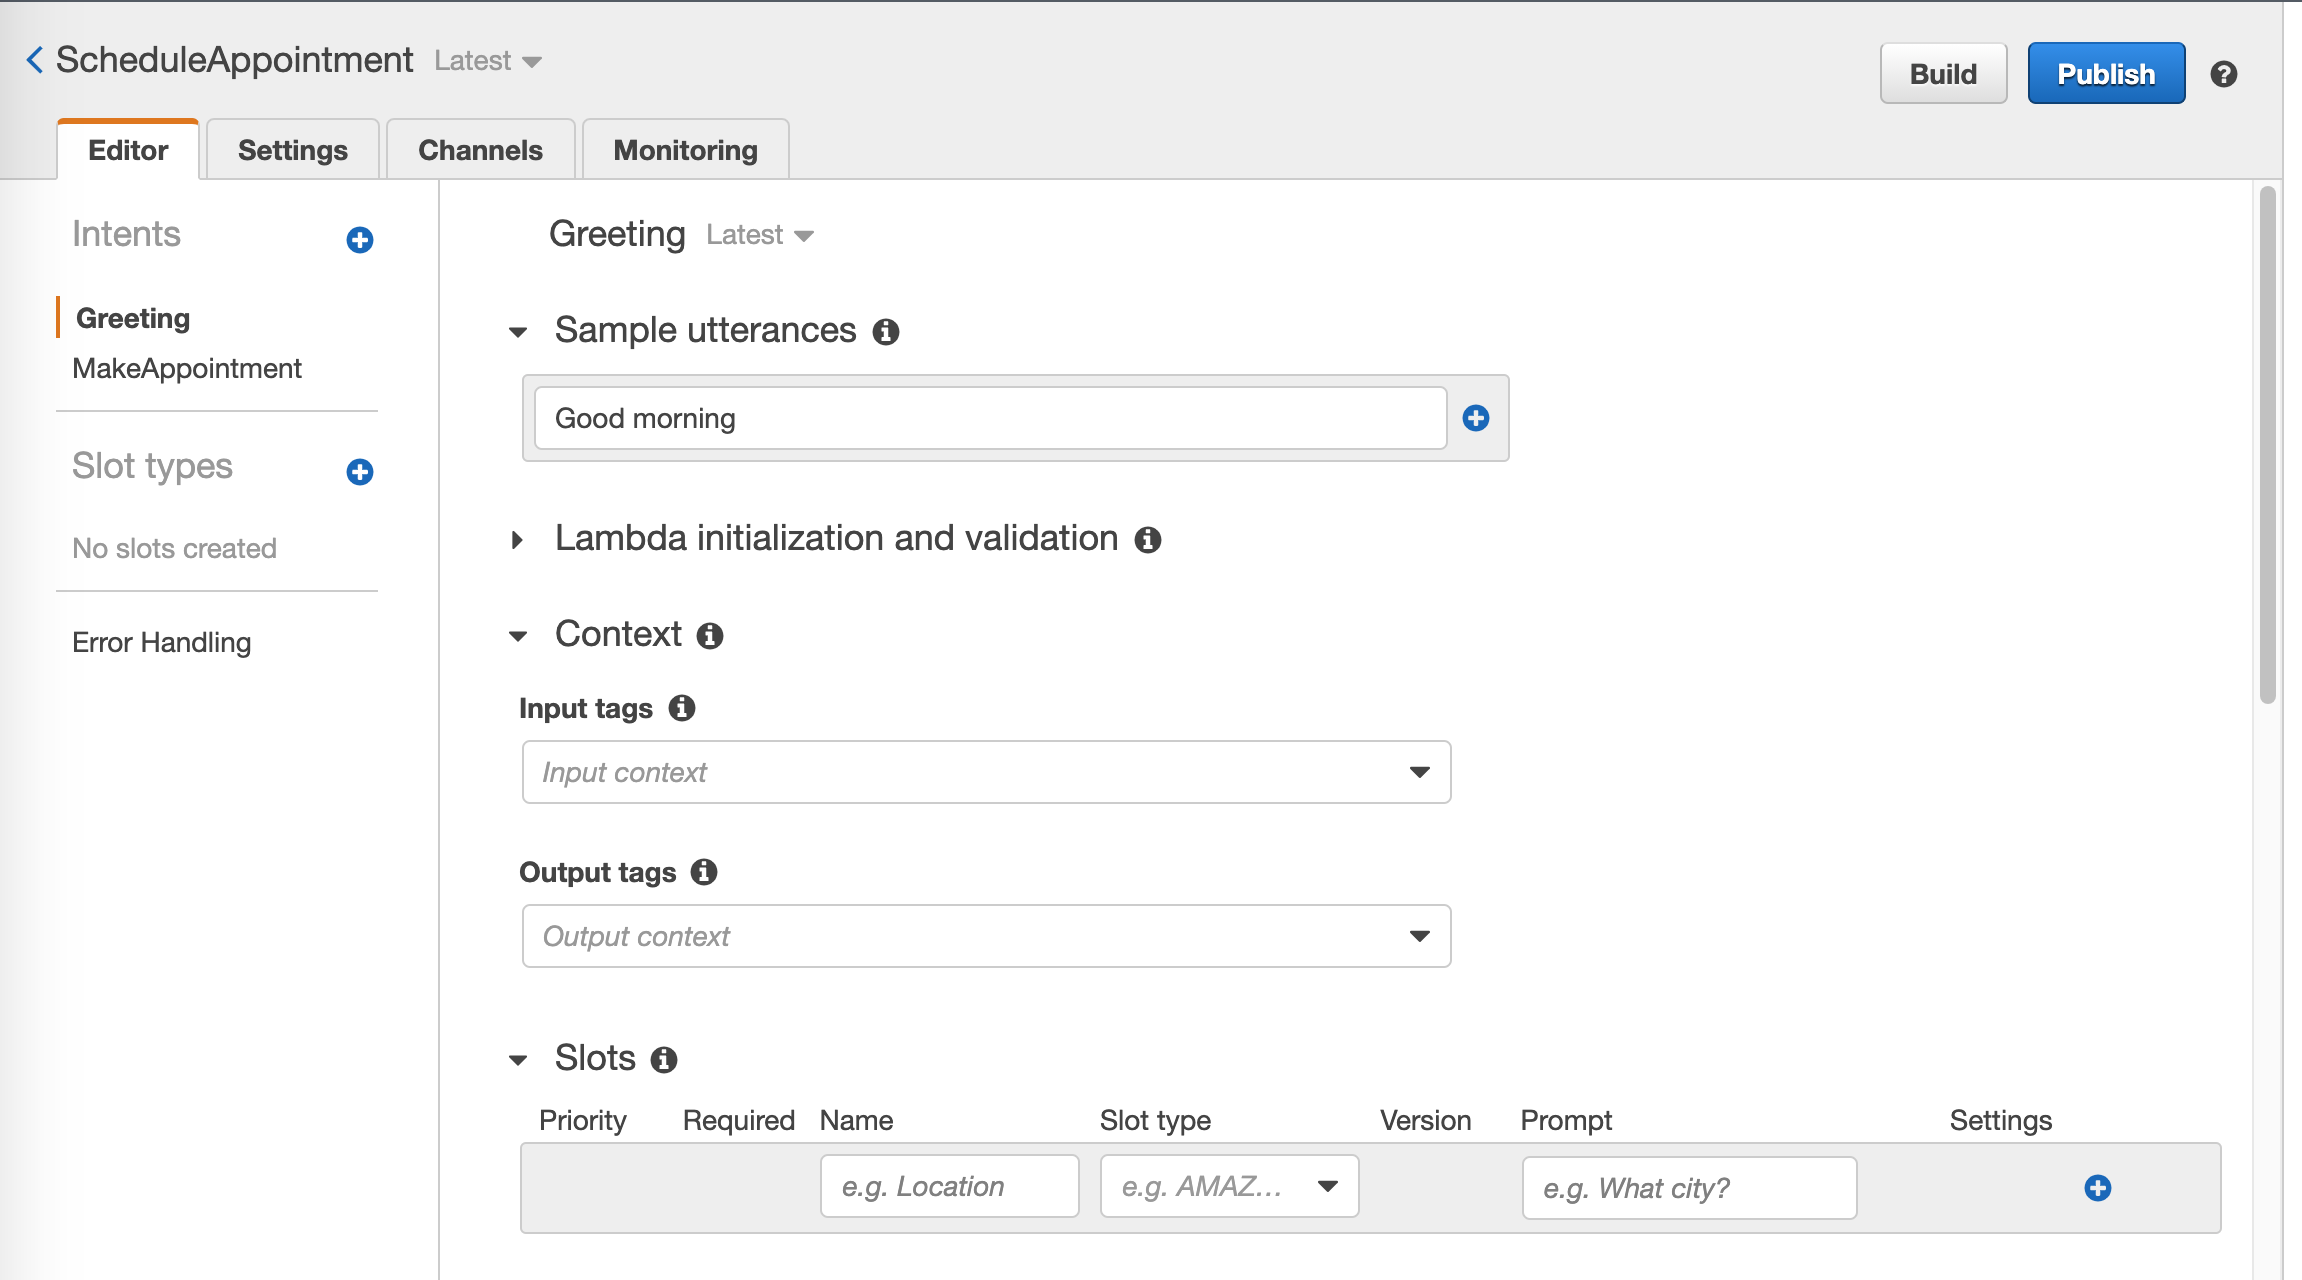 Adding new utterances to a Lex bot
Next, under Response click on Add Message.
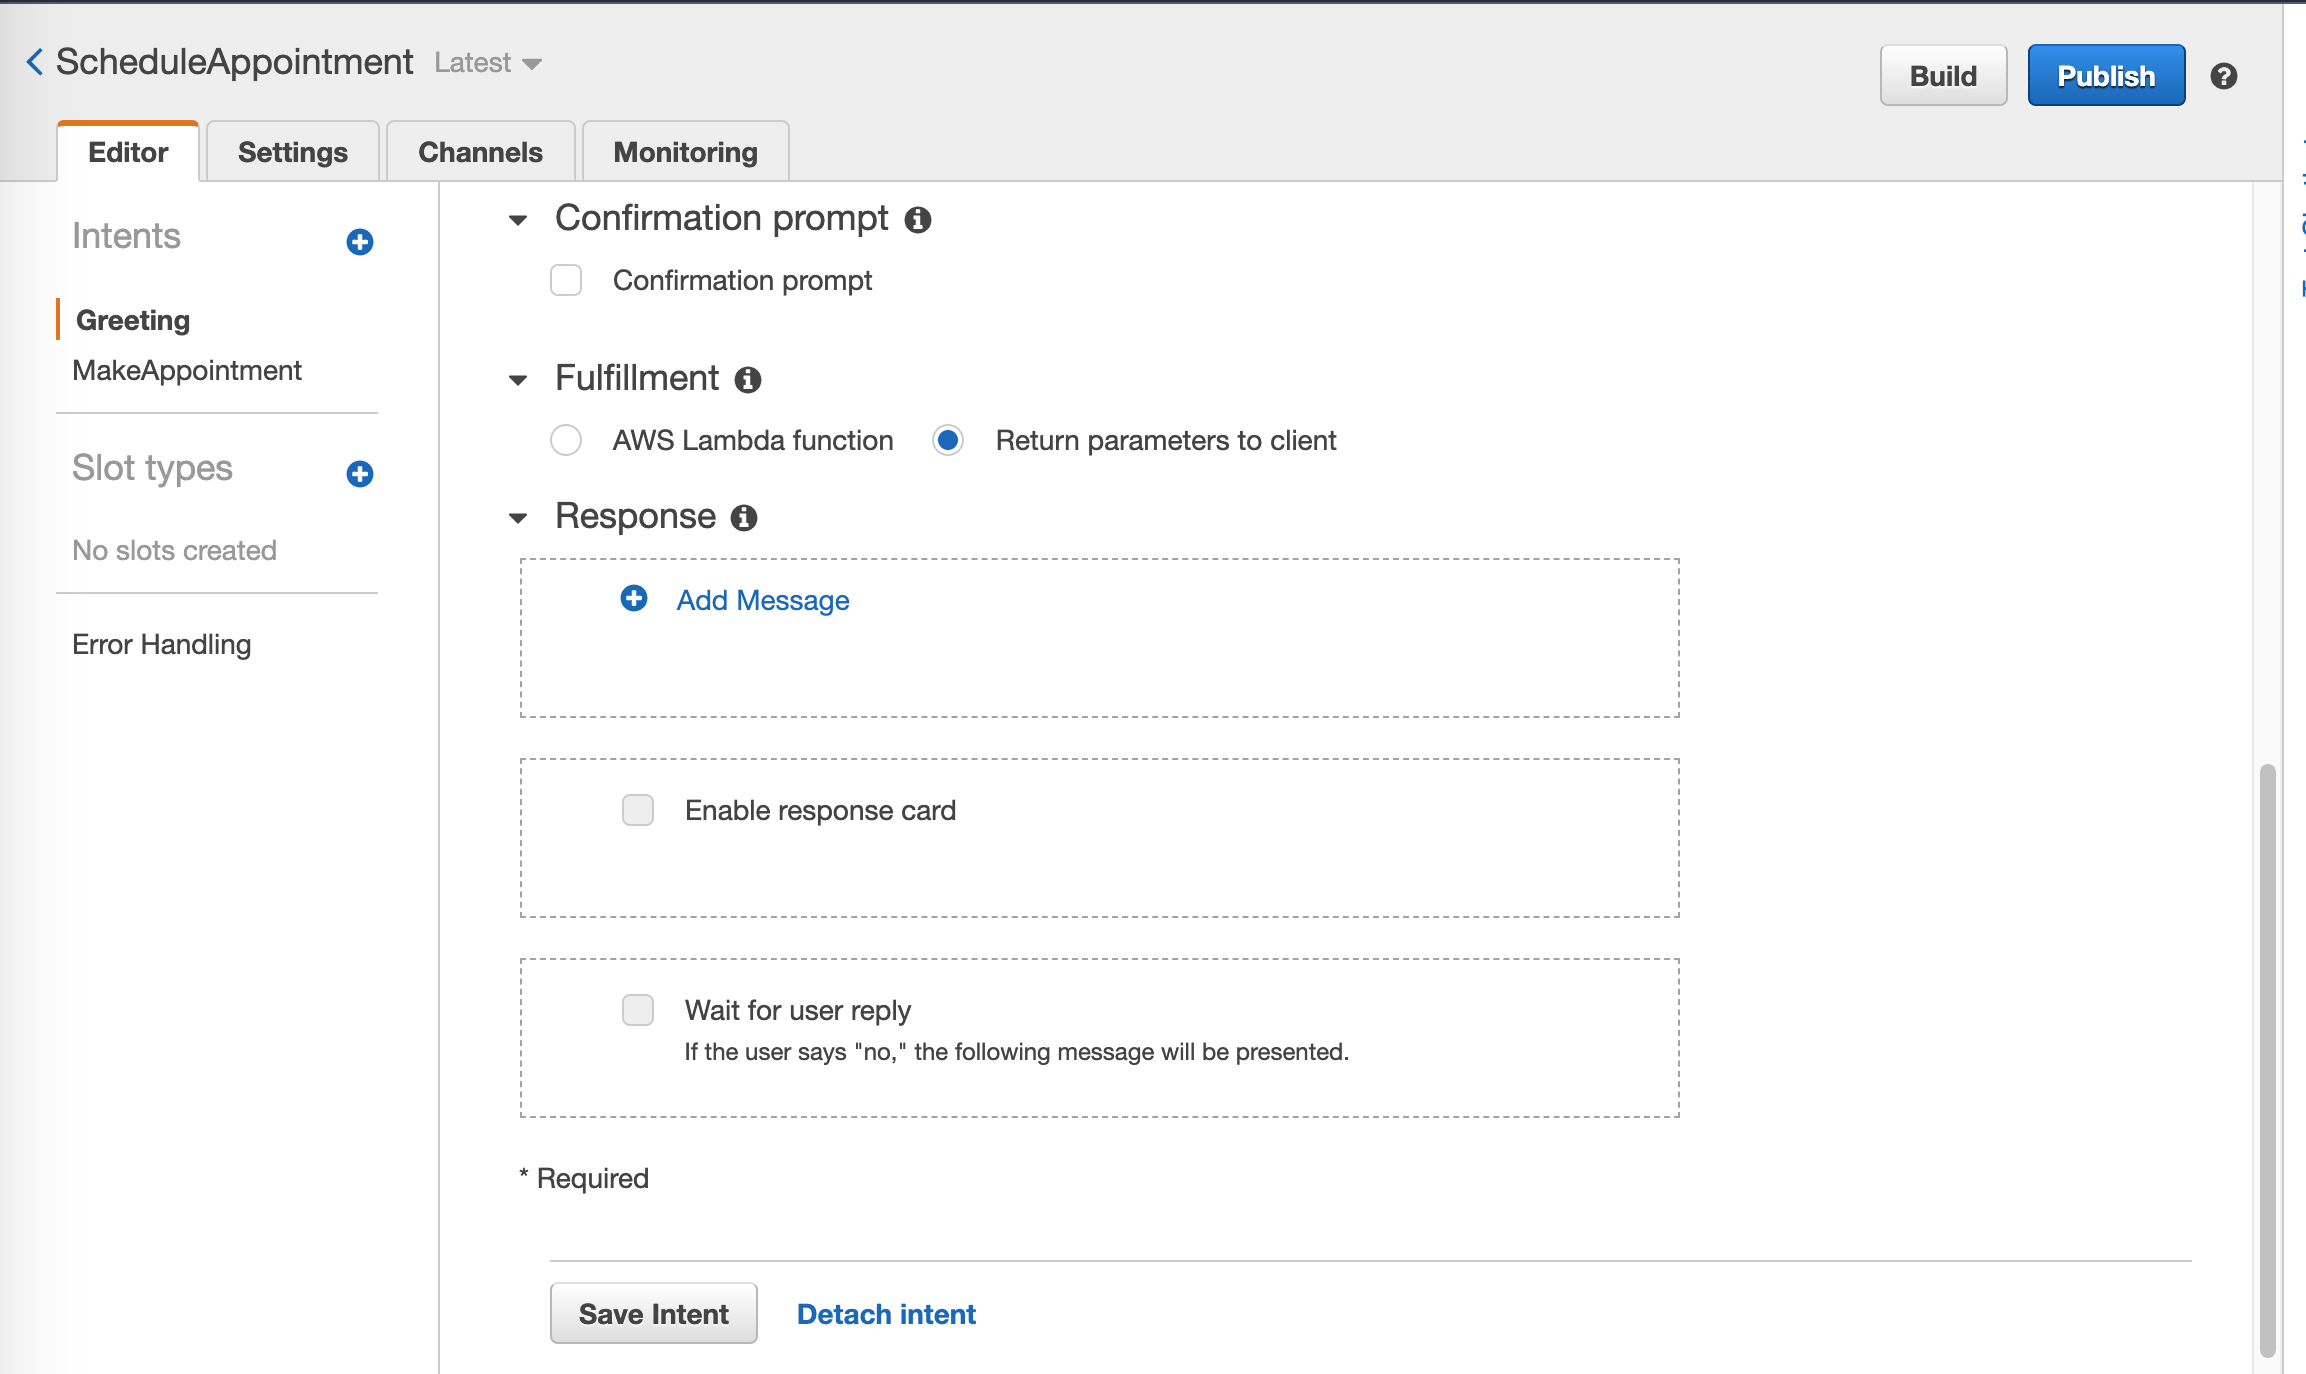 Adding a new message to the bot responder
Enter one or more greeting messages. The content and number of messages are entirely up to you. For example, Hi, how may I help you?, or Hello, what is the reason you are calling?
Do not forget to click on the [+] icon for each entered message.
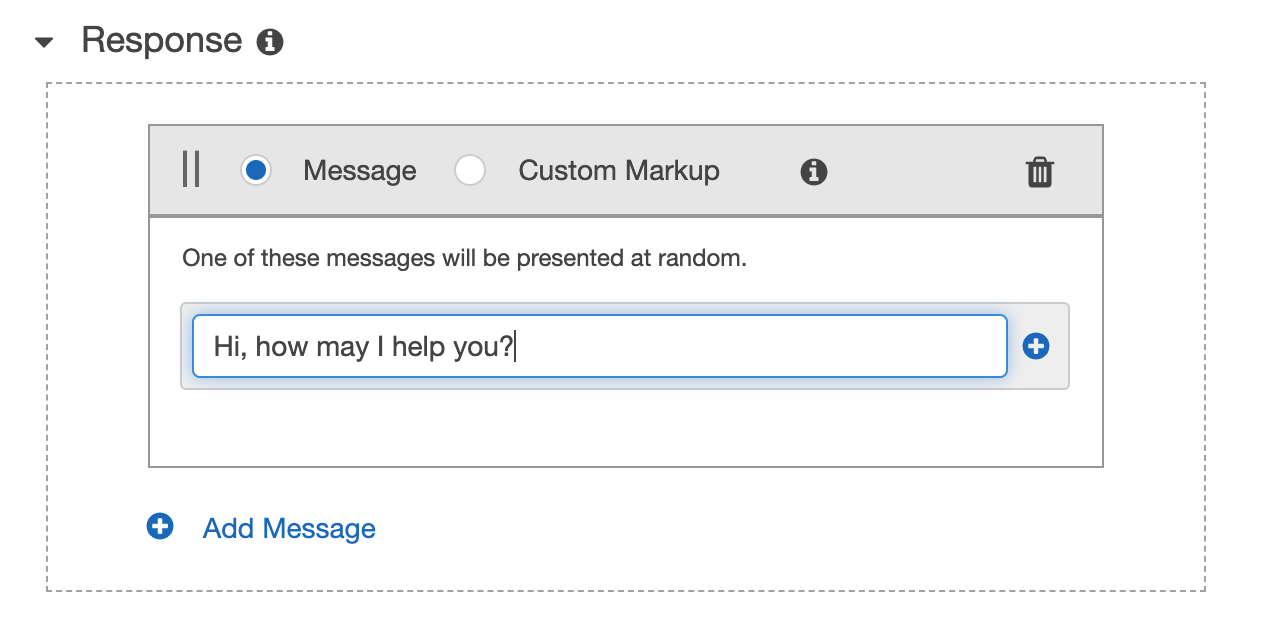 Adding a message response to a Lex bot
After adding all desired messages, click on Save Intent.
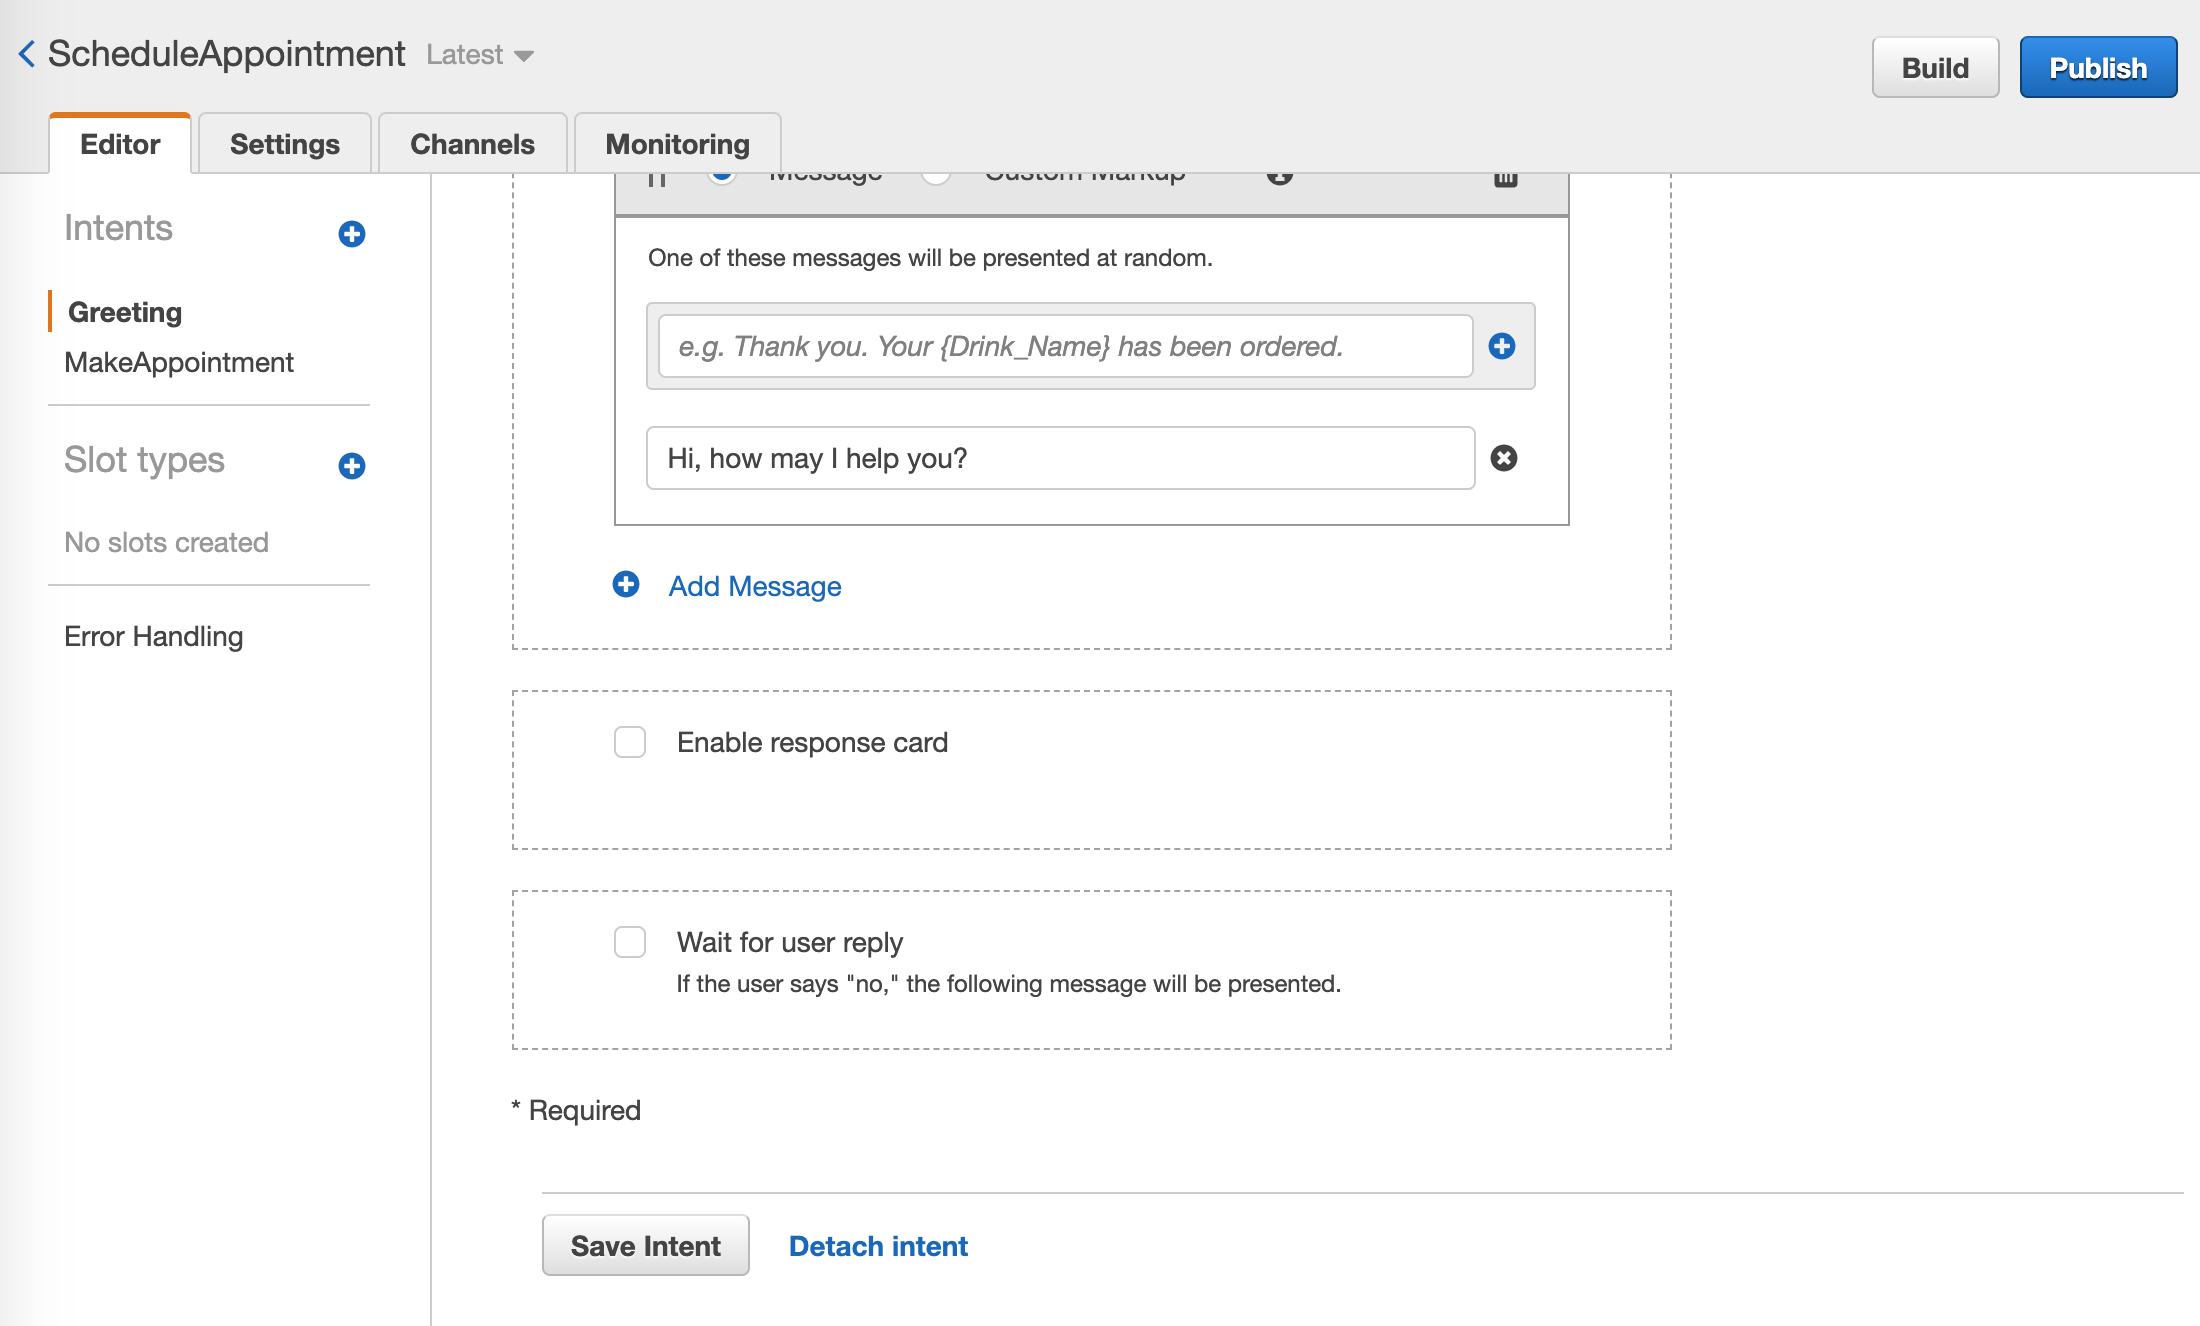 Listing message responses
Next, you will need to rebuild the bot by clicking on Build. After the build completes, go ahead and Publish your bot one more time, as you did before.
You will be asked to enter an alias once again, and you can use the same alias as you did earlier for the sample bot.
 Entering 'staging' as the alias for the Lex bot
Call the phone number you have linked to the application from the previous steps, and you will hear “Please wait”. That TTS from the Vonage API platform is played as soon as your call is answered by the platform.
Once the WebSocket is set up, the Vonage API platform plays the TTS “Good morning” to the Lex bot (you as the caller will not hear that).
The Lex bot plays one of the response messages (of the Greeting intent). You hear it over the phone, confirming the connection with the Lex bot.
You may then ask to set up an appointment (with this example Lex bot).
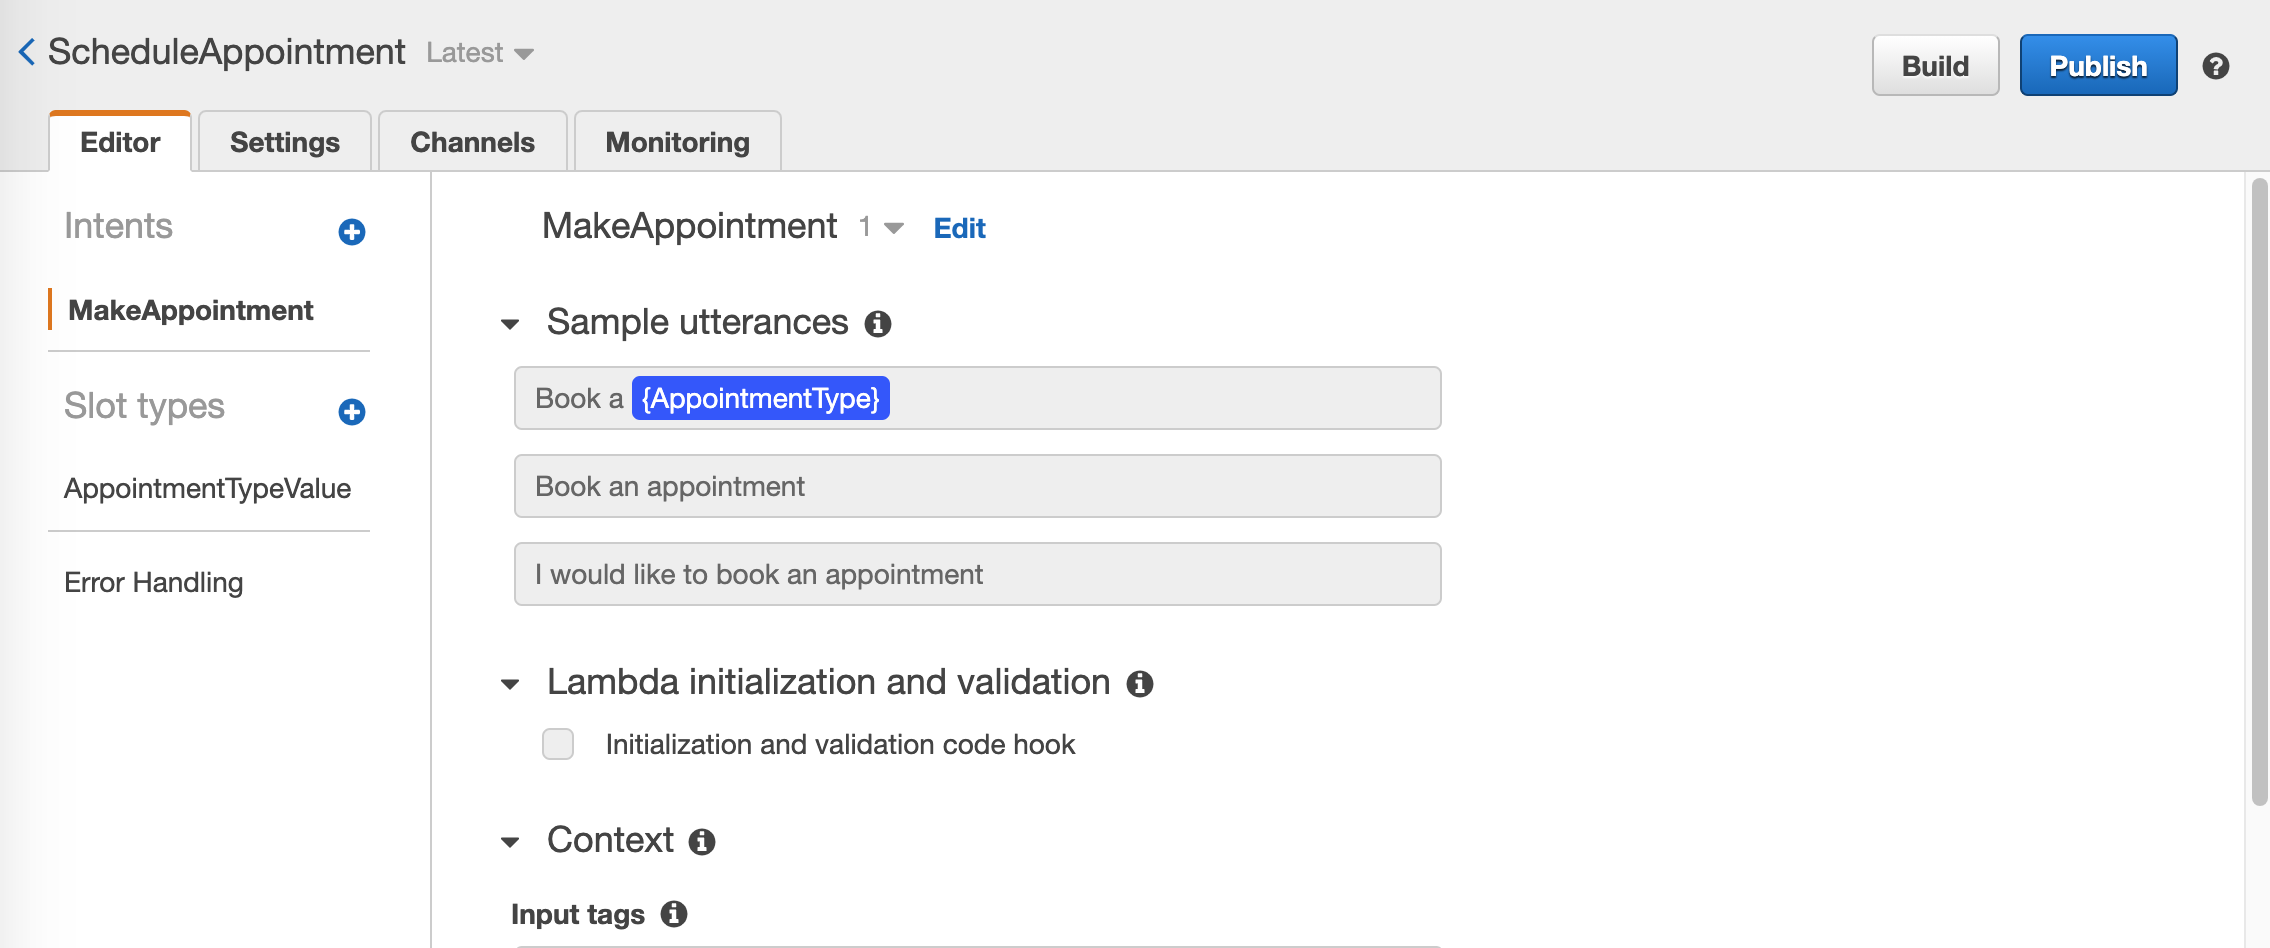
On your AWS console, go to Amazon Lex, then your Lex bot. Click onEdit.
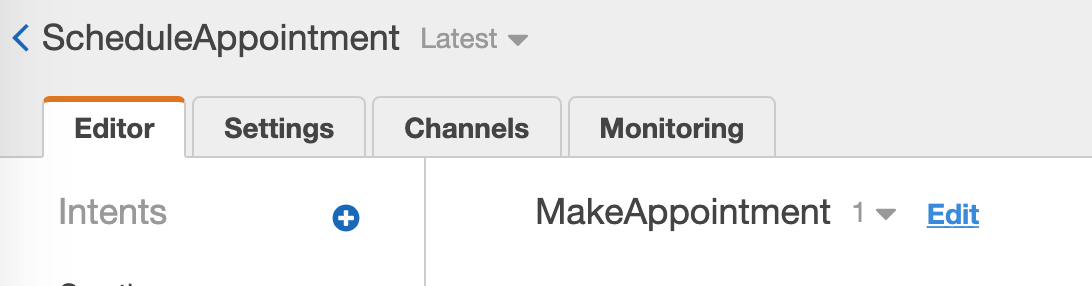 Editing the Lex bot
Under Response, click on Add Message.
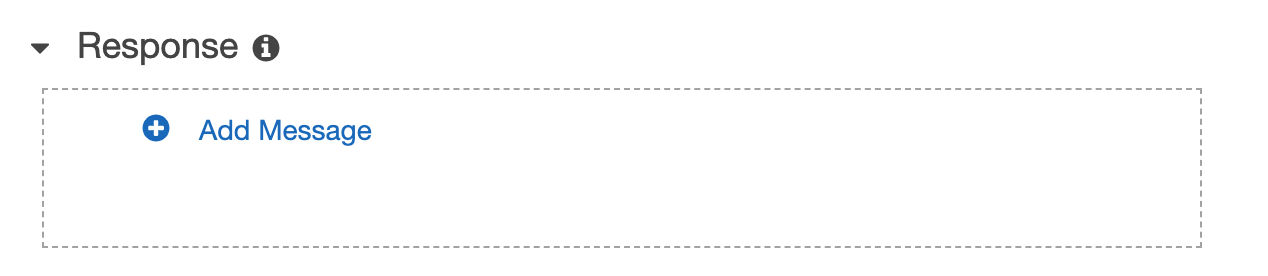 Adding a new message to the Lex bot
Enter one or more response messages, for example:
Your appointment for {AppointmentType} on {Date} at {Time} has been confirmed. Good bye!
Words inside the curly braces correspond to slots related to this intent.
Then click on the [+] icon to add your new response.
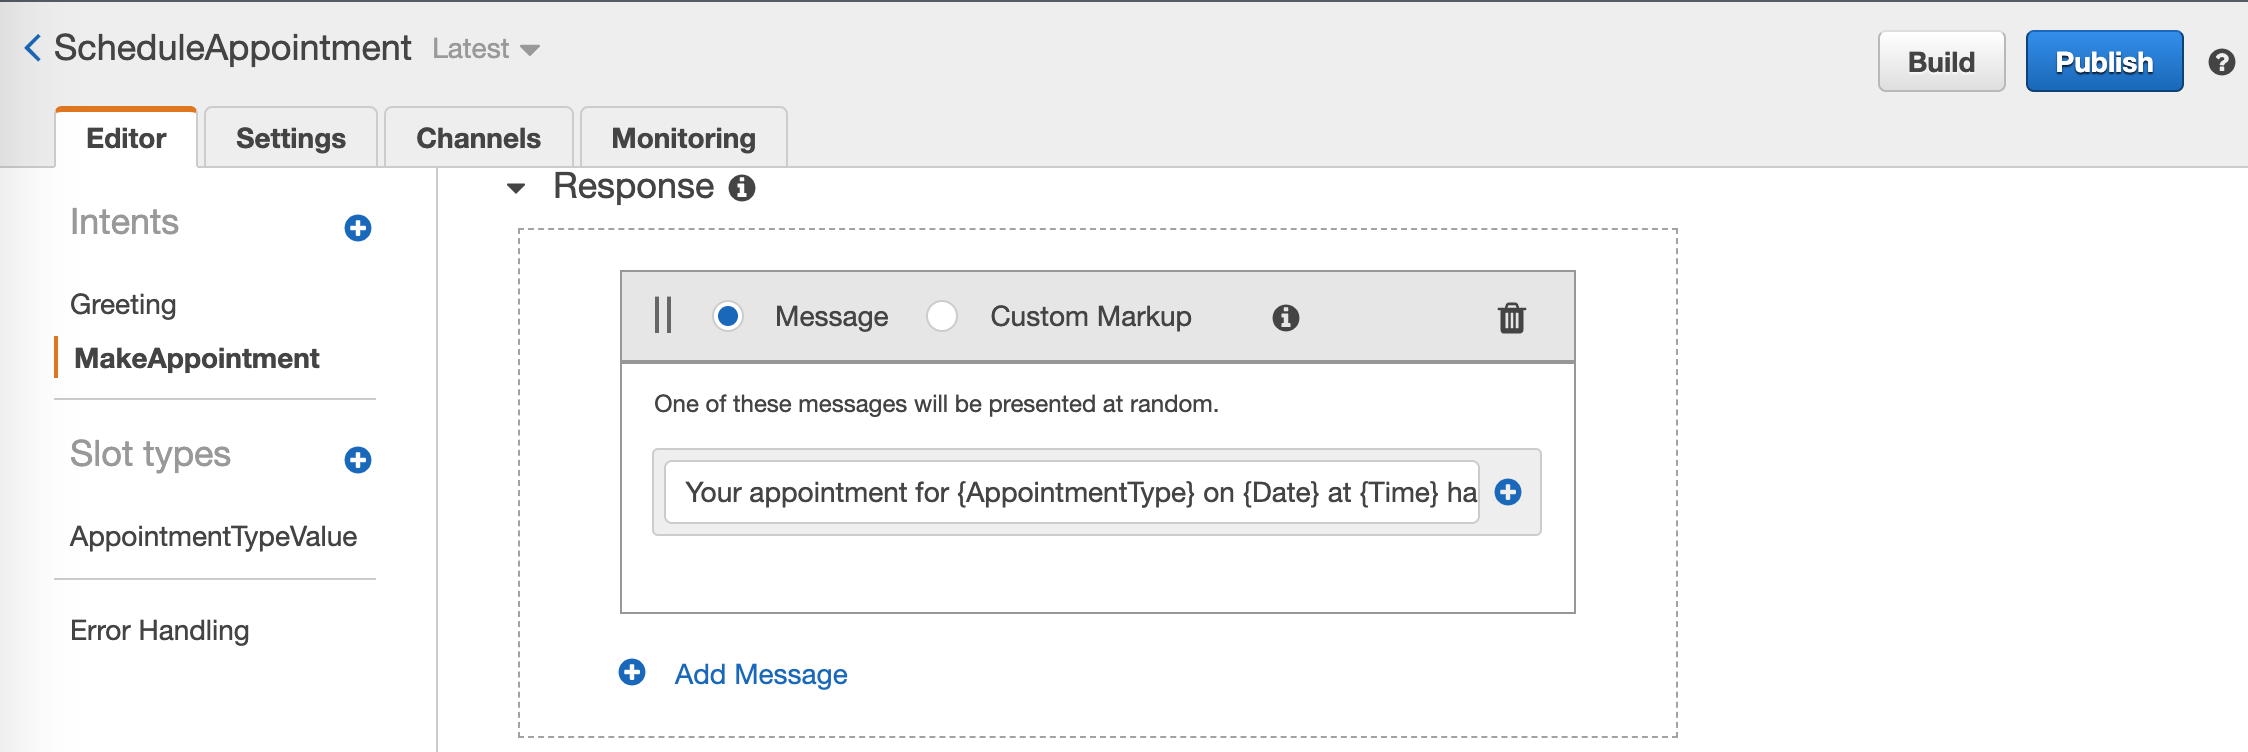 Adding a new message to the Lex bot
To finalize your new message, click on Save Intent.
Finally, to commit these changes, click Build to rebuild the bot with the new changes. Then, you will need to, once again, publish a new version. You can keep the same alias as previous steps.
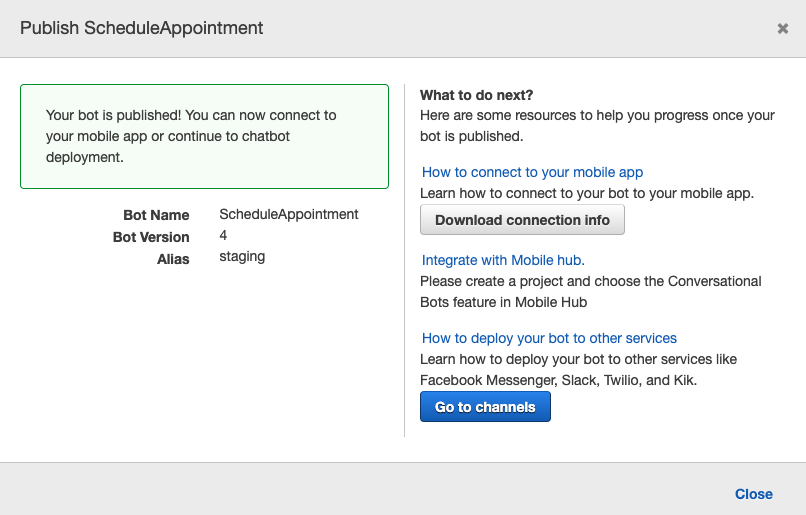 A successfully published bot
To test out these new changes, call the phone number linked to your account and interact with the Lex bot to set up an appointment. This time you will hear the confirmation message you just set up read back to you by the Lex bot.
Share:
Customer Solutions Engineer at Vonage. With a background in product management, network and systems operations, customer support, quality assurance, software development team manager, Tony is working in the Telecommunications industry formerly in France and now in the US. He helps global large and smaller companies develop solutions using programmable voice, messaging, video, and multi-factor authentication services.