
Share:
Phil is Head of Developer Relations at Hookdeck, an asynchronous messaging platform, and a proud Vonage alumni.
Building a Voice Alerts Broadcast System using Ruby
Time to read: 8 minutes
Sometimes a text message won't do. When you really want to be alerted about something important you probably want to receive an actual phone call; whether it's because a server is down, or because a natural disaster has occurred in your area.
Similarly a service provider or (local) authority dealing with an emergency will want to reach out to as many people as possible, as quickly as possible, regardless if they own a mobile phone.
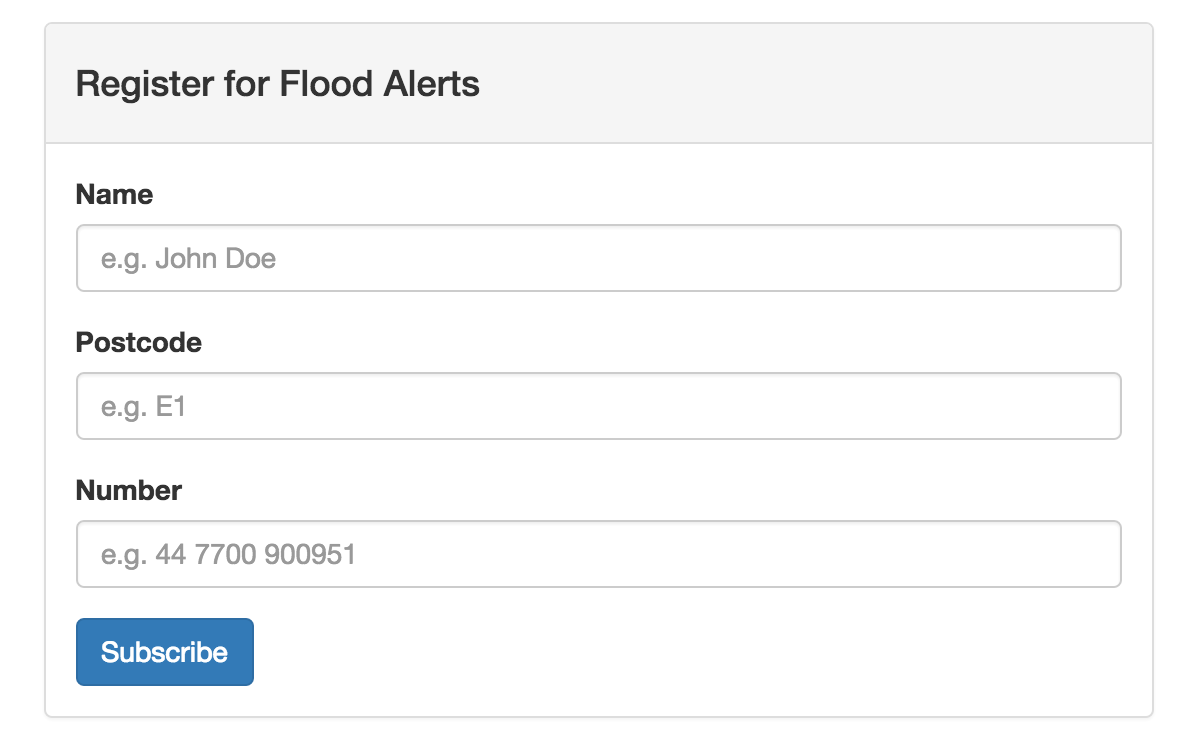
For this tutorial we'll add a Voice Alerts Broadcast System to an existing app using the Nexmo Text-To-Speech API (TTS). For this purpose we have built the Nexmo Flood Alerts app that allows people to subscribe to voice alerts for their postcode.
This app serves as our starting point for this tutorial. It is a basic Sinatra app, written in Ruby with a few extra gems to make things easier. We've added SQLite3 and ActiveRecord for persisting our Subscribers. We also added Bootstrap to make our UI look a bit more attractive. Finally, for this tutorial we've left the fetching of the flood data as an implementation detail and instead we'll be manually sending the notifications through the admin panel.
You can download the starting point of this app from Github:
Then visit localhost:4567 in your browser and subscribe to a flood alert with your postcode and your number. After this you can visit the (very rudimentary) admin panel where you should be able to see your subscription.
All the code for this starting point can be found on the subscriptions branch on Github. All the code we will be adding below can be found on the alerts branch. For your convenience you can see all the changes between our start and end point on Github as well.
Nexmo Voice is the easiest way to build high quality voice applications in the cloud. It has plenty of features and the one we will be looking at today is the Text-To-Speech API (TTS). We will use this API to send people voice calls that will speak out the flood alerts to them. To do this we are going to add the following changes to our app:
Add the Nexmo Ruby Gem to our app
Create a form to allow the admin to select who receives the alerts
Send a request to the Nexmo API for a Text-To-Speech message
In order to send a Text-To-Speech message via Nexmo we're going to have to add the nexmo gem to the project.
# Gemfile
gem 'nexmo'
gem 'dotenv'As you can see we also added the dotenv gem. This is just so that the app can load the API credentials from a .env file. The Nexmo gem automatically picks up those environment variables and uses them to initialize the client. You can find your credentials on the settings page of your Nexmo account.
Next up we also need to tell the app to use these two gems when it's started.
# app.rb
require 'nexmo'
require 'dotenv'
Dotenv.loadNow that we've loaded these 2 gems we can simply call Nexmo::Client.new anywhere without any parameters to start making API calls.
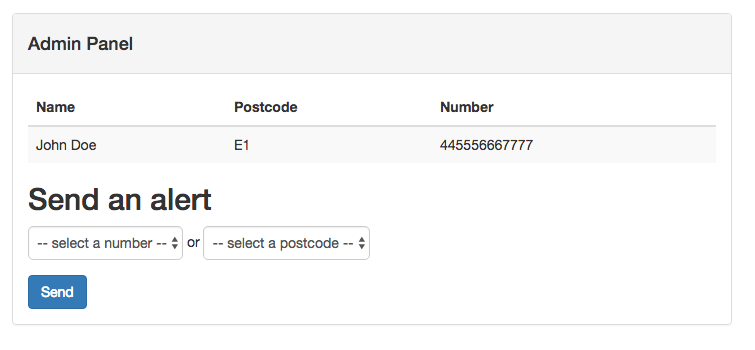
Before we start sending alerts to everyone we should probably give the admin a way to select who to send a message to. Let's start by adding a form to the admin panel.
<!-- views/admin.erb -->
  ...
</table>

<h2 class='header'>Send an alert</h2>

<form class="form form-vertical" action="/alert" method="post">
  <div class="form-group form-inline">
    <select class="form-control" name="number">
      <option disabled selected value> -- select a number -- </option>
      <% Subscriber.pluck(:number).sort.each do |number| %>
        <option><%= number %></option>
      <% end %>
    </select>
  </div>
  <input type='submit' value='Send' class='btn btn-primary'>
</form>
Ignoring the Bootstrap boilerplate, all we did here is create a form with one field that gives us the option to target a phone number. Let's add a second field after the <select> we've just added that lets us choose from all the postcodes as well.
<!-- views/admin.erb -->
</select>
...
or
<select class="form-control" name="postcode">
  <option disabled selected value> -- select a postcode -- </option>
  <% Subscriber.pluck(:postcode).sort.each do |postcode| %>
    <option><%= postcode %></option>
  <% end %>
</select>
...
When the admin submits this form it will POST a request to /alert where we can parse the number or postcode selected and make a call to the Nexmo API.
# app.rb
...
post '/alert' do
  if params[:number]
    send_alert(:number, params[:number])
  elsif params[:postcode]
    send_alert(:postcode, params[:postcode])
  end
  redirect '/alert'
endWithin send_alert, which actually sends the message, we will pass along 4 parameters to the initiate_tts_call method of the Nexmo::Client.
to- The number to send a voice message to. (required)text- The message to speak out to the recipient (required)from- The Nexmo Voice number to send a voice message from (optional)lg- The voice language to use. In this case we will use a British voice. (optional)
To get a Nexmo Voice Number either head over to the Nexmo Dashboard and purchase a number, or alternatively use the Vonage CLI and buy a number right on the command line. Once purchased add the number to the .env file:
Now we can send our message.
# app.rb
def send_alert key, value
  Subscriber.where(key => value).each do |subscriber|
    Nexmo::Client.new.initiate_tts_call(
        to: subscriber.number,
      from: ENV['NEXMO_PHONE_NUMBER'],
      text: %{
        <break time="1s"/> Hello #{subscriber.name}.
        This is a flood alert for
        <prosody rate="-50%">#{subscriber.postcode}</prosody>.
        Thank you for using Nexmo.
      },
        lg: 'en-gb'
    )
  end
endHere we find all the Subscribers that match the given postcode or number, and then for each we make a call to the Nexmo API.
The voice message's text parameter has a few interesting things embedded in the text. First off we used the <break/>-tag to pause for a second at the start of the call. This is useful to wait for the recipient to put the phone to their ear. Similarly we used the <prosody>-tag to slow down the pronunciation of the postcode. More about these tags can be found in our documentation.
Finally, all we need to do is make sure that when the admin is redirected they see a page that confirms they sent the alert.
# app.rb
get '/alert' do
  erb :alert
end<!-- views/alert.erb -->
<% content_for :title do %>
Alert sent
<% end %>
<p>
Your Nexmo Flood Alert has been sent.
</p>
That's it, give it a try! Make sure to restart Sinatra if needed. Select your own number from the dropdown and submit the form. You should receive a voice call within seconds!
The Nexmo Text-To-Speech API has a lot more options than we showed here, and we actually skipped a few very powerful ones:
Nexmo can automatically retry a call for you up to 10 times
Nexmo can automatically detect answering machines and either leave a message or hangup
You can specify a webhook endpoint for Nexmo to make an HTTP call to after an alert has been successfully received
You can specify the preferred gender of the voice used to turn your text into speech
Personally, I really like that I can send a Text-To-Speech message like this without directly needing webhooks, allowing me to add webhooks only if needed or on a later.
I'd love to know what you'd add next? Please drop me a tweet (I'm @cbetta) with thoughts and ideas.