Share:
Arjuna Sky Kok is the author of "Hands-on Blockchain for Python Developers" and the creator of PredictSalary, a tool to predict the salary ranges from job opportunities. He lives in Jakarta, Indonesia
Build Social Media Style Stories with Android and Python
Time to read: 20 minutes
Instagram has a popular feature, which is called Stories, inspired heavily by Snapchat. Stories enables users to create a video or a still picture that will disappear in a short period (24 hours). Later, other social media platforms developed this feature as well, such as Linkedin and Twitter.
In this tutorial, we will build this feature for Android with Vonage’s Video API, we’ll also need a server to handle the sessions and tokens for the client, which will be built using Python.
Android device (optional)
Ngrok (optional)
To begin, we’ll be building a server that our mobile application can communicate with. This server will be using Django, a Python web framework.
First, create a Python virtual environment by running the following two commands:
Then we can install dependencies for our backend server:
The command above will install Django, and Opentok the Vonage Video Python SDK.
Initialize your Django project by running the following command:
Before we jump into writing the code, we need to create at least one application inside the Django project. A Django project can consist of many applications. For example, project A can be a Stories application, while project B could be a messaging application or e-commerce application. First, change your current directory into the project directory and then initialize a new application with the two commands shown below:
You don't have to execute the next command because we won’t be using a database in this tutorial. However, a warning will persist unless we execute the migration command, so run the following to stop these warnings.
To make sure our Django web application works, you can run the webserver script.
You can access your web application at localhost with port 8000. Which, in your browser will look like http://localhost:8000. If you go to this URL, you’ll be greeted with a success message and a picture of a rocket.
Our code will need to use your Vonage Video (also known as OpenTok) API key and secret, which should never be hardcoded into your application. To increase the security of the application, you can use environment variables. In your Terminal, you can set your two values as shown in the examples below. Make sure to replace xxxxxx with your values. You can get these values for the API key and API secret in the Vonage Video API docs.
Views are the templates that are rendered in your Django application. Open the storiesserver/storiesapp/views.py file and replace the contents of it with the following:
from django.http import HttpResponse, JsonResponse

import os, time

from opentok import OpenTok, MediaModes, ArchiveModes

api_key = os.environ["OPENTOK_API_KEY"]
api_secret = os.environ["OPENTOK_API_SECRET"]
opentok = OpenTok(api_key, api_secret)

videos = [
]

index = 1

def get_token(request):
	global opentok
	session = opentok.create_session(media_mode=MediaModes.routed, archive_mode=ArchiveModes.manual)
	token = session.generate_token(expire_time=int(time.time()) + 200)
	return JsonResponse({"token": token, "session": session.session_id,
                     	"api_key": api_key})

def video_stream(request, archive_id):
	global opentok
	video = opentok.get_archive(archive_id)
	return HttpResponse(video.url)

def videos_list(request):
	global videos
	return JsonResponse(videos, safe=False)

def video_start_archive(request, session_id):
	global index, videos
	name = f"Story {index}"
	archive = opentok.start_archive(session_id)
	index += 1
	videos.append({
    	"name": name,
    	"archive_id": archive.id
	})
	return HttpResponse(f"{archive.id}")

def video_stop_archive(request, archive_id):
	global opentok
	opentok.stop_archive(archive_id)
	return HttpResponse("Stop Archiving")

def homepage(request):
return HttpResponse("Hello")The first part of this code creates an OpenTok instance, which will use our pre-set environment variables for the API key and API secret.
Then we have two global variables, videos and index. They are like a mini database in memory that holds our stories (or videos) information.
In the first method, we generate our session and token with the get_token method. To create a session, we use the create_session method from the OpenTok instance. It accepts two parameters: a media mode and an archive mode. We use the MediaModes.routed value for media mode because we publish a video as a Story, not for video chatting. MediaModes.routed means we send the video to the server instead of another client. We use the ArchiveModes.manual value for archive mode because we want to archive (record) the video manually so we can get the archive id. This id is important when we want to get the recording video. If not, we have to iterate it from the archive list which is inconvenient. To generate the token, we use the generate_token method from the session instance. We pass the expired time value as a parameter inside this method. Then, in the end, we send the session, the token and the API key to the client.
In the second method, the video_stream method, we get the video URL from the archive id. If you notice, this method has an additional parameter besides the usual parameter, request. How we get the archive id is done in another method.
In the third method, the videos_list method, we send the list of our videos to the client. It is basically our videos variable wrapped in JSON.
In the fourth method, the video_start_archive method, we archive the video. This method has an additional parameter, session_id. We use the start_archive method from the OpenTok instance. It accepts an OpenTok session. After executing this method, our video session will be recorded. The start_archive method returns the archive id. We store it to the videos variable. Other than the archive id, we generate a nice name for this video which is something like "Story 1", "Story 2", and so on.
In the fifth method, the video_stop_archive method, we stop archiving the video. This method has an additional parameter, archive_id. In other words, we stop recording the video. We use the stop_archive method from the OpenTok instance to do the job. It accepts the archive id as the parameter.
The last method, the homepage method, is just for testing purpose to verify whether the Django web application can be accessed or not.
Then we need to create a mapping from URLs to these views methods. Create the storiesserver/storiesapp/urls.py file and copy the example below into the file:
from django.urls import path

from . import views

urlpatterns = [
	path('', views.homepage, name='index'),
	path('token', views.get_token, name='token'),
	path('videos/<str:archive_id>', views.video_stream, name='videostream'),
	path('videos-list', views.videos_list, name='videoslist'),
	path('video-start-archive/<str:session_id>', views.video_start_archive, name='startarchive'),
	path('video-stop-archive/<str:archive_id>', views.video_stop_archive, name='stoparchive'),
]The path method accepts three arguments:
URL path The method to be accessed A name for the route for reference purposes.
For example, the second path maps the token URL to the get_token method in the views.
On the server-side of the Django application, we need to modify the urls.py file to map to the stories URLs, so locate the file: storiesserver/storiesserver/urls.py and replace the contents of this file with:
from django.contrib import admin
from django.urls import include, path

urlpatterns = [
	path('stories/', include('storiesapp.urls')),
]In this file, we map the application URL file to the stories/ URL. For example, with the token URL, we would have the following full URL: http://localhost:8000/stories/token.
To expose the Django application to the Internet and our Android devices during development, we will be using Ngrok. After connecting your account, we can start an HTTP tunnel which forwards to our Django web application port, 8000:
When the tunnel has been created, you will see the public URL which looks something like: https://xxxxxxxx.ngrok.io. Then you need to modify the storiesserver/storiesserver/settings.py file, by adding the "xxxxxxxx.ngrok.io", "10.0.2.2" and "localhost" strings to the ALLOWED_HOSTS variable. The 10.0.2.2 address is the way the Android emulator access localhost in your computer.
Your ALLOWED_HOSTS variable should look like this after the alteration:
ALLOWED_HOSTS = ["10.0.2.2", "localhost", "xxxxxxxx.ngrok.io"]Then to access the token URL, you would access this URL: https://xxxxxxxx.ngrok.io/stories/token.
At this point, you have built the server component which can generate tokens, archive video recording and deliver video recording URL. Next, you are going to build an Android application that acts as a client to this server application. With this mobile application, you can record videos and watch the video recordings.
Fire up Android Studio, create a new project and select “Empty Activity” for your project template. For the minimum SDK, choose “API 16: Android 4.1 (Jelly Bean)” and for the language, choose “Kotlin”.
The first thing needed when building a project in Android Studio is to add any dependencies needed. Open the build.gradle in project level and add the following line inside the repositories block which is located inside the allprojects block. Then sync the file.
maven { url 'https://tokbox.bintray.com/maven' }The second thing you have to do is to add dependencies on the file, which has the same name build.gradle but in application level (or module level). Add these lines inside the dependencies block. Do not forget to sync the file.
implementation 'com.opentok.android:opentok-android-sdk:2.19.+'
implementation "com.squareup.okhttp3:okhttp:4.2.1"
implementation 'com.google.code.gson:gson:2.8.6'
implementation 'pub.devrel:easypermissions:3.0.0'
implementation 'org.jetbrains.kotlinx:kotlinx-coroutines-android:1.3.2'This project uses five additional libraries, these are:
Vonage Video SDK (OpenTok) OkHttp library to send requests to our backend server, Gson library to parse JSON response, EasyPermissions library to handle permissions when our Android application asks permissions to use camera and microphone, Coroutines library to handle non-blocking and blocking code conveniently.
This step is optional. If you want to test the application with an emulator and do not want to use Ngrok, then you need to create a network configuration file. Create the xml directory inside the res directory, then create a new file called network_security_config.xml file inside the xml directory. Copy the following into it:
<?xml version="1.0" encoding="utf-8"?>
<network-security-config>
	<domain-config cleartextTrafficPermitted="true">
    	<domain includeSubdomains="true">10.0.2.2</domain>
	</domain-config>
</network-security-config>
It means you can develop the application without the HTTPS protocol for the backend URL.
To activate this network configuration, open the AndroidManifest.xml file and add the following attribute into application node:
android:networkSecurityConfig="@xml/network_security_config"Then add the following inside the manifest node.
<uses-permission android:name="android.permission.INTERNET" />
<uses-permission android:name="android.permission.ACCESS_NETWORK_STATE" />We need these two additions because we want to connect our mobile application to our backend server.
While we’re in this file, let's create references to an additional two activities which will be created later. Add these lines after the only activity node.
<activity android:name=".ViewingStoryActivity">
</activity>
<activity android:name=".CreatingStoryActivity">
</activity>
We have three Activities, but we need to create 3 layouts for these Activities. We also need to create an additional layout for row layout in a RecyclerView used within the MainActivity.
First, create the row layout by creating a new file named row.xml within the app/src/main/res/layout directory. Copy the following XML into this new file::
<?xml version="1.0" encoding="utf-8"?>
<LinearLayout xmlns:android="http://schemas.android.com/apk/res/android"
	android:id="@+id/row"
	android:orientation="horizontal"
	android:layout_width="match_parent"
	android:layout_height="wrap_content">
	<Button
    	android:text="TextView"
    	android:layout_width="wrap_content"
    	android:layout_height="48dp"
    	android:layout_margin="16dp"
    	android:id="@+id/buttonView"
    	android:layout_weight="1"/>
</LinearLayout>The above defines the creation of a button, which will be used to launch an Activity to watch the story or the video.
Next, we need to create a layout to display a Video. Create a new file named activity_viewing_story.xml in the layout directory, and add the following XML to the file:
<?xml version="1.0" encoding="utf-8"?>
<androidx.constraintlayout.widget.ConstraintLayout
	xmlns:android="http://schemas.android.com/apk/res/android" android:layout_width="match_parent"
	android:layout_height="match_parent">

	<WebView
    	android:id="@+id/webview"
    	android:layout_width="match_parent"
    	android:layout_height="match_parent" />

</androidx.constraintlayout.widget.ConstraintLayout>The layout contains a WebView which will render the video.
Next, we have to create the activity_creating_story.xml file. This is the layout used by the Activity to create a video. Delete the content of the file and add the following code to it:
<?xml version="1.0" encoding="utf-8"?>
<androidx.constraintlayout.widget.ConstraintLayout
	xmlns:android="http://schemas.android.com/apk/res/android"
	xmlns:tools="http://schemas.android.com/tools"
	android:layout_width="match_parent"
	android:layout_height="match_parent">
	<FrameLayout
    	android:layout_width="match_parent"
    	android:layout_height="match_parent"
    	tools:ignore="MissingConstraints"
    	>
    	<FrameLayout
        	android:layout_width="match_parent"
        	android:layout_height="match_parent"
        	android:layout_marginBottom="120dp"
        	android:id="@+id/publisher"
        	/>
    	<Button
        	android:layout_margin="48dp"
        	android:layout_gravity="bottom|end"
        	android:id="@+id/publishbutton"
        	android:text="Upload Story"
        	android:layout_height="wrap_content"
        	android:layout_width="wrap_content"
        	tools:ignore="MissingConstraints" />
	</FrameLayout>

</androidx.constraintlayout.widget.ConstraintLayout>The FrameLayout with the publisher ID is used by the Video SDK to display the video which is being sent to the Video server. The purpose of the button in this Activity is to stop the recording of the video and end the Activity.
Lastly, we need to edit the activity_main.xml file. This file contains the layout used by the MainActivity, which will list all stories (videos) that have been created. The file will also contain a button to launch the Activity to create a video. Replace the contents of this file with the following XML to it:
<?xml version="1.0" encoding="utf-8"?>
<androidx.constraintlayout.widget.ConstraintLayout xmlns:android="http://schemas.android.com/apk/res/android"
	xmlns:app="http://schemas.android.com/apk/res-auto"
	xmlns:tools="http://schemas.android.com/tools"
	android:layout_width="match_parent"
	android:layout_height="match_parent"
	tools:context=".MainActivity">

	<androidx.recyclerview.widget.RecyclerView
    	android:id="@+id/listview"
    	android:layout_width="match_parent"
    	android:layout_height="match_parent"
    	tools:layout_editor_absoluteX="0dp"
    	tools:layout_editor_absoluteY="89dp" />

	<com.google.android.material.floatingactionbutton.FloatingActionButton
    	android:id="@+id/fab"
    	android:layout_width="wrap_content"
    	android:layout_height="wrap_content"
    	android:clickable="true"
    	android:contentDescription="Plus"
    	app:layout_constraintBottom_toBottomOf="parent"
    	app:layout_constraintEnd_toEndOf="parent"
    	android:layout_marginBottom="48dp"
    	android:layout_marginEnd="48dp"
    	android:layout_marginRight="48dp"
    	/>
</androidx.constraintlayout.widget.ConstraintLayout>
Let’s define the server URL within the strings.xml file which can be found in the values directory. Do this by adding the following to your resources node:
<string name="SERVER">http://localhost:8000</string>If you are using Ngrok though, change it to the following example (make sure to replace xxxxx with your ngrok URL):
<string name="SERVER">https://xxxxxx.ngrok.io</string>
First, we’ll need to create the necessary classes for a RecyclerView. A RecyclerView needs an adapter and a holder. Create a holder file by creating the file with the name StoryViewHolder.kt within the package directory. The package will be something similar to com.example.storiesapplication which is located inside the java directory. Copy the following code into this new file:
package com.example.storiesapplication

import android.view.View
import android.widget.Button
import androidx.recyclerview.widget.RecyclerView


class StoryViewHolder(private val view : View, onClick: (view: View) -> Unit) : RecyclerView.ViewHolder(view) {

	private val buttonView : Button = this.view.findViewById(R.id.buttonView)

	init {
    	buttonView.setOnClickListener(onClick)
	}

	fun bindModel(item : String) {
    	this.buttonView.text = item
	}

}
For every class or Activity file you create, make sure you change the com.example.storiesapplication package to your package if your package is different.
This is a standard holder class where you set the text of the button with a string parameter and set a callback for the button.
After creating the holder class, we need an adapter class. An adapter is a bridge between data and the view of RecyclerView. Create a new file within the java/package/ directory called StoryAdapter.kt file and add the following code in this file:
package com.example.storiesapplication

import android.view.LayoutInflater
import android.view.View
import android.view.ViewGroup
import androidx.recyclerview.widget.RecyclerView


class StoryAdapter(private val dataset: Array<VideoJson>, val onClick: (view: View) -> Unit) : RecyclerView.Adapter<StoryViewHolder>() {

	override fun onCreateViewHolder(parent: ViewGroup, viewType: Int) : StoryViewHolder {
    	val linearLayout = LayoutInflater.from(parent.context).inflate(R.layout.row, parent, false)
    	return StoryViewHolder(linearLayout, onClick)
	}

	override fun onBindViewHolder(holder: StoryViewHolder, position: Int) {
    	holder.bindModel(dataset[position].name)
	}

	override fun getItemCount() = dataset.size
}The onCreateViewHolder method inflates the row layout and creates an instance of the holder class. The onBindViewHolder method sets the data to a specific row of the RecyclerView, and the getItemCount method returns the number of items stored.
It’s now time to create the RecyclerView in the MainActivity. Modify the MainActivity.kt file, by replacing the contents with the following:
package com.example.storiesapplication

import android.content.Intent
import android.os.Bundle
import android.view.View
import android.widget.Button
import androidx.appcompat.app.AppCompatActivity
import androidx.recyclerview.widget.LinearLayoutManager
import androidx.recyclerview.widget.RecyclerView
import com.google.gson.Gson
import com.opentok.android.*
import okhttp3.*
import kotlinx.coroutines.*

const val REQUEST_CODE_CREATE_STORY = 1
const val REQUEST_CODE_VIEW_STORY = 2


class MainActivity : AppCompatActivity() {

	private lateinit var recyclerView: RecyclerView
	private lateinit var viewAdapter: RecyclerView.Adapter<*>
	private lateinit var viewManager: RecyclerView.LayoutManager

	private val client = OkHttpClient()

	private var videosMap = mutableMapOf<String, String>()

	override fun onCreate(savedInstanceState: Bundle?) {
    	super.onCreate(savedInstanceState)
    	setContentView(R.layout.activity_main)

    	val fab: View = findViewById(R.id.fab)
    	fab.setOnClickListener { view ->
        	val self = this
        	CoroutineScope(Dispatchers.IO).launch {
            	val deferredToken = async { getToken() }
            	val results = deferredToken.await()

            	withContext(Dispatchers.Main) {
                	val intent = Intent(self, CreatingStoryActivity::class.java).apply {
                    	putExtra("token", results)
                	}
                	startActivityForResult(intent, REQUEST_CODE_CREATE_STORY)
            	}
        	}
    	}

    	loadUpVideos()

	}

	fun loadUpVideos() {
    	val self = this
    	viewManager = LinearLayoutManager(this)
    	CoroutineScope(Dispatchers.IO).launch {
        	val deferredVideos = async { getVideos() }
        	val videosList = deferredVideos.await()
        	videosMap = mutableMapOf<String, String>()
        	for (video in videosList) {
            	videosMap.put(video.name, video.archive_id)
        	}
        	viewAdapter = StoryAdapter(videosList) { view: View ->
            	val button: Button = view as Button
            	CoroutineScope(Dispatchers.IO).launch {
                	val archiveId = videosMap[button.text.toString()]
                	withContext(Dispatchers.Main) {
                    	val intent = Intent(self, ViewingStoryActivity::class.java).apply {
                        	putExtra("archive_id", archiveId)
                    	}
                    	startActivityForResult(intent, REQUEST_CODE_VIEW_STORY)
                	}
            	}
        	}
        	withContext(Dispatchers.Main) {
            	recyclerView = findViewById<RecyclerView>(R.id.listview).apply {
                	setHasFixedSize(true)
                	layoutManager = viewManager
                	adapter = viewAdapter
            	}
        	}
    	}
	}

	override fun onActivityResult(requestCode: Int, resultCode: Int, data: Intent?) {
    	super.onActivityResult(requestCode, resultCode, data)

    	if (requestCode== REQUEST_CODE_CREATE_STORY) {
        	loadUpVideos()
    	}
	}

	suspend fun getToken(): Array<String> {
    	var request = Request.Builder().url("${getString(R.string.SERVER)}/stories/token").build()
    	client.newCall(request).execute().use { response ->
        	val string = response.body!!.string()
        	val gson = Gson()
        	val tokenJson = gson.fromJson(string, TokenJson::class.java)
        	val session_id = tokenJson.session
        	val token = tokenJson.token
        	val api_key = tokenJson.api_key
        	return arrayOf<String>(api_key, token, session_id)
    	}
	}

	suspend fun getVideos(): Array<VideoJson> {
    	var request = Request.Builder().url("${getString(R.string.SERVER)}/stories/videos-list").build()
    	client.newCall(request).execute().use { response ->
        	val string = response.body!!.string()
        	val gson = Gson()
        	val videosJson = gson.fromJson(string, Array<VideoJson>::class.java)
        	return videosJson
    	}
	}

}

class TokenJson(
	val token: String,
	val session: String,
	val api_key: String
)

class VideoJson(
	val name: String,
	val archive_id: String
)The onCreate method adds a callback to the floating button in this Activity, which will call the getToken method to get the token, the session, and the API key before passing them to the CreatingStoryActivity Activity. The RecyclerView also loads the video list, and for each row, we add a callback to call the ViewingStoryActivity Activity.
Next, we need to create the CreatingStoryActivity.kt file in the app/src/main/java/com/example/storiesapplication directory (the same directory where the MainActivity.kt file resides), which is the Activity that publishes a video to the OpenTok server. Copy the following code into this new file::
package com.example.storiesapplication

import android.Manifest
import android.opengl.GLSurfaceView
import android.os.Bundle
import android.util.Log
import android.widget.Button
import android.widget.FrameLayout
import androidx.appcompat.app.AppCompatActivity
import com.opentok.android.*
import kotlinx.coroutines.*
import okhttp3.OkHttpClient
import okhttp3.Request
import pub.devrel.easypermissions.AfterPermissionGranted
import pub.devrel.easypermissions.EasyPermissions


class CreatingStoryActivity : AppCompatActivity(), Session.SessionListener, PublisherKit.PublisherListener  {

	private var mPublisherViewContainer: FrameLayout? = null
	private var mPublisher: Publisher? = null

	private val client = OkHttpClient()

	companion object {
    	private val LOG_TAG = "android-stories"
    	const val RC_VIDEO_APP_PERM = 124
    	private var mSession: Session? = null
	}

	private var token: String? = null
	private var apiKey: String? = null
	private var sessionId: String? = null
	private var archiveId: String? = null

	override fun onCreate(savedInstanceState: Bundle?) {
    	super.onCreate(savedInstanceState)
    	setContentView(R.layout.activity_creating_story)

    	val message = intent.getStringArrayExtra("token")
    	message?.let {
        	apiKey = it[0]
        	token = it[1]
        	sessionId = it[2]

        	requestPermissions()
    	}

    	val button = findViewById<Button>(R.id.publishbutton)
    	button.setOnClickListener {
        	mSession!!.unpublish(mPublisher)
        	CoroutineScope(Dispatchers.IO).launch {
            	val deferredStopArchive = async { stopArchive() }
            	deferredStopArchive.await()
            	withContext(Dispatchers.Main) {
                	finish()
            	}
        	}
    	}
	}

	override fun onRequestPermissionsResult(requestCode: Int, permissions: Array<String?>, grantResults: IntArray) {
    	super.onRequestPermissionsResult(requestCode, permissions, grantResults)
    	EasyPermissions.onRequestPermissionsResult(requestCode, permissions, grantResults, this)
	}

	@AfterPermissionGranted(RC_VIDEO_APP_PERM)
	private fun requestPermissions() {
    	val perms = arrayOf<String>(Manifest.permission.INTERNET, Manifest.permission.CAMERA, Manifest.permission.RECORD_AUDIO)
    	if (EasyPermissions.hasPermissions(this, *perms)) {
        	mPublisherViewContainer = findViewById(R.id.publisher)

        	mSession = Session.Builder(this, this.apiKey, this.sessionId).build()
        	mSession?.let {
            	it.setSessionListener(this)
            	it.connect(this.token)
        	}

    	} else {
        	EasyPermissions.requestPermissions(this, "This app needs access to your camera and mic to make video calls", RC_VIDEO_APP_PERM, *perms)
    	}
	}

	suspend fun startArchive(): Unit {
    	var request = Request.Builder().url("${getString(R.string.SERVER)}/stories/video-start-archive/${sessionId}").build()
    	client.newCall(request).execute().use { response ->
        	val string = response.body!!.string()
        	archiveId = string
    	}
	}

	suspend fun stopArchive(): Unit {
    	var request = Request.Builder().url("${getString(R.string.SERVER)}/stories/video-stop-archive/${archiveId}").build()
    	client.newCall(request).execute()
	}

	override fun onConnected(session: Session?) {
    	Log.i(LOG_TAG, "Session Connected")

    	mPublisher = Publisher.Builder(this).build()
    	mPublisher?.let {
        	it.setPublisherListener(this)
            it.renderer.setStyle(BaseVideoRenderer.STYLE_VIDEO_SCALE, BaseVideoRenderer.STYLE_VIDEO_FILL)

        	mPublisherViewContainer!!.addView(it.view)

        	if (it.view is GLSurfaceView) {
            	(it.view as GLSurfaceView).setZOrderOnTop(true)
        	}

        	mSession!!.publish(mPublisher)

        	CoroutineScope(Dispatchers.IO).launch {
            	val deferredStartArchive = async { startArchive() }
            	deferredStartArchive.await()
        	}
    	}

	}

	override fun onDisconnected(session: Session?) {
    	Log.i(LOG_TAG, "Session Disconnected")
	}

	override fun onStreamReceived(session: Session?, stream: Stream?) {
    	Log.i(LOG_TAG, "Stream Received")
	}

	override fun onStreamDropped(session: Session?, stream: Stream?) {
    	Log.i(LOG_TAG, "Stream Dropped")
	}

	override fun onError(publisherKit: Session?, opentokError: OpentokError?) {
    	opentokError?.let {
        	Log.e(LOG_TAG, "Session error: " + opentokError.getMessage())
    	}
	}

	override fun onError(publisherKit: PublisherKit?, opentokError: OpentokError?) {
    	opentokError?.let {
        	Log.e(LOG_TAG, "Publisher error: " + opentokError.getMessage())
    	}
	}

	override fun onStreamCreated(publisherKit: PublisherKit?, stream: Stream?) {
    	Log.i(LOG_TAG, "Publisher onStreamCreated")
	}

	override fun onStreamDestroyed(publisherKit: PublisherKit?, stream: Stream?) {
    	Log.i(LOG_TAG, "Publisher onStreamDestroyed")
	}
}In the onCreate method above, we request permissions for the camera, internet, and audio recording. If we have the permissions, we create a session object using the token, the session, and the API key. We also have to set the listener for this session object. We also set a callback to the button in this Activity. The button will send a request to stop archiving the video.
We have many methods required by the session listener. The most important one is the onConnected method, which will be called if our session has connected to the OpenTok server.
We create a publisher object and set the FrameLayout as the publisher's view. We also have to connect our session object to this publisher object. Then we create a request object to start archiving the video.
Then we need to create the ViewingStoryActivity.kt file in the app/src/main/java/com/example/storiesapplication directory (the same directory where the MainActivity.kt file resides), which is the Activity that views a video, so add the following code into this file::
package com.example.storiesapplication

import android.os.Bundle
import android.webkit.WebView
import androidx.appcompat.app.AppCompatActivity
import kotlinx.coroutines.*
import okhttp3.OkHttpClient
import okhttp3.Request


class ViewingStoryActivity : AppCompatActivity() {

	private val client = OkHttpClient()

	override fun onCreate(savedInstanceState: Bundle?) {
    	super.onCreate(savedInstanceState)
    	setContentView(R.layout.activity_viewing_story)

    	val webView: WebView = findViewById(R.id.webview)
    	val message = intent.getStringExtra("archive_id")
    	message?.let {
        	CoroutineScope(Dispatchers.IO).launch {
            	val deferredVideoUrl = async { getVideoUrl(it) }
            	val videoUrl = deferredVideoUrl.await()
            	withContext(Dispatchers.Main) {
                	webView.loadUrl(videoUrl)
            	}
        	}
    	}
	}

	suspend fun getVideoUrl(archiveId: String): String {
    	var request = Request.Builder().url("${getString(R.string.SERVER)}/stories/videos/${archiveId}").build()
    	client.newCall(request).execute().use { response ->
        	return response.body!!.string()
    	}
	}
}
At first, we get the video URL from the archive id by sending a request to our Django application. Then we load the URL in the WebView.
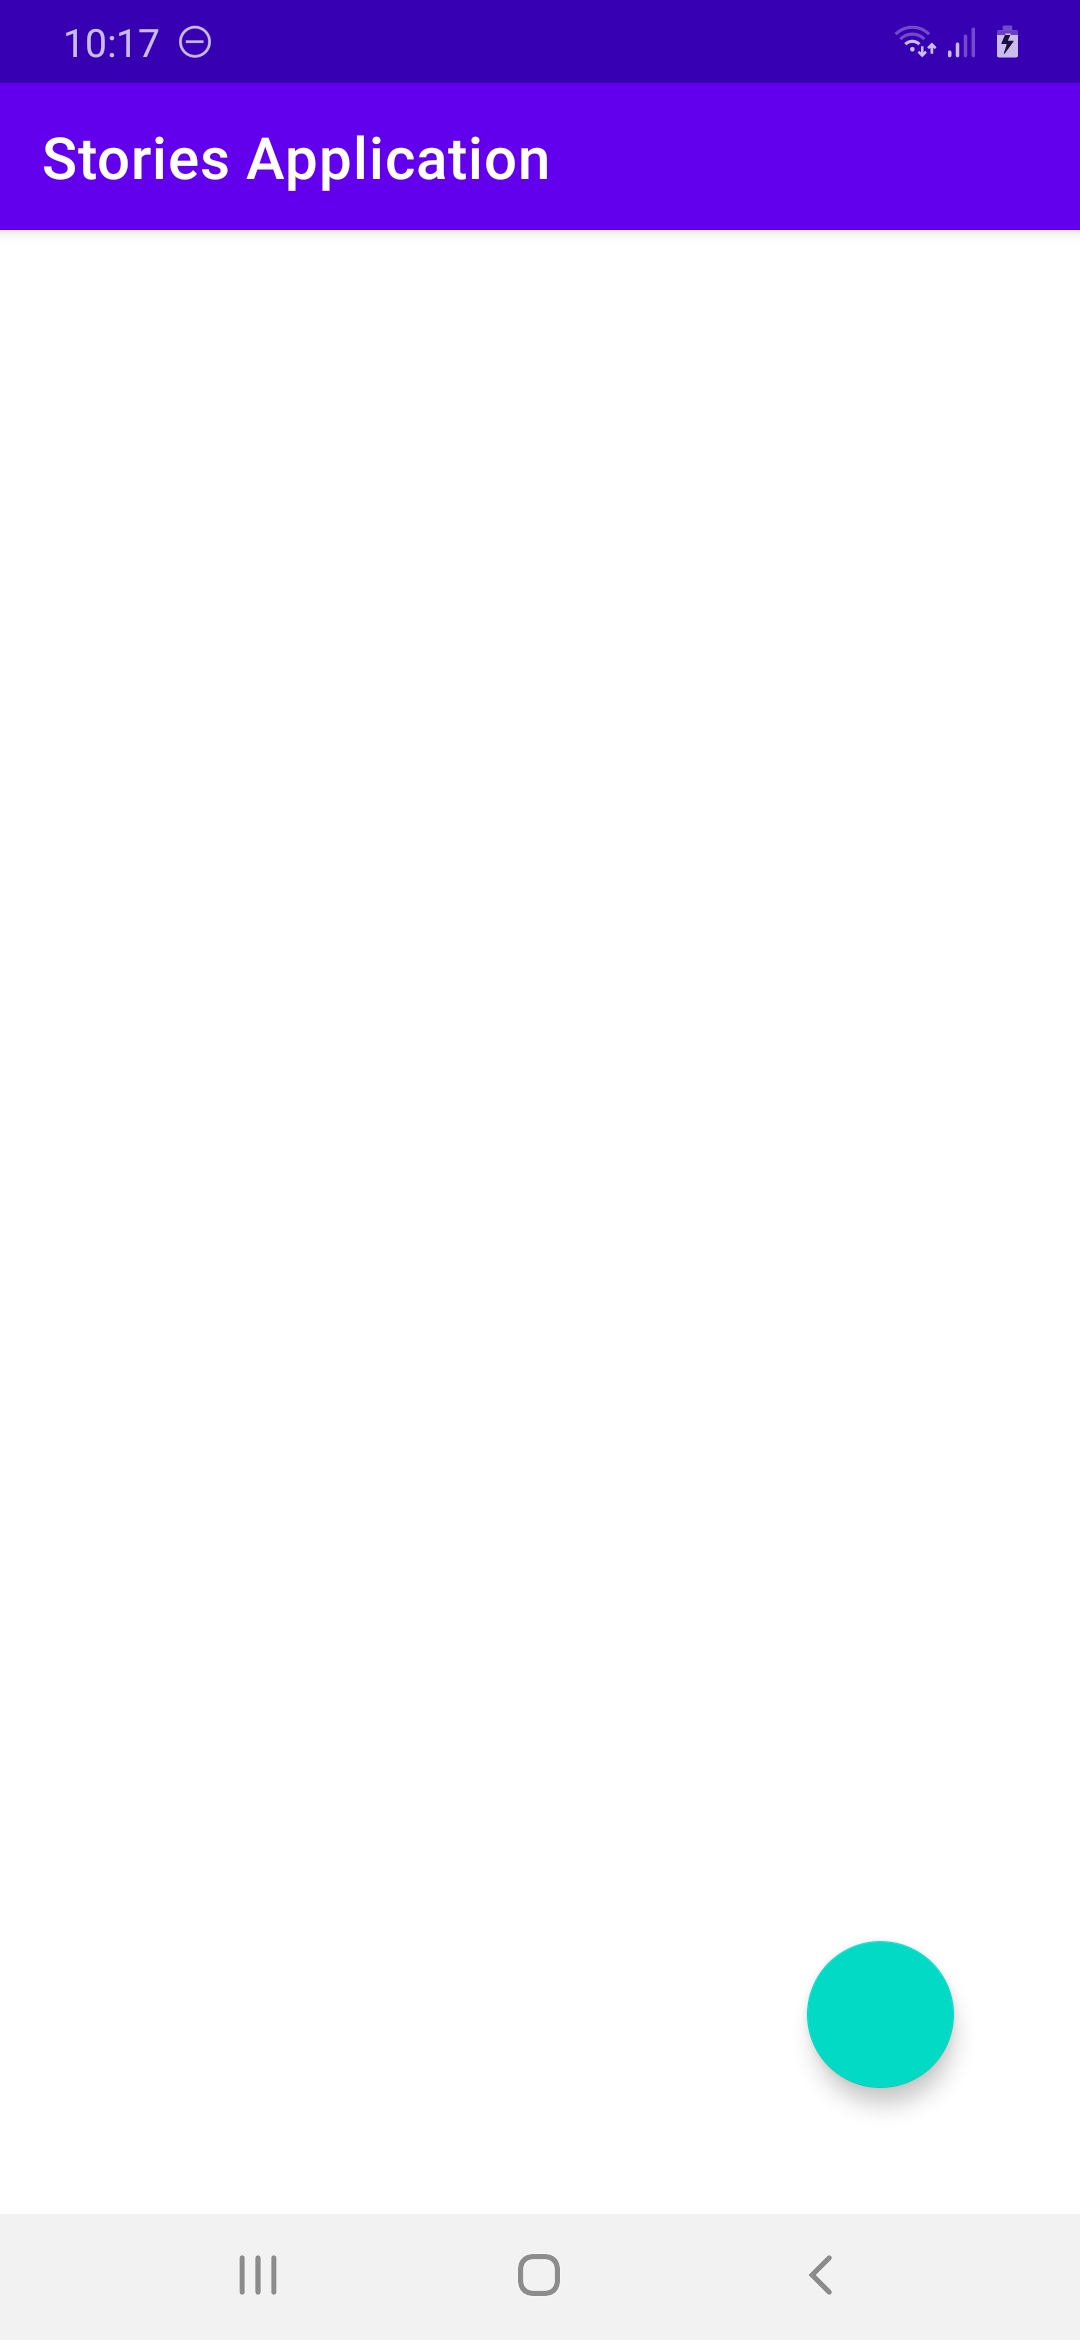
Launch the application. Remember to use Ngrok or deploy the Django application on the cloud if you want to use an Android device. At first, you will see an empty screen and a floating button.
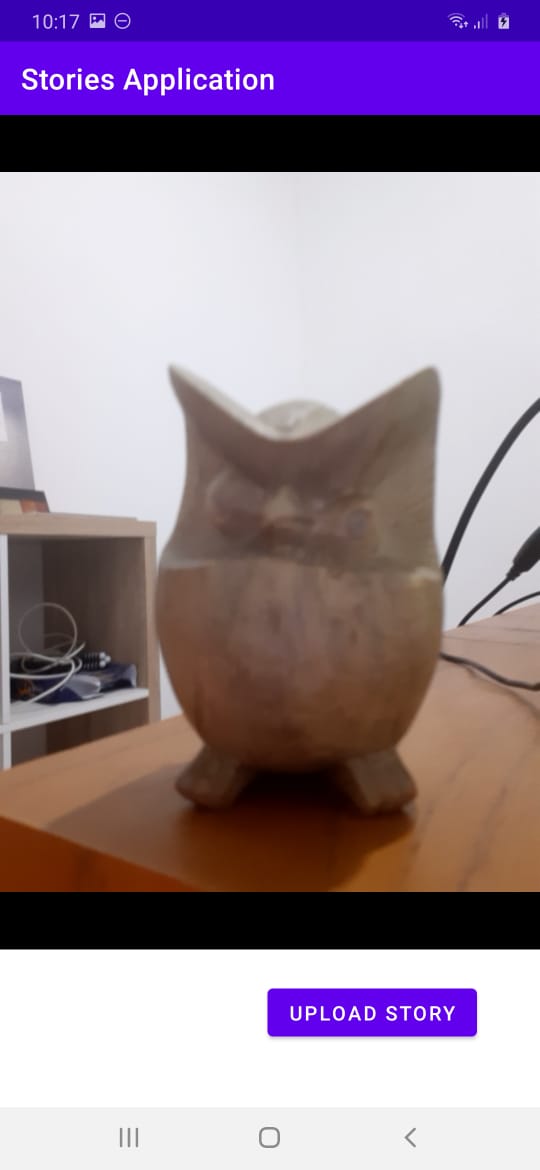
Press the floating button and the device will stream a video from your camera to the OpenTok server. When you have recorded enough for your story, press the "Upload Story" button on the screen.
You will be redirected back to the main screen, that now displays a list of your stories.
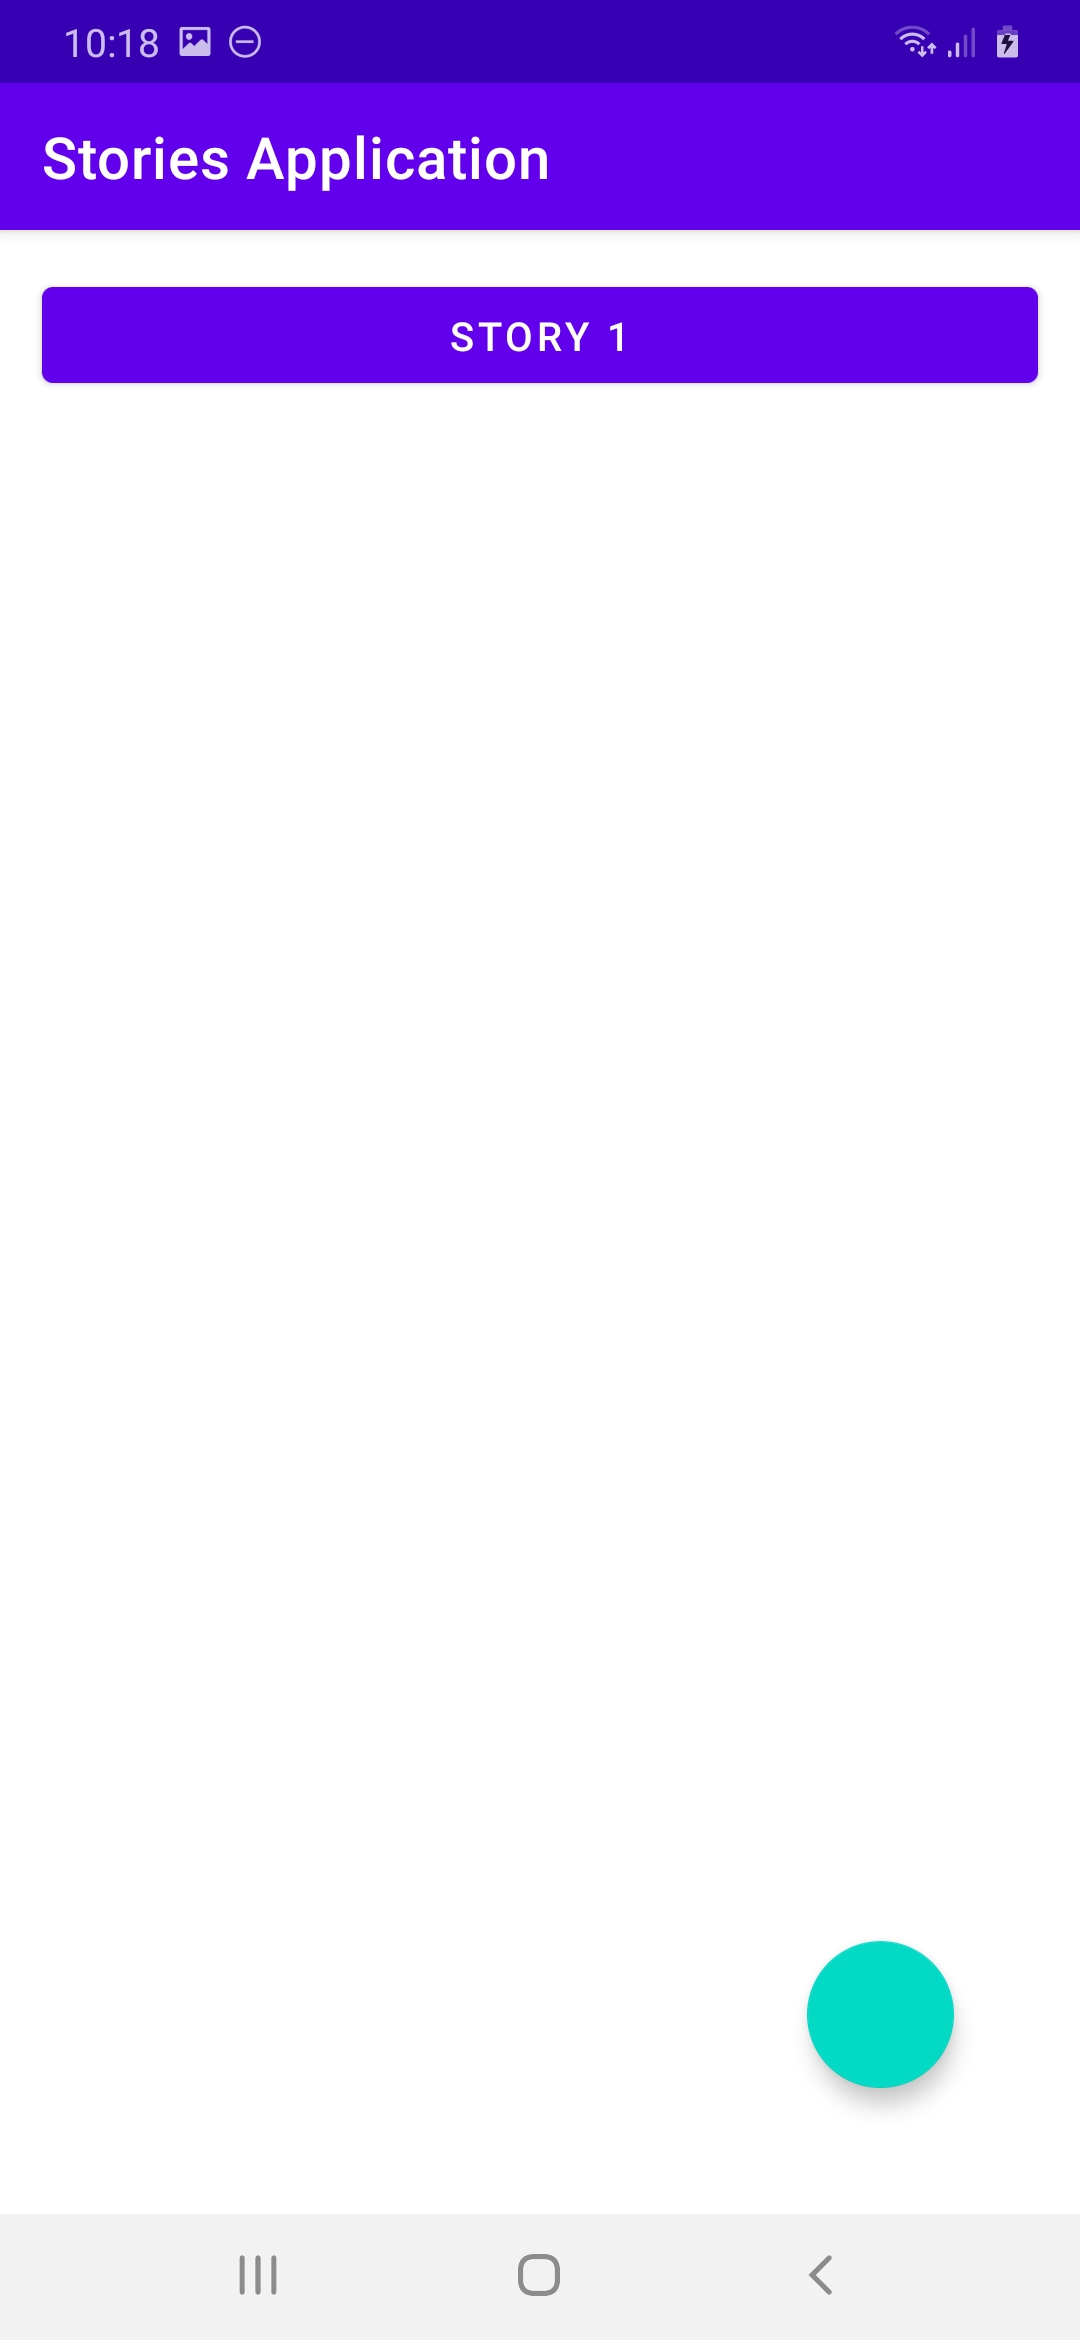
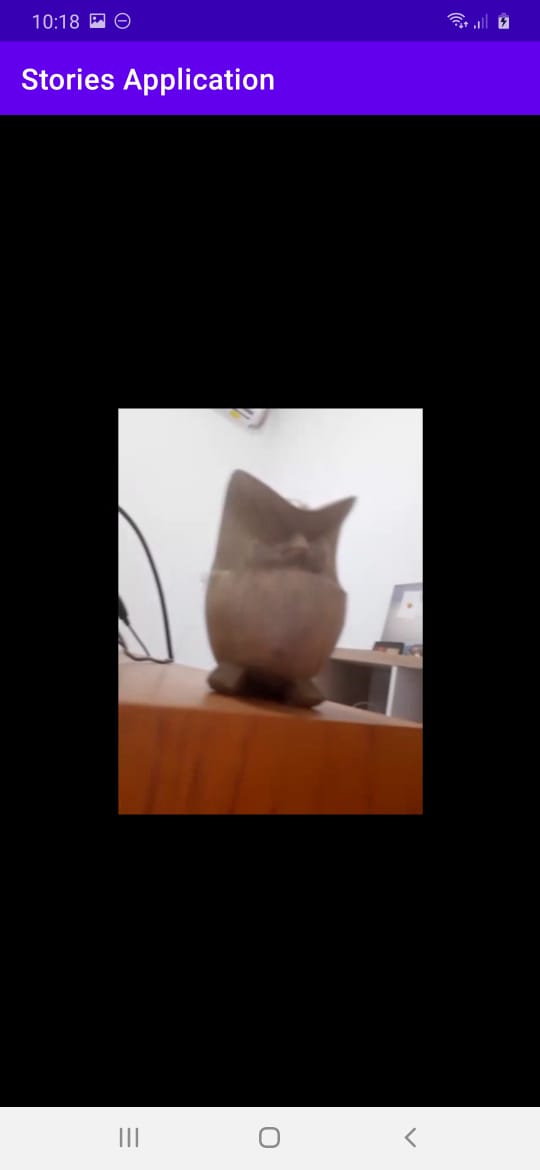
If you press the story row, you will be redirected to the viewing story screen. You can watch your video that you have recorded previously.
This application is far from perfect. If you notice, the recorded video is shorter than the recording session. That happens because it takes time to send a request to archive the video. On top of that, our stories list is a simple RecyclerView. You can convert them to a horizontal scroll. Each story is wrapped in a circle shape just like Instagram Stories looks like! We also do not have authentication and authorization. There is no owner for the story. This video is stored in the OpenTok server for some time. After that, the video will be deleted. You can choose to save the video somewhere else before that happens.