Adding Phone and Biometric Verification to Your iOS Application
Time to read: 10 minutes
Two-factor authentication (2FA) adds an extra layer of security for users that are accessing sensitive information. There are multiple types of 2FA, such as:
Something you know (username, password)
Something you have (your phone/SIM)
Something you are (Biometric Fingerprint or Retina Scan)
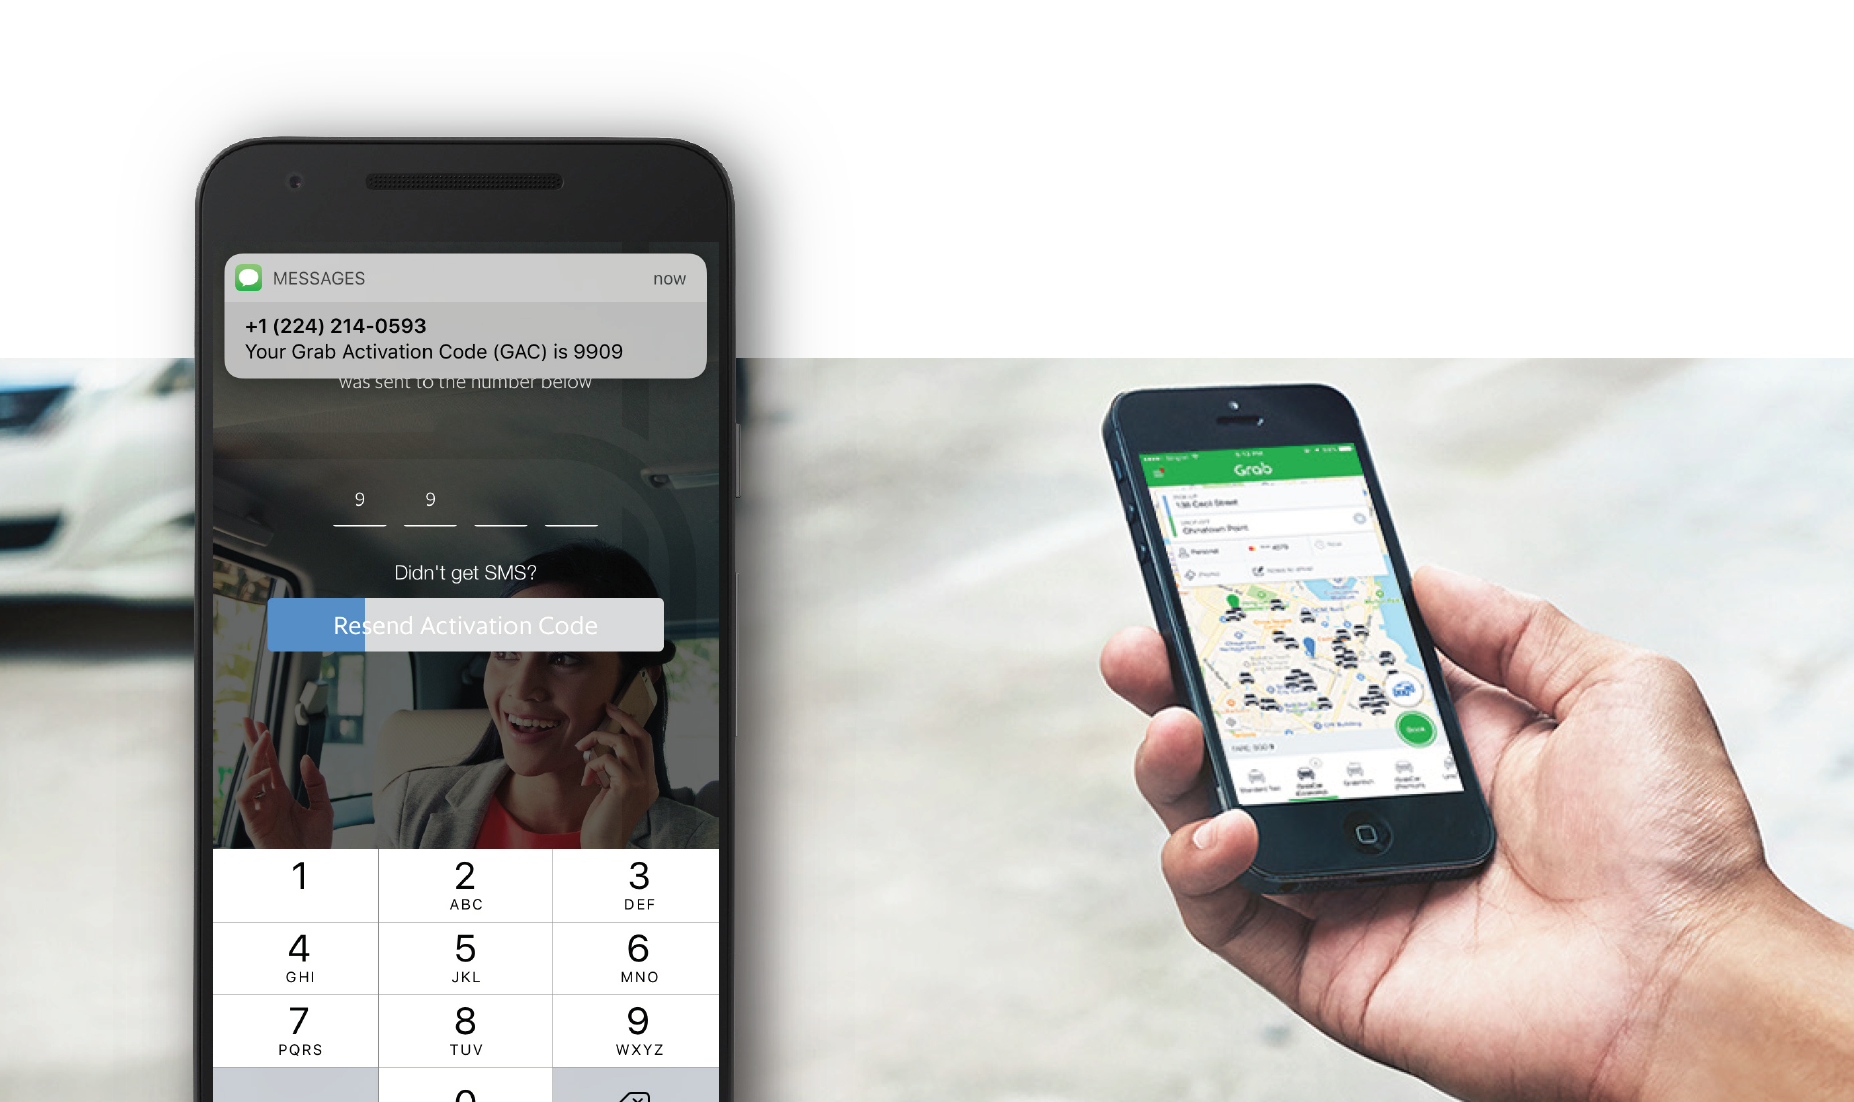
In this tutorial, we’ll cover how you can add all three of these to an iOS application using the Nexmo Verify SDK.
Using the SDK will allow you to add an extra layer of security. You will ensure the user is tied to a specific physical device by capturing the Device ID and an SMS/TTS PIN code. Certifying the user is logging in from the same device as the previous login attempt reduces spam/fraud.
We will be using a starter app (Swift 3) that uses a Back4App backend for the user login (something you know). We will use the Verify SDK for our 2FA solution through SMS and TTS, and Apple’s Touch ID for biometric verification (something you are).
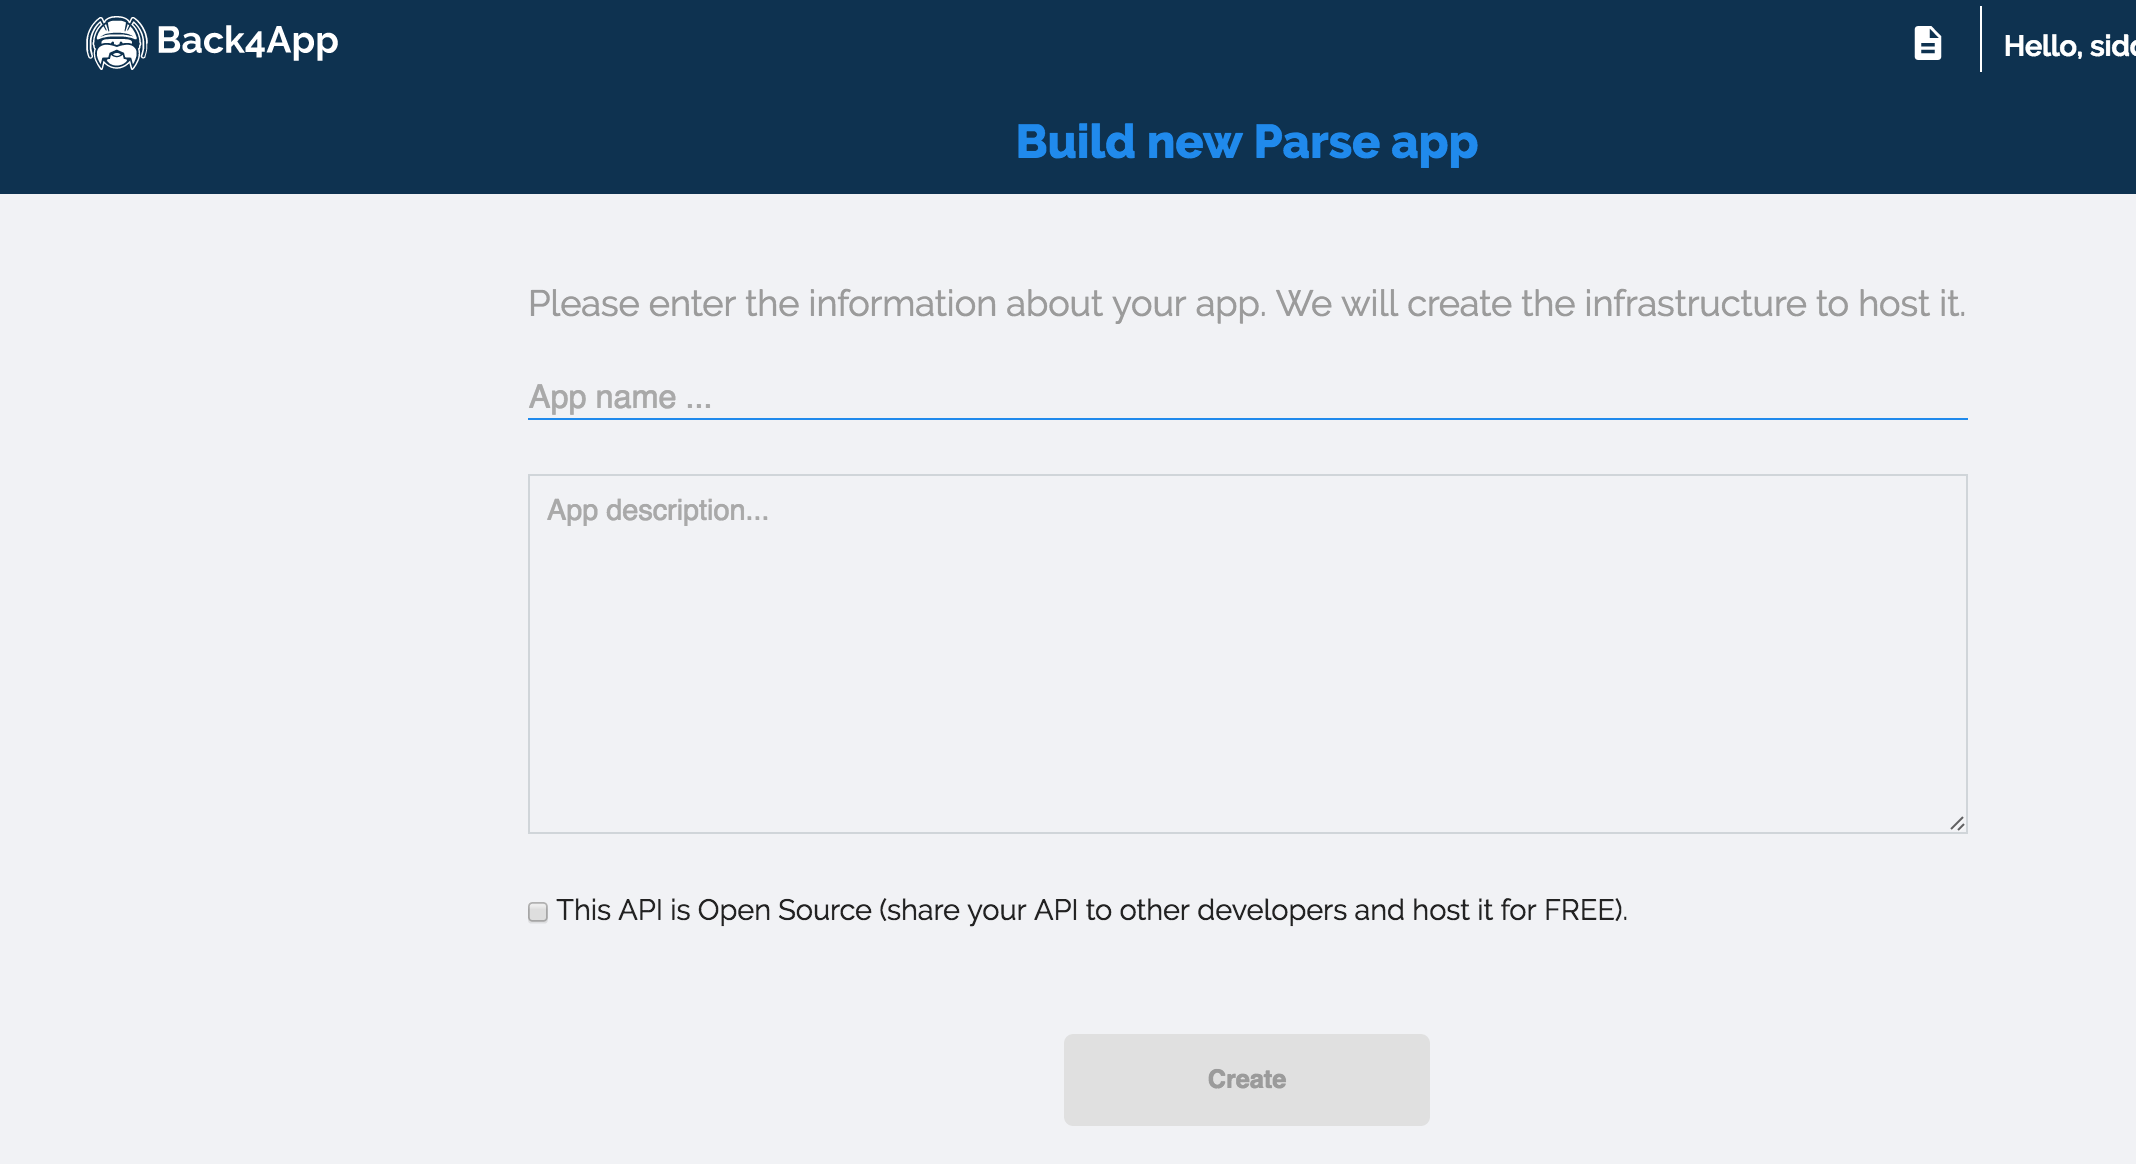
Back{4}App is a backend that lets you build and host Parse apps (which is handy since Parse closed down). If you do not have an existing Back{4}App account, sign up and create an application.
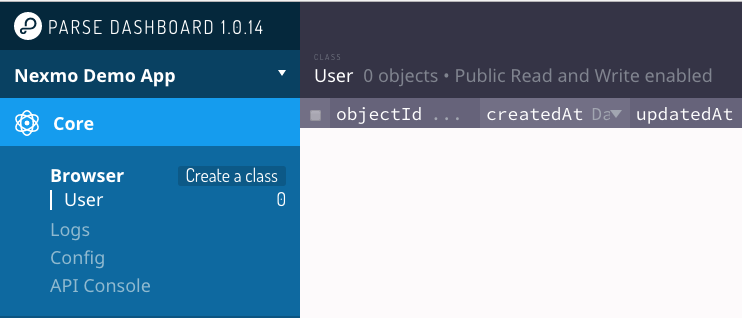
Once your app is created, click the ‘server’ button inside the ‘Core Settings’ section. You will then directed to a page with your new application credentials. Once you have taken note of your Application ID and Client Key, click the back button and go to the ‘Dashboard’ located inside the ‘Core Settings’ section. Once you are redirected to the dashboard, head over to the ‘Core’ section, press ‘Edit’ (located on the top right corner) and add the following columns to the ‘User’ class:
'checking' (Number)
'saving (Number)
'sitekey' (File - image for users)
phoneNumber (string)
‘smsVerification’ (Boolean value - allow users to enable SMS verification on login)
Now that Back{4} apps is set up, we can look at getting our starter application in place.
Let’s get started by getting the starter app from GitHub. In your Terminal, run the following:
The repo has a getting-started (pre-2FA) branch, which allows you to follow the tutorial below, and a master branch, which contains the final version of this tutorial.
Open the NexmoBankingApp.xcproj in XCode. Select "NexmoBankingApp" to open your app settings, and update the project’s "Bundle Identifier" to a valid identifier and app name registered to Apple's Developer Portal. Add your Back4App Application ID and Client Key in AppDelegate.swift.
let configuration = ParseClientConfiguration {
$0.applicationId = "BACK4APP_APP_ID"
$0.clientKey = "BACK4APP_CLIENT_KEY"
$0.server = "https://parseapi.back4app.com"
}
Parse.initializeWithConfiguration(configuration)Once entered, head on over to 'ViewController.swift' and add a dummy user to the database by uncommenting the 'signUpDemoAccount()' function call in the 'viewDidLoad()' method in 'ViewController.swift':
override func viewDidLoad() {
super.viewDidLoad()
self.onlineID.delegate = self
signUpDemoAccount() //Uncomment to create dummy user
}Update the PFUser's username, password, email, and phoneNumber fields in the 'signUpDemoAccount()' function.
func signUpDemoAccount() {
var user = PFUser()
user.username = "ENTERUSERNAME"
user.password = "ENTERPASSWORD"
user.email = "ENTEREMAILADDRESS@DEMO.NET"
user["phoneNumber"] = "ENTER-YOUR-PHONE-HERE"
user["smsVerification"] = false
user["checking"] = 5000
user["saving"] = 10000
let sitekeyImage = UIImage(named: "nexmo.png")
let imageData = UIImagePNGRepresentation(sitekeyImage!)
let imageFile = PFFile(name:"nexmo.png", data:imageData!)
user["sitekey"] = imageFile
user.signUpInBackground {
(success, error) -> Void in
if !success {
print(error.debugDescription)
} else {
print("User signed up.")
}
}
}
Run the app. The PFUser will be created and will populate the Back4App dashboard. To avoid creating another user when you start the app again, you should comment out the 'signUpDemoAccount()' function call in the 'viewDidLoad()' method after you run the app the first time.

Go ahead and run the app again. You will be able to access the user's account information by entering the credentials of the newly created user.
Okay, now let's beef up the security in the app by adding 2FA.
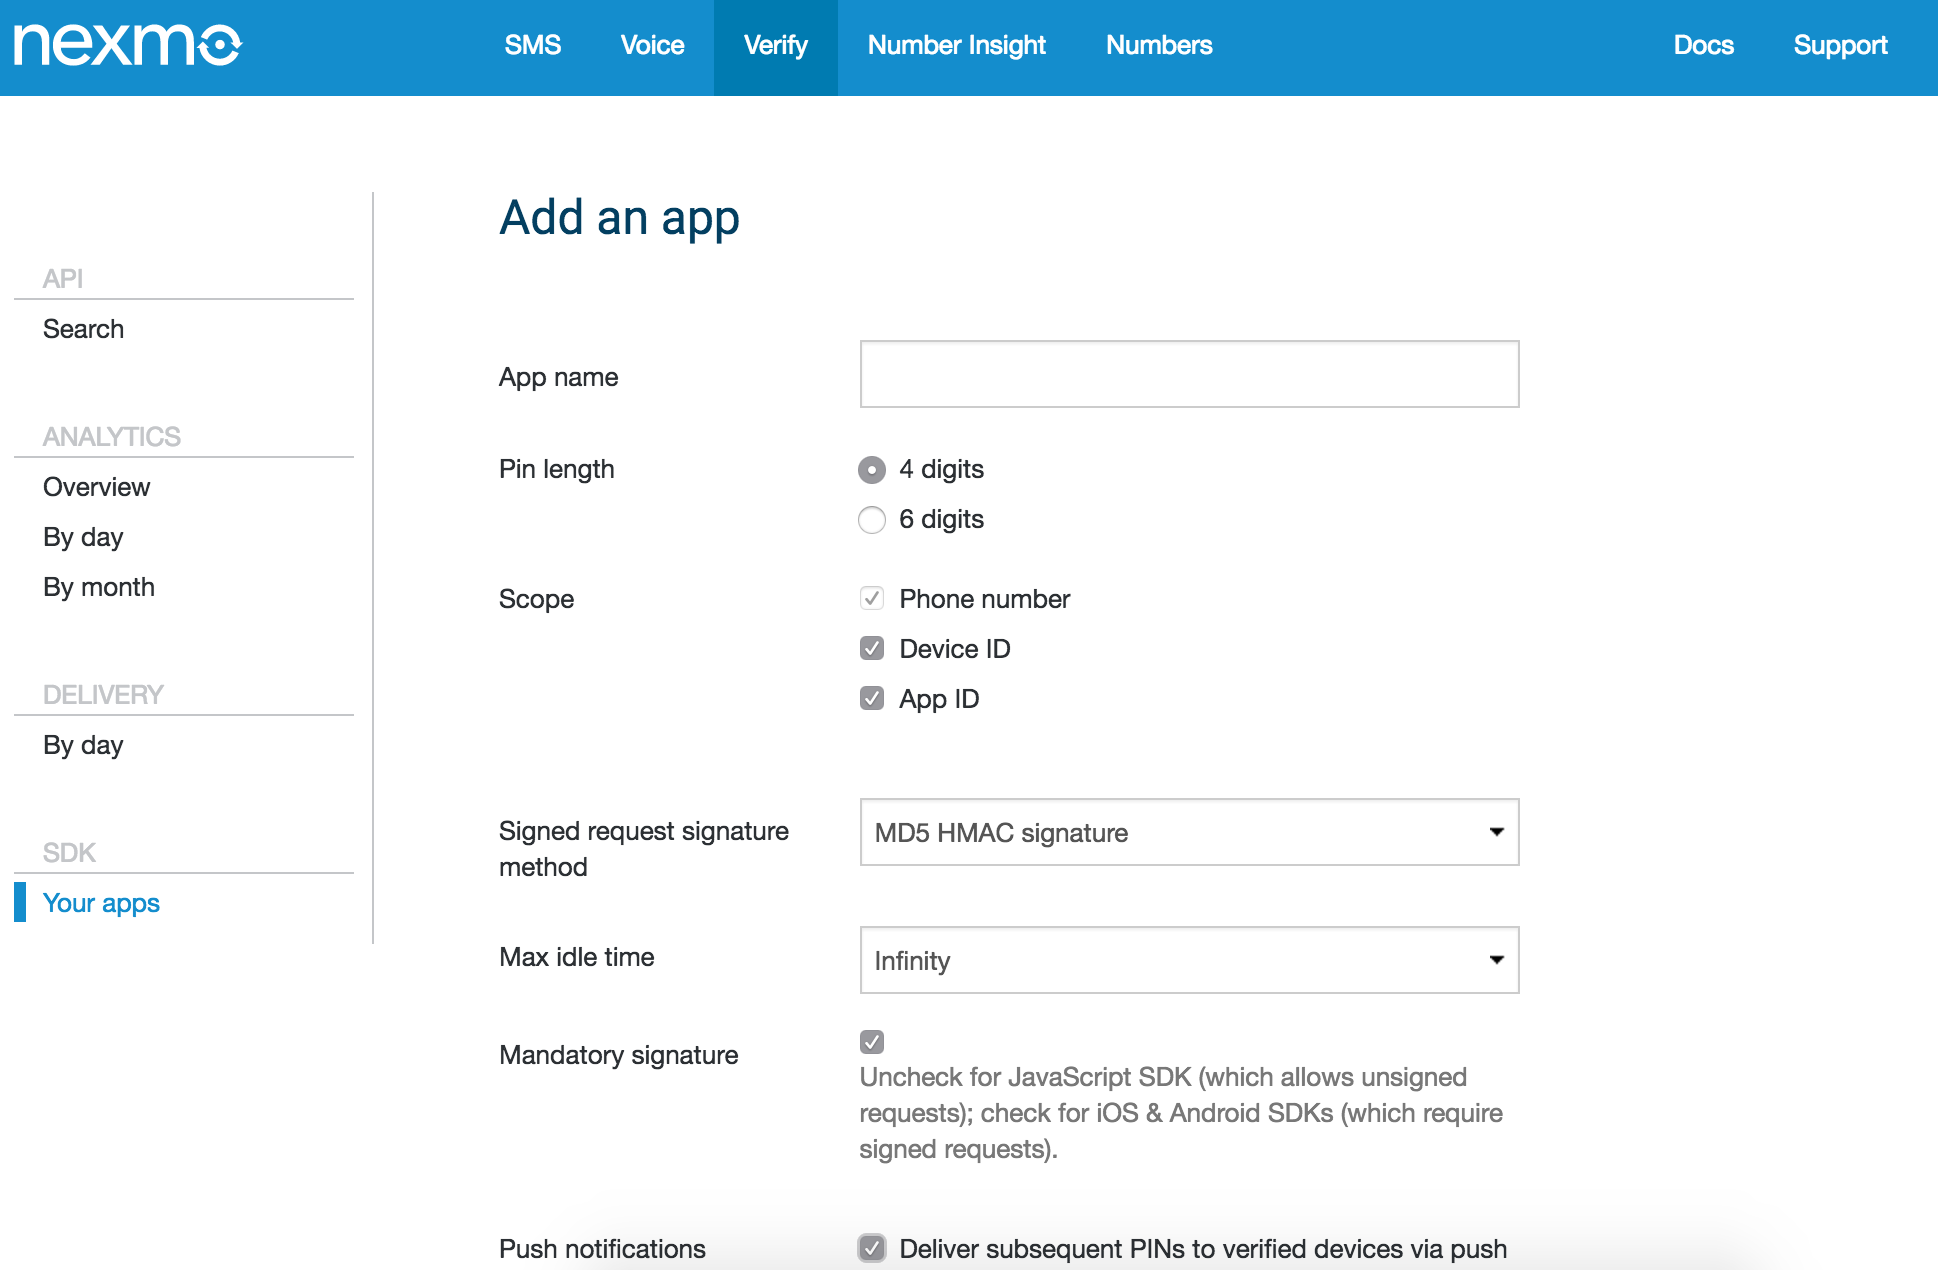
Sign up for a Nexmo account and go to your customer dashboard. Click on the Verify tab and add a new application under 'Your Apps'. Set up your app with a name, idle time of Instant (maximum length of time the user will stay verified; in this case, users will expire immediately), and PIN code length.
Next, let's add the Nexmo Verify SDK. The Verify SDK can be easily added to your project using Cocoapods. Create a Podfile in your project directory, add the ‘NexmoVerify’ pod inside the file, and install the pod via Terminal. (If the pod cannot be found, run pod update to update Cocoapods.)
Inside Podfile
# Uncomment this line to define a global platform for your project
# platform :ios, '9.0'
target 'NexmoBankingApp' do
# Comment this line if you're not using Swift and don't want to use dynamic frameworks
use_frameworks!
# Pods for NexmoBankingApp
pod ‘NexmoVerify’
endOnce the pod installation has completed, close Xcode and open the new ‘xcworkspace’ proect file. Now you are ready to dive into the code!
If you want to learn more about the NexmoVerify pod you can check out the source code on Github.
Now that you have your dependencies in place and have attained the Nexmo app credentials, it's time to add them to your 'AppDelegate' file.
In AppDelegate.swift:
import NexmoVerify //Add to top of the file

fileprivate var appID = "YOUR_NEXMO_APP_ID"
fileprivate var sharedSecret = "YOUR_NEXMO_SHARED_SECRET"
Initialize the Nexmo Client inside the ‘didFinishLaunchingWithOptions’ function of the ‘AppDelegate’ file.
func application(_ application: UIApplication, didFinishLaunchingWithOptions launchOptions: [UIApplicationLaunchOptionsKey: Any]?) -> Bool {
let configuration = ParseClientConfiguration {
$0.applicationId = "BACK4APP_APP_ID"
$0.clientKey = "BACK4APP_CLIENT_KEY"
$0.server = "https://parseapi.back4app.com"
}
Parse.initializeWithConfiguration(configuration)
NexmoClient.start(applicationId: appID, sharedSecretKey: sharedSecret)
return true
}
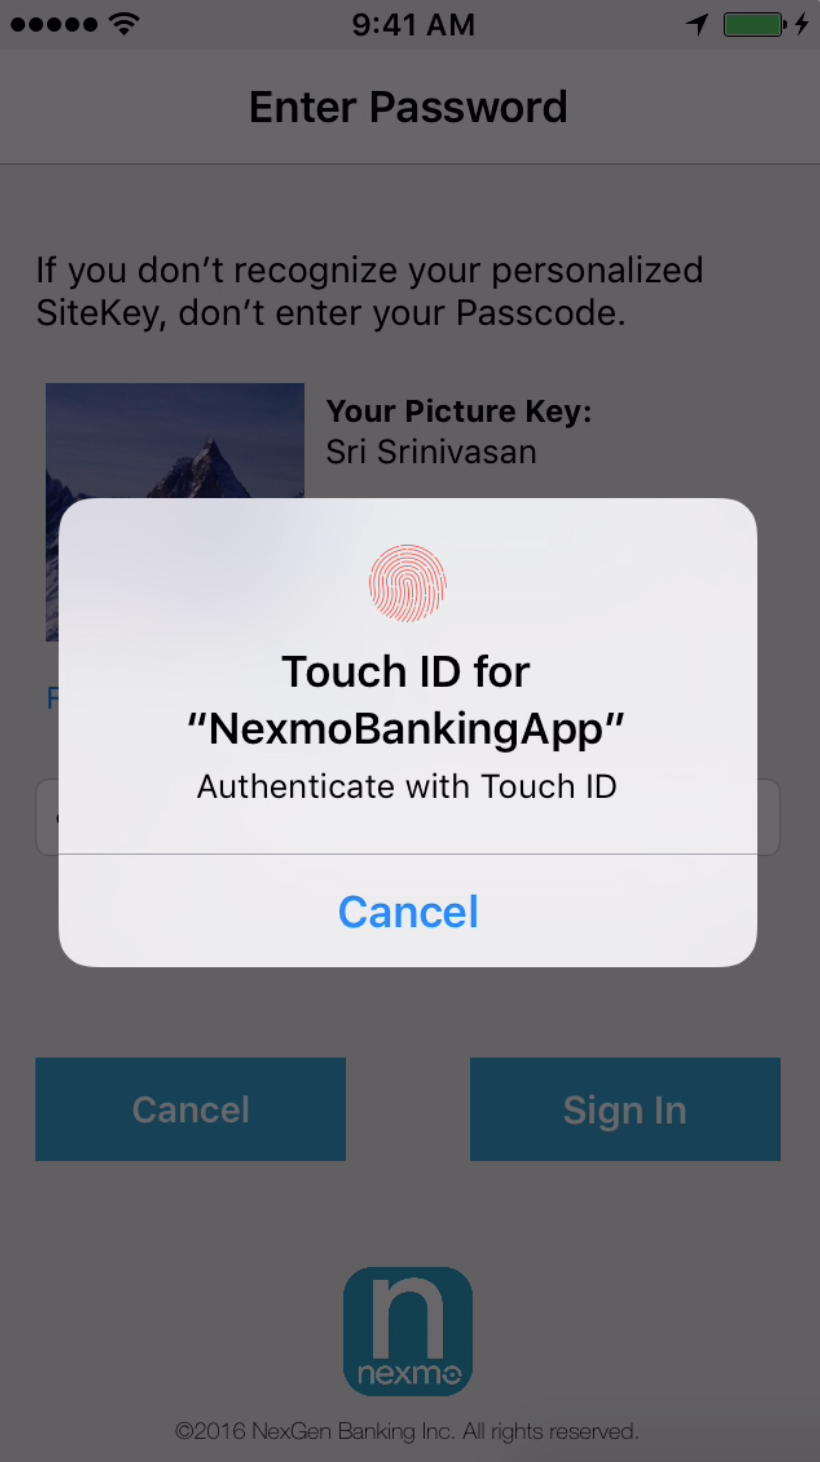
On successful login, because we provided Back4Apps with the username and password combination, the second screen takes the user to their sitekey verification where we will be adding biometric Touch ID verification.
Let's handle the user pressing the sign in button by using Apple's LocalAuthentication API to prompt a Touch ID verification. If the device is not compatible with Touch ID (no fingerprint reader), the user skips the biometric verification. Add a segue ('signInStopped') so that when the user is unable to successfully pass the Touch ID verification, he or she is logged out and returned to the login page. Based on the user’s SMS verification preference setting, the continue workflow function will trigger a verification request after segueing to the PIN verification screen (which we create next) or show the user’s account page.
import LocalAuthentication

@IBAction func signInButton(_ sender: AnyObject) {
initialWorkFlow()
}
func initialWorkFlow() {
let context = LAContext()
var error: NSError?
if context.canEvaluatePolicy(.deviceOwnerAuthenticationWithBiometrics, error: &error) {
let reason = "Authenticate with Touch ID"
context.evaluatePolicy(.deviceOwnerAuthenticationWithBiometrics, localizedReason: reason, reply:
{(success, error) in
if success {
self.continueWorkflow()
}
else {
let alert = UIAlertController(title: "Failed Identification", message: "Touch ID Authentication Failed. Sign In process stopped.", preferredStyle: .alert)
let defaultAction = UIAlertAction(title: "Continue", style: .default) {
UIAlertAction in
PFUser.logOut()
self.performSegue(withIdentifier: "signInStopped", sender: self)
}

alert.addAction(defaultAction)
self.present(alert, animated: true, completion: nil)
}
})
}
else {
print("Touch ID not available")
self.continueWorkflow()
}
}
func continueWorkflow() {
if (PFUser.current()?["smsVerification"] as! Bool) {
self.performSegue(withIdentifier: "verifyPin", sender: self)
}
else {
self.performSegue(withIdentifier: "showAccount", sender: self)
}
}
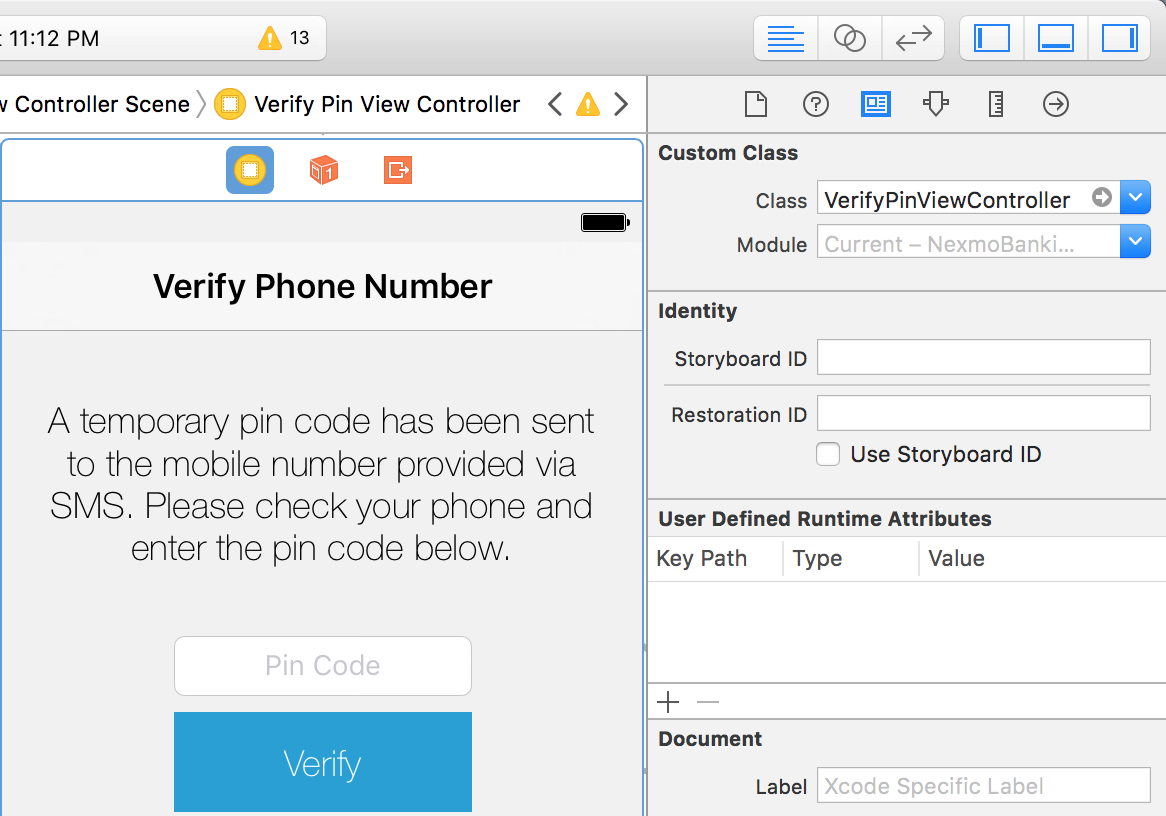
Add a new file to your project (‘VerifyPinViewController’) and create a view controller in the Storyboard using the Interface Builder. Open up the 'Utilities' menu by clicking the button on the top right of the Interface Builder. Click the 'Identity Inspector' button and enter the name of the new class after clicking the link the View Controller in the IB to the file. Next, add a text box (‘pinCode’ - IBOutlet) along with a button (‘verifyPin’ - IBAction) to submit the pin code. Create a segue (‘verifyPin’) that is connected to the 'SitekeyViewController' and the newly created view controller.
Inside the ‘viewDidAppear’ method of the newly added view controller, call the function below.
import Foundation
import UIKit
import Parse
import NexmoVerify

class VerifyViewController : UIViewController {
@IBOutlet weak var pinCode: UITextField!
@IBAction func verifyButton(_ sender: Any) {
}

override func viewDidLoad() {
super.viewDidLoad()
}

override func viewDidAppear(_ animated: Bool) {
super.viewDidAppear(true)
let alert = UIAlertController( title: "User Phone Verification", message: "Your identity is being verified.", preferredStyle: .alert)
let defaultAction = UIAlertAction(title: "Continue", style: .default) {
UIAlertAction in
self.verifyUser()
}
alert.addAction(defaultAction)
present(alert, animated: true, completion: nil)
}
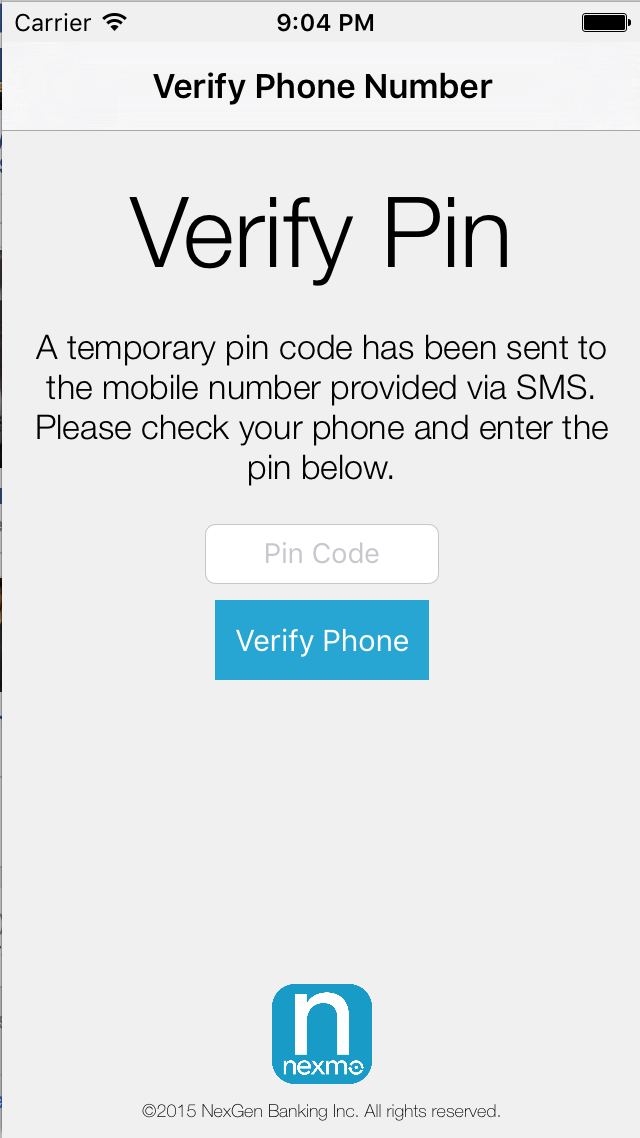
Grab the user’s phone number from the Back4Apps database and trigger a verification request using the getVerifiedUser() method. Create a segue ('pinVerified') that is connected from 'VerifyPinController' to 'StatementViewController'.
func verifyUser() {
VerifyClient.getVerifiedUser(countryCode: "US", phoneNumber: PFUser.current()?["phoneNumber"] as! String,
onVerifyInProgress: {
},
onUserVerified: {
self.performSegue(withIdentifier:"pinVerified", sender: self)
},
onError: { verifyError in
switch (verifyError) {
case .invalidPinCode:
UIAlertView(title: "Wrong Pin Code", message: "The pin code you entered is invalid.", delegate: nil, cancelButtonTitle: "Try again!").show()
case .invalidCodeTooManyTimes:
let alert = UIAlertController(title: "Unsucessful Identification", message: "Logging out. Goodbye.", preferredStyle: .alert)
let defaultAction = UIAlertAction(title: "Goodbye", style: .default) {
UIAlertAction in

VerifyClient.cancelVerification() { error in
if let error = error {
// something wen't wrong whilst attempting to cancel the current verification request
return
}
}
self.performSegue(withIdentifier: "logout", sender: self)
}
alert.addAction(defaultAction)
self.present(alert, animated: true, completion: nil)
default:
print(verifyError.rawValue)
break
}
})
}Also, call the checkPinCode method provided by the Nexmo client when the button is pressed to verify the PIN provided by the user.
@IBAction func verifyButton(sender: AnyObject) {
if pinCode.text!.isEmpty {
let alert = UIAlertController(title: "Enter Pin Code", message: "Please check your phone and enter the pin code send via SMS.", preferredStyle: .alert)
let defaultAction = UIAlertAction(title: "Back", style: .default, handler: nil)
alert.addAction(defaultAction)
present(alert, animated: true, completion: nil)
}
else {
VerifyClient.checkPinCode(pinCode.text!)
}
}
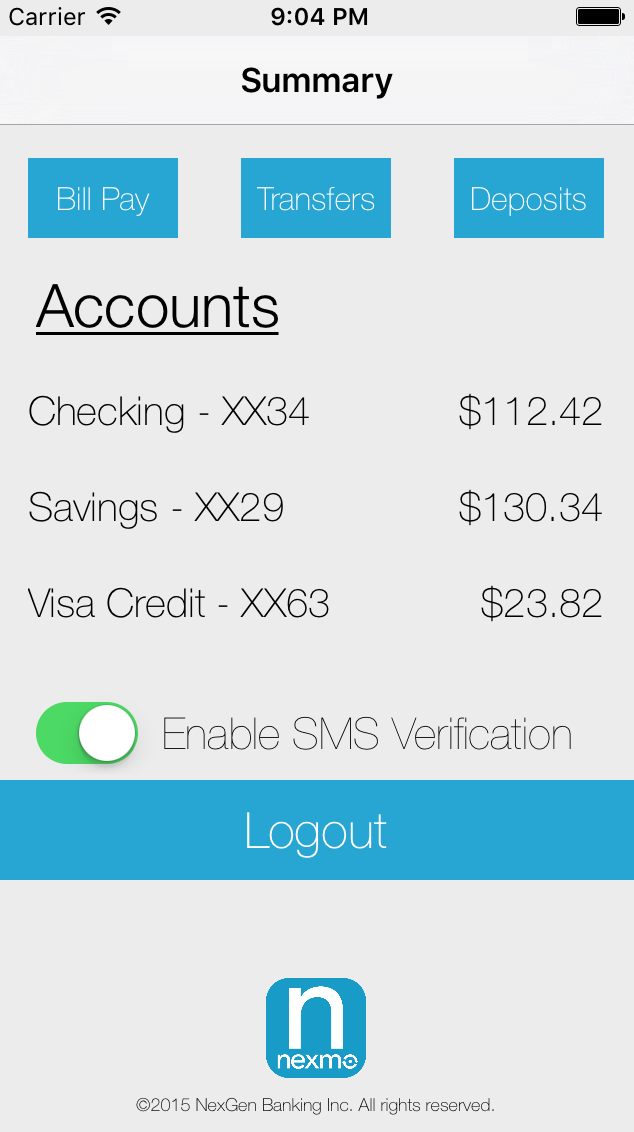
Next, add the logic that allows the user to enable SMS verification. Add a switch UI element to your ‘StatementViewController’ as an IBOutlet. Also, add a Boolean variable to hold the value of the switch. The value of the switch is stored in the database on user logout. If the switch was toggled on, an SMS verification will be triggered on the next login. After the view appears, check the values for the checking and savings accounts to validate they are not nil.
@IBOutlet weak var switch2FA: UISwitch!
var switchBoolValue:Bool!
func logout() {
if switchBoolValue == true {
let alert = UIAlertController(title: "SMS Verification", message: "Perform SMS verification on login?", preferredStyle: .alert)
let defaultAction = UIAlertAction(title: "Continue", style: .default) {
UIAlertAction in
PFUser.current()?["smsVerification"] = true
PFUser.current()?.saveInBackground()
self.performSegue(withIdentifier: "logoutUser", sender: self)
}
let cancelAction = UIAlertAction(title: "Cancel", style: .cancel, handler: nil)
alert.addAction(defaultAction)
alert.addAction(cancelAction)
self.present(alert, animated: true, completion: nil)
}
else {
print("SMS FALSE successful logout")
PFUser.current()?["smsVerification"] = false
PFUser.current()?.saveInBackground()
self.performSegue(withIdentifier: "logoutUser", sender: self)
}
}

override func viewDidAppear(_ animated: Bool) {
super.viewDidAppear(true)
if (PFUser.current()?["saving"] == nil || PFUser.current()?["checking"] == nil) {
PFUser.logOut()
self.performSegue(withIdentifier: "logout", sender: self)
}
else {
switch2FA.addTarget(self, action: #selector(StatementViewController.switchMoved), for: UIControlEvents.valueChanged)
switchBoolValue = true
}
}

func switchMoved() { // stores value for the switch
if switch2FA.isOn {
switchBoolValue = true
print("switch on")
}
else {
switchBoolValue = false
print("switch off")
}
}
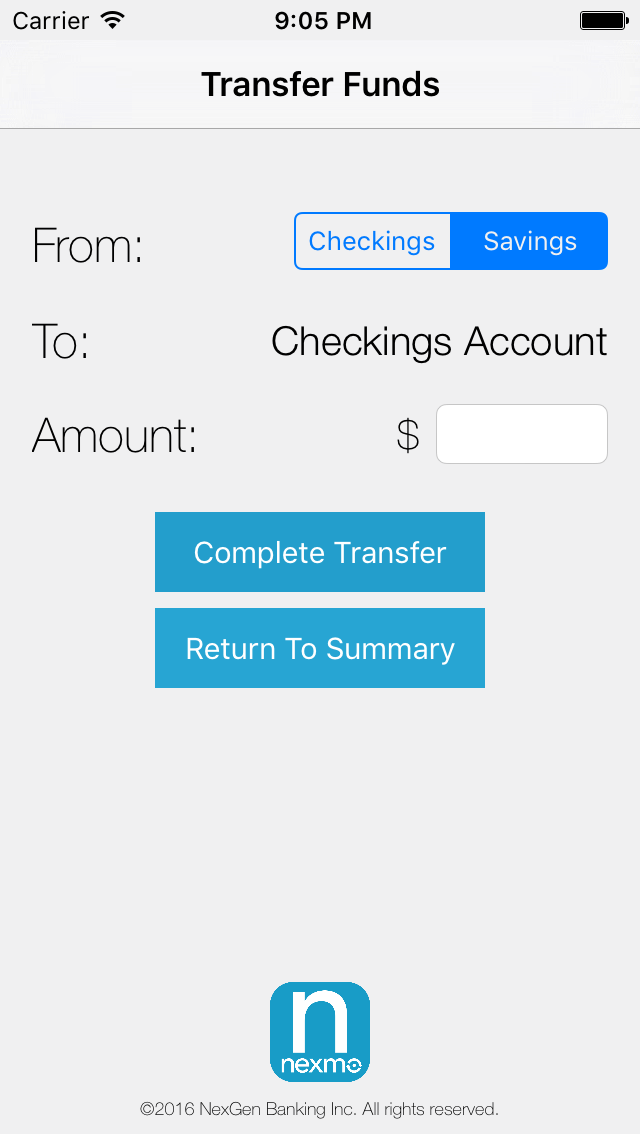
For more secure transactions, such as a user transferring funds from one account to another, you can trigger a verification request to confirm the user request action.
Add a new controller ('TransferPinViewController') with a text field ('pinCode' - IBOutlet) and a button ('verifyButton' - IBAction) in the storyboard file. Create a segue ('verifyTransfer') from the 'TransferViewController' to the newly created view controller.
The checkings, savings, transfer amount, transfer source, and the after transfer total will be sent with the segue. Update the transfer functions ('checkingToSaving' and 'savingToChecking') to send the user to the 'TransferPinViewController' after verifying the available balance for the transfer.
func checkingToSaving() {
print("checkingToSaving")
if checkingAmount - transferAmt > 0 {
print("NEWTOTAL: \(checkingAmount - transferAmt)")
transferSource = "checkingToSaving"
afterTransferTotal = checkingAmount - transferAmt
self.performSegue(withIdentifier: "verifyTransfer", sender: self)
}

else {
print("ERROR")
let alert = UIAlertController(title: "Transfer Error", message: "You do not have the requested transfer amount in your Checking Account. Please try again.", preferredStyle: .alert)
let defaultAction = UIAlertAction(title: "Back", style: .default, handler: nil)
alert.addAction(defaultAction)
self.present(alert, animated: true, completion: nil)

}
}
func savingToChecking() {
if savingAmount - transferAmt > 0 {
transferSource = "savingToChecking"
afterTransferTotal = savingAmount - transferAmt
self.performSegue(withIdentifier: "verifyTransfer", sender: self)
}
else {
print("ERROR")
let alert = UIAlertController(title: "Transfer Error", message: "You do not have the requested transfer amount in your Savings Account. Please try again.", preferredStyle: .alert)
let defaultAction = UIAlertAction(title: "Back", style: .default, handler: nil)
alert.addAction(defaultAction)
self.present(alert, animated: true, completion: nil)
}
}
override func prepare(for segue: UIStoryboardSegue, sender: Any!) {
if (segue.identifier == "verifyTransfer") {
let verifyTransferVC = segue.destination as! TransferPinViewController;
verifyTransferVC.checkingAmount = checkingAmount
verifyTransferVC.savingAmount = savingAmount
verifyTransferVC.transferAmt = transferAmt
verifyTransferVC.transferSource = transferSource
verifyTransferVC.afterTransferTotal = afterTransferTotal
}
}
Create a function that calls the ‘getVerifiedUser’ method to initiate the user verification. This function should be called when the view loads.
import NexmoVerify //Add to top of the file

override func viewDidLoad() {
super.viewDidLoad()
verify()
}
func verify() {
VerifyClient.getVerifiedUser(countryCode: "US", phoneNumber: PFUser.current()?["phoneNumber"] as! String,
onVerifyInProgress: {
},
onUserVerified: {
self.performTransfer()
},
onError: { verifyError in
switch (verifyError) {
case .invalidPinCode:
UIAlertView(title: "Wrong Pin Code", message: "The pin code you entered is invalid.", delegate: nil, cancelButtonTitle: "Try again!").show()
case .invalidCodeTooManyTimes:
let alert = UIAlertController(title: "Unsucessful Identification", message: "Logging out. Goodbye.", preferredStyle: .alert)
let defaultAction = UIAlertAction(title: "Goodbye", style: .default) {
UIAlertAction in
VerifyClient.cancelVerification() { error in
if let error = error {
// something wen't wrong whilst attempting to cancel the current verification request
return
}
}
self.performSegue(withIdentifier: "logout", sender: self)
}
alert.addAction(defaultAction)
self.present(alert, animated: true, completion: nil)
default:
print(verifyError.rawValue)
break
}
})
}As shown above, call the function 'performTransfer' inside the 'onUserVerified' callback method. As we did in the previous verification view controller, call the 'checkPinCode' method inside your IBAction button to check the provided PIN from the user. Lastly, create a segue ('sucessfulTransfer') from the 'VerifyPinViewController' to the 'StatementViewController' to return the user to the Statements screen on successful transfer.
@IBOutlet weak var pincode: UITextField!
@IBAction func checkPin(sender: AnyObject) {
VerifyClient.checkPinCode(pincode.text!)
}
func performTransfer() {
if transferSource == "checkingToSaving" {
checkingAmount = checkingAmount - transferAmt
savingAmount = savingAmount + transferAmt
PFUser.current()?["checking"] = checkingAmount
PFUser.current()?["saving"] = savingAmount
PFUser.current()?.saveInBackground()
OperationQueue.main.addOperation {
self.performSegue(withIdentifier: "successfulTransfer", sender: self)
}
}
else if transferSource == "savingToChecking"{
savingAmount = savingAmount - transferAmt
checkingAmount = checkingAmount + transferAmt
PFUser.current()?["saving"] = savingAmount
PFUser.current()?.saveInBackground()
PFUser.current()?["checking"] = checkingAmount
PFUser.current()?.saveInBackground()
OperationQueue.main.addOperation {
self.performSegue(withIdentifier: "successfulTransfer", sender: self)
}
}
}That is all you need to do to enable two-factor authentication in your iOS app using Nexmo’s Verify SDK.
Nowadays, enabling 2FA is a must for managing access to sensitive information and ensuring proper user identification. In this tutorial, we secured the demo application with all three methods of authentication. Using a user's username and password combo, we ensured something the user knows (login credentials). By implementing Nexmo’s Verify iOS SDK, we ensured we verified something the user has (access to their phone by capturing the user’s device ID and IP address). Adding Apple’s Touch ID ensured something the user is (themselves) by using biometric verification.
The process of adding 2FA is simple using the Verify SDK and Apple’s Local Authentication API, and it adds an extra layer of security that protects your user’s sensitive information.
Feel free to send me your thoughts or questions on Twitter @sidsharma_27.