Share:
Rabeb was a Developer Advocate at Nexmo focusing on cloud communication APIs and helping developers get the best experience possible when building their apps. Other than writing code for a living, Rabeb advocates for bringing more women and minorities into tech, thus her involvement with Women Who Code and different tech communities. She leads the Women Who Code Network in Bristol.
Add 2FA to a Microsoft bot with Nexmo’s Verify API
Time to read: 4 minutes
2FA (Two Factor Authentication) is increasingly used to increase security within applications. As bots become increasingly popular, developers will need to consider how to integrate 2FA with their bots In this demo, we will see how to use the Nexmo Verify API with Microsoft Bot Framework.
In this post, we won't go through the details of creating a bot. We are assuming that you know how to setup Visual Studio to create bot projects. If you are not familiar with Microsoft Bot framework, you can visit the documentation page here.
The Bot Builder SDK for .NET currently supports C#. Visual Studio for Mac is not supported. You will need a Windows machine to be able to run this demo.
To set up 2FA, we are using Nexmo Verify API and the Nexmo C# Client Library
In our scenario, we are going to add two-factor authentication to a bot on sign-up. As a first time user, you are required to provide a little bit of information to complete your profile like your name and phone number.
Then, the bot will try to verify that phone number by sending a PIN using the Nexmo Verify API. The next step is to collect the PIN and check it.
The first thing to do in order to set up 2FA with a bot, is to create a bot. It makes sense, doesn't it? In Visual Studio, create a new project of the type "Bot Application": File--> New--> Project--> Bot application
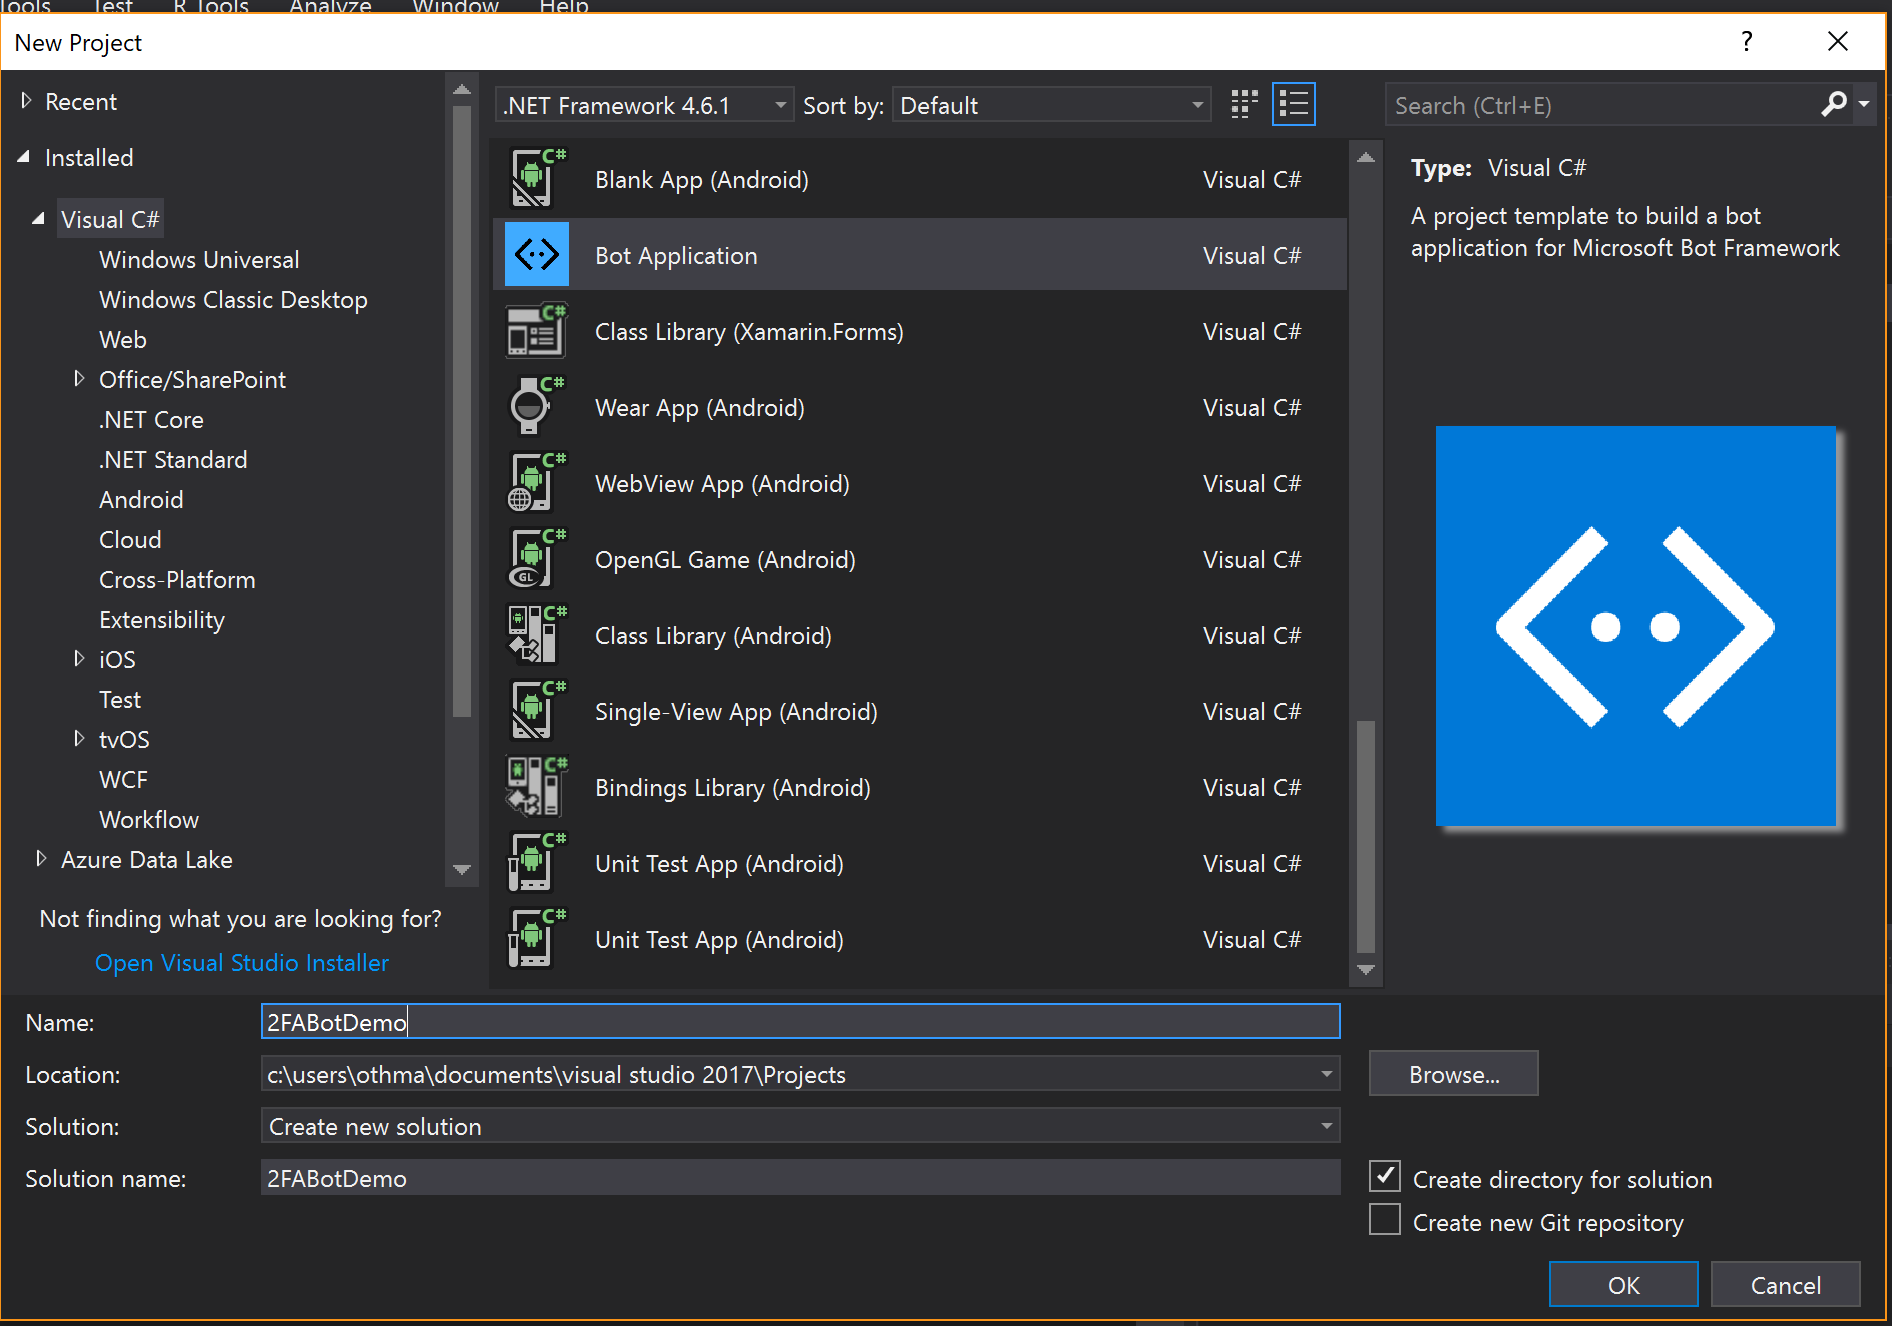 Creating and Saving new project
Using Nexmo APIs with a Bot Application is no different from using the APIs with any other .Net Project. install the Nexmo C# Client Library via the NuGet Package Manager Console.
Install-Package Nexmo.Csharp.Client -Version 3.0.1’
In order to verify the user's phone number on sign up, we are going to collect a little bit of information for building a user's profile.
With the Microsoft Bot Framework, there are few ways to manage the conversation flow and build dialogs. In this case, we are going to use FormFlow as it simplifies the process of managing a guided conversation like ours.
 2fa Typing message
Add a 'UserProfile' class to the project, this class defines the form. The class includes some properties to help us build the profile and a 'BuildForm()' method that uses 'FormBuilder' to create the form and define a simple welcome message.
Make sure to import the namespace FormFlow to be able to use FormFlow.
Microsoft.Bot.Builder.FormFlowusing Microsoft.Bot.Builder.Dialogs;
using Microsoft.Bot.Builder.FormFlow;
using System;
namespace _2FABotDemo
{
[Serializable]
public class UserProfile
{
[Prompt("What's your first name?")]
public string FirstName;
[Prompt("How about your last name?")]
public string LastName;
[Prompt("I now need your phone number in its international format but without '+' or '00'. I will send you a verification code shortly.")]
public string PhoneNumber;
public static IForm<UserProfile> BuildForm()
{
return new FormBuilder<UserProfile>().Message("Welcome! Before I'm of any use to you, I will need to verify your identity. Please answer the following questions.")
.OnCompletion(async (context, UserProfile) => {
context.PrivateConversationData.SetValue<bool>("ProfileComplete", true);
await context.PostAsync("Your profile is complete.");
})
.Build();
}
}
}
Now that we have a profile form, we need to connect it to the framework to be able to actually use it. This is done by adding it to the controller 'MessagesController.cs' via 'MakeRootDialog()' method.
'MakeRootDialog()' in return calls 'FormDialog.FromForm' method to create the user profile form. Once the user profile is completed, the bot will proceed to sending a verification code to the phone number provided by the user.
For the sake of clarity, we are grouping the methods related to verification (i.e., for sending and checking) in a helper class called 'VerifyHelper.cs'.
public  string RequestId { get; set; }
public Client Client { get; set; }

public VerifyHelper()
{
    Client = new Client(creds: new Nexmo.Api.Request.Credentials
    {
         ApiKey = "NEXMO_API_KEY",
         ApiSecret = "NEXMO_API_SECRET"
    });
}

public  void SendVerificationCode(string phoneNumber)
{
     var result = Client.NumberVerify.Verify(new NumberVerify.VerifyRequest
     {
          number = phoneNumber,
          brand = "NexmoQS"
     });

     RequestId = result.request_id;
}internal static IDialog<UserProfile> MakeRootDialog() => Chain.From(() => FormDialog.FromForm(UserProfile.BuildForm))
.Do(async (context, userprofile) =>
{
SetVerify(new VerifyHelper());
try
{
var completed = await userprofile;
GetVerify().SendVerificationCode(completed.PhoneNumber);
await context.PostAsync("All Done! I sent a verification code to the phone number you provided. Could you please tell me the code once you receive it?");
}
catch (FormCanceledException<UserProfile> e)
{
string reply;
if (e.InnerException == null)
{
reply = $"You quit on {e.Last} -- maybe you can finish next time!";
}
else
{
reply = "Sorry, I've had a short circuit. Please try again.";
}
await context.PostAsync(reply);
}
});'MakeRootDialog()' is called by the Conversation.SendAsync()' method.
await Conversation.SendAsync(activity, () => MakeRootDialog());
Now that the code is sent, the next step is to verify it once the user provides it to the bot.
 Verify Code
This is done via the 'CheckVerificationCode' method in 'VerifyHelper.cs'.
public  string CheckVerificationCode(string code)
{
     var result = Client.NumberVerify.Check(new NumberVerify.CheckRequest
     {
          request_id = RequestId,
          code = code
     });

     if (result.status == "0")
     {
         return "Verification Sucessful";
     }
     else
     {
          return result.error_text;
     }
}As you can see, this method returns a string because we want to use that string to communicate with the user via the bot. the other thing to note here is 'RequestId'. This is the identifier of the verify request to check. When we send the verification code, we simply stored this identifier.
Now let's go back to the bot, we mentioned that we are creating the form in 'MessageController.cs'. That is because the 'Post' method within 'MessageController.cs' is responsible for receiving any message from the user and invokes the root dialog.
So when the user types in the verification code, the bot will still intercept that message in the post method just like the user profile information. Therefore, we need a way to tell the bot what right action to do next. If you look closely at the BuildForm method in 'UserProfile.cs', you'd notice that we are setting a bool ProfileComplete to true on completion.
.OnCompletion(async (context, UserProfile) => {
context.PrivateConversationData.SetValue<bool>("ProfileComplete", true);So what happens is everytime the user types something, we will check to see if ProfileComplete is set to true or not. If the profile is complete then the assumption is that the user has entered the verification code and we proceed to check if that code is valid; if not we keep filling the profile in the root dialog.
StateClient sc = activity.GetStateClient();
                BotData userData = sc.BotState.GetPrivateConversationData(
                    activity.ChannelId, activity.Conversation.Id, activity.From.Id);

var boolProfileComplete = userData.GetProperty<bool>("ProfileComplete");

if (!boolProfileComplete)
{
   await Conversation.SendAsync(activity, () => MakeRootDialog());
}
else
{
   ConnectorClient connector = new ConnectorClient(new Uri(activity.ServiceUrl));
   Activity replyMessage = activity.CreateReply(GetVerify().CheckVerificationCode(activity.Text));
   await connector.Conversations.ReplyToActivityAsync(replyMessage);
}
The aim of this demo is to walk you through how to add 2FA to your Microsoft Bot applications using Nexmo Verify API on sign up.
We have created a user profile form then send a verification code to the phone number provided by the user. Once the user enters the code sent to them, we will verify it. Watch out our blog to see more samples and scenarios on how to use the Nexmo APIs with Microsoft Bot Framework.
Share:
Rabeb was a Developer Advocate at Nexmo focusing on cloud communication APIs and helping developers get the best experience possible when building their apps. Other than writing code for a living, Rabeb advocates for bringing more women and minorities into tech, thus her involvement with Women Who Code and different tech communities. She leads the Women Who Code Network in Bristol.