Add Two factor Authentication to your Django app with Nexmo
Time to read: 12 minutes
I showed my love for two factor authentication before on the Vonage blog with a demo application for my "Kittens & Co" business. Interestingly enough not everyone is equally a fan of cats, some of us prefer dogs, some of us prefer other animals, but we all love two factor authentication, right?
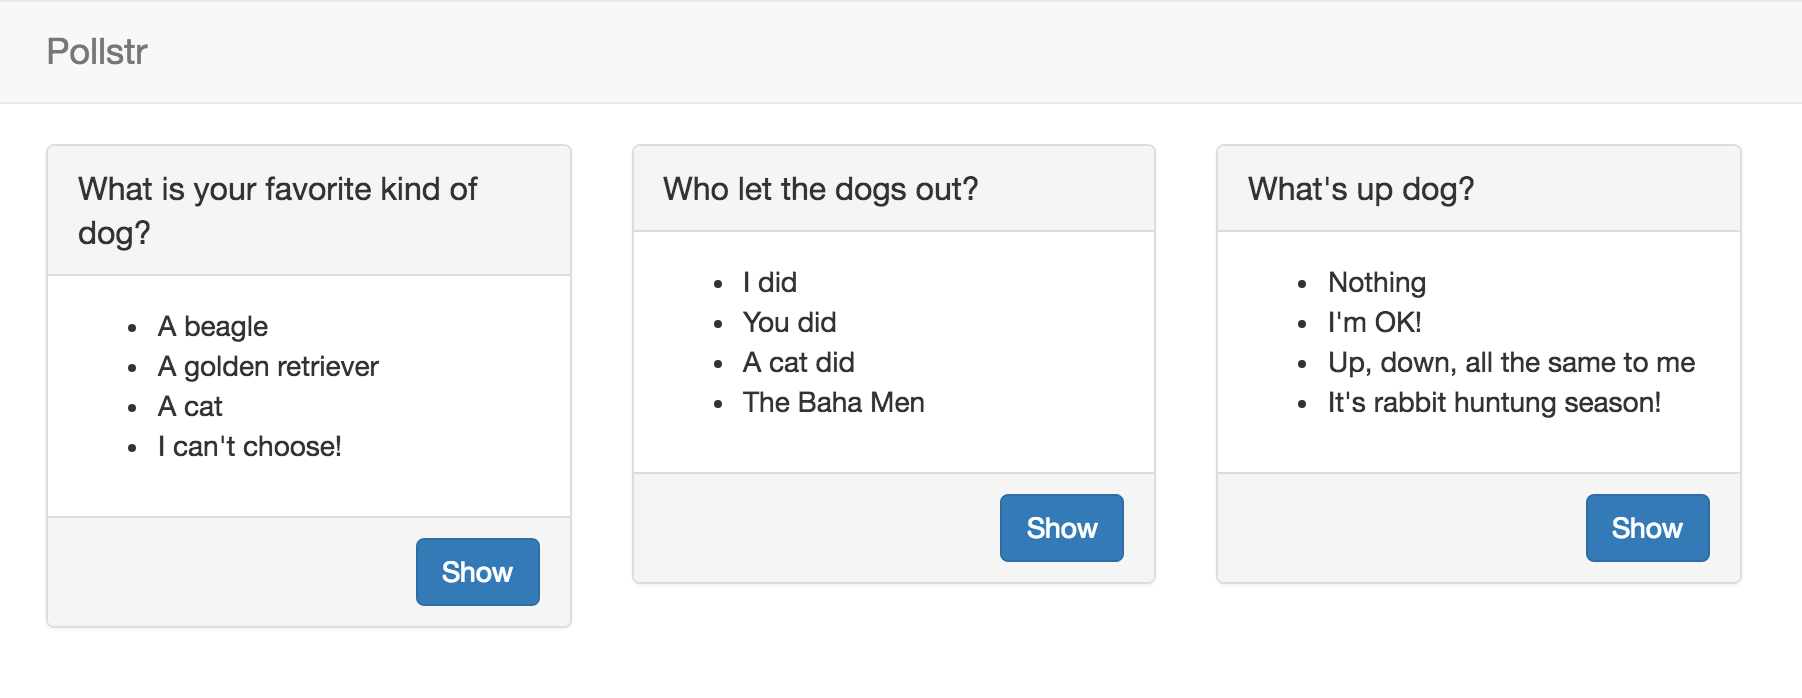
For this tutorial, I am going to show you how to add two factor authentication to your Django site using the Vonage Verify API. For this purpose, I have built a little app called “Pollstr” – a simple web app for doing polls. I know it's going to be an overnight success because of the missing "e" in the name. I want to add two-factor-authentication to ensure that people are indeed who they say they are, and to prevent spam on my polls.
 Pollstr screenshot
You can download the starting point of the app from Github and run it locally.
Then visit 127.0.0.1:8000 in your browser and try to vote on a poll. You can log in with these credentials:
username:
testpassword:
test1234
By default the app implements registration and login using Django's built in auth framework but most of this tutorial applies similarly to apps that use other authentication methods. Additionally we added some bootstrap for some prettyfication of our app.
All the code for this starting point can be found on the before branch on Github. All the code we will be adding below can be found on the after branch. For your convenience you can see all the changes between our start and end point on Github as well.
Vonage Verify is a no-hassle and secure way way to implement phone verification in just 2 API calls! In most two factor authentication systems you will need to manage your own tokens, token expiry, retries, and SMS sending. Vonage Verify manages all of this for you.
To add Vonage Verify to our app we are going to make the following changes:
Add a
phone_numberto our userAdd a
TwoFactorMixinto our views to ensure the user is logged in and verifiedRecord a new phone number for new users
Send the user a verification code
Verify the code sent to their number
The default user model in Django does not have a phone number, so we're going to have to add one ourselves. There's a few ways we could do this but in this case we're going keep all our new code contained to a new two_factor app.
This will generate a lot of new files in the /two_factor folder. Let's open up the /two_factor/models.py and add a new model that has a One-to-One relation with our user.
# two_factor/models.py
...
from django.contrib.auth.models import User

class TwoFactor(models.Model):
    number = models.CharField(max_length=16)
user = models.OneToOneField(User)Next up we will want to generate the migrations for this model, but to do so we first need to make sure to add two_factor.apps.TwoFactorConfig to our INSTALLED_APPS.
# pollstr/settings.py
INSTALLED_APPS = [
    'polls.apps.PollsConfig',
    'two_factor.apps.TwoFactorConfig',
    'django.contrib.admin',
    ...
]With this in place we can generate our migrations and migrate our database:
Our Django app uses class-based views which allow us to use custom "mixins" to add our own behaviour every view. Currently we use the LoginRequiredMixin to ensure we are logged in before we can vote on polls.
# polls/views.yml
class OptionsView(LoginRequiredMixin, DetailView):
...We are going to implement a new TwoFactorMixin to add a TwoFactor layer to this check. Let's start by changing our views to use this new mixin, even though we haven't written it yet.
# polls/views.py
from two_factor.mixins import TwoFactorMixin

class OptionsView(TwoFactorMixin, DetailView):
    ...

class ResultsView(TwoFactorMixin, DetailView):
    ...

class VoteView(TwoFactorMixin, View):
...Now let's add the mixin in to our two_factor app:
# two_factor/mixins.py
from django.contrib.auth.mixins import UserPassesTestMixin
from django.core.urlresolvers import reverse

class TwoFactorMixin(UserPassesTestMixin):
    def test_func(self):
        user = self.request.user
        return (user.is_authenticated and "verified" in self.request.session)

    def get_login_url(self):
        if (self.request.user.is_authenticated()):
            return reverse('two_factor:new')
        else:
return reverse('login')What we have done here is to create a new mixin that itself uses the UserPassesTestMixin. This mixin then automatically calls the test_func function where we check that the user is both logged in and that this session has been verified. We do the latter by simply checking if the key verified has been set in the session. By using the session like this someone can be logged in on multiple machines while still requiring verification for each of them.
The get_login function provides the UserPassesTestMixin with a route to redirect the user to if the test fails. In this case we have 2 scenarios, one where the user is not logged in at all, and one where they are logged in but not verified.
If you'd run your server at this point it would fail because, well, we haven't implemented any of the routes or views yet to redirect the user to. Let's do this next.
 Screen Capture of Number Verification Form
When the user needs to be verified they get redirected to two_factor:new where we will ask them to either set, or confirm the phone number that we will send a code to.
# two_factor/urls.py
from django.conf.urls import url

from . import views

app_name = 'two_factor'
urlpatterns = [
    url(r'^$', views.NewView.as_view(), name='new'),
    url(r'^create/$', views.CreateView.as_view(), name='create'),
    url(r'^verify/$', views.VerifyView.as_view(), name='verify'),
]We also added the URLS for our next steps as well. Next we need to make sure to import these URLs into our main app.
# pollstr/urls.py
urlpatterns = [
    ...
    url(r'^polls/', include('polls.urls')),
    url(r'^2fa/', include('two_factor.urls')),
]When the app redirects to /2fa/ it will try to render the NewView view. This view is going to make the TwoFactor model available to the template, but we have to catch the obvious exception when the user does not have a TwoFactor object yet, and initialize one instead.
# two_factor/views.py
from django.views.generic import DetailView
from django.contrib.auth.mixins import LoginRequiredMixin

from .models import TwoFactor

class NewView(LoginRequiredMixin, DetailView):
    template_name = 'two_factor/new.html'

    def get_object(self):
        try:
            return self.request.user.twofactor
        except TwoFactor.DoesNotExist:
return TwoFactor.objects.create(user=self.request.user)We try to return the user.twofactor record but if it does not exist we initialize one instead and return that.
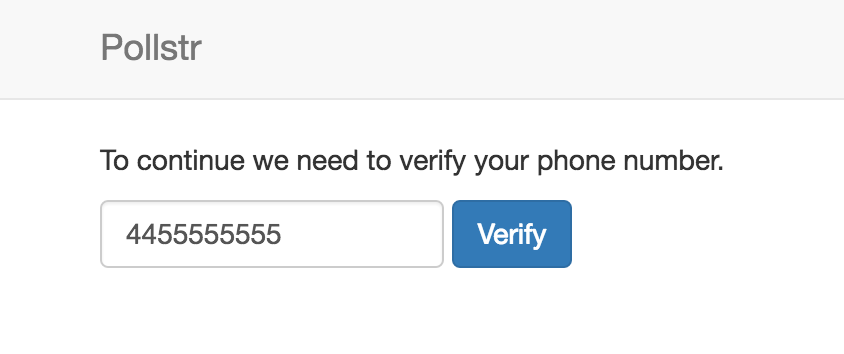
The view renders the two_factor/new.html template which will allow the user to either fill in their phone number, or shows their already provided number in a disabled field. We will ignore the number in the disabled field later on if it was already set, but it makes for a nice reminder to the user what number the code will be sent to.
<!-- two_factor/templates/two_factor/new.html -->
{% extends 'polls/base.html' %}

{% block content %}

<form class='form-inline' action="{% url 'two_factor:create' %}" method="post">

  {% csrf_token %}
  <input type="hidden" name="next" value="{{ request.GET.next }}">

  <p>
    To continue we need to verify your phone number.
  </p>

  <div class="form-group">
    <input type="text" name="number" value="{{ object.number }}"
           {% if object.number %}disabled{% endif %} class='form-control'>
  </div>
  <div class="form-group">
    <input type="submit" name="name" value="Verify" class="btn btn-primary">
  </div>
</form>

{% endblock %}
Ignoring the Bootstrap overhead our form is a basic form with a few fields:
The
numberto submit a code toThe
nextpage to redirect to after we're done with verifying, this is a built in Django feature so let's play nice with this.
When the form submits to /2fa/create we will need to send the code to the user with Vonage.
Vonage Verify is very easy to use and essentially comes down to 2 API calls. The first one sends the verification code to the user's phone number. In our case this will happen in the CreateView when the form is submitted.
To send the code we will need the vonage Python library. We already added this to your requirements.txt together with the django-dotenv library which will allow us to load our credentials from a .env file. If you have a different preferred way of managing your app dependencies you can install them with pip directly.
The vonage library can either be instantiated with an API key and secret, or by setting the some environment variables. You can get your Vonage API key and secret from the developer dashboard.
With these environment variables set we now no longer need to initialize our Vonage client and can use it directly as follows.
# two_factor/views.py
from django.views.generic import DetailView, View
from django.contrib import messages
from django.contrib.auth.mixins import LoginRequiredMixin
from django.http import HttpResponseRedirect
from django.core.urlresolvers import reverse
from django.contrib.auth import logout

import nexmo

from .models import TwoFactor

class CreateView(LoginRequiredMixin, View):
    def post(self, request):
        number = self.find_or_set_number(request)
        response = self.send_verification_request(request, number)

        if (response['status'] == '0'):
            request.session['verification_id'] = response['request_id']
            return HttpResponseRedirect(reverse('two_factor:verify')+"?next="+request.POST['next'])
        else:
            logout(request)
            messages.add_message(request, messages.INFO, 'Could not verify your number. Please contact support.')
            return HttpResponseRedirect('/')


    def find_or_set_number(self, request):
        two_factor = request.user.twofactor

        if (not two_factor.number):
            two_factor.number = request.POST['number']
            two_factor.save()

        return two_factor.number

    def send_verification_request(self, request, number):
        client = nexmo.Client()
return client.start_verification(number=number, brand='Pollstr')The code here does a few things. First off it uses find_or_set_number to check if the user already has a phone number set, and only if it is not set it will save the number they submitted.
It then uses nexmo.Client().start_verification to start the verification process. We pass in 2 parameters here: the number of the user and a user friendly brand name that will appear in the text message we send.
Next we check if the status of our API call is 0 and if it is we store the request_id for this verification attempt in the session. We do this as we will need this same id later to confirm the code the user received.
Finally we redirect the user to our VerifyView which is a simple view that renders a form to input the verification code.
# two_factor/views.py
from django.views.generic import DetailView, View, TemplateView

class VerifyView(LoginRequiredMixin, TemplateView):
template_name = 'two_factor/verify.html'And the corresponding template. As you can see we're still passing the next value along so we can redirect back to the right poll in the end.
<!-- two_factor/templates/two_factor/verify.html -->
{% extends 'polls/base.html' %}
{% block content %}
<form class="form-inline" action="{% url 'two_factor:confirm' %}" method="post">
{% csrf_token %}
<input type="hidden" name="next" value="{{request.GET.next}}">
<p>
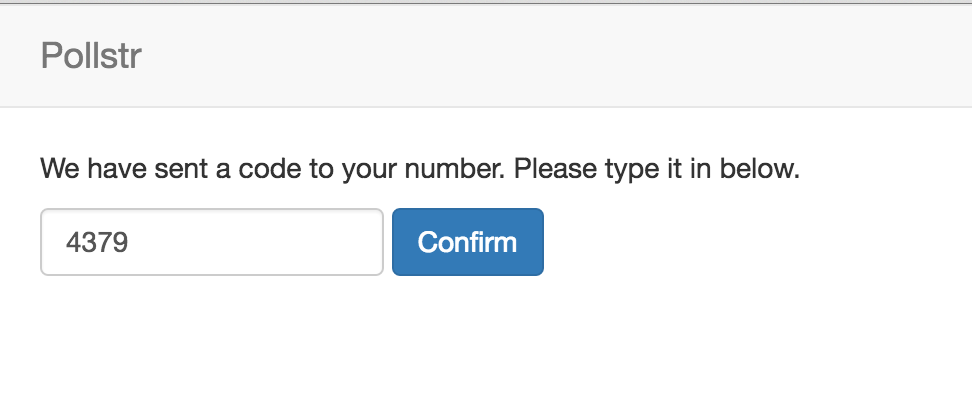
We have sent a code to your number. Please type it in below.
</p>
<div class="form-group">
<input type="text" name="code" class="form-control">
</div>
<div class="form-group">
<input type="submit" name="name" value="Confirm" class="btn btn-primary">
</div>
</form>
{% endblock %}
 Screengrab of 2 Factor Authentication Form
The last step in this tutorial is to confirm the code the user provides. Let's first add the route for this page.
# two_factor/urls.py
urlpatterns = [
    ...
    url(r'^confirm/$', views.ConfirmView.as_view(), name='confirm'),
]In the previous step the user was presented with a form with a code field. When they submit this to the two_factor:verify URL we will need to call the vonage library again with the code and the request_id we stored in the session earlier.
# two_factor/views.py
class ConfirmView(LoginRequiredMixin, View):
    def post(self, request):
        response = self.check_verification_request(request)

        if (response['status'] == '0'):
            request.session['verified'] = True
            return HttpResponseRedirect(request.POST['next'])
        else:
            messages.add_message(request, messages.INFO, 'Could not verify code. Please try again.')
            return HttpResponseRedirect(reverse('two_factor:verify')+"?next="+request.POST['next'])


    def check_verification_request(self, request):
return nexmo.Client().check_verification(request.session['verification_id'], code=request.POST['code'])We use the nexmo.Client().check_verification function to check the code is valid for the request_id. If it was successful the status code will be 0 and we mark the session as verified. When we redirect the user to the page they started off on the TwoFactorMixin will now no longer redirect the user away, but instead will allow them to view the poll.
 Using Vonage for 2 Authentication Factor
There are many more options in the Vonage Verify API than we’ve covered here. The code we showed here is pretty simple and there's many different ways this user experience could be implemented. The Vonage Verify system is extremely resilient, as it falls back to phone calls if needed, expires tokens without you having to do anything, prevents reuse of tokens, and logs verification times.
The Vonage Python library is very agnostic as to how it’s used which means you could implement things very differently than I did here. I’d love to know what you’d add next? Please drop me a tweet (I’m @cbetta) with thoughts and ideas.