Vonage Video APIを使い始める
アカウントとアプリケーションを設定し、クイックスタートに従って接続とストリーミングを行います。
前提条件
- を作成する。 Vonageアカウント.
- を作成する。 アプリケーション を入手してください。 アプリケーションID そして 秘密鍵.
- を実行する。 クイックスタート に接続し、ストリーミングする。
Vonageアカウントの作成
無料会員登録 Vonageアカウント.
登録後、以下の画面が表示されます。 Vonageダッシュボード 新しいアプリケーションを作成するためです。
アプリケーションの作成
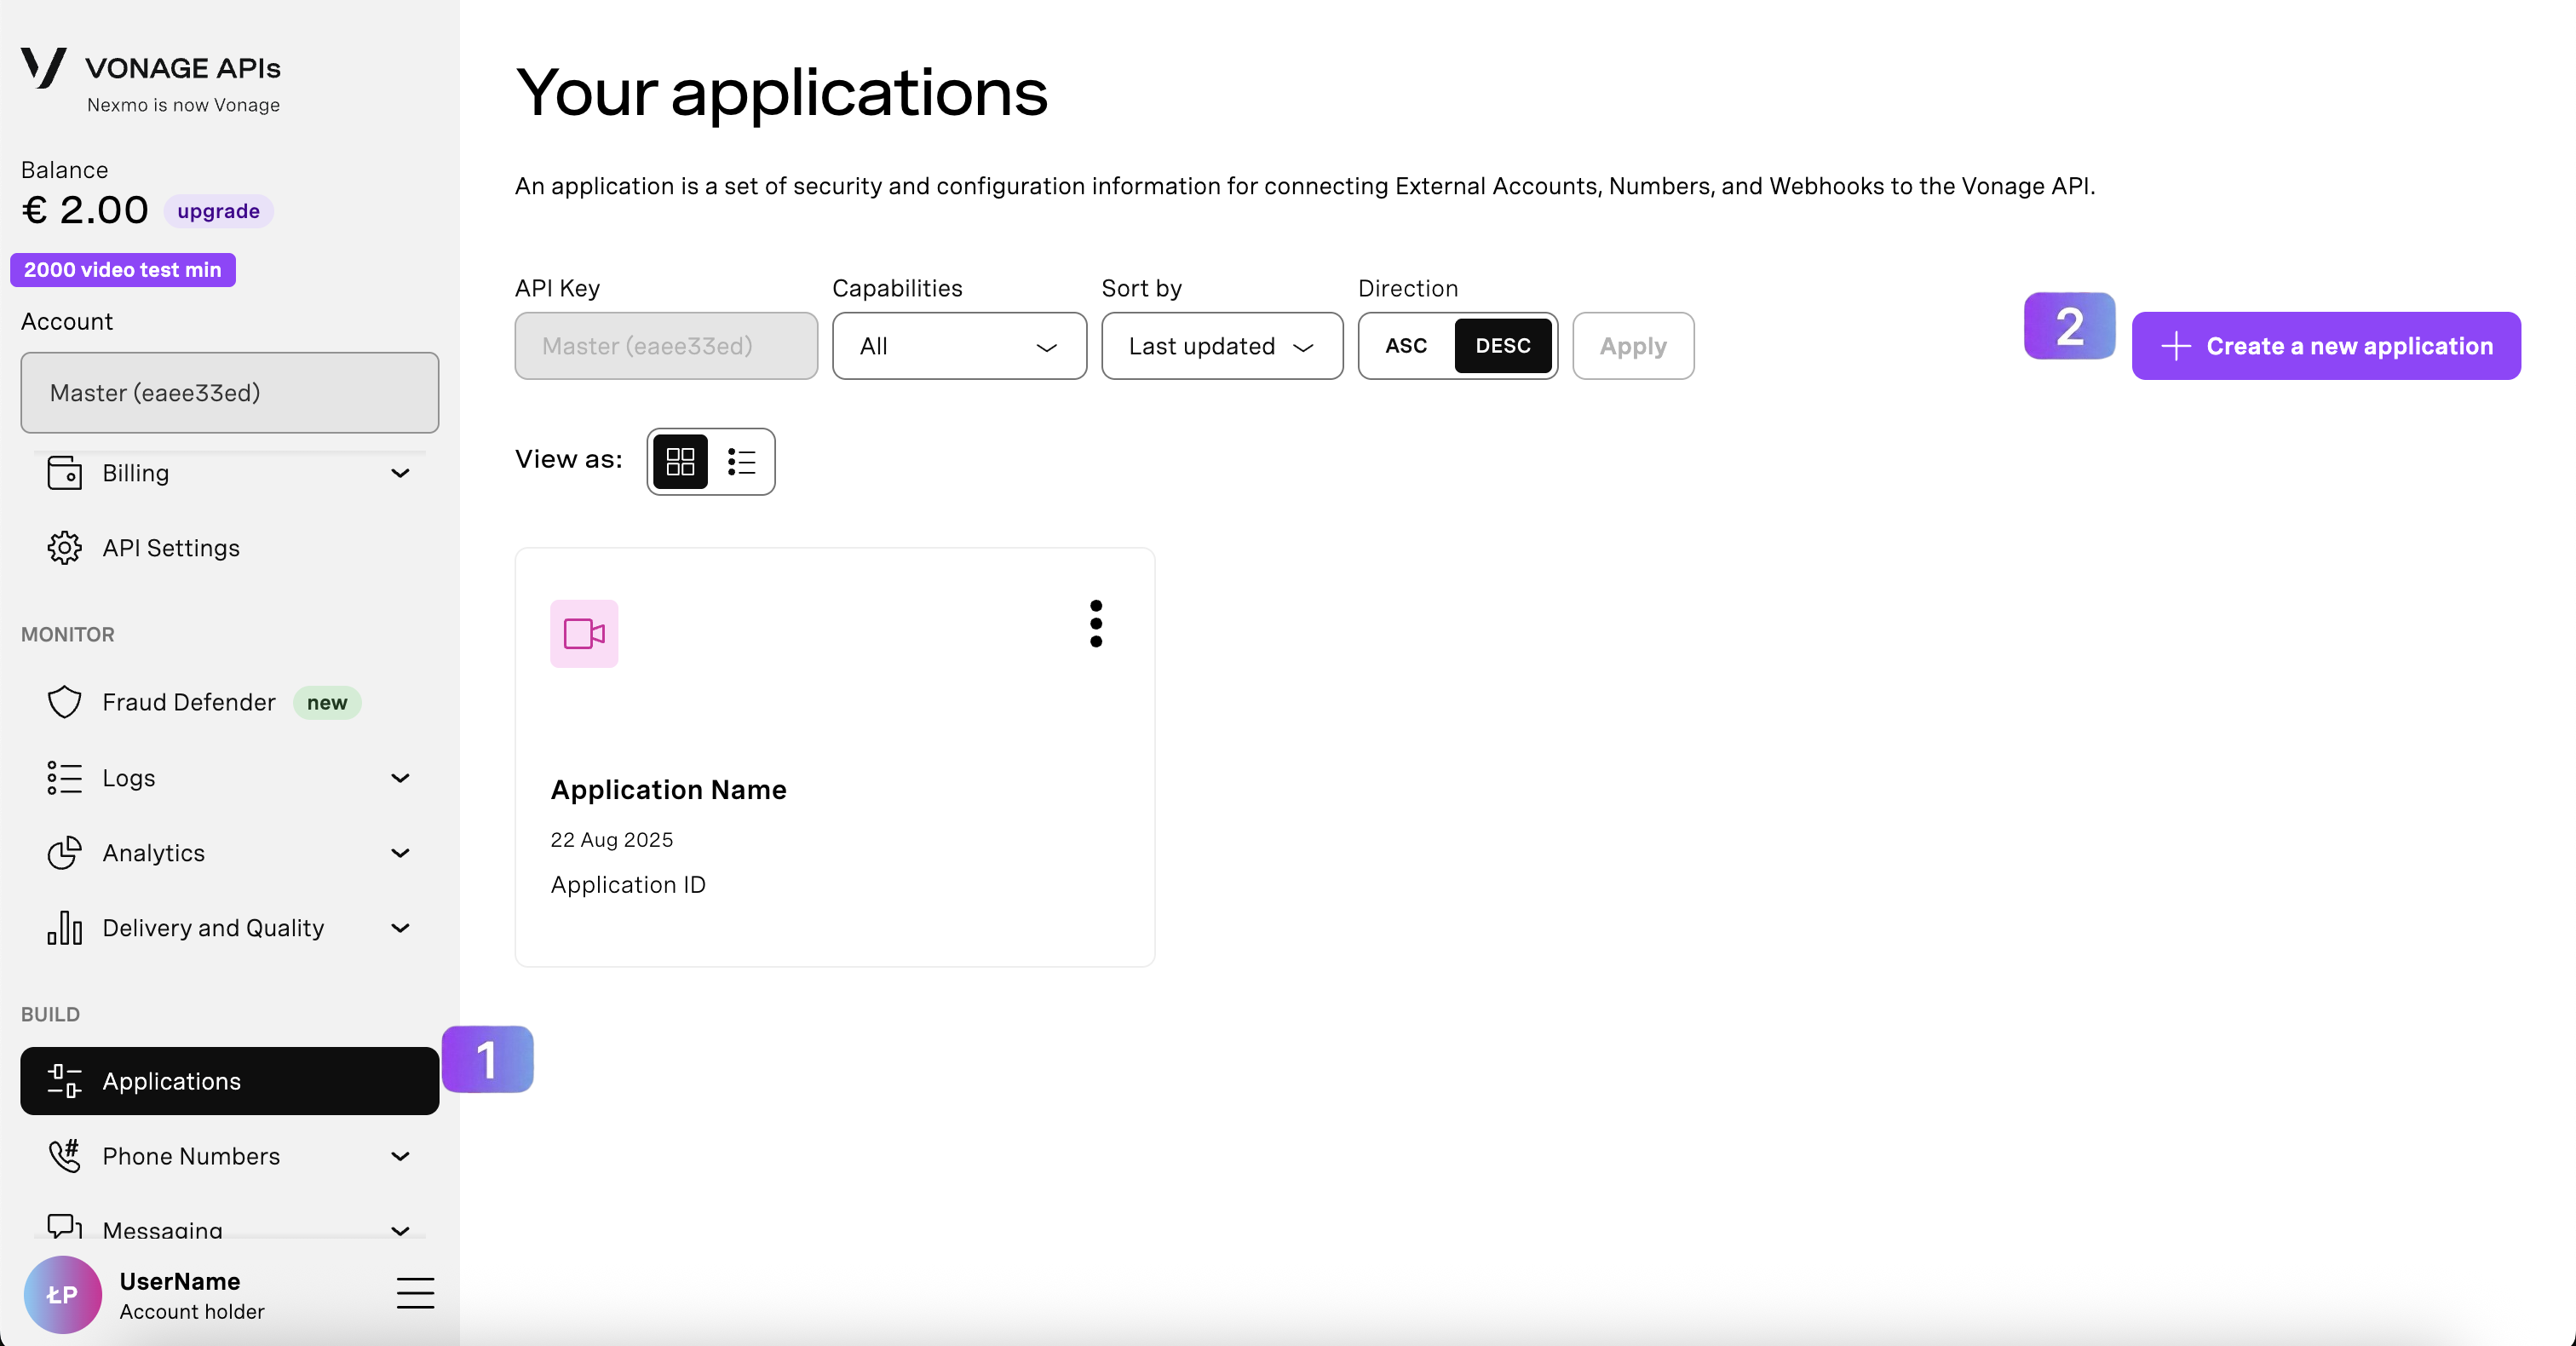
ログイン後 VonageダッシュボードVonageビデオプロジェクトのアプリケーションを作成します。
- 左側のナビゲーションから Applications.
- より Applications ページで 新規アプリケーションの作成 をクリックして新しいアプリケーションを作成します。
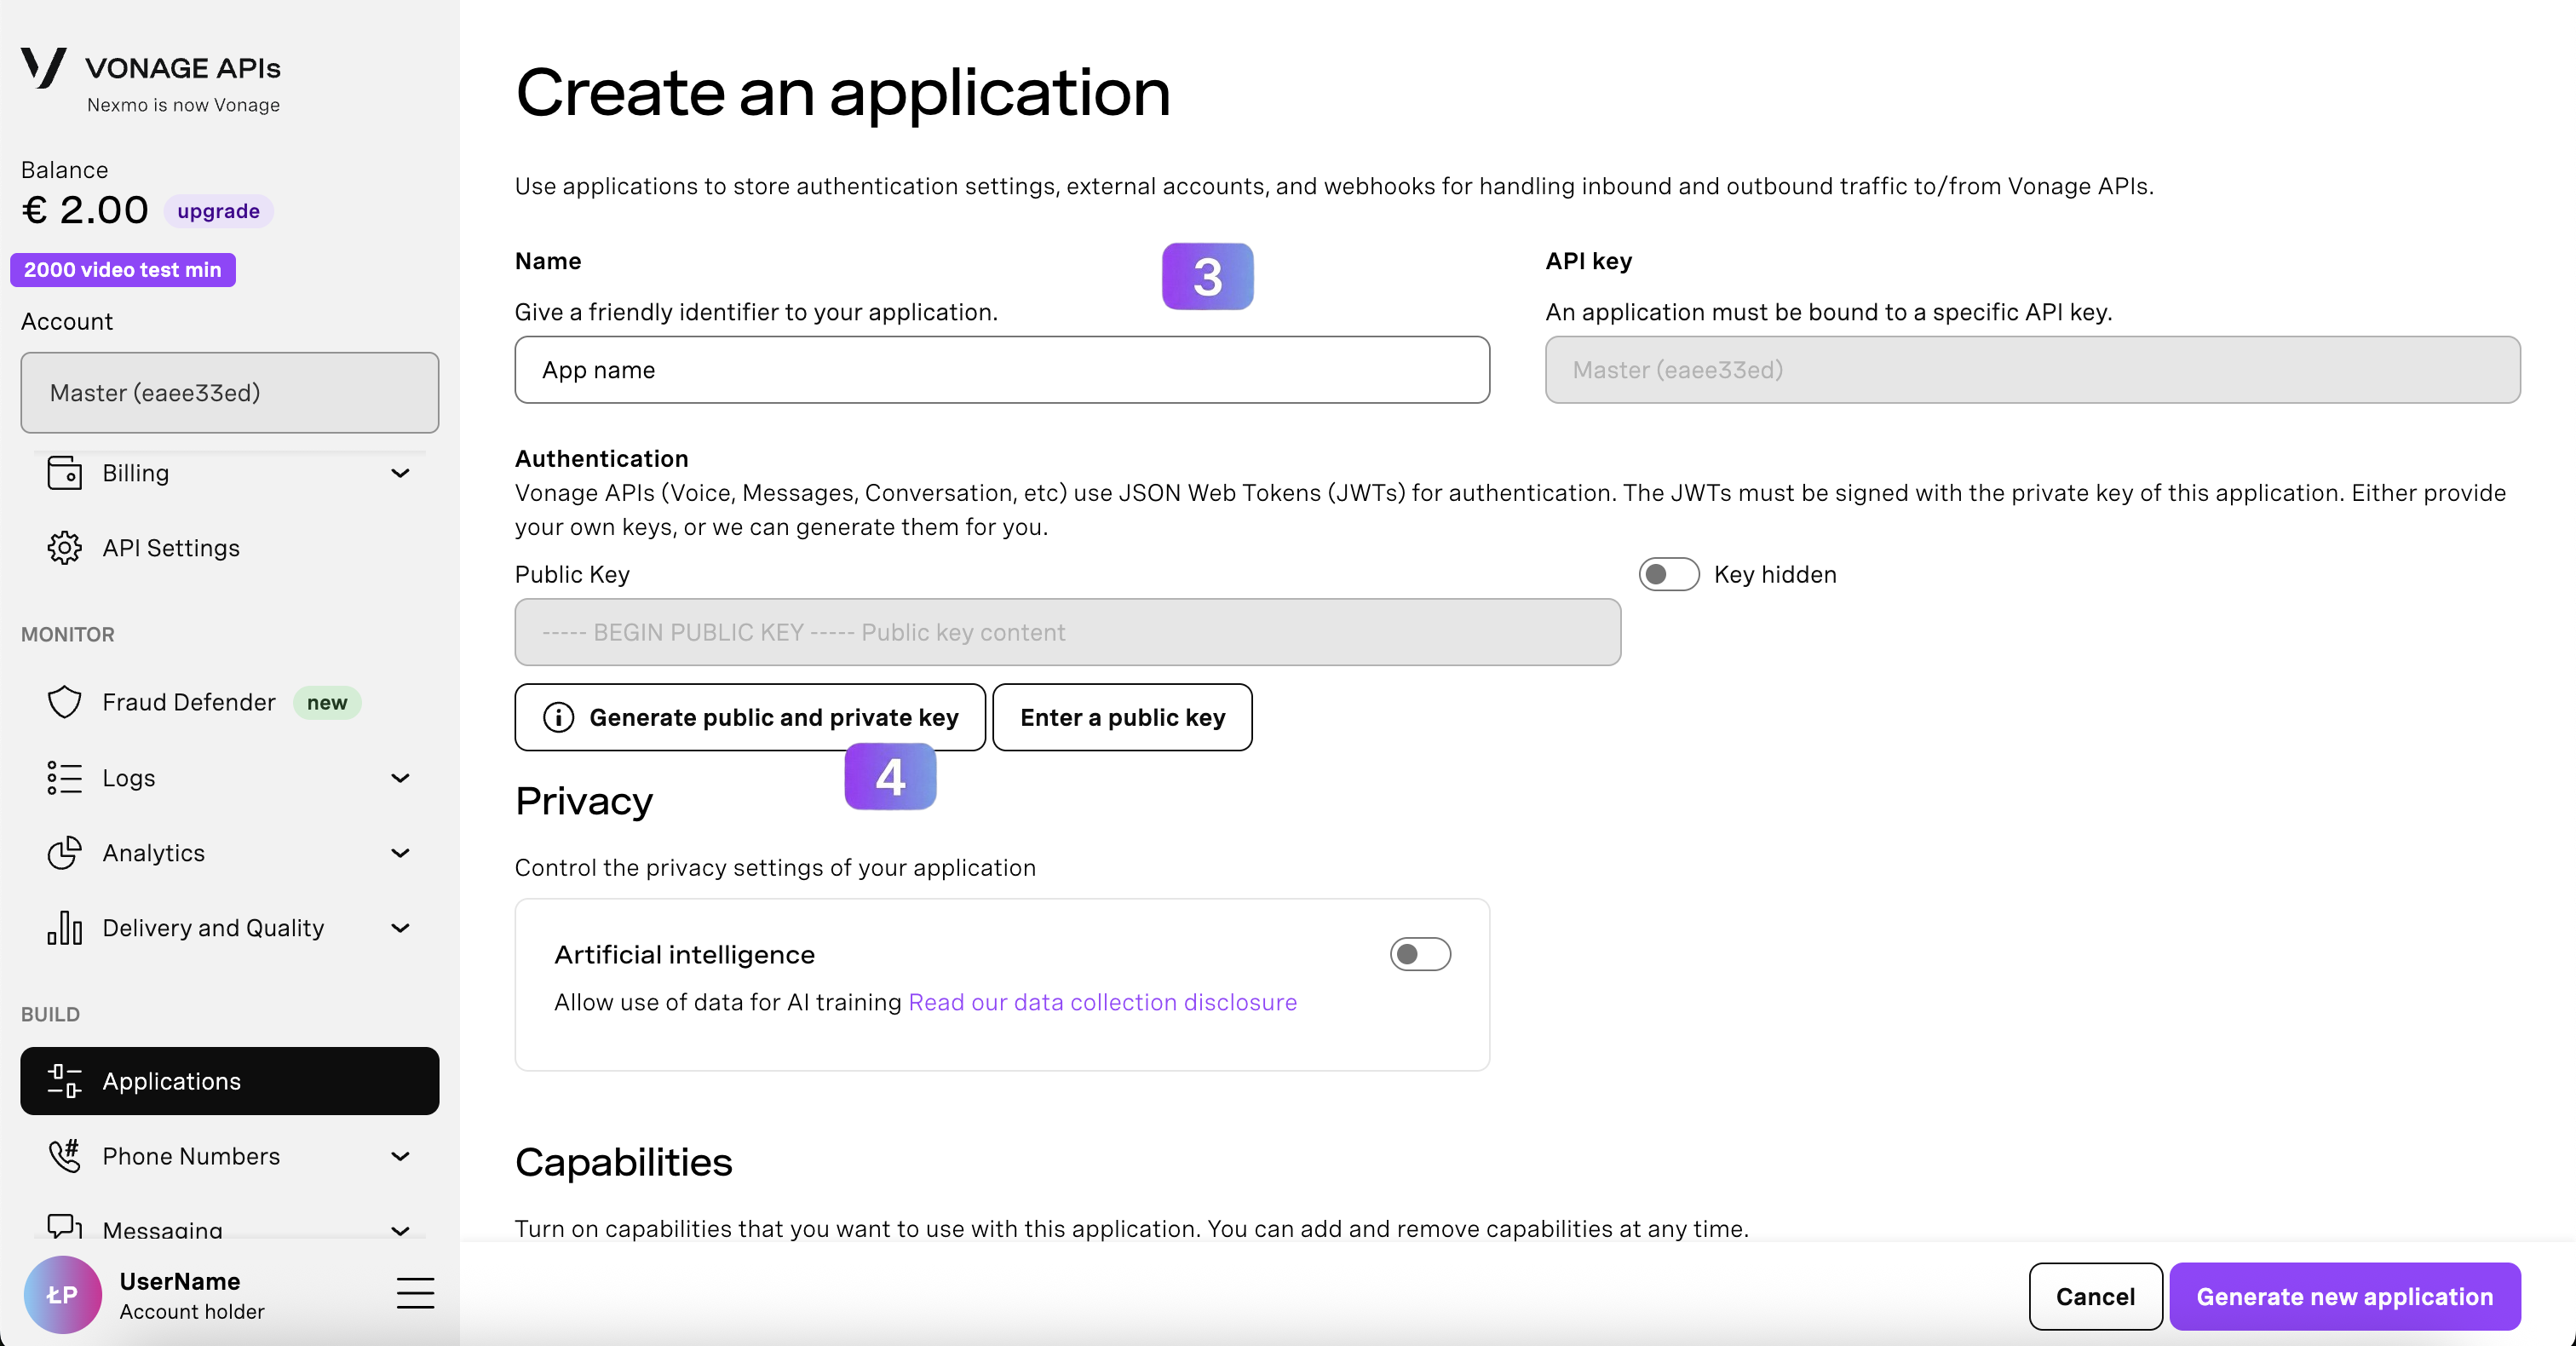
- プロジェクト名を記入してください。
- をクリックする。 公開鍵と秘密鍵の生成.を含むファイルが生成されます。 秘密鍵.ダウンロードして大切に保管してください。
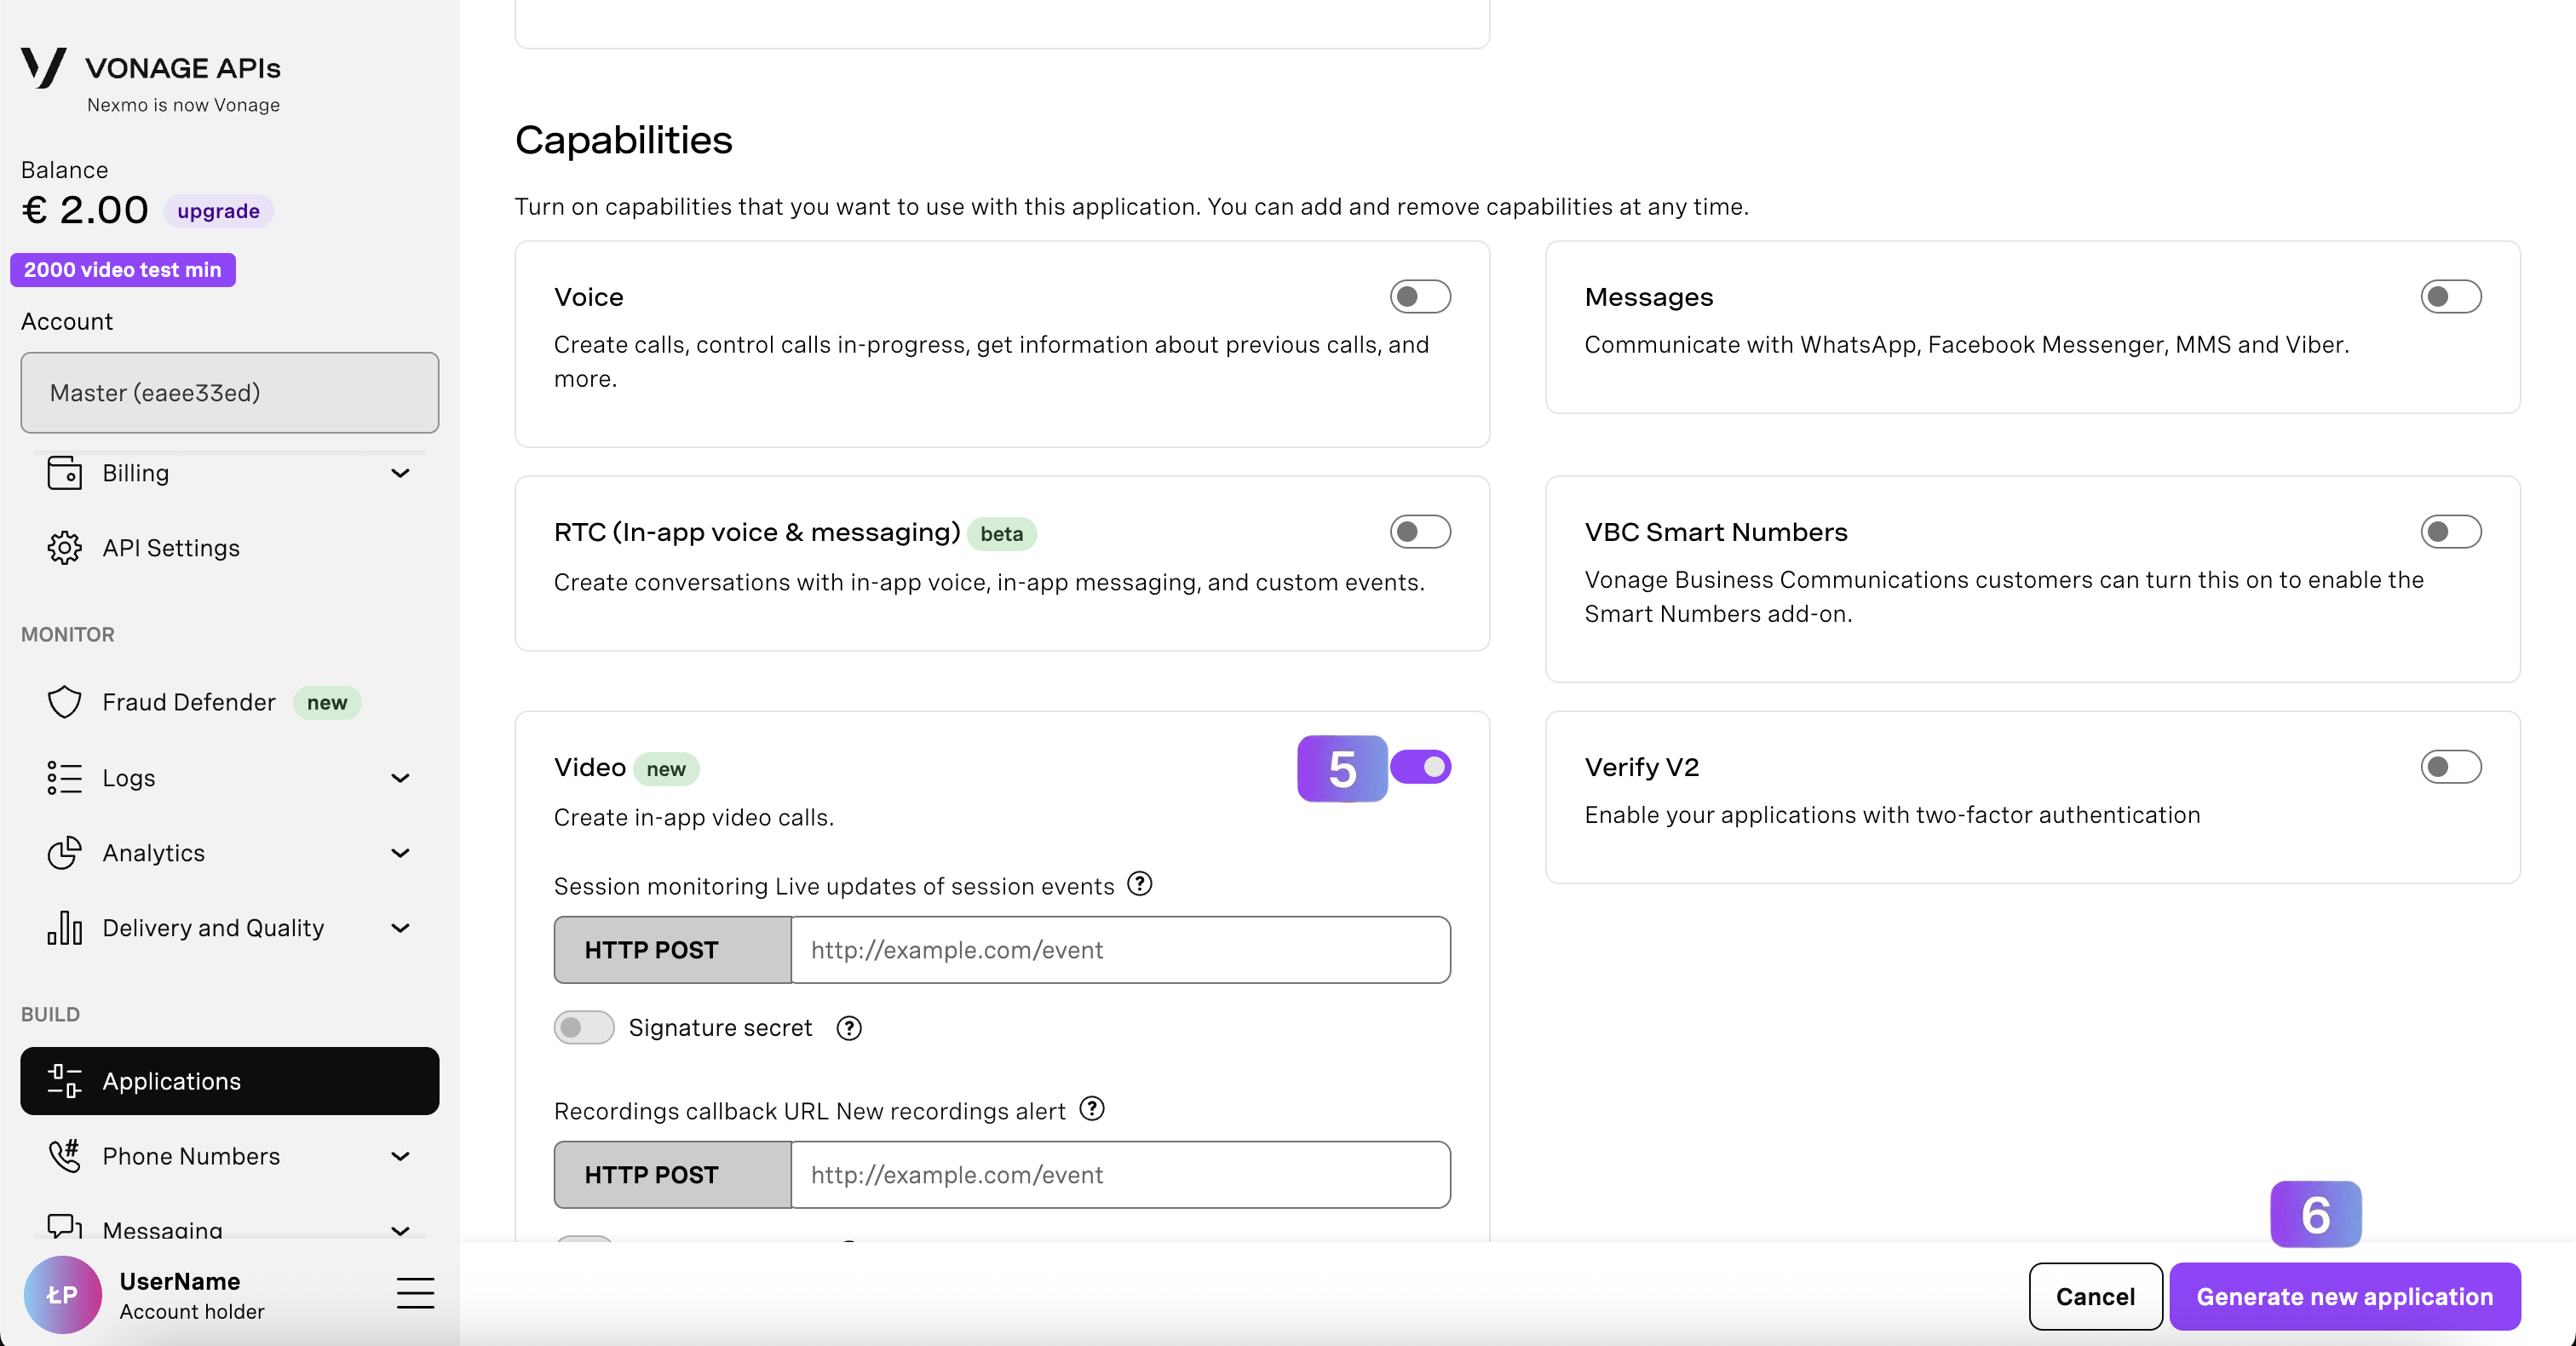
- 下にスクロールして 能力 リストをトグルする。 ビデオ の能力を持つ。
- をクリックする。 新規アプリケーションの作成 ボタンをクリックする。
認証
アプリケーションが生成されると、複数のクレデンシャルを表示できるようになります。今のところ、必要なのは2つだけです:
- アプリケーションID ビデオアプリケーションに固有の英数字の識別子です。
- 秘密鍵: このキーは JWTベースの認証.必ず安全な場所に保管してください。
アプリケーションの認証に必要です。
最初のビデオセッションを構築する
ダッシュボードの認証情報の準備ができたら、Client SDK と Server SDK を使用してセッションを作成し、トークンを発行して、アプリをエンドツーエンドで接続します。このセクションに従って、どの認証情報がサーバーに存在し、クライアントがどのようにそれらを使用して公開と購読を行うかを理解してください。
クライアントをセッションに接続するには、以下の手順が必要です:
- アプリケーションIDと秘密鍵 - アプリケーションの作成時に生成され、JWT ベースの認証に使用されます。
- セッションID - はセッション(「部屋」)を識別する。を参照してください。 セッションガイド.
- トークン - アクセスを許可し、クライアントの役割を定義する短期間のクレデンシャル。
まず、以下のリストからお好みのVideo SDKをインストールしてください。次に クイックスタート セクションを使用してセッションIDとトークンを生成する。 サーバーSDKその後、クライアントを初期化して接続する。参照 参加セッション 背景のために。
SDKのインストール
クライアントプラットフォームに合ったSDKを選び、インストールガイドに従ってください:
- ウェブ OpenTok.jsをインストールする
- アンドロイドだ: Video Android SDKを追加する
- iOS: iOS SDKをインストールする
- Linuxだ: Linux SDKのインストール
- リアクト・ネイティブ React Native SDKをインストールする
クイックスタート
以下の手順に従って、バックエンドの認証情報からライブセッションでパブリッシュとサブスクライブを行うクライアントに移行してください:
- セッションの作成 - クライアントが参加できるユニークなルームをサーバー上に作成します。
- トークンの生成 - 各参加者に短命のクレデンシャル(ロール/TTL)を発行する。
- セッションの初期化 そして コネクト - アプリケーションIDとセッションIDでSDKを設定し、トークンを使用して接続します。
- ストリームを公開する - カメラ/マイクをキャプチャし、セッションにメディアを送信します。
- ストリームを購読する - リモートメディアをUIにアタッチし、ストリームイベントをリッスンする。
バックエンドはまだ? を試してみよう。 ビデオAPIプレイグラウンド セッションを試すために。