Kotlin
インターフェイスの構築
電話をかけられるようにするには、画面に3つの要素を追加する必要がある:
- A
TextView接続状態を表示する - A
Button通話を開始する - A
Button通話を終了する
を開く。 app/res/layout/activity_main.xml ファイルをクリックします。をクリックする。 Code ボタンをクリックする:
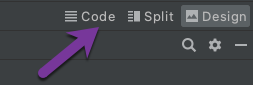
ファイルの内容を以下のように置き換える:
コピー
<?xml version="1.0" encoding="utf-8"?>
<LinearLayout xmlns:android="http://schemas.android.com/apk/res/android"
        xmlns:app="http://schemas.android.com/apk/res-auto"
        xmlns:tools="http://schemas.android.com/tools"
        android:layout_width="match_parent"
        android:layout_height="match_parent"
        android:orientation="vertical"
        android:gravity="center"
        tools:context=".MainActivity">

    <TextView
            android:id="@+id/connectionStatusTextView"
            android:layout_width="wrap_content"
            android:layout_height="wrap_content"
            android:layout_marginBottom="20dp"
            tools:text="Connection status"/>

    <Button
            android:id="@+id/startCallButton"
            android:layout_width="wrap_content"
            android:layout_height="wrap_content"
            android:layout_marginBottom="20dp"
            android:text="Start call"
            android:visibility="gone"
            tools:visibility="visible"/>

    <Button
            android:id="@+id/endCallButton"
            android:layout_width="wrap_content"
            android:layout_height="wrap_content"
            android:text="End call"
            android:visibility="gone"
            tools:visibility="visible"/>
</LinearLayout>
コードを使用してビューを制御するので、ビューへの参照を保存する必要があります。これらのプロパティを MainActivity クラスである:
コピー
private lateinit var startCallButton: Button
private lateinit var endCallButton: Button
private lateinit var connectionStatusTextView: TextView
次に、先に追加したプロパティにビューを割り当て、ボタンにコールバックを追加する必要があります。以下のコードを onCreate メソッド MainActivity クラス(リクエスト・パーミッション・コード以下):
コピー
// init views
startCallButton = findViewById(R.id.startCallButton)
endCallButton = findViewById(R.id.endCallButton)
connectionStatusTextView = findViewById(R.id.connectionStatusTextView)

startCallButton.setOnClickListener {
        startCall()
}

endCallButton.setOnClickListener {
        hangup()
}
コードをコンパイルするために、以下の2つの空のメソッドを MainActivity クラスである:
コピー
@SuppressLint("MissingPermission")
private fun startCall() {
        // TODO: update body
}

private fun hangup() {
        // TODO: update body
}
このチュートリアルの次のステップで、これらのメソッドの本体を埋めていくことになる。
ビルド&ラン
プロジェクトを再度実行する (Ctrl + R).
デフォルトではボタンが非表示になっていることに注意してください:
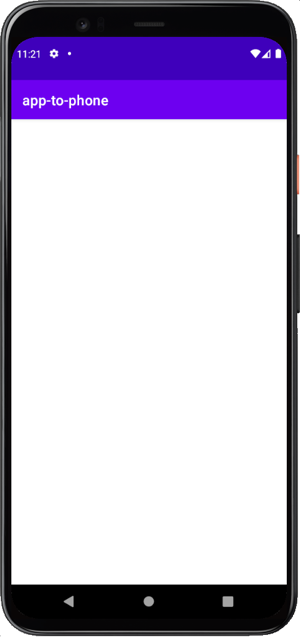
接続の状態が表示され START CALL ボタンが表示されます。
In-Appで音声通話をする
Android Client SDKを使用して、アンドロイドアプリから電話に音声通話をかける。
手順
1
このタスクの紹介2
Prerequisites3
ウェブフック・サーバーの作成4
Vonageアプリケーションの作成5
Vonage番号をリンクする6
ユーザーの作成7
JWTの生成8
Androidプロジェクトを作成する9
パーミッションの追加10
メイン画面の構築11
クライアントの初期化12
電話をかける13
通話を終了する14
次はどうする?