Kotlin
電話をかける
最後に、このアプリケーションから電話をかける機能を設定しましょう。
の中で onCreate 関数に、RTC Hangupリスナーを追加する:
コピー
client.setOnCallHangupListener { callId, callQuality, isRemote ->
  onGoingCall = null
  hideUI()
  startCallButton.visibility = View.VISIBLE
  waitingForIncomingCallTextView.visibility = View.VISIBLE
}
このコール・リスナーは、通話相手が電話を切ったときに処理する。これが起きたら、アプリを元の状態にリセットする。
開始コールのクリックリスナーのコードを onCreate それもそうだ:
コピー
startCallButton.setOnClickListener { startCall() }
を押して通話を開始するには start call ボタンを追加する。 startCall メソッド Mainctivity クラスである:
コピー
@SuppressLint("MissingPermission")
fun startCall() {
  client.serverCall(mapOf("to" to otherUser)) {
      err, outboundCall ->
    when {
      err != null -> {
        connectionStatusTextView.text = err.localizedMessage
      }
      else -> {
        onGoingCall = outboundCall
        hideUI()
        endCallButton.visibility = View.VISIBLE
      }
    }
  }
}
上記のメソッドは通話を開始する。
ウェブフック
電話をかけながら、端末に切り替えてください。 /voice/answer NCCO を取得するために呼び出されるエンドポイント:
コピー
NCCO request:
  - callee: 447700900000
また、通話がさまざまな段階を経て進むにつれて、 /voice/event が送られる:
コピー
...
---
VOICE EVENT:
{
  from: null,
  to: 'Alice',
  uuid: '2da93da3-bcac-47ee-b48e-4a18fae7db08',
  conversation_uuid: 'CON-1a28b1f8-0831-44e6-8d58-42739e7d4c77',
  status: 'started',
  direction: 'inbound',
  timestamp: '2021-03-10T10:36:21.285Z'
}
---
VOICE EVENT:
{
  headers: {},
  from: 'Alice',
  to: '447700900000',
  uuid: '8aa86e22-8d45-4201-b8d8-3dcd76e76429',
  conversation_uuid: 'CON-1a28b1f8-0831-44e6-8d58-42739e7d4c77',
  status: 'started',
  direction: 'outbound',
  timestamp: '2021-03-10T10:36:27.080Z'
}
---
...
---
VOICE EVENT:
{
  start_time: null,
  headers: {},
  rate: null,
  from: 'Alice',
  to: '447700900000',
  uuid: '8aa86e22-8d45-4201-b8d8-3dcd76e76429',
  conversation_uuid: 'CON-1a28b1f8-0831-44e6-8d58-42739e7d4c77',
  status: 'answered',
  direction: 'outbound',
  network: null,
  timestamp: '2021-03-10T10:36:31.604Z'
}
---
VOICE EVENT:
{
  headers: {},
  end_time: '2021-03-10T10:36:36.000Z',
  uuid: '8aa86e22-8d45-4201-b8d8-3dcd76e76429',
  network: '23433',
  duration: '5',
  start_time: '2021-03-10T10:36:31.000Z',
  rate: '0.10000000',
  price: '0.00833333',
  from: 'Unknown',
  to: '447700900000',
  conversation_uuid: 'CON-1a28b1f8-0831-44e6-8d58-42739e7d4c77',
  status: 'completed',
  direction: 'outbound',
  timestamp: '2021-03-10T10:36:35.585Z'
}
---
VOICE EVENT:
{
  headers: {},
  end_time: '2021-03-10T10:36:35.000Z',
  uuid: '2da93da3-bcac-47ee-b48e-4a18fae7db08',
  network: null,
  duration: '15',
  start_time: '2021-03-10T10:36:20.000Z',
  rate: '0.00',
  price: '0',
  from: null,
  to: 'Alice',
  conversation_uuid: 'CON-1a28b1f8-0831-44e6-8d58-42739e7d4c77',
  status: 'completed',
  direction: 'inbound',
  timestamp: '2021-03-10T10:36:36.187Z'
}
注: 通話が完了すると、イベントには通話時間と料金の情報も含まれる。
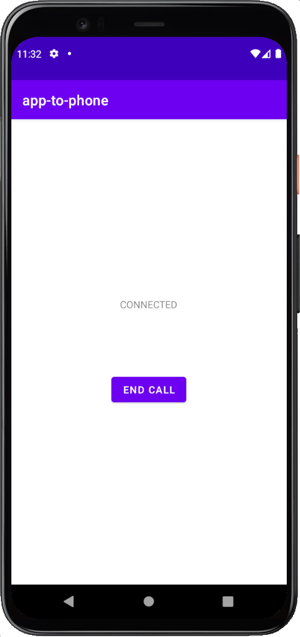
について end call ボタンが表示され、現在の通話状態が反映された:
In-Appで音声通話をする
Android Client SDKを使用して、Androidアプリから他のデバイスにインストールされている同じAndroidアプリに音声通話を発信します。
手順
1
このタスクの紹介2
Prerequisites3
ウェブフック・サーバーの作成4
Vonageアプリケーションの作成5
ユーザーを作成する6
JWTの生成7
Androidプロジェクトを作成する8
パーミッションの追加9
メイン画面の構築10
クライアントの初期化11
電話を受ける12
電話をかける13
次はどうする?