
Share:
Lisa helps connect business communications with customer workflows by working closely with the teams that create Vonage integrations with CRMs such as Salesforce, Microsoft Dynamics and HubSpot. Through adding developer solutions for Vonage Apps, she looks forward to unlocking powerful capabilities for people to work and communicate seamlessly within the platforms they use the most. Outside of work, Lisa enjoys singing choral music, playing the mellophone bugle, and spending time with her husband and their corgi.
Make Phone Calls With Microsoft Excel and Vonage Open ContactPad SDK
Time to read: 7 minutes
On this page, I will explain how I built a functioning VBC integration with a 3rd party platform in a short amount of time leveraging the new Vonage Open ContactPad. First, here is a video that demonstrates the available functionality of the integration.
I selected Microsoft Excel Online because I had recently read that Microsoft released a JavaScript API for Excel. Many people use the program to work with spreadsheets and I found it was a reasonably straightforward way to deal with the data. Microsoft Excel allows integrations through Office Add-Ins. One very cool add-in is Script Lab, which lets developers experiment with creating add-ins. The scope of this how-to will be to go through adding the code into Script Lab using Excel and Vonage JavaScript functions and then publishing the result to a GitHub Gist. To move forward from there, the reader may be interested in publishing Office Add-Ins.
To get the most of out this how-to, it's recommended to install the Script Lab Office Add-In and import the Gist from Github:
The Gist contains the full source code for you to customize for your project. The examples below are at times very specific and don't include everything you need to get a certain function running.
The Vonage Open ContactPad SDK is a JavaScript software development toolkit that allows developers to embed a Vonage Unified Communications (UC) dialer interface into a web-based application. While it does require signing in with a Vonage Business Communications account to use it, you can develop with the SDK with no additional API users or sign-ups. This makes for a very lightweight integration framework for developers who want to embed communications clients into their applications.
It's important to note that the Vonage Open ContactPad SDK product is meant to be embedded in web applications and works best when the developer has full control over the space that it's embedded in. There's a note on the bottom of the getting started page that makes this very point.
When you install Script Lab in Excel, it creates a Script Lab menu item to the right of the Help menu item. Click on its tab, then you will see 3 buttons that help you work with Script Lab - Code, Run, and Functions. Next, click on Code, a window appears embedded into the Excel interface with a VisualStudio-like window that will hold your code. As long as you don't clear your browser’s cache, your Script Lab code remains. If you prefer more permanence, you will use the Share option to save your code as a gist in GitHub. In my adventures, I ended up creating a lot of private gists. If I were working on a true integration project, I would probably transfer my code to Visual Studio Code and work with more precise version control.
Once I got the lay of the land in Script Lab, I started with the HTML section where I knew I wanted to embed my dialer. To follow along, check out the instructions here for loading the Open ContactPad. This includes a live sample of how to do this using Plunker.
In my case, I wanted to provide a <div> container so that my application would appear in the full dialer interface and not as a moveable dot on the page. I set the data-provider as uc in order to load the Unified Communications dialer.
<div class="vonage-dialer-container"></div>
<script data-provider="uc" data-autoload="false" src="https://apps.gunify.vonage.com/cti/common/vonage.dialer.sdk.js">
</script>The amazing thing is that you can STOP HERE, run the code, and have an embedded dialer in Microsoft Excel Online! However, there's much more that developers can do to customize the experience.
So, why set up sample data? Well, I wanted to give users examples of how I want the format and location of the data in the spreadsheet so that the code knows where to find it. I wanted a clickable area to trigger a phone call for each "contact" (row) and set a place for a phone number. I started with the HTML for the application in Script Lab and added a button that would populate the data in the desired section of the spreadsheet. If you press this button multiple times, it will just overwrite what's on the sheet.
<center><button onclick="populateSampleData()">Populate Sample Data</button></center>Next step is to implement the populateSampleData() function in JavaScript. Fortunately, the Microsoft Excel JavaScript API documentation has some examples.
function populateSampleData() {
 return Excel.run(function(context) {
   var worksheet = context.workbook.worksheets.getItem("Sheet1");

   var data = [
     ["Company", "Contact Last", "Contact First", "Number", ""],
     ["Widget Zone", "Anderson", "Wendy", "555-555-5555", "Dial"],
     ["Widgets Galore", "Burns", "Ryan", "555-555-5555", "Dial"],
     ["Widgets Emporium", "Johnson", "Amanda", "555-555-5555", "Dial"]
   ];

   var range = worksheet.getRange("A2:E5");
   range.values = data;
   range.format.autofitColumns();

   return context.sync().then(function() {});
 }).catch(errorHandlerFunction);
}Initially, you select the first worksheet, which, in a blank Excel file is normally called "Sheet1". Then create an object with the data that goes into the sheet. Next, set the range to cover the amount of cells that data will take up and set the range’s values to the data object. Autofitting the columns makes the appearance a little neater.
I also created some formatting that happens when the application loads. This positions the selection to the upper left cell. As well as, makes my Dial "buttons" clickable and changes their background and text colors.
//start with selection at upper left
 var worksheet = context.workbook.worksheets.getItem("Sheet1");
 var initSelection = worksheet.getRange("A1");
 initSelection.select();

 //format dial buttons
 var range = worksheet.getRange("E:E");
 var conditionalFormat = range.conditionalFormats.add(Excel.ConditionalFormatType.containsText);

 conditionalFormat.textComparison.format.font.color = "white";
 conditionalFormat.textComparison.format.fill.color = "purple";
 conditionalFormat.textComparison.rule = {
   operator: Excel.ConditionalTextOperator.contains,
   text: "Dial"
 };
One of the most satisfying achievements of this project is the ability to click on something in the Excel sheet and trigger a phone call to a number that came from that sheet. In my case, that is the Dial "button" that appears on each row of data. I use "button" in quotes because it's not a button at all - just a cell with the word "Dial". I've created a handler that checks for selection changes and reacts when the clicked cell’s text matches the word "Dial."
function handleSelectionChanged(event) {
 return Excel.run(function(context) {
   var range = context.workbook.getSelectedRange().load();

   return context.sync().then(function() {
     const selectedContent = JSON.stringify(range.values, null, 4);

     const rowString = JSON.stringify(range.rowIndex, null, 4);

     const rowIndex = Number(rowString) + 1;

     if (selectedContent.match("Dial")) {
       placeCall(rowIndex);
     }
   });
 }).catch(errorHandlerFunction);
}

function placeCall(row) {
 return Excel.run(function(context) {
   var toNumberRange = context.workbook.worksheets
     .getItem("Sheet1")
     .getRange("D" + row)
     .load();

   return context.sync().then(function() {
     const toNumber = JSON.stringify(toNumberRange.values, null, 4);

     VonageDialer.placeCall(toNumber);
   });
 }).catch(errorHandlerFunction);
}
Another powerful feature of the Open ContactPad allows you to make things happen within your integrated application based on when it receives Vonage events. All you have to do is look at the event type (event.type) and create code to react to the event. The details of what my code is doing for these events will be described in the Advanced Topics area. CALL_START, CALL_ANSWER, and CALL_END are just a few of the options available. For more information, reference the SDK Data Models.
VonageDialer.init({ /* dialer config options */ }, (dialer) => {
 dialer.setOnDialerEvent((event) => {
   switch (event.type) {
     case 'CALL_START': {
       break;
     }
     case 'CALL_ANSWER': { // available only for UC
       break;
     }
     case 'CALL_END': {
       // do something based on event.data (screen pop, store interaction, etc.)
       break;
     }
     default: {
       console.log('Unhandled event', event);
     }
  }
 });
});
This section will go over further customizations to make the integration your own like implementing contact search and setting the interaction contact.
Let's take a look at how to make the contacts in the spreadsheet searchable in the ContactPad.
The first thing to do in order to make contacts appear is to enable the contactsProvider feature as part of the dialer initialization. As shown in the next section below, just set the value to true under features, and you will be all set! This documentation has more information about creating an integration provider.
If you register an icon, it will be used to visually designate where the contacts are coming from. Since this is an Excel integration, I chose to use the Excel icon. I obtained the base64 from Icon Scout.
VonageDialer.init(
 {
   features: {
     contactsProvider: true,
     openContact: true
   }
 },
 (dialer) => {
   dialer.registerSvgIcon(
     "excel",
     "data: image / svg + xml; utf8; base64, **excel icon SVG data goes here**
   );
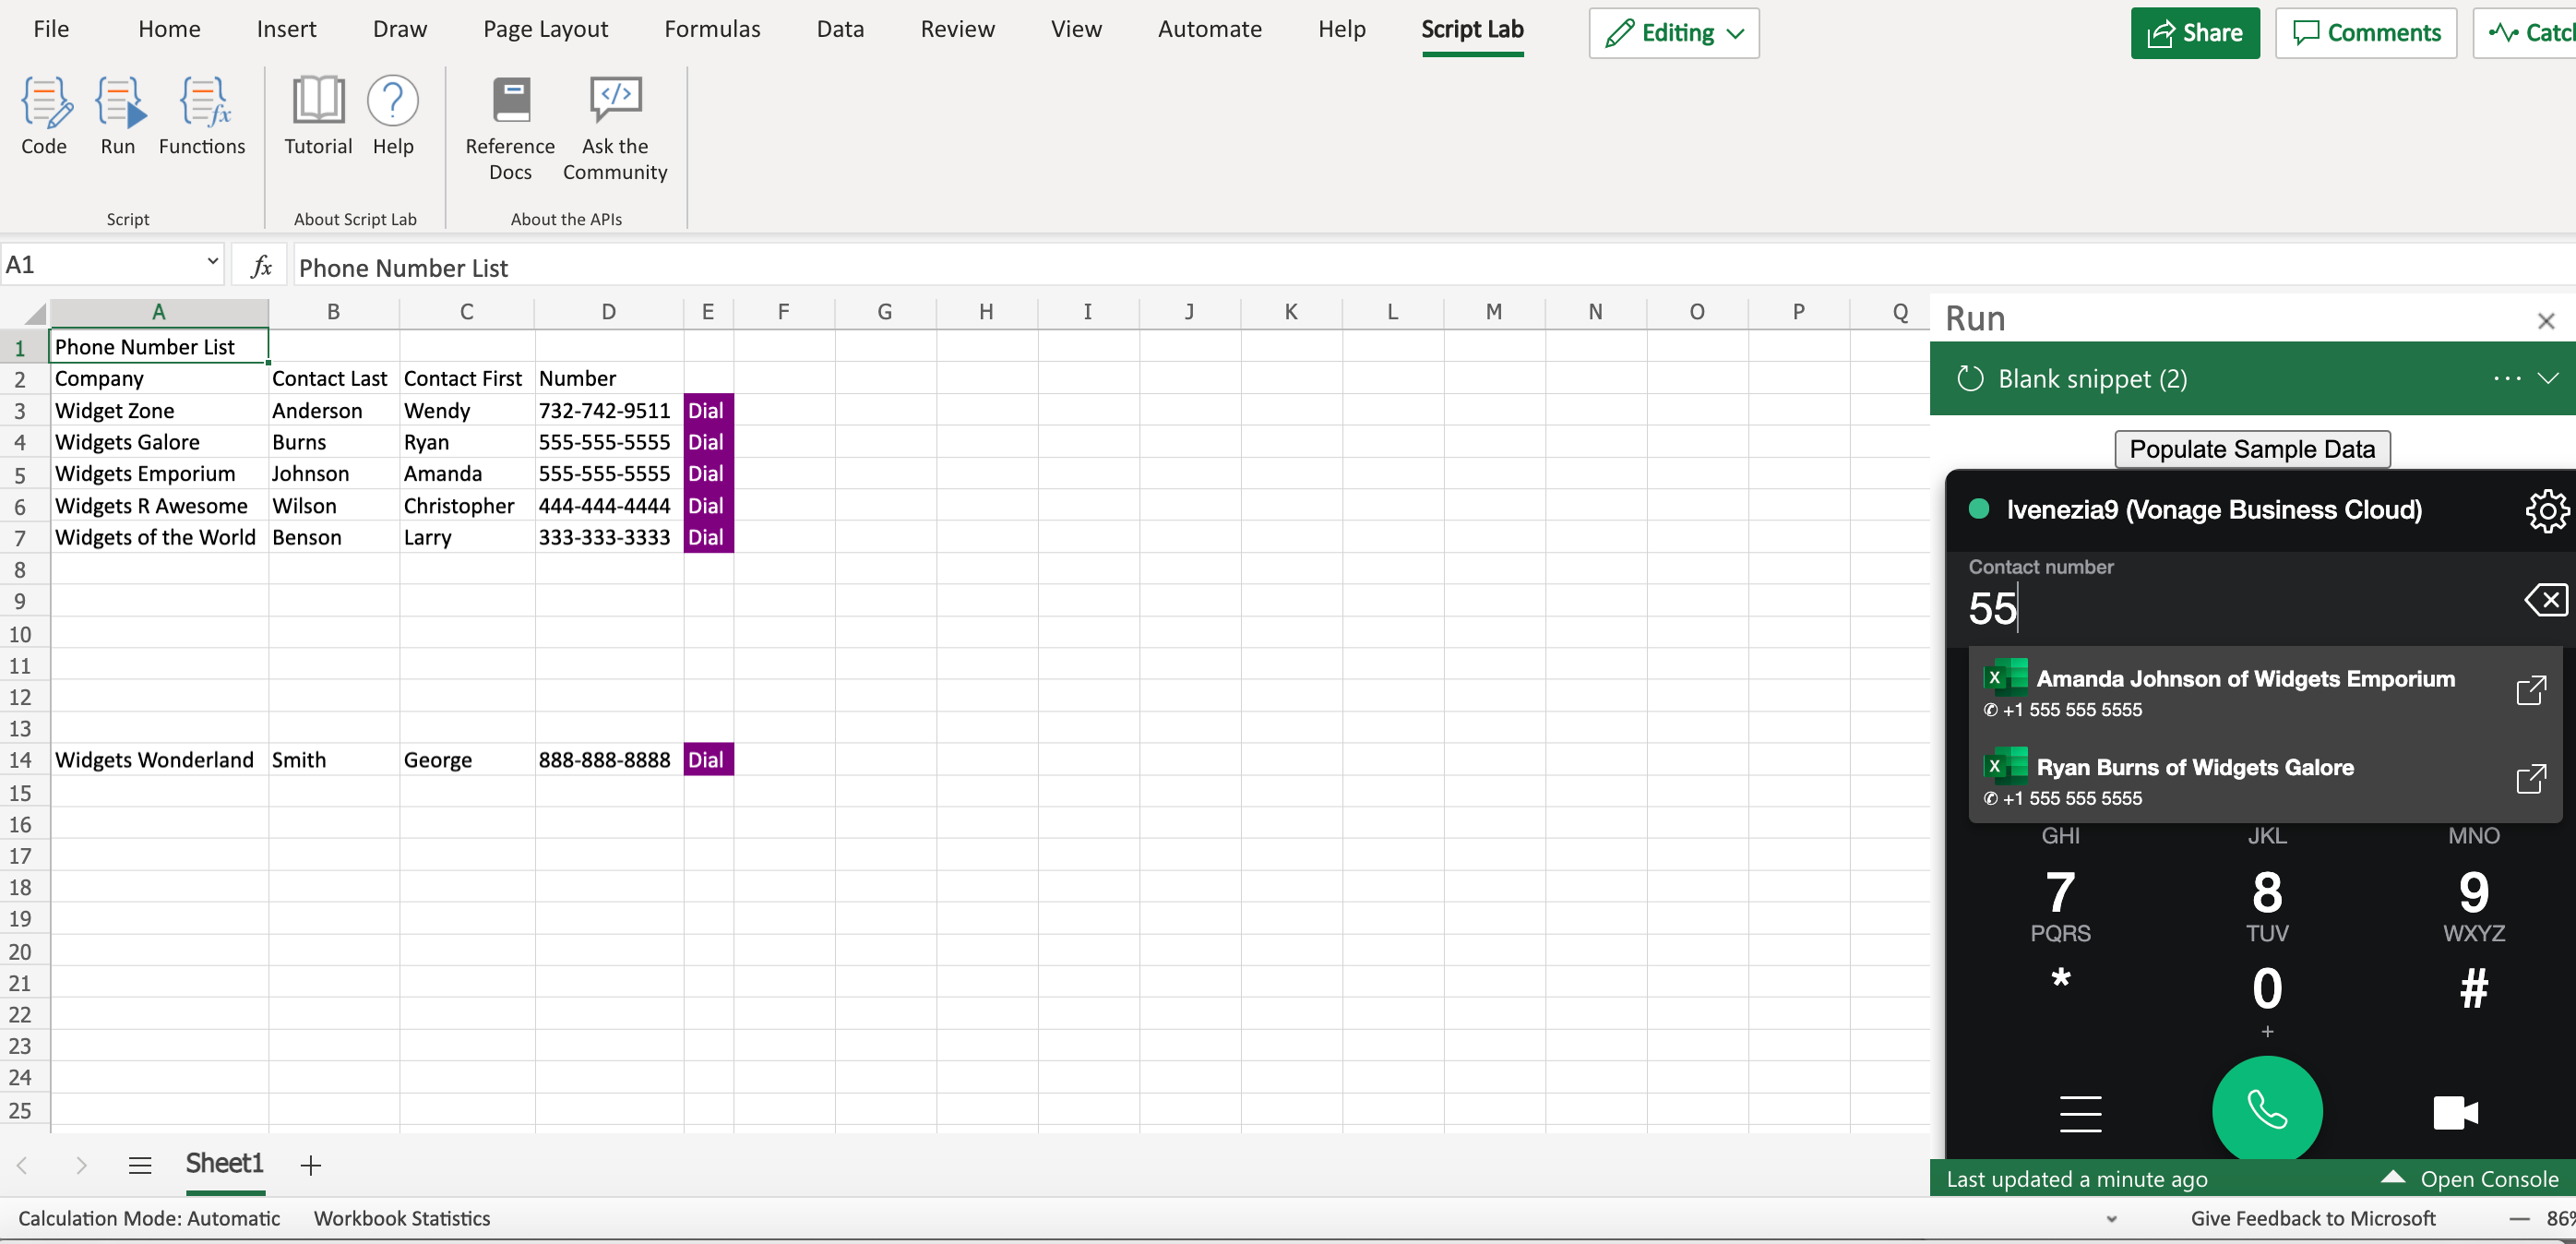 Search Contact Data
Formatting, storing, and searching through phone numbers can become quite involved tasks. To get a taste, take a look at this SitePoint article that describes the complexity. Fortunately, in my own project, I have control over some things. For one, I know that my user has only a US number. So, I explicitly set my dialer’s country code to US.
var countryCode = "US";
VonageDialer.setCountryCode(countryCode);I also assume that all the phone numbers that will be entered are US numbers, so I use libphonenumber with the US country to format the numbers both for searching and displaying.
<script src="https://unpkg.com/libphonenumber-js@1.9.6/bundle/libphonenumber-max.js">
</script>filteredContacts.push(sortedContacts[i]);
const ph = libphonenumber.parsePhoneNumber(sortedContacts[i].phoneNumber, countryCode);For a quick example, my code is sufficient, but depending on your goals with your implementation, you will want to spend time considering your user's numbers, the numbers that will be considered contacts, and implement your search functions very carefully.
These are the functions that I created for translating the contacts data from the format that Excel's JavaScript expects to the format that Vonage's JavaScript expects. They are called in the code that allows you to search the contacts.
function translateContacts(excelData) {
excelData = JSON.parse(excelData);
let len = excelData.length,
contactsData = [],
obj = new Object(),
objString = "",
i;
for (i = 0; i < len; i += 1) {
if (excelData[i][4] == "Dial") {
obj["provider"] = "excel";
obj["id"] = i;
obj["label"] = excelData[i][2] + " " + excelData[i][1] + " of " + excelData[i][0];
obj["type"] = "Contact";
const ph = libphonenumber.parsePhoneNumber(excelData[i][3], countryCode);
obj["phoneNumber"] = ph.format("INTERNATIONAL").replace(/\D/g, "");
objString = JSON.stringify(obj);
contactsData.push(JSON.parse(objString));
}
}
return contactsData;
}
function filterContacts(query, contacts) {
const sortedContacts = contacts.sort(function (a, b) {
const labelA = a.label.toUpperCase(); // ignore upper and lowercase
const labelB = b.label.toUpperCase(); // ignore upper and lowercase
if (labelA < labelB) {
return -1;
}
if (labelA > labelB) {
return 1;
}
// names must be equal
return 0;
});
let filteredContacts = [];
for (let i = 0; i < sortedContacts.length; i++) {
if (
JSON.stringify(Object.values(sortedContacts[i]).filter(item => item !== "excel"))
.toUpperCase()
.indexOf(query.toUpperCase()) > 0
) {
filteredContacts.push(sortedContacts[i]);
const ph = libphonenumber.parsePhoneNumber(sortedContacts[i].phoneNumber, countryCode);
sortedContacts[i].phoneNumber = ph.format("INTERNATIONAL");
}
}
return filteredContacts;
}
   const searchContactables = (query, callback) => {
     Excel.run(function(context) {
       var worksheet = context.workbook.worksheets.getItem("Sheet1");

       var range = worksheet.getRange("A3:E999");
       range.load("values");

       return context.sync().then(function() {
         const excelData = JSON.stringify(range.values, null, 4);
         const contactsData = translateContacts(excelData);

         const filteredContacts = filterContacts(query.replace(/[^A-Za-z0-9_]/g, ""), contactsData);

         callback(filteredContacts);
       });
     }).catch(errorHandlerFunction);
   };
   dialer.setOnSearchContactables(searchContactables);
This functionality is described in the Set interaction content section of the Open ContactPad documentation. Here I show how I've implemented the ability for the remote number's contact information to appear in the dialer during a call.
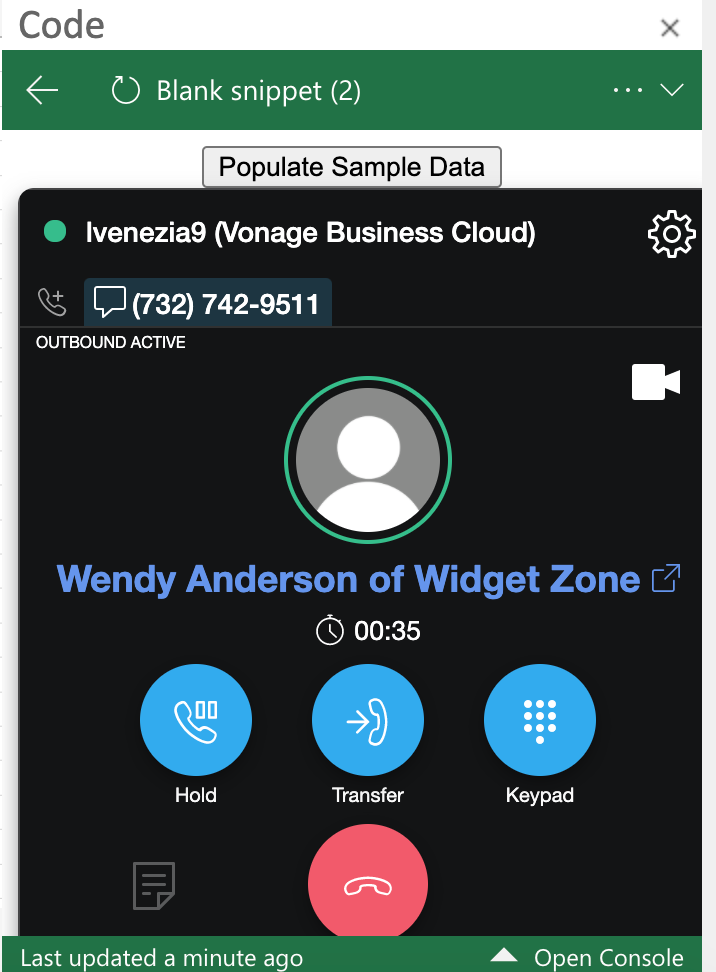 Dialer Interface
 dialer.setOnDialerEvent((event) => {
   //search for contact
   Excel.run(function(context) {
     var worksheet = context.workbook.worksheets.getItem("Sheet1");
     var range = worksheet.getRange("A3:E999");
     range.load("values");
     return context.sync().then(function() {
       const excelData = JSON.stringify(range.values, null, 4);
       const contactsData = translateContacts(excelData);
       const query = "" + event.data.phoneNumber;
       const filteredContacts = filterContacts(query.replace(/[^A-Za-z0-9_]/g, ""), contactsData);
       const interactionContact = filteredContacts[0];
       switch (event.type) {
         case "CALL_START": {
           if (filteredContacts.length > 0) {
             dialer.setInteractionContact(event.data.id, {
               provider: interactionContact.provider,
               id: "" + interactionContact.id,
               label: interactionContact.label,
               type: interactionContact.type
             });
           }
           break;
         }
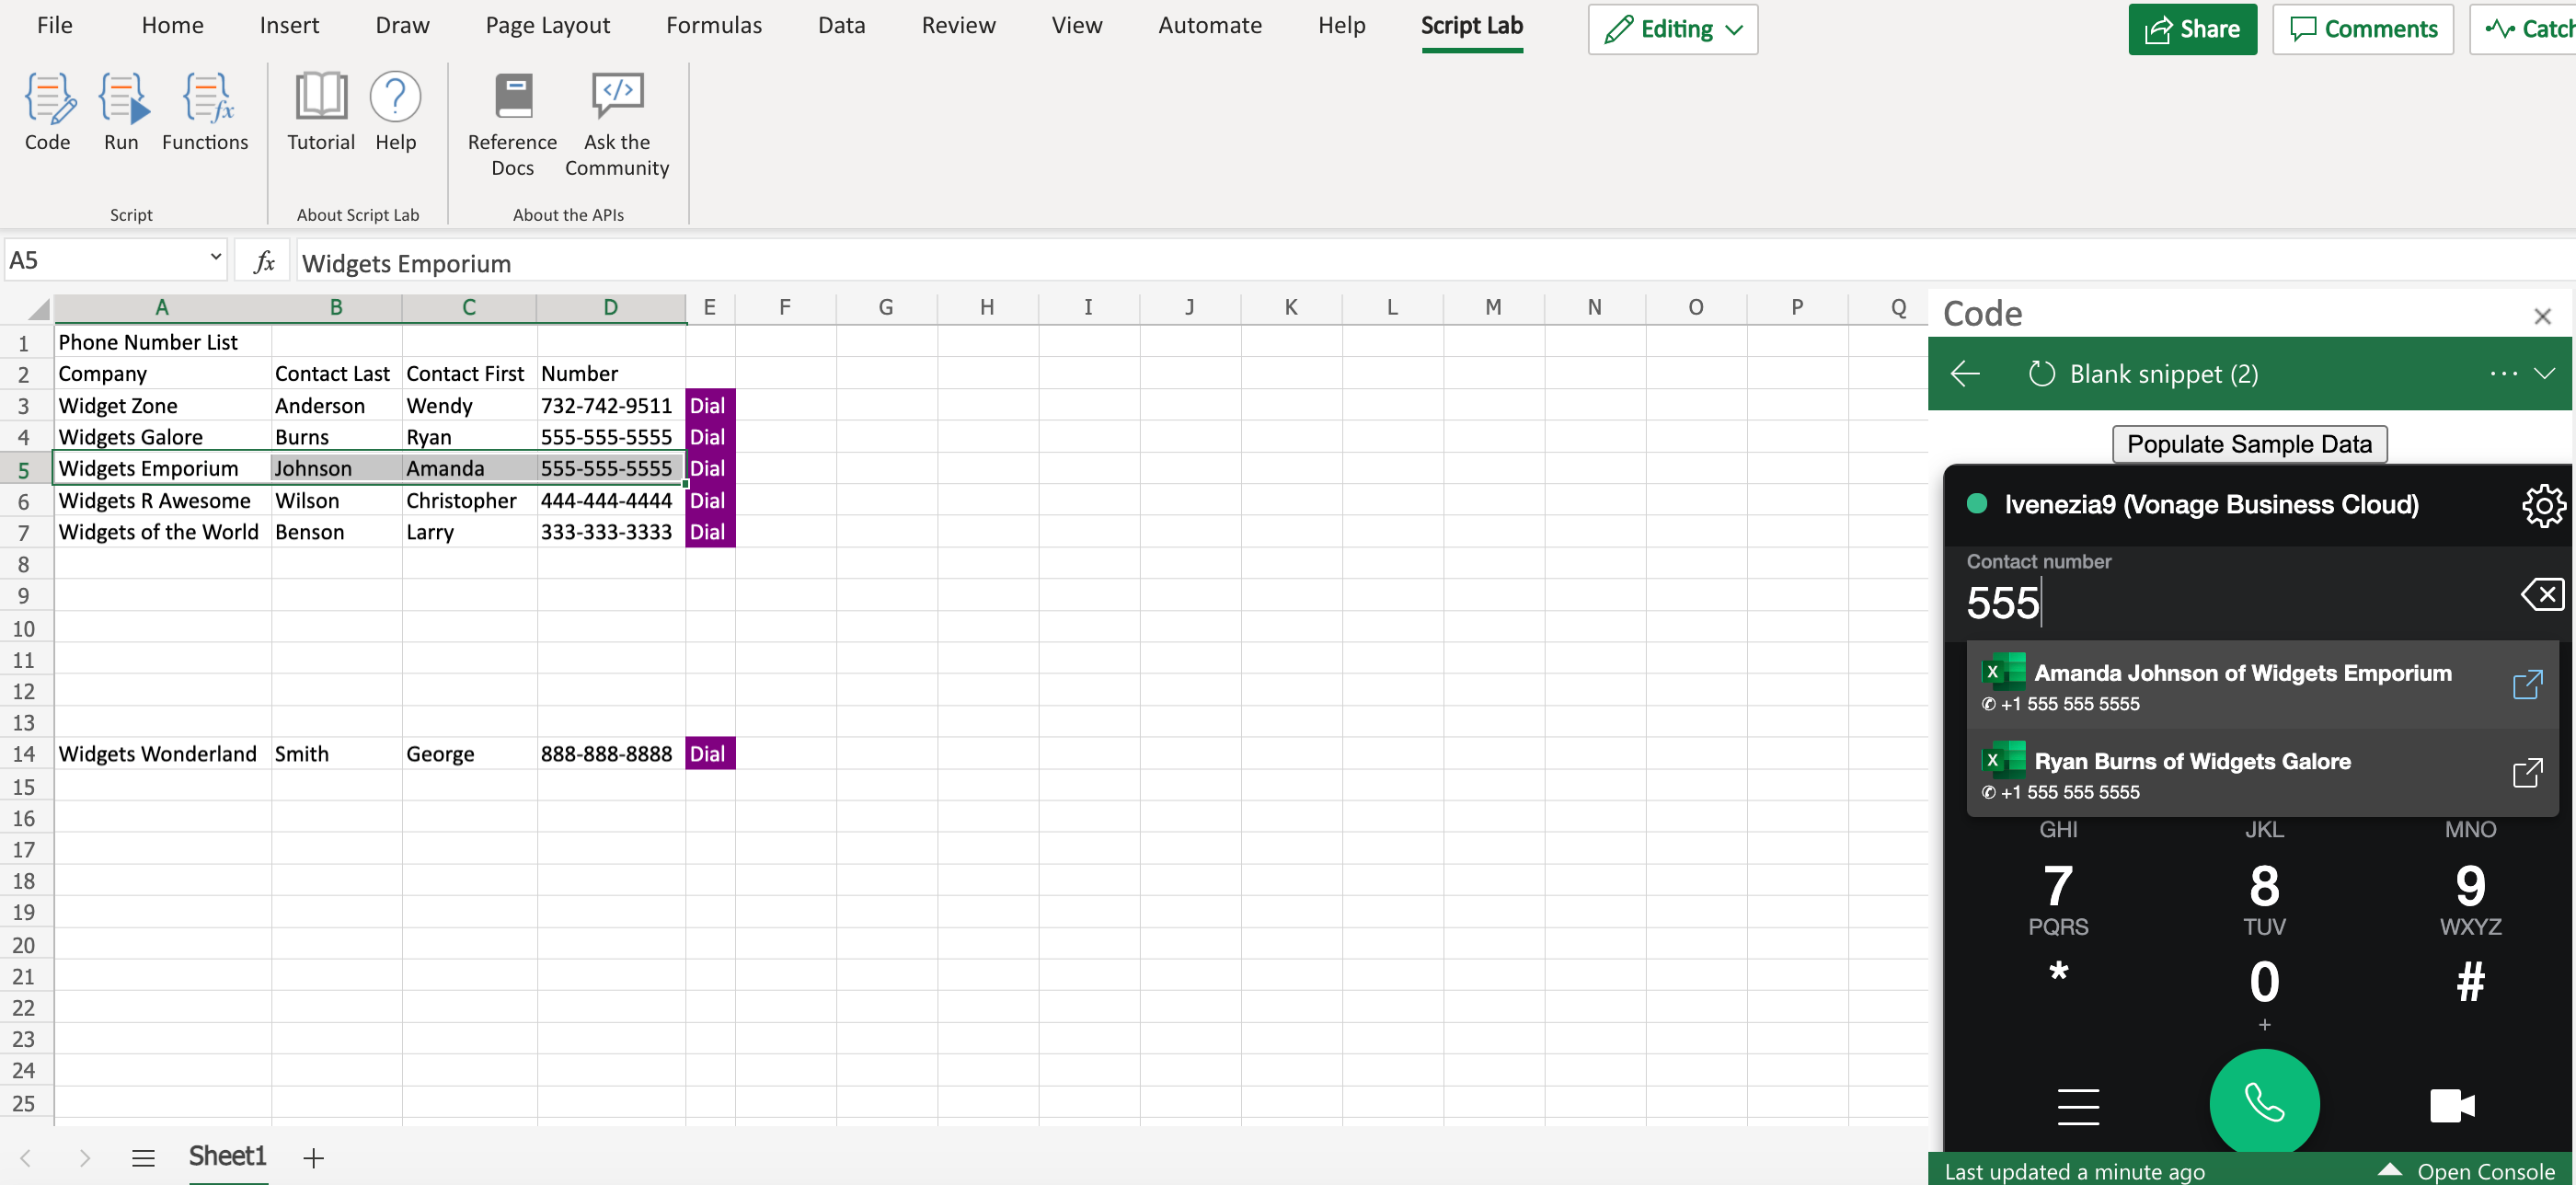 Open Contact
This code will highlight the contact in the Excel sheet when the user clicks on the link icon from the contact search. To work it requires openContact: true in the dialer’s init features.
case "OPEN_CONTACT": {
     const rowNumber = event.data.id + 3;
     const rowString = "A" + rowNumber + ":D" + rowNumber;
     const row = worksheet.getRange(rowString);
     row.select();
     break;
}// Dialer init
VonageDialer.init({
features: {
contactsProvider: true,
openContact: true,
openActivity: 'acme',
eventsHistory: true
}
}, (dialer) => { /* <-- dialer instance */ });
I hope from reading this, you can create a customizable Vonage dialer that can be used within many different applications. Please share in the business-communications-api channel in the Vonage Community Slack org if you have used this information to create useful implementations of your own.
Share:
Lisa helps connect business communications with customer workflows by working closely with the teams that create Vonage integrations with CRMs such as Salesforce, Microsoft Dynamics and HubSpot. Through adding developer solutions for Vonage Apps, she looks forward to unlocking powerful capabilities for people to work and communicate seamlessly within the platforms they use the most. Outside of work, Lisa enjoys singing choral music, playing the mellophone bugle, and spending time with her husband and their corgi.