Share:
Oscar Rodriguez is the Director Global Solution Engineering at Nexmo, the Vonage API Platform
Integrating Multichannel Messaging into Salesforce
Time to read: 8 minutes
Nexmo Messages API for Salesforce, powered by Billennium, enables you to send messages via SMS, MMS, WhatsApp Business, Facebook Messenger, and Viber Service Messages directly on the Salesforce Apex class. This means that you can call the API within your Salesforce environment. Whether you are a developer creating a messaging app or an administrator creating a messaging flow, the Messages API is a simple way to integrate an omnichannel strategy.
In this tutorial, I will walk you through the installation of the Nexmo Messages API for Salesforce package, which you can then use to build a Salesforce application or managed Salesforce package of your own that leverages the Nexmo Messages API as the underlying messaging provider. I will also walk through building a flow with the Salesforce Process Builder. There are a few ways to integrate this package into your Salesforce environment, but the one that I'll be showcasing here is a really nifty deploy tool that's hosted on our GitHub repo.
But before we dive into the details, let’s address the big question: Why would you use the Messages API over the plethora of services for each individual channel? The answer is simplicity; you access multiple channels through a single API. All you have to do is specify the channel in a parameter in your payload. So you can specify that your message is going to be sent with SMS or WhatsApp, for example, just by dropping that channel parameter in your API request.
Another great value-add of the Messages API is that it allows you to integrate with various AI services. For example, we've used the Messages API to build a chatbot experience with AI platforms such as IBM Watson or Google Dialogflow.
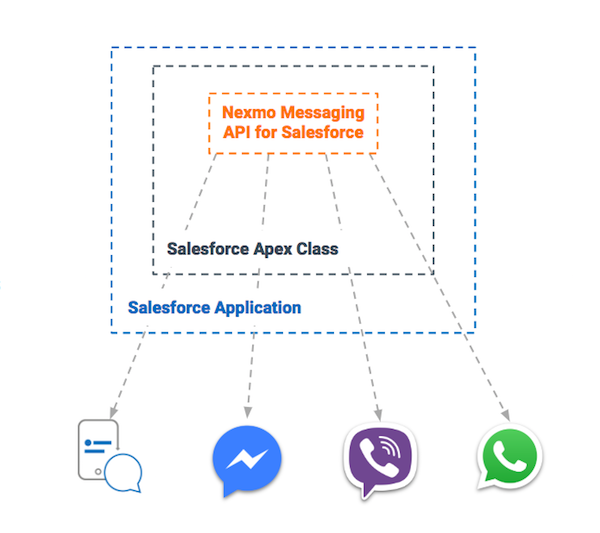 Nexmo Messaging API Flow
So let's walk through the installation process, exploring the Messages API for Salesforce package and what's going on under the hood. To demonstrate its capability, I'll showcase what it looks like to fire off an anonymous function. Watch the video below to see my full installation demo.
To begin, visit the Nexmo community page on GitHub where we host some open source code. The Nexmo Messages API for Salesforce package is hosted here at nexmo-salesforce. We have some documentation if you are going to do any sort of quick start or if you would like to install with Ant. Otherwise, the Deploy to Salesforce tool embedded at the top of the documentation enables that one-click integration I referenced earlier. Click that button to start the installation process and then we'll get into invoking the send message function within our Salesforce apps.
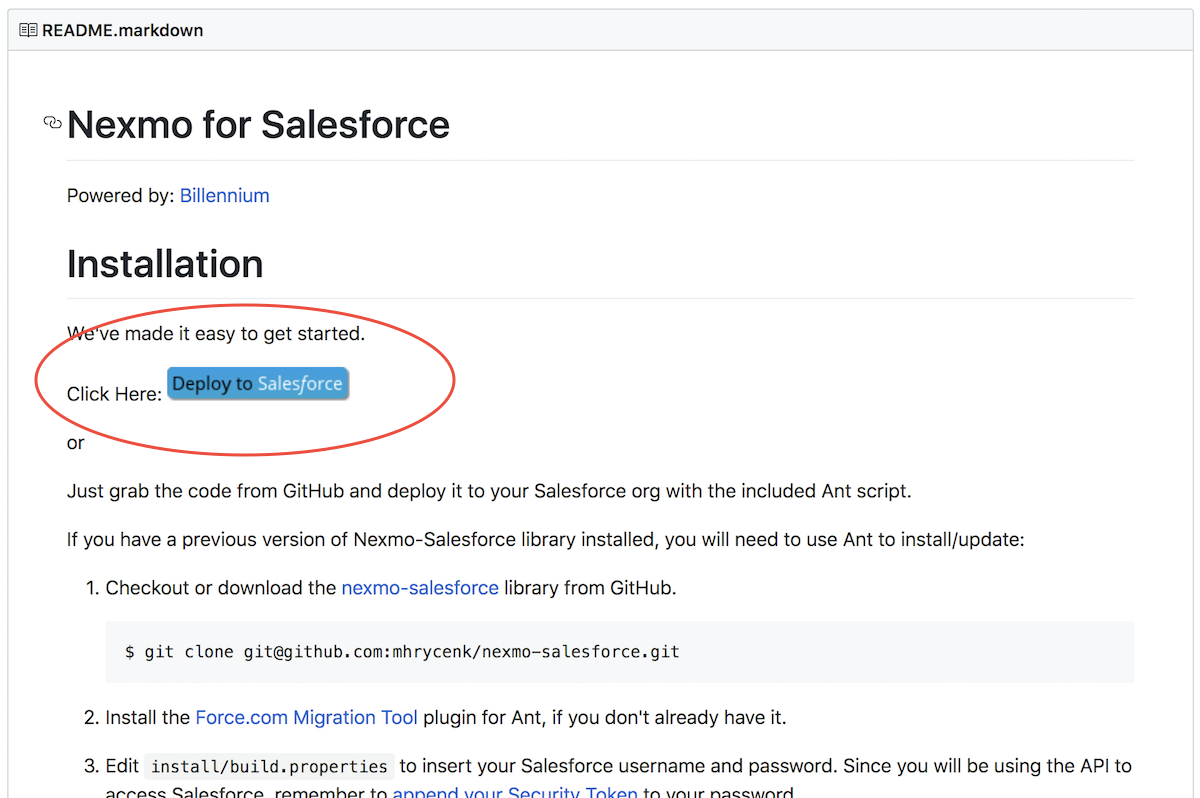 Nexmo for Salesforce
The first thing you'll do is log into Salesforce, as this is the environment in which you want the package embedded. Just make sure that your production environment is checked when you're actually doing the installation.
After you've provided Salesforce with the authorization, you’ll see the page where the package is going to be installed as well as what's going to be installed in terms of the classes that are going to be available in Salesforce. When you click the deploy button, you'll see that a deployment has started and you should receive updates about that installation until the deployment is complete.
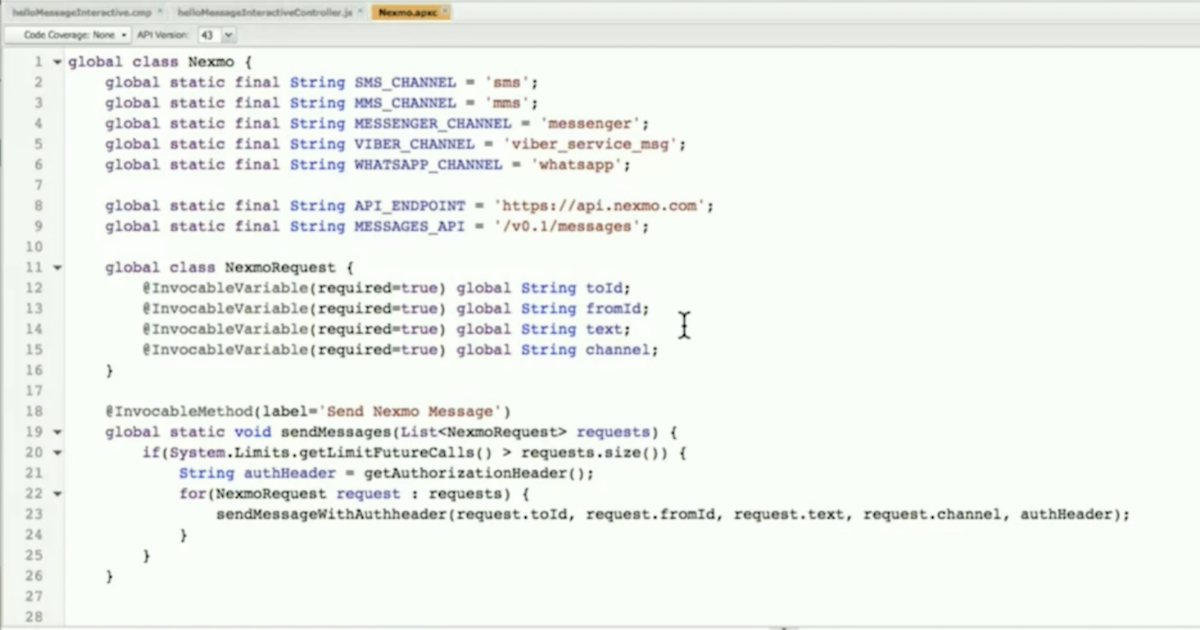
So just that simply you've now integrated the Messages API for Salesforce package into your Salesforce environment. You can actually prove that it’s installed by returning to your Salesforce environment, opening the developer console, and then opening up the Nexmo Apex class. You’ll see that the global Nexmo class is available within your Salesforce environment on Apex.
 code example
This code is open source for your consumption; the endpoint—https://api.nexmo.com—will not change. The version may change in the future, but we won't be deprecating this version anytime soon. We very simply removed the necessity to specify the channel or to make multiple requests in order to send messages across various channels.
Check out the code and you’ll see that you can also just invoke the function anonymously. Ctrl+E opens up this anonymous Apex function. You can call the Nexmo Apex class sendMessage function. For example, if you drop a mobile phone number in the ToNumber and a Nexmo number as the from address, you can test the function. Just enter a test message, specify the channel as "sms," execute the code, and you’ll receive the message on your mobile phone. You can run the same test for any of the other channels that the Nexmo Messages API supports.
The Nexmo Apex class is available within our environment. And you can obviously develop on top of that, so if you're building any sort of Lightning component or package yourself, you would just invoke this function in order to be able to send messages through the Nexmo Messages API. It's that simple.
Now, I'll walk us through the Process Builder and creating a really common use case: support notifications. When a customer support agent closes a case in Service Cloud, Process Builder will trigger a flow that sends out an SMS or WhatsApp message to the customer. I'm going to show you how you can create the listener in Process Builder that will send an alert notification to your customers every time an agent services a customer request and closes the case. Watch the video below to see my full Process Builder demo.
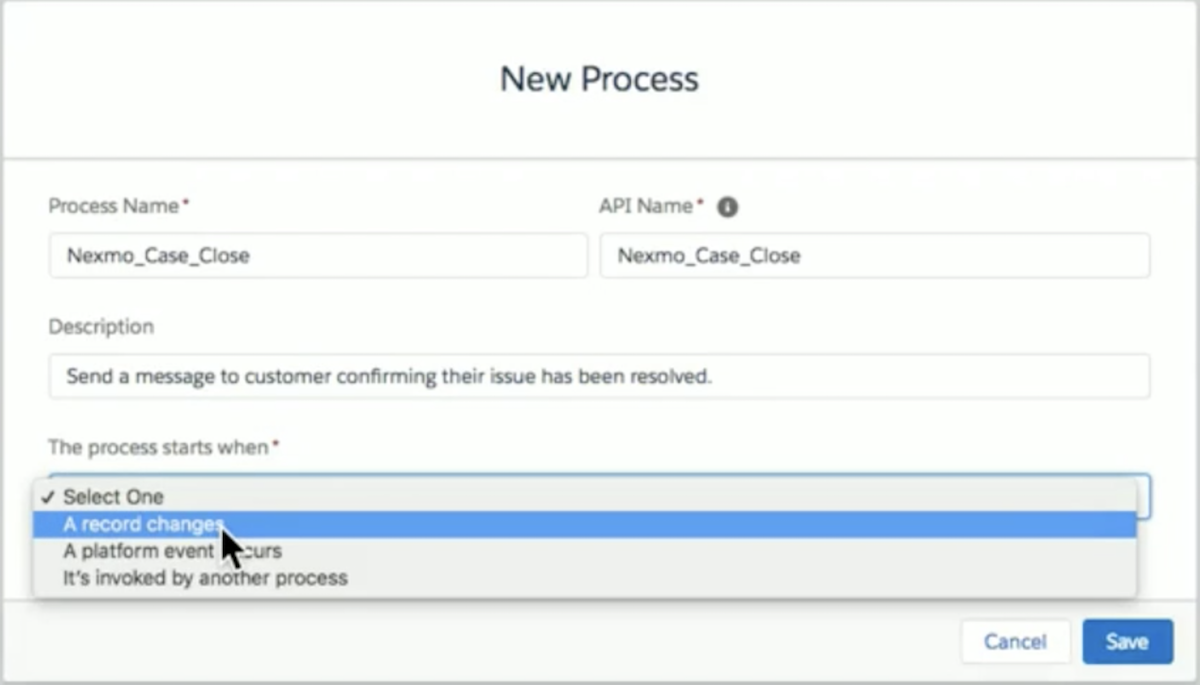
To begin, open a new process in Process Builder and enter a unique Process Name, something like Nexmo_Case_Close. For the description, you can enter "Send a message to customer confirming their issue has been resolved." From the The process starts when dropdown menu, choose a record changes as that's the trigger that will kick off the process.
 Process builder
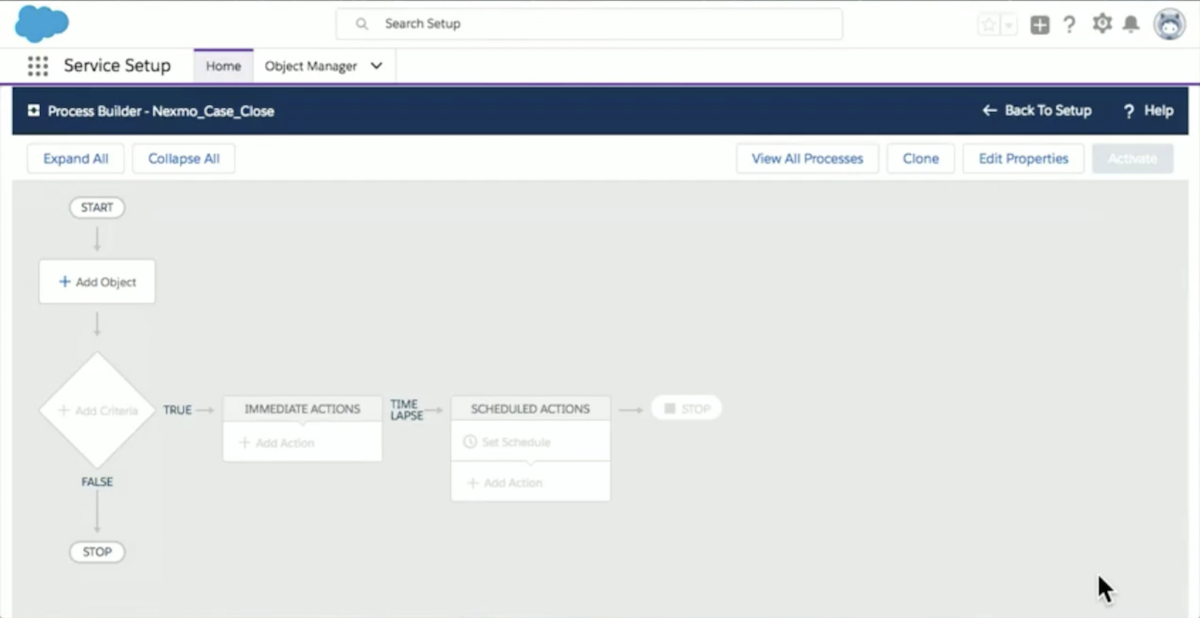
The process will open in the Process Builder interface, a simple visual builder tool that you don't need any development experience to use. With the Messages API for Salesforce package installed, the Nexmo Apex class is available within Process Builder.
 process builder deep dive
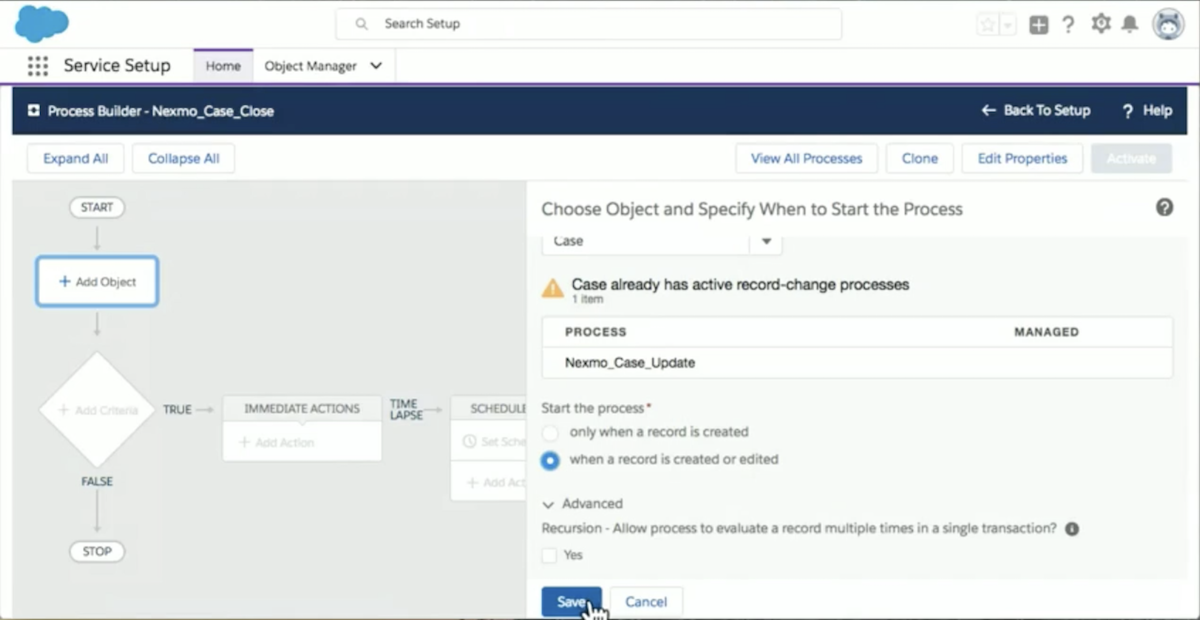
Click Add Object. Choose Case as the object. We already have a process (Nexmo_Case_Close) that's monitoring cases, so go ahead and select it.
 process builder
To make sure the process allows us to monitor cases as expected, choose to start the process when a record is created or edited, rather than only when it's created. Under the Advanced options, leave the Recursion option ("Allow process to evaluate a record multiple times in a single transaction?") unchecked for now. Save the Object.
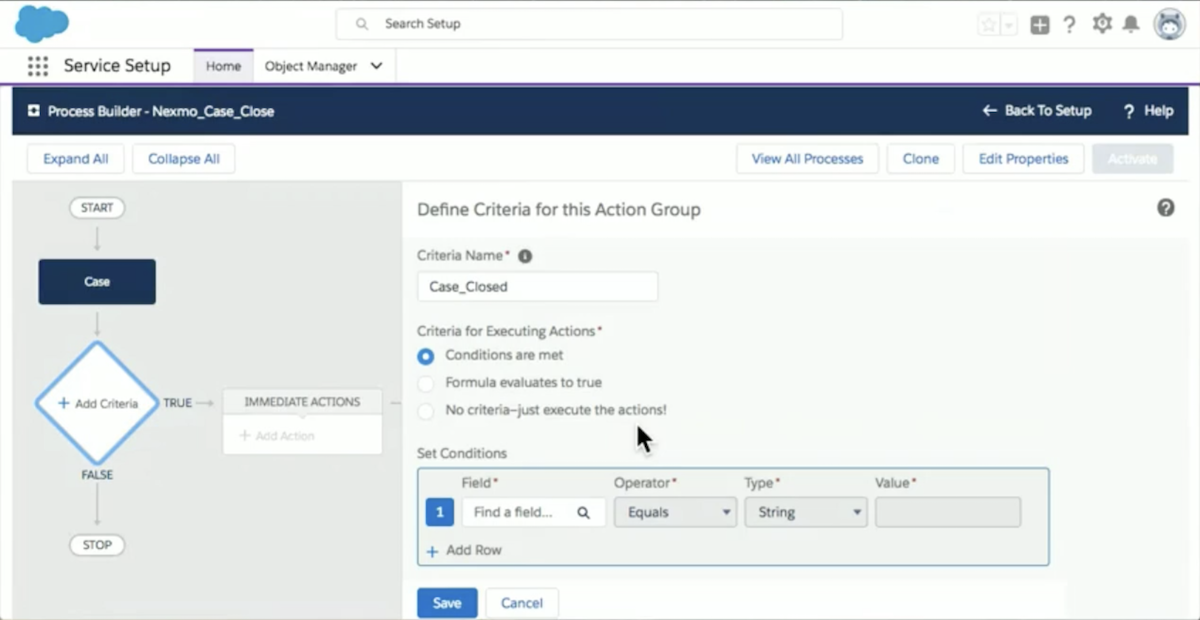
Next, click Add Criteria in the process. The Criteria Name can be something like Case_Closed, because we just want to send a notification to the end customer when an agent has closed the case. The Criteria for Executing Actions selection is where we will determine our business logic, so again, you don't need any coding experience to build the process. This is actually building the logic that is going to determine whether or not the functions in your flow will be executed. So let's set it for when all conditions are met.
 Process builder
Next, we're gonna set conditions. The only condition is that the case is closed, so for the Field, scroll through the list and select Closed, which will be of type Boolean (true or false) and the API Name will be IsClosed. So the way our selected conditions would read is: if the case is closed, then the process would do something. The Advanced option is "Do you want to execute the actions only when the specified changes are made to the record?" Go ahead and check Yes, because you probably don't want updates every time the case is edited, there's any sort of internal message, or the status goes from open to working or open to escalated. You want it to execute only when the case is closed. Click Save.
Now we have a record that we're monitoring. We have logic that we've built in for when a case is actually closed.
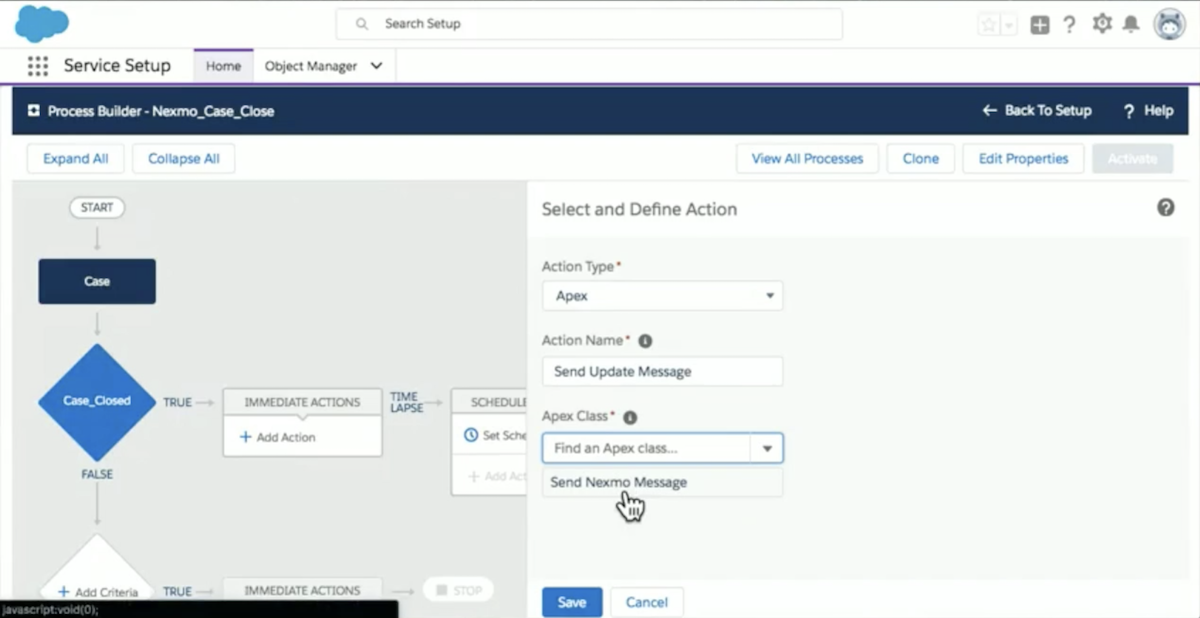
Next, let's add an action. We can select Apex as the Action Type. The Action Name can be “Send Update Message.” For Apex Class, "Send Nexmo Message" will come up and because you've installed that package, it should be available directly.
 process builder
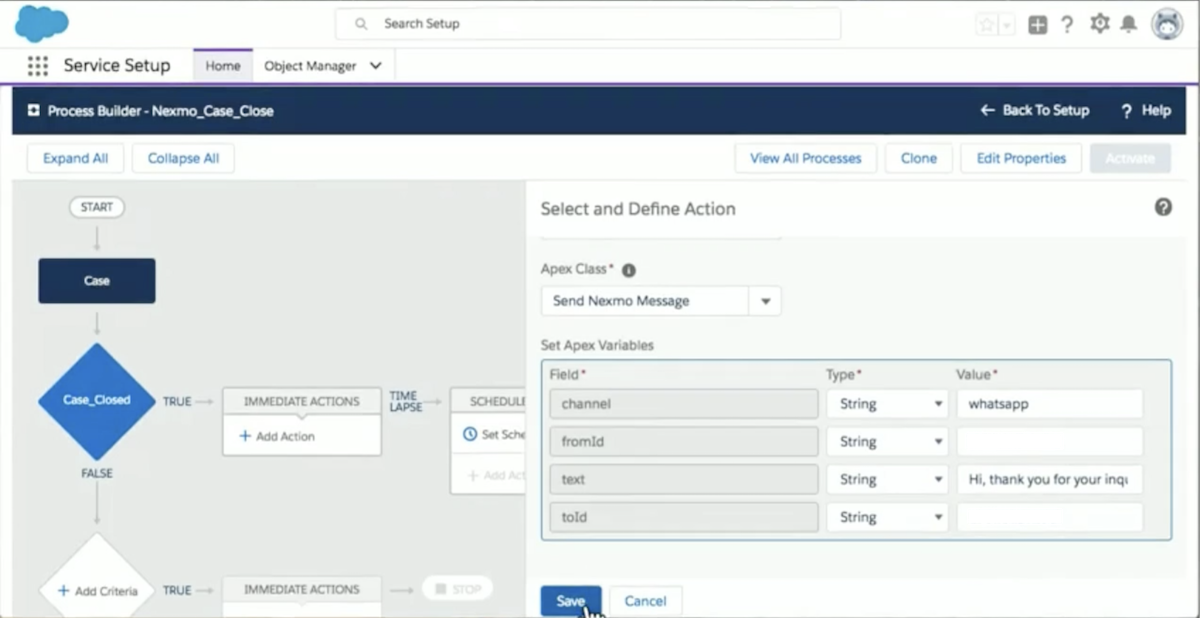
What comes up next are the Apex variables, the variables you're gonna be passing in to your request as part of that payload. You can specify the channel, which in this case is WhatsApp. The fromId would be a Nexmo-enabled WhatsApp number. The text would be something to the effect of "Hi, thank you for your inquiry. Your issue has been resolved. We sent you a refund of the amount xyz." This could be a dynamic value, but for this exercise, let's keep it static. The toId is going to be your phone number. With all the strings correctly set, you can save the variables. All you have to do now is to activate the process.
 process builder
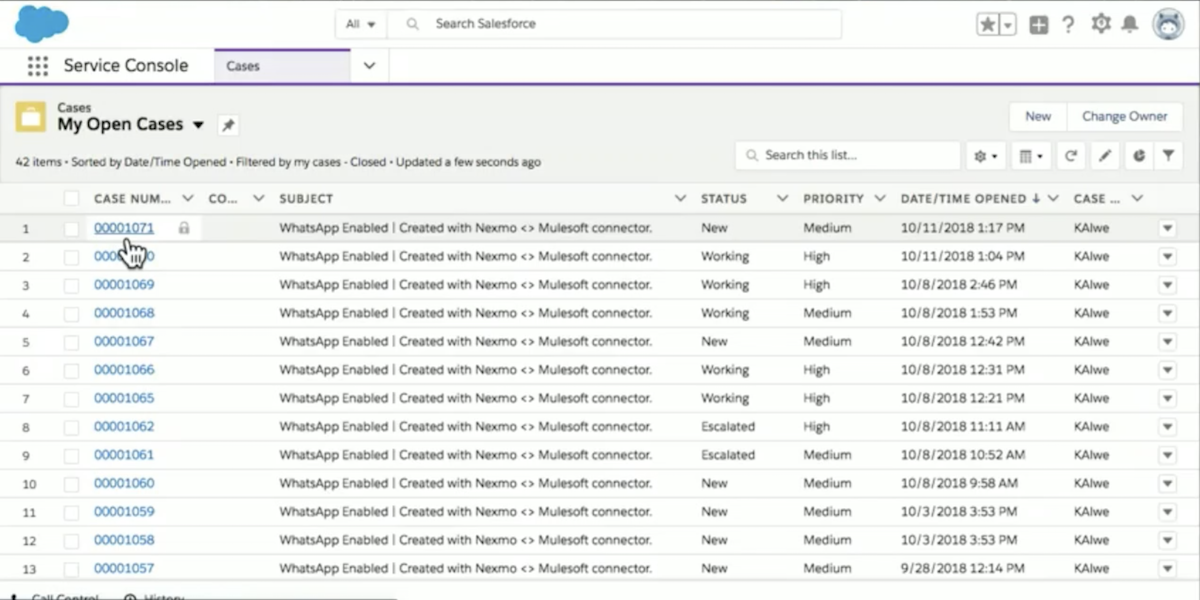
To test the process, you can assume the role of an agent and see if it behaves as expected. Go to your App Launcher and open the Service Console. Pretend you’re an agent sitting in your contact center reviewing the open cases that are building up in your queue.
 process builder
Choose a case by its case number and suppose its description is something like, "Hi, I saw your ad. Interested." You can respond to the customer by typing a message saying, "Great, we are going to reach out directly. Thanks for your support!" and sharing it.
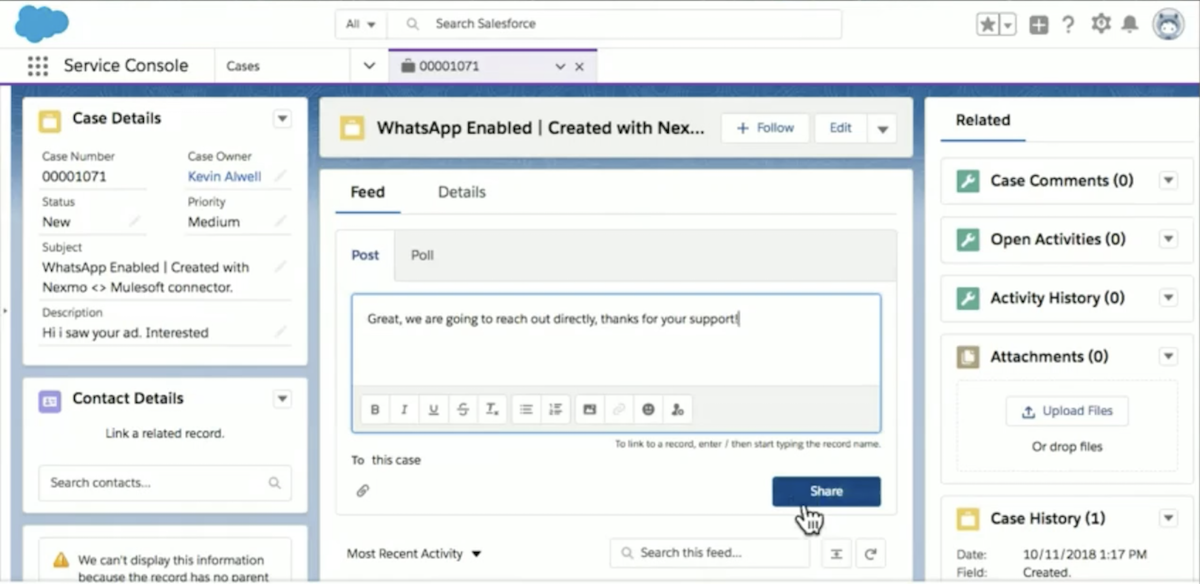
The key step here is to update the case’s status, because we have the trigger set for when the case is closed. So go ahead and close the case and see if the process picks up on it.
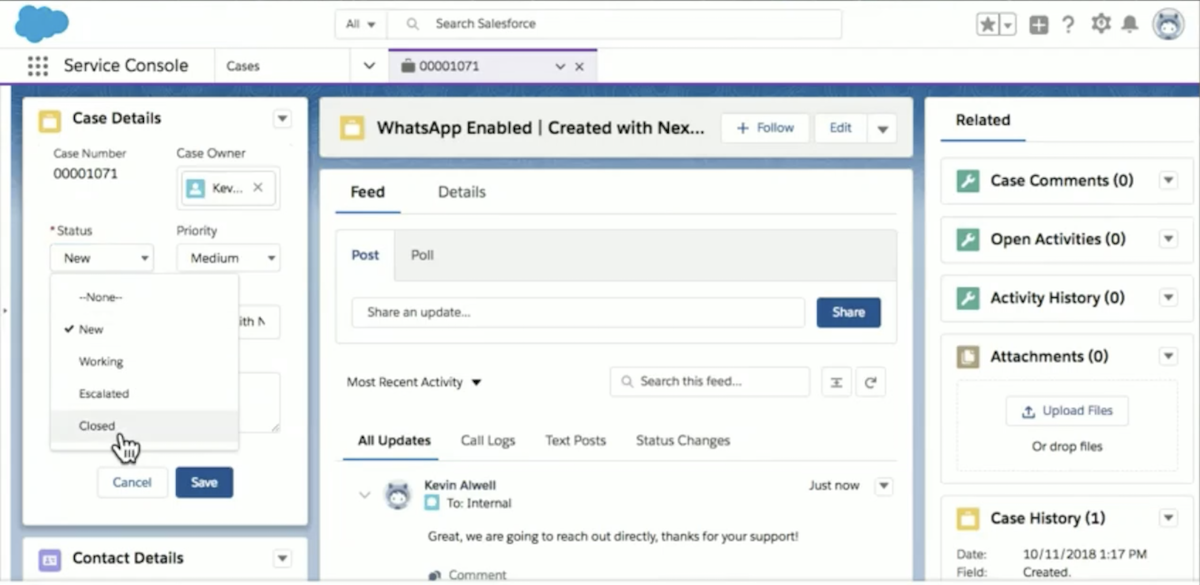 case details
Closing the case should’ve fired the trigger when this event was ingested by our Process Builder flow. You should receive a message from Process Builder to your WhatsApp account saying, "Hi, thank you for your inquiry. Your issue has been resolved. We sent you a refund amount of xyz."
Hopefully, your flow successfully messaged you about the closed case. We used Process Builder, but there are a lot of tools that you can use to do this. You could just as easily use something like a MuleSoft flow or you can build it internally within your own client application or server-side application.
If you'd like more information about the Nexmo Messages API for Salesforce package, check out our documentation. You’ll find information for embedding the service directly into your application, whether it's on the server side or client side, within Salesforce or not. And again, it allows you to send messages across the various channels using the single interface, and it's really simple to integrate.
If you want to access the code and use the package itself, go to our GitHub community page and you can install it with that one-click installation tool or by using Ant, whichever works best for your needs.
To see how our partners are using the package, watch this demo of SMS Magic's multichannel messaging solution powered by the Nexmo Messages API for Salesforce.