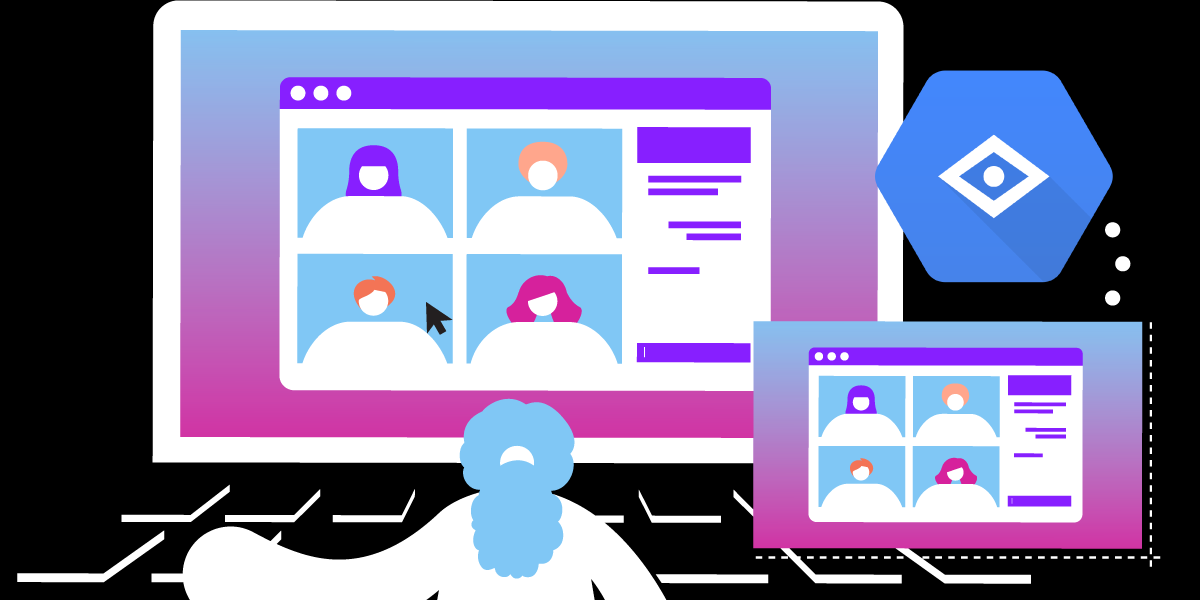
Gather AI Insights From Video Calls with Vision AI and the Video API
Time to read: 13 minutes
This tutorial will show you how to set a video call using the Vonage Video API, take a screenshot of the video, and analyze the image.
Have you ever heard of the Google Cloud Platform Vision API? It’s cool to try it out and get data from the pictures. If you want to quickly try it out, you can add a photo and get a different type of analysis of it both in a JSON file and in a human-readable way.
Note: Currently, the Vonage Video API has arrived in our Vonage Dashboard, and as of now (March 2024), when this blog post was first written, you have 2000 minutes free to try it out.
A Google Cloud account with access to Vision AI.
A webcam and microphone.
Google Chrome, Firefox, or another supported browser.
A code editor/ IDE.
Go to the Google Cloud Console and create a new project, name it, add the location, and click Create. The benefit of creating a new project is that once you’re done with this tutorial, you can delete the whole project and ensure you’re not using any resources related to the project.
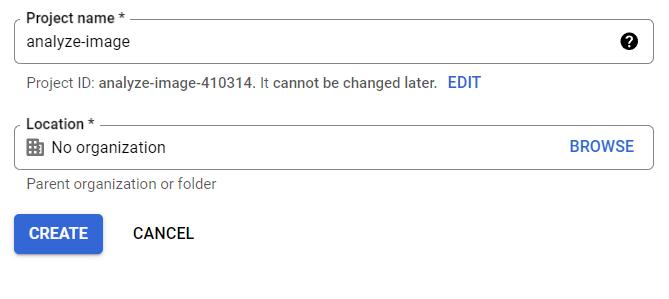 Google Cloud's Project Name and Location
After creating the project, You’ll be taken to the Google Cloud dashboard. Ensure a billing account is related to this project.
Enable Vision API for this project; you can access the menu on the left, click on the marketplace and look for Vision API. Alternatively, you can search for Vision AI at the top search bar and click to enable it within the workflow.
Install the gcloud CLI.
Here's an overview of the files you'll find in our project.
[node_modules]
[public]
 ├── index.html
 └── client.js
[screenshots]
server.js
private.key
package-lock.json
package.json
Create a new project folder for this node project, for instance, ai-insights and install the Google Cloud Vision API Node.js Client:
Initialize gcloud by typing the command below and choosing the project we’ve created from the console.
After that, you’ll be asked to log in. After logging in, you will be prompted to choose a cloud project and choose the project ID you’ve created.
Create your credentials file. I am using the below command, but you can check the documentation for different ways of creating credential files.
Make sure there is an image to be analyzed at the root of your project (for example, if you created a project folder for this node project called ai-insights it would be at the root of the folder). Make sure the file variable fileName is populated with the image address, e.g. path/to/image.png.
Create a server.js JavaScript file and add the code; let’s use the example of detecting faces.
Run the main server file with node.
Let's set up a browser-based audio-video chat with Vonage Video API. You need to set up a video call to complete this tutorial. I'll show you step-by-step how to achieve this in the following steps. If you would like to see other examples of how to set up videos and learn more, check the last section of this article.
Go to the Vonage dashboard and log in/ sign up.
Click "Applications" in the left menu.
Click "Create a new application" at the top and give it a name.
Copy the application ID for future reference.
Click "Edit" and "Generate public and private keys." The private key will be downloaded.
Scroll down and enable "Video (new)" for the application.
Click "Save changes" at the bottom of the page.
Note your API Key and API Secret for your project. Be sure to store these credentials securely, as you will use them later when configuring your application.
Create an HTML file named public/index.html to facilitate the integration of the Vonage Video API into your project. This file includes the necessary scripts and elements to initiate the video session. Below is a breakdown of the HTML structure:
<!DOCTYPE html>
<html lang="en">
  <head>
    <!-- Meta tags for character set and viewport settings -->
    <meta charset="UTF-8" />
    <meta name="viewport" content="width=device-width, initial-scale=1.0" />

    <!-- Title of the HTML document -->
    <title>Video Screenshot</title>

    <!-- Include the Vonage Video API library -->
    <script src="https://static.opentok.com/v2/js/opentok.min.js"></script>

    <!-- Styling for the video container -->
    <style>
      #containerId {
        height: 400px; /* Adjust the height as needed */
      }
    </style>
  </head>
  <body>
    <!-- Button to trigger the screenshot functionality -->
    <button id="take-screenshot">Take Screenshot</button>

    <!-- Container to hold the video stream -->
    <div id="containerId"></div>

    <!-- Include the client-side JavaScript file -->
    <script src="client.js"></script>
  </body>
</html>
Create a public/client.js file. You'll establish the connection to the Vonage Video API session and configure a publisher. Follow these steps to generate the necessary credentials and incorporate them into the code under the // credentials section:
Replace the placeholders (appId, sessionId, and token) with the actual values obtained during the setup process. Creating a session and generating a token are crucial steps in enabling secure and authenticated communication within the Vonage Video API. Remember to retrieve the appId from the Vonage Dashboard to ensure seamless integration with the `public/client.js file.
// credentials

const appId = ""; // Replace with your Vonage Video API application ID

const sessionId = ""; // Replace with the session ID generated for your video session

const token = ""; // Replace with the token generated for authentication
In this code segment, we connect to the Vonage Video API session using the provided appId and sessionId. The OT.initSession() function initializes the session, enabling communication on the Vonage Video API platform.
The variables publisher and subscriber are declared in a broader scope to manage the publisher's and subscriber's video streams. Following the connection initiation, the session.connect() function authenticates the session using the provided token. Any connection errors are logged for debugging purposes.
A publisher video stream is created with OT.initPublisher() upon successful connection. This video is displayed in the specified HTML element (containerId). The session.publish() method broadcasts the publisher's video to all participants.
The session.on("streamCreated") event listener detects newly created subscriber video streams. When a new stream is identified, it is subscribed to and displayed within the designated HTML container.
Note: Initiating the publisher's video stream may prompt the browser to request camera and microphone access for a secure video conferencing experience.
// client.js

// Declare publisher and stream in the broader scope
let publisher;
let subscriber;

// Connect to the Video API session
const session = OT.initSession(appId, sessionId);

// Connect to the session
session.connect(token, function (err) {
  if (err) {
    console.error("Error connecting to session", err);
  } else {
    // Create publisher
    publisher = OT.initPublisher("containerId", {
      insertMode: "append",
      width: "100%",
      height: "100%",
    });

    // Publish the video stream
    session.publish(publisher);
  }
});

// Handle the streamCreated event
session.on("streamCreated", function (event) {
  subscriber = session.subscribe(event.stream, "containerId", {
    insertMode: "append",
    width: "100%",
    height: "100%",
  });
});
I've used a couple of APIs to support taking a screenshot of the call, for instance, html2canvas or Canvas API. Still, they'd have the screenshot image taken grayed out. The best method that worked for me was to capture and display static images of the Publisher and Subscriber videos in a Video API call. These images can be used as screenshots. The process involves utilizing the Video API to access the image data of the video streams and then creating an HTML image element to display the captured image.
After you get that setup, you can add the code to get a screenshot of the call, and you could either manually add it to an earlier Vision AI try it out link we’ve shared or we could use their API.
Here’s the code that allows screenshots of a particular page part by clicking a button. The image data is sent to the server, which saves it to a file. The file name is returned so the user can know where the screenshot was saved.
In the public/client.js file, add an event listener to the "Take Screenshot" button to capture the publisher and subscriber video streams:
// Take screenshot on button click
document
  .getElementById("take-screenshot")
  .addEventListener("click", async function () {
    try {
      // publisher snapshot
      const publisherImage = publisher.getImgData();

      // subscriber snapshot
      const subscriberImage = subscriber.getImgData();

      // Send the screenshots to the server
      const response = await fetch("/take-screenshot", {
        method: "POST",
        headers: {
          "Content-Type": "application/json",
        },
        body: JSON.stringify({
          publisherImage,
          subscriberImage,
        }),
      });

      const result = await response.json();
    } catch (error) {
      console.error("Fetch error:", error);
    }
  });
Let's dive into the upgraded server.js script. This recent enhancement introduces a new endpoint, "/take-screenshot," designed to handle base64-encoded images from both the publisher and subscriber video feeds. These images become PNG files through the saveImage function.
Upon receiving a screenshot request, the server saves the images and engages the Google Cloud Vision API through the detectFaces function. This function plays an important role in recognizing and logging facial expressions present in the screenshots. The server processes the images, logs their paths, and delivers facial expression analyses for both video streams.
We must create a /screenshots folder in the project's root directory, where the screenshots will be saved. Find the server.js code I've just explained in this section below:
// server.js

const express = require("express");
const app = express();
const fs = require("fs");
const path = require("path");

// Initialize Google Cloud Vision client
const vision = require("@google-cloud/vision");
const client = new vision.ImageAnnotatorClient();

app.use(express.json({ limit: "100mb" }));

// Serve the HTML file on the root path
app.get("/", (req, res) => {
  res.sendFile(path.join(__dirname, "public", "index.html"));
});

// Serve the JavaScript file
app.get("/client.js", (req, res) => {
  res.sendFile(path.join(__dirname, "public", "client.js"));
});

app.post("/take-screenshot", async (req, res) => {
  try {
    const publisherImage = req.body.publisherImage;
    const subscriberImage = req.body.subscriberImage;

    const publisherImagePath = saveImage(publisherImage, "publisher");
    const subscriberImagePath = saveImage(subscriberImage, "subscriber");

    const publisherFaces = await detectFaces(publisherImagePath);
    const subscriberFaces = await detectFaces(subscriberImagePath);

    res.json({
      status: "ok",
      publisherFaces,
      subscriberFaces,
      publisherImagePath,
      subscriberImagePath,
    });
  } catch (error) {
    console.error("Error processing images:", error);
    res.status(500).json({
      status: "error",
      error: "Internal Server Error",
      details: error.message,
    });
  }
});

// Snippet of code from https://cloud.google.com/vision/docs/detecting-faces
async function detectFaces(imagePath) {
  const [result] = await client.faceDetection(imagePath);
  const faces = result.faceAnnotations;
  console.log("Faces:");
  faces.forEach((face, i) => {
    console.log(`  Face #${i + 1}:`);
    console.log(`    Joy: ${face.joyLikelihood}`);
    console.log(`    Anger: ${face.angerLikelihood}`);
    console.log(`    Sorrow: ${face.sorrowLikelihood}`);
    console.log(`    Surprise: ${face.surpriseLikelihood}`);
  });
}

function saveImage(imageData, prefix) {
  try {
    const buffer = Buffer.from(imageData, "base64");
    const fileName = `${prefix}-screenshot-${Date.now()}.png`;
    const folderPath = path.join(__dirname, "screenshots");

    // Create a folder if it doesn't exist
    if (!fs.existsSync(folderPath)) {
      fs.mkdirSync(folderPath);
    }

    const filePath = path.join(folderPath, fileName);

    // Write image to disk
    fs.writeFileSync(filePath, buffer);
    console.log(`Image saved: ${filePath}`);

    // Return the path to the saved image
    return filePath;
  } catch (error) {
    console.error("Error in saveImage:", error);
    return undefined; // Return undefined in case of an error
  }
}

app.listen(3002, () => {
  console.log("Server listening on port 3002");
});
Now you have all the files created to try this out. Run the main server file with node.
You’ll see a message that says, Server listening on port 3002. Go to your browser and open http://localhost:3002/.
Click on the button to take the screenshot. A screenshot image base64 encoded will be downloaded to your screenshot folder. You can see the image's analysis in the console that looks like this:
Today, you saw how to use the video API and the Google Cloud Platform Vision AI. To enhance your application further, you can explore the Vision API's features, such as detecting text, landmarks, or objects. You can also consider implementing additional functionality, like saving the analysis results to a database or integrating them with other services.
Do share your opinion with our Community on Vonage Community Slack or send us a message with @VonageDev on X.
Server SDK — Before going to production, you must set up a server to generate credentials.
Video API Overview — If you haven't already, take a few minutes to learn precisely how Vonage Video works.
Video API Basics — Quickly learn how the Vonage Video API works (with pictures).