
Forward a Call Via Voice Proxy With Koa.js
Time to read: 11 minutes
This tutorial shows you how to add voice capabilities to your application. We will use Koa, a web framework for Node.js, to create a server that handles incoming calls and events and the Vonage Voice API to forward calls to another phone number. Let's get started.
By the end of this project, this is what your project folder should look like:
To follow along with this tutorial, you'll need:
Node.js installed
Ngrok is installed to expose your local development server to the internet.
A Vonage Developer account to access our Voice API.
For us to be able to expose endpoints from our local machines without having to deploy our application to a live environment, we will make our local server accessible to the internet using ngrok
Once installed, in a new terminal/command prompt window, start ngrok on port 3000:
ngrok http 3000
You can create and manage Vonage applications using the Vonage CLI. Install it if you haven't already:
npm install @vonage/cli -g
Execute the command to set the API Key and API Secret Configuration. After this, you'll see Configuration saved on your terminal or in the command prompt.
The VONAGE_KEY and VONAGE_SECRET can be found on the Vonage Dashboard.
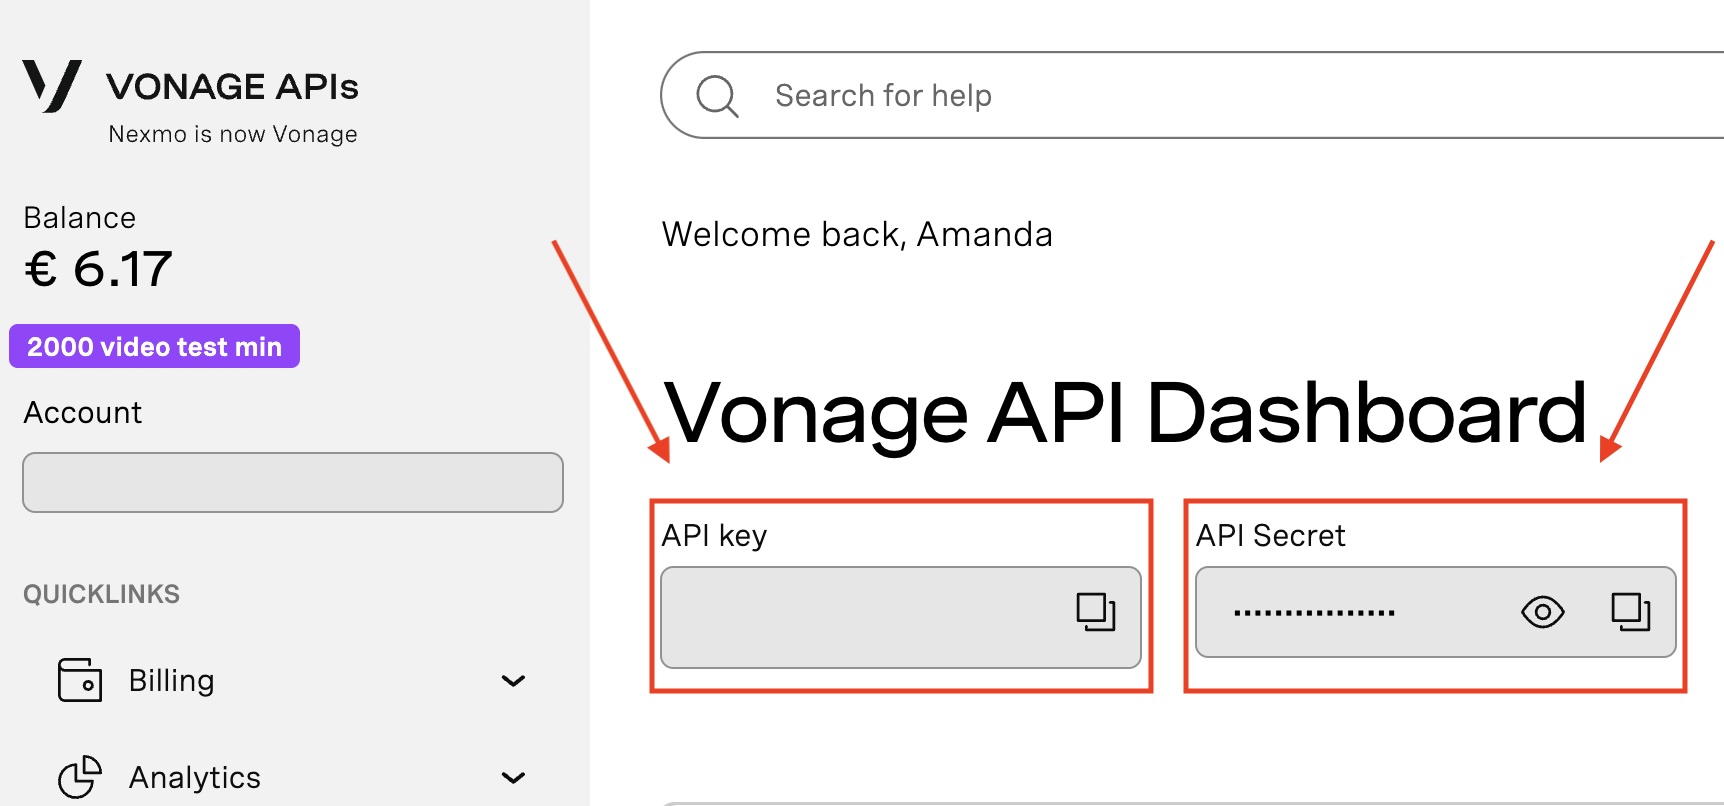 Vonage Dashboard
Use the CLI to create a new application with voice capabilities and make a note of the application ID provided upon creation. Run the command to create a new Vonage Application.
After that, a prompt with some fields will pop up, and you call fill as follows.
You should get a response similar to this:
Next, we'll need a virtual number acting as our "public face" for incoming calls. This number will be linked to our Vonage application, and here's how to acquire one:
Search for available numbers in your desired region. Thankfully, we can purchase numbers directly from the CLI like this!
vonage numbers:search US(replace US with your country code if needed).Buy a number:
vonage numbers:buy 12079460000 US.
Remember that some numbers cannot be purchased via the Command Line, so you must purchase them via the dashboard. You can do so by going to the Vonage Dashboard and the Buy Numbers page. Tick 'Voice' in the search filter and select the country where you want to buy a number.
With our number chosen, it’s time to connect it to our Vonage application. You can link a virtual phone number directly from the Vonage Dashboard or via the CLI. Linking ensures that calls to your virtual number are correctly routed through your application.
vonage apps:link --number=12079460000 APPLICATION_ID
You can also do it from the dashboard. Go to the Application page and click on the application you created earlier. Click the 'Link' button in the Voice section next to the number you want to link.
Create a new directory for your project and navigate into it. (Example folder
VoiceWithVonage)Initialize a new Node.js project with
npm init -yto accept all default settings.
Our project relies on a few dependencies, which we will install with a single command:
We'll use environment variables to store sensitive information like API keys and phone numbers to keep our application secure and manageable.
Create a .env file in your project root and add your variables refer to Michael's blog post for a better explanation of how to use environment variables in Node.js
// .env
VONAGE_API_KEY= Your Vonage API key, used for authenticating API requests.
VONAGE_API_SECRET= Your Vonage API secret
VONAGE_APPLICATION_ID= The ID of your Vonage application. Vonage applications allow you to manage your communication services and define how they interact with your web application.
VONAGE_PRIVATE_KEY= The path to your Vonage application's private key file. When you create a Vonage application that uses voice capabilities, you generate a public/private key pair. The private key authenticates your application when making API requests. It will  look like nameOfTheFile.key.
FROM_NUMBER= The Vonage virtual number (purchased through Vonage) that calls will come from. It is the number displayed to the user receiving the call.
YOUR_SECOND_NUMBER= The destination phone number to which the call will be forwarded. It should be in [E.164 format](https://en.wikipedia.org/wiki/E.164).
The Vonage Server SDK makes integration with Vonage's services straightforward. Initialize it in your project to enable voice functionality, ensuring that placeholder values are replaced with your API credentials stored in your .env file.
Create a file called forward_a_call.js and the code below.
// forward_a_call.js
require("dotenv").config();
const { Vonage } = require("@vonage/server-sdk");

// Initialize the Vonage Server SDK with your credentials
const vonage = new Vonage({
 apiKey: process.env.VONAGE_API_KEY,
 apiSecret: process.env.VONAGE_API_SECRET,
 applicationId: process.env.VONAGE_APPLICATION_ID,
 privateKey: process.env.VONAGE_PRIVATE_KEY,
});
We begin by setting up our server environment:
require("dotenv").config();
const Koa = require("koa");
const Router = require("@koa/router");
const koaBody = require("koa-bodyparser");

const app = new Koa();
const router = new Router();

app.use(koaBody());Here, we import the necessary modules and initialize our Koa application. dotenv loads environment variables (like your Vonage API credentials and phone numbers) from a .env file.
The koaBodyparser middleware is applied to parse the body of incoming requests, which is essential for reading JSON payloads in our /event webhook.
Additionally, we use @koa/router, a routing middleware, to define and manage routes within our application. This allows us to specify actions for different paths, such as /answer for answering calls and /event for processing webhook events.
The /answer route is defined as responding to incoming calls. When the Vonage platform receives a call to your virtual number, it requests that this /answer endpoint retrieve instructions, known as an NCCO (Call Control Object), on handling the call.
In this example, the NCCO instructs Vonage first to play a message ("Please wait while we connect your call.") and then connect the call to another specified number (YOUR_SECOND_NUMBER), using your Vonage number (FROM_NUMBER) as the caller ID.
router.get("/answer", async (ctx) => {
  const ncco = [
    {
      action: "talk",
      text: "Please wait while we connect your call.",
    },
    {
      action: "connect",
      eventUrl: [],
      from: process.env.FROM_NUMBER,
      endpoint: [
        {
          type: "phone",
          number: process.env.YOUR_SECOND_NUMBER,
        },
      ],
    },
  ];
  ctx.body = ncco;
});
The /event route captures and logs events related to the call. This endpoint is essential for debugging and monitoring your calls' lifecycle. Events can include call statuses such as answered, completed, or failed. By logging these events, we can gain insights into call flow and troubleshoot any issues
Finally, we apply our routes to the Koa application and start the server.
router.post("/event", async (ctx) => {
  console.log(ctx.request.body);
  ctx.status = 204; // No content to send back
});

app.use(router.routes()).use(router.allowedMethods());

app.listen(3000, () => console.log("Server running on port 3000"));
The application listens on port 3000 and logs a message to the console once the server runs. Here, the routes we defined become accessible, allowing the Vonage platform to interact with our server based on the URLs specified in the Vonage Dashboard for our application's answer and event webhooks.
With everything in place, start your server by running the command:
Test the call forwarding by dialing your Vonage virtual number. The call should be redirected to the number specified in your .env file.
Congratulations! You've now mastered the art of call forwarding with Vonage. If you have any questions or suggestions or want to share what you’ve built, join our Vonage Developer Slack Community or reach out on X, formerly known as Twitter.
Build an Escape Plan With the Vonage Voice API and Get a Ghost Call