Share:
Karl is a Developer Advocate for Vonage, focused on maintaining our Ruby server SDKs and improving the developer experience for our community. He loves learning, making stuff, sharing knowledge, and anything generally web-tech related.
Choose Your Own Adventure With Vonage AI Studio
Time to read: 11 minutes
Vonage AI Studio is a no-code/low-code platform for creating conversational flows across various communication channels. It uses a drag and drop interface to connect modules and actions into complex flows that can automate processes and connect to many different services. AI Studio's conversational flows are built on Vonage AI's proprietary natural language understanding (NLU) algorithms to enable conversational interactions where users can communicate in 'natural language' without being required to use certain keywords, choose from a list of options, or formulate their questions in a specific way.
AI Studio has been available for a while in Developer Preview. It recently became generally available for use, which is super exciting, and so I wanted to highlight this fact by writing about some of its capabilities. There were several approaches I could have taken to do this, such as building 'real-world' customer service type flow. For this article though, I wanted to try something a little bit different, and explore some of AI Studio's features in a fun and interesting way.
In my younger days, I loved reading 'choose your own adventure' books. These books, rather than following a linear narrative structure, allowed you to make decisions at certain points in the story, and then turn to the appropriate page in the book based on your decision. I thought it might be cool to build my own 'choose your own adventure' story with AI Studio.
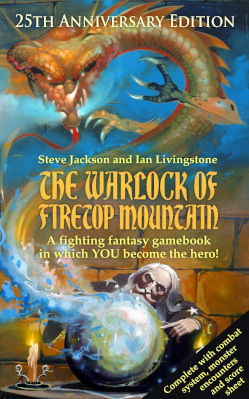 'The Warlock of Firetop Mountain' book cover
Within the AI Studio interface, each conversation flow is created as an 'agent'. There are different types of agents available depending on your use cases, such as Voice, SMS, WhatsApp, and HTTP.
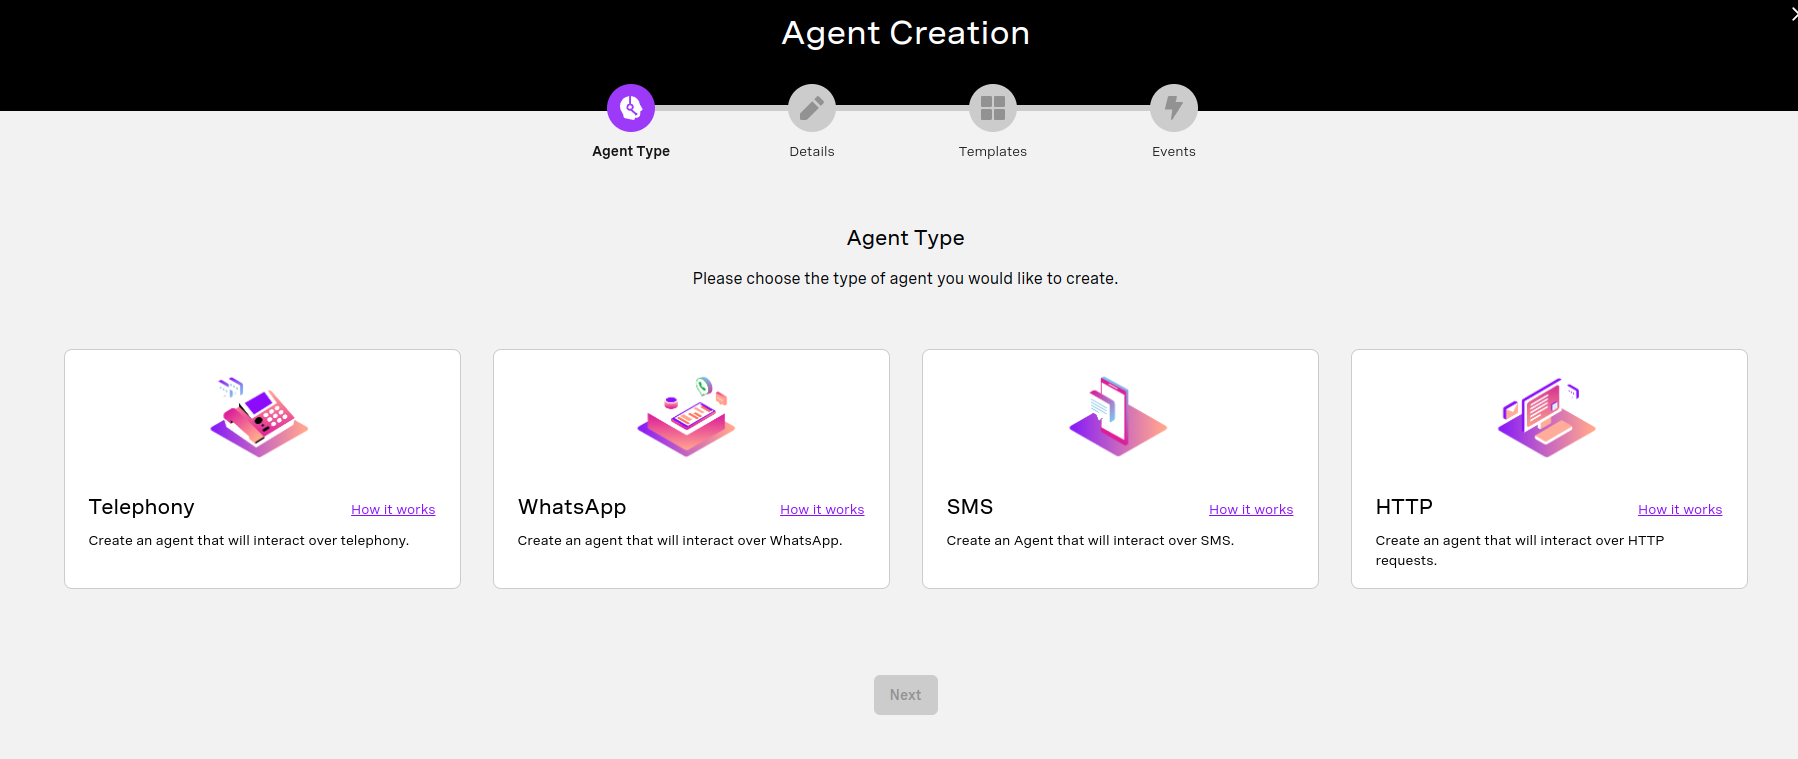 AI Studio screenshot: Agent Creation
For my 'choose your own adventure' story, I decided to create a Voice agent. AI Studio’s Voice agents combine Vonage’s proprietary automated speech recognition (ASR) with its NLU capabilities to provide naturalistic voice interactions.
When first creating an agent, there are several settings to set, such as the Agent name, Country, Language, and Timezone.
For Voice agents, you additionally need to choose the voice that your agent will use to 'speak' with, using AI Studio's text-to-speech capabilities. Though when creating the various elements in your conversational flow there is also the option to use audio recordings instead.
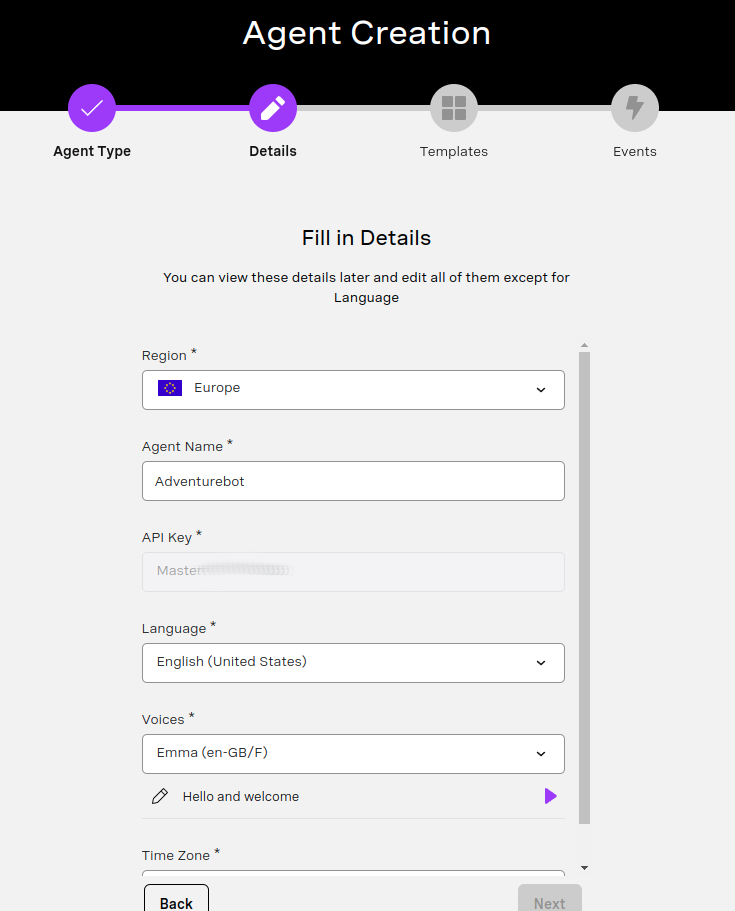 AI Studio screenshot: Agent Set up
Find out more about Agents.
Flows are combinations of different conversation nodes connected together on the AI Studio drag-and-drop Canvas.
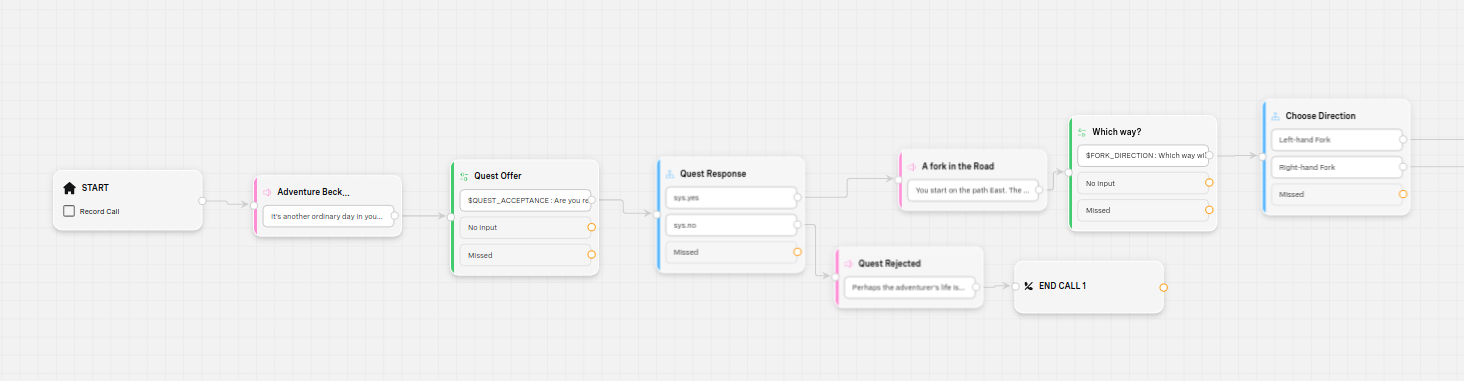 AI Studio screenshot: Intro flow
You can place all the nodes for your entire flow on the same canvas. For large, complex flows though, it can be more manageable to split them up into sub-flows. This is the approach I took for my story, for which there are four main parts. There's a Main Flow that sets the scene for the adventure. At the end of this flow, the story reaches a 'fork in the road' and the adventurer has to choose which path to take. This is where I made created a couple of sub-flows, with the fork in the road leading to either a River Flow or a Forest Flow. These two sub-flows then converge again for the final part of the adventure in the Castle Flow.
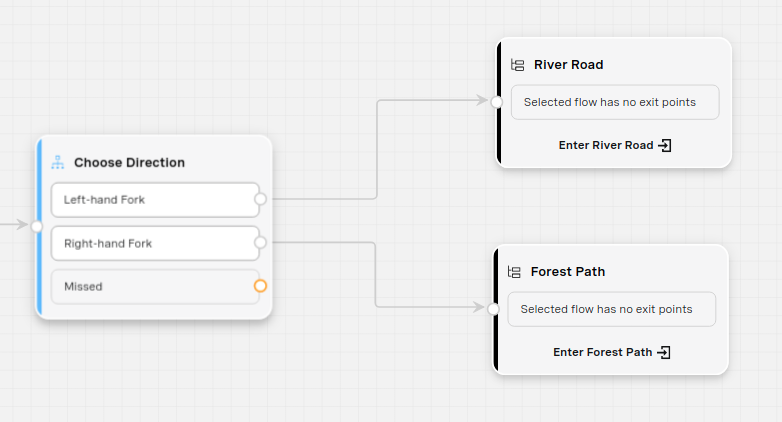 AI Studio screenshot: sub-flows
You create and manage sub-flows in the Flows tab of the AI Studio menu.
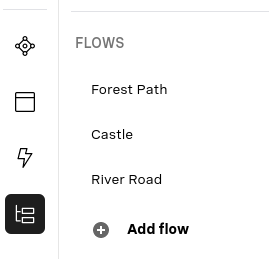 AI Studio screenshot: Flows tab of the menu
In a real-world scenario, you might create sub-flows for different business functions that a customer might want to access, such as sales, support, billing, and so on.
Find out more about Flows.
As mentioned earlier, Flows are combinations of different conversation Nodes connected together. There are different types of conversation nodes, which each fulfill a specific purpose within the conversational overall flow. Let's take a look at some of them.

All stories have a beginning, and all conversation flows in AI Studio need a Start Node. As well as acting as the starting point for your flow, Start Nodes allow you to set certain options for the overall flow. The exact options you can choose from here will depend on the type of flow you. For a Voice Call flow, you can choose to record the call, and also set up a webhook that responds to a call-disconnection event. Neither of these is necessary for my adventure story, so I used the node purely as a starting point.
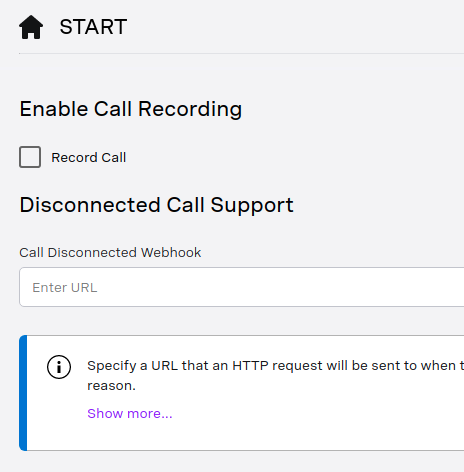 AI Studio screenshot: Start Node setup
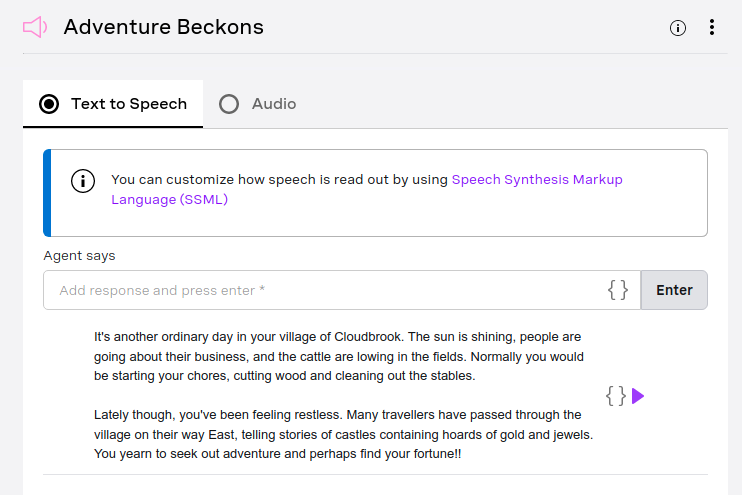
The purpose of the Speak Node is for providing information to the caller. When setting up the Node, you have the option of either inputting text, which will be read out in the voice you have set using AI Studio's text-to-speech capabilities, or recording actual speech.
Since my 'adventure flow' is primarily concerned with telling an exciting story, I relied on this node heavily at multiple points in the flow for scene setting and to describe various parts of the narrative.
 AI Studio screenshot: Speak Node
Find out more about the Speak node.
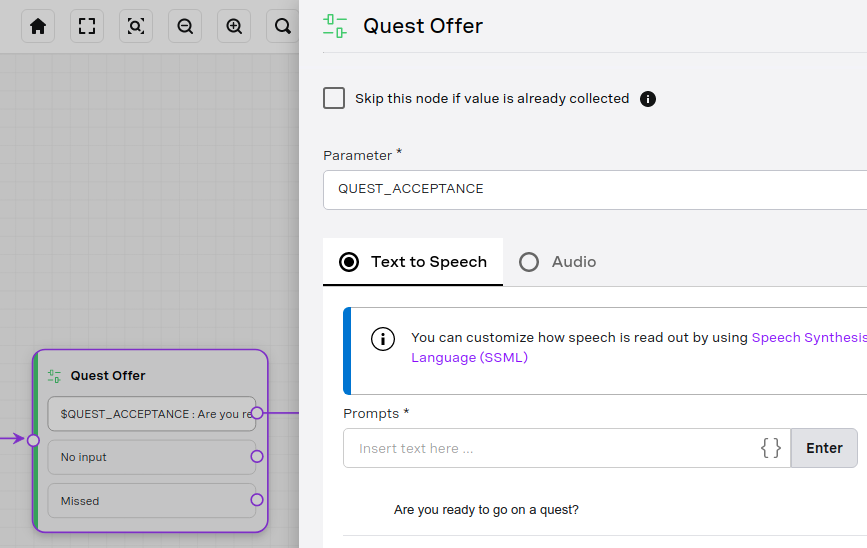
This is one of the most important types of nodes available for building a conversational flow. AI Studio Conversational flows are essentially interactions between two parties -- the user and the AI agent. In any interaction, both parties need to be able to contribute, and this is where the Collect Input node comes in.
This node essentially allows you to create a parameter and collect some input from the user to set as the value for that parameter. You set a parameter name and a prompt, which is essentially a question or statement to elicit a response from the user. You can also allow a set number of retries for answering the question and have the option of using a specific retry prompt.
In my story, I used this node number of places where the protagonist has to make certain decisions, such as whether to accept the quest, which fork in the road to take, whether or not to explore an abandoned building, and so on. There are many real-world scenarios where you might want or need to gather input from a user, from asking why they are contacting your business, to obtaining specific information like an order, account number, or some contact details.
 AI Studio screenshot: Collect Input Node
Find out more about the Collect Input node.
When you collect input as part of a conversation flow that represents some sort of user choice, it's generally because you want to direct the flow in a particular way in response to that choice. The way an AI Studio agent assesses and responds to user input is determined using Conditions nodes or Classification nodes, and it is where much of the AI Studio 'magic' happens. The user input is set as a parameter, which is then used in the context of Conditions and Classification nodes.
The Classification node is one way of determining what to do in response to some user input. In your flow, it will generally follow a Collect Input node. Classification nodes are awesome for natural conversation flow because rather than constraining user choices to a very specific set of values (think of IVRs with options like "Say '1' for Sales, '2' for Support...", etc), they allow the user to speak in a natural way, such as saying "support", "customer support", "the customer support department", or even "I need help". It's the job of the Classification node to then figure out what to do, based on that user input. The way it does this is by using intents.
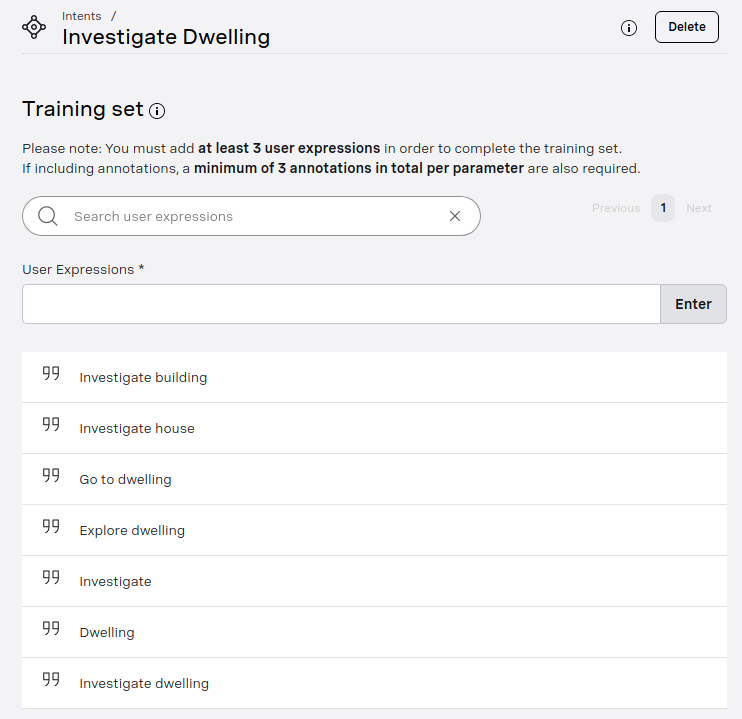
One way to think about intents is as a general expectation of what a user might say in response to a certain question or situation. Each intent encompasses a particular use case or action and is made up of multiple user expressions or things that a user might say to suggest this action or use case.
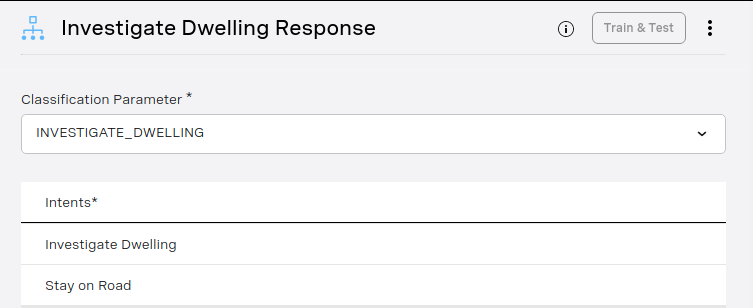
In my adventure story, I used Classification nodes and Intents quite heavily for the various decision points that occur during the narrative. For example, the adventurer has to decide whether to explore an abandoned building. Within the Classification node for this decision, I use a couple of intents: one to investigate the dwelling and one to stay on the road.
 AI Studio screenshot: Classification Node
This node contains the different intents that cover the potential user responses to the situation, and each intent contains various expressions that can suggest that intent.
 AI Studio screenshot: Intent setup
Find out more about Classification nodes and Intents.
Conditions nodes are similar to Classification nodes in terms of their purpose -- they determine a course of action based on user input -- but they use a different underlying mechanism to do that: Entities.
An entity is essentially a list of values and their synonyms. They are useful for situations where a user has to choose something from a group of specific things, but there are possibly different words for each thing. For example, if someone was providing their t-shirt size, they might say either 'big' or 'large' to mean the same thing, or similarly 'extra-large' and 'XL' are synonymous.
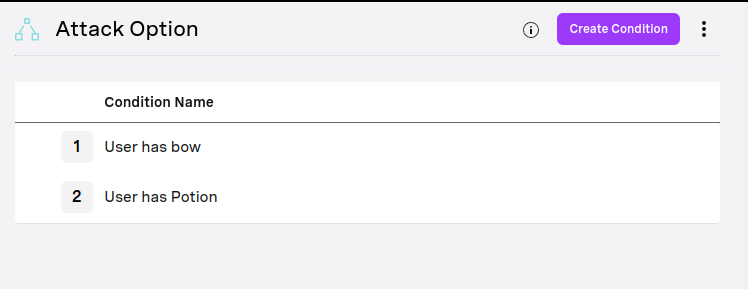
For my adventure flow, I mostly used Classification nodes and Intents rather than Conditions nodes and Entities, since the situations my adventurer finds themself in are more open-ended and better served by Intents. I did, however, use Conditions nodes in a couple of places where it made sense to use them. One of these was in determining which options were available to attack the dragon.
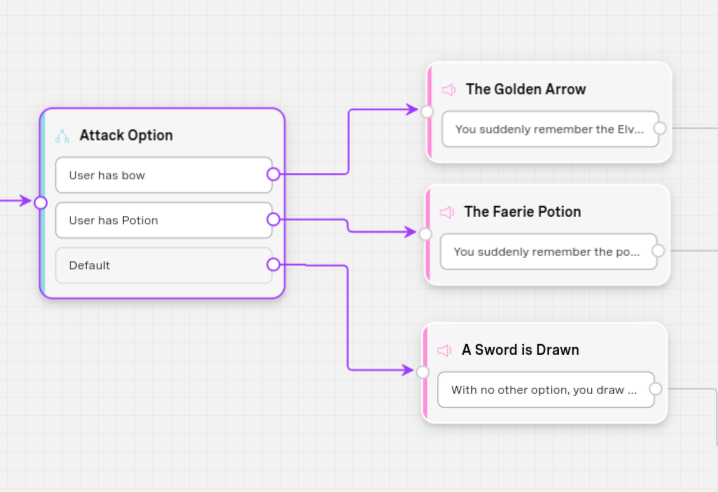 AI Studio screenshot: Conditions Node
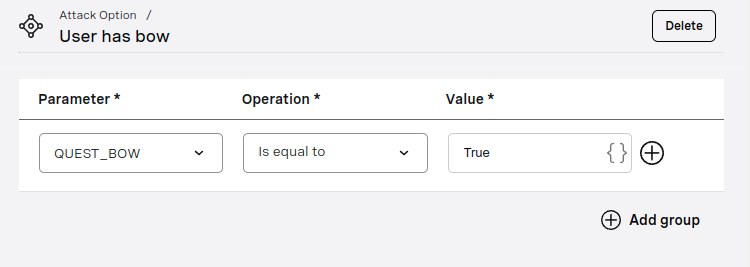
The logic for this node is based on conditions determined by the value of certain parameters for items that the user had picked up during the adventure.
 AI Studio screenshot: Conditions Node setup
 AI Studio screenshot: Entity
Find out more about Conditions nodes and Entities.
The Speak, Collect Input, Conditions, and Classification nodes are the 'main characters' of AI Studio conversational flows, and the majority of most flows will be built primarily using these four types of nodes. There are situations, however, where you might require some additional functionality that can't be provided by these nodes. Fortunately, AI Studio provides you with a strong supporting cast of more specialist nodes. I used a number of these in my flow, so let's check them out!
We've briefly encountered parameters already in the context of Collect Input nodes. In those nodes, the value of the parameter was set according to some user input. There are situations though, where you might want to set a specific value in a parameter instead.
In my adventure flow, there are situations where the protagonist can pick up items to help them on their quest. For these situations, I used the Set Parameter node to record the fact that the item had been picked up.
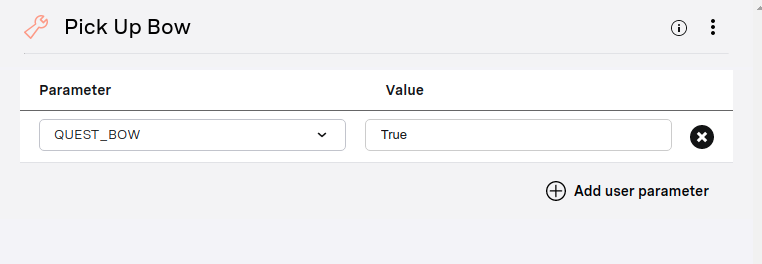 AI Studio screenshot: Set Parameter Node
Find out more about Set Parameter nodes.
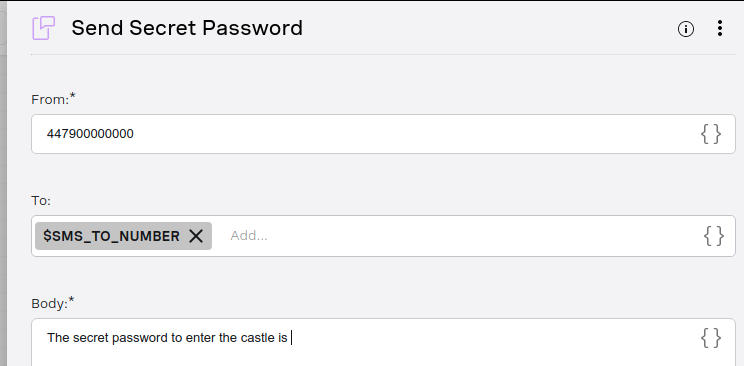
The SMS node is used for sending an SMS message to a user. You need to provide it with a number (including country code) and a message to send.
In a real-world context, it can be useful for doing things like sending out links to help pages or documentation in response to certain queries.
In my story, I used this node at a point where the adventurer needs a secret password to enter the castle. They get sent the password via SMS, which they then have to say in response to an input prompt to open the castle doors.
 AI Studio screenshot: Send SMS Node
There's also a Send Email node, which has a similar purpose.
Find out more about the Send SMS node and Send Email node.
AI Studio is mostly a no-code solution, allowing anyone to set up powerful and fully-featured conversation flows with zero programming knowledge, by using the intuitive drag-and-drop interface. There are certain situations, however, when you might want to set or manipulate a parameter value based on some specific, customised logic. This is where the Custom Code node comes in!
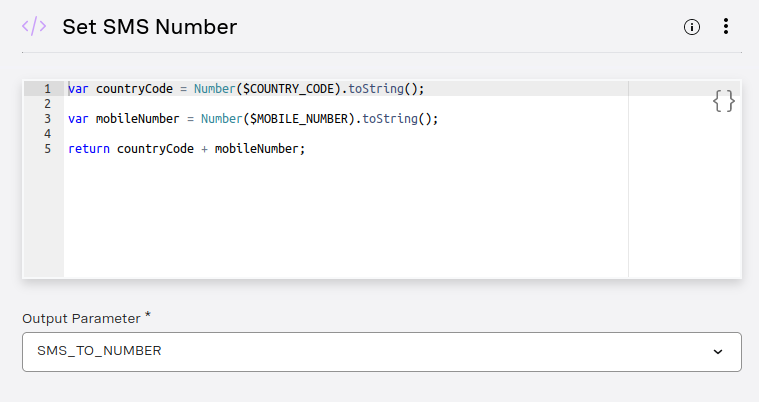
The Custom Code node lets you use JavaScript code to produce a particular value, which is then set as a value of an Output Parameter which can be used elsewhere in your flow.
I used the Custom Code node in a couple of places in my adventure story. One of these was where I wanted to remove any leading zeros (if present) from the mobile number and country code provided by the user, and then combine them into a single value and assign it to an output parameter, which I could then use in the Send SMS node to send the secret password.
 AI Studio screenshot: Custom Code Node
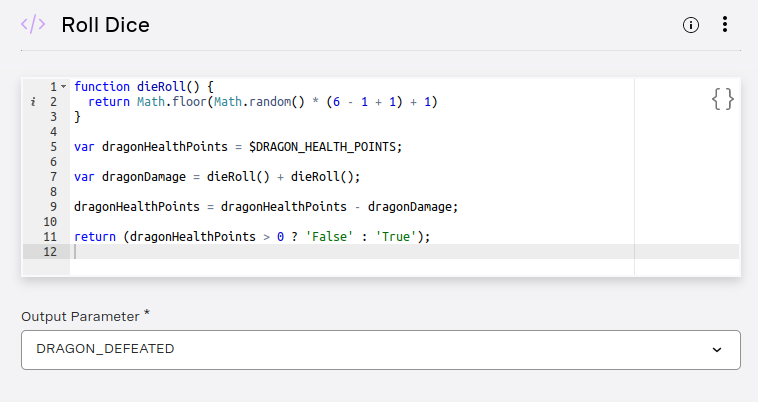
Another use of the Custom Code node in my flow was to mimic a dice roll during a battle with the dragon.
 AI Studio screenshot: Custom Code Node
There are many other potential use-cases for the Custom Code node.
Find out more about the Custom Code node.
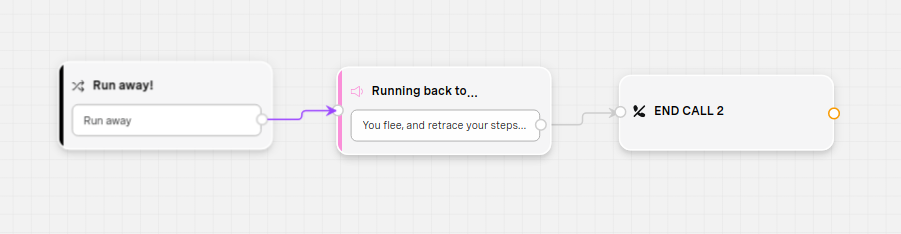
The Context Switch node does exactly what its name suggests -- it switches the context from the current one to a completely different one. A real-world use-case might be when a customer is going through an automated flow to track an order, or maybe update some details on their account, but at any point in these structured flows they can say "I want to speak to someone" and the flow can be interrupted and the customer's call instead routed through to an agent.
Like the Classification node, the Context Switch node works based on Intents.
In my flow, I imagined a situation where travelling through scary forests, exploring abandoned buildings, or fighting dragons might become a little overwhelming, so at any point, the adventurer can choose to run away back to the safety of the village!
 AI Studio screenshot: Context Switch Node
Find out more about the Context Switch node.
All stories, and calls, must come to an end at some point. The purpose of the End Call node is to terminate the call. For a Voice Call flow, you will need to place an End Call node at the end of each 'branch' of your flow.
Find out more about the End Call node.
Want to go on an adventure where you can wander through enchanted forests, encounter faeries, and fight dragons? Then try out my AI Studio voice flow by calling one of the following numbers:
UK: +44 (0)7418 371898
US: +1 (0)201 464 3585
AUS: +61 (0)485828854
Have fun and good luck on your adventure!
Perhaps you'd like to create your own conversational flow with Vonage AI Studio. It's super easy to get started! Log into the Vonage Dashboard and access the AI Studio.
There are also several nodes and integrations that I didn't use in my flow, so I haven't discussed them in this article. For more information on these and on using AI Studio in general, check out the AI Studio documentation.
We always welcome community involvement. Please feel free to join us on the Vonage Community Slack or send us a message on Twitter.