
Share:
Diana is a developer advocate at Vonage. She likes eating fresh oysters.
Build a Voice Chatbot with Voice API & OpenAI API in Java
Time to read: 3 minutes
The Vonage Voice API is a tool for developers to integrate voice-calling capabilities into their applications. It provides features such as making and receiving phone calls, call control (e.g., call forwarding, call recording), text-to-speech and speech-to-text capabilities, interactive voice response (IVR) systems, and more. With the Vonage Voice API, developers can create applications, such as call screening systems, virtual assistants, conference calling platforms, and customer support hotlines.
In this tutorial, we will be combining it with the OpenAI API (ChatGPT) to create a voice chatbot. We will go over how to deploy and customize the bot on Vonage Cloud Runtime which eliminates the need to manage servers and hosting on your own.
A Vonage developer account. If you don't have one, create an account.
A Vonage phone number. This can be purchased using the free credit through the Vonage developer dashboard under 'Numbers' (left-hand sidebar).
An OpenAI API key from the OpenAI API Dashboard. Store this key somewhere safe because you won't be able to see it again after creating it. You will need to purchase OpenAI credits to successfully receive an answer to your call.
After signing into your Vonage developer account, go to the Voice ChatGPT Bot (Java) CodeHub page. Under the 'Deploy Code' tab, click 'Deploy new instance'.
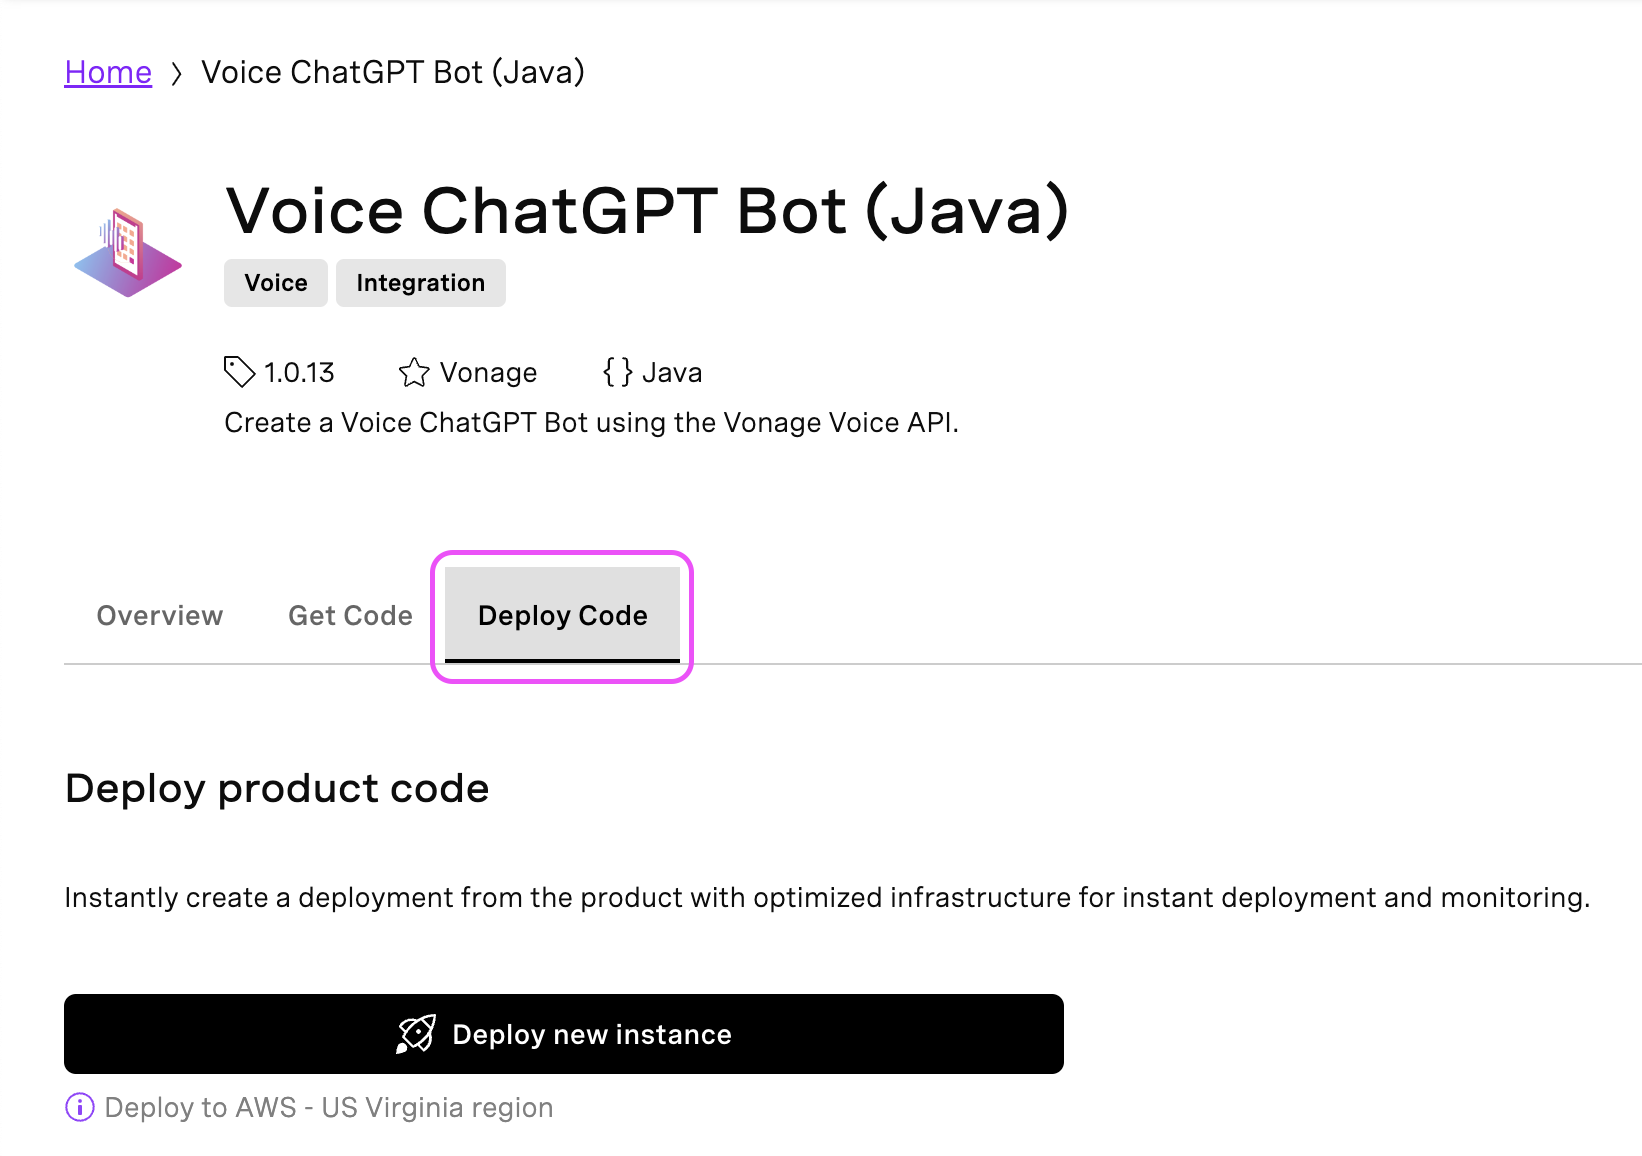 Deploy Code Tab
In the pop-up, give your instance a name, choose your AWS region, assign a Vonage phone number to this project, and enter your OpenAI API secret. Click 'Continue'. Your application will appear under 'Deployed Instances'. Click 'Launch' to start it.
 Create IstanceYou'll be directed to a new page where you are prompted to select a language. Once you've chosen your preferred language, click 'Set language'.
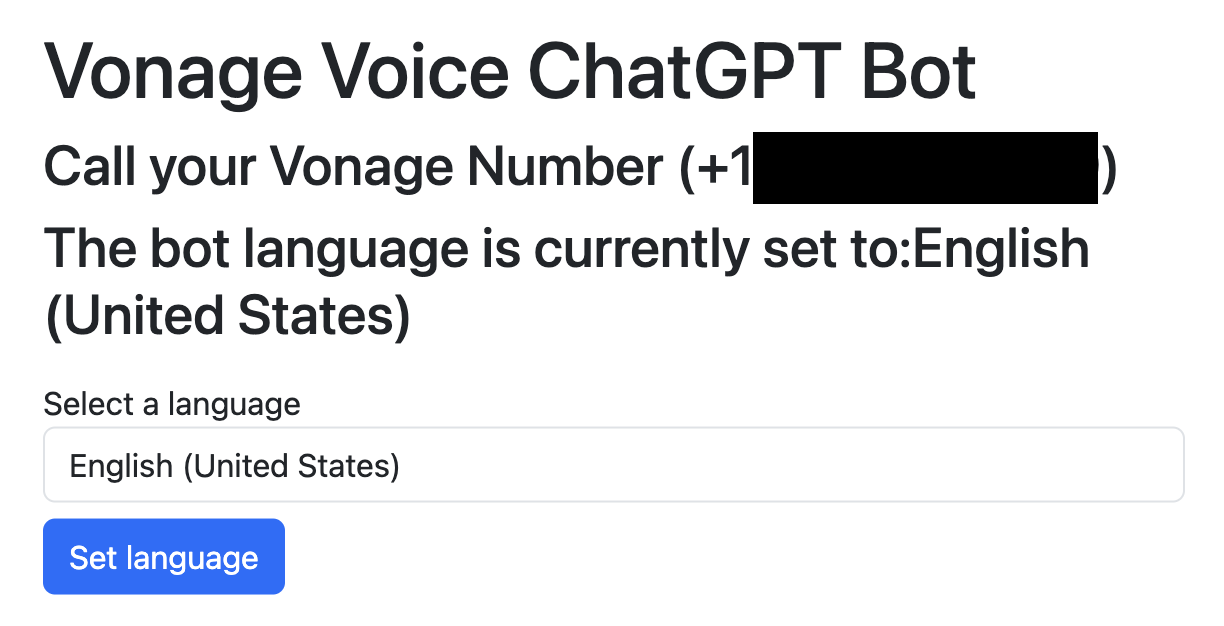 Set Language
Go to the 'Get Code' tab and click 'Create a new development environment'.
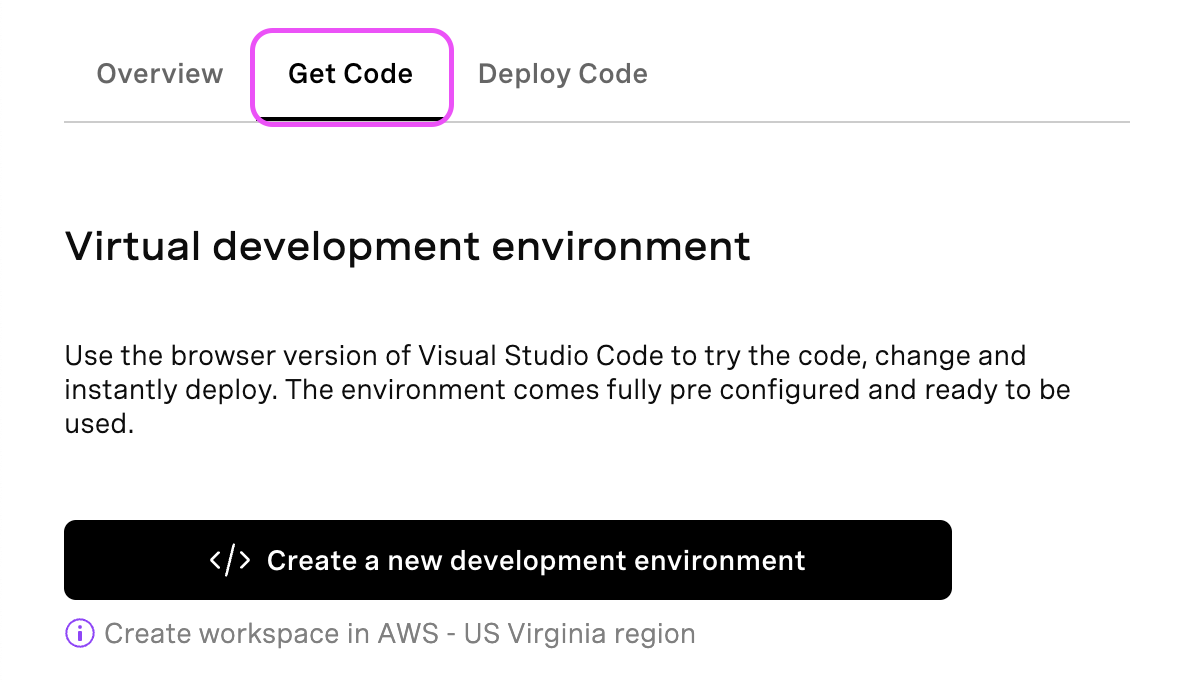 Get Code
In the pop-up, give your instance a name, choose your AWS region, assign the same Vonage phone number as earlier to this project, and re-enter your OpenAI API secret. Click 'Continue'. You'll then be directed to your workspace:
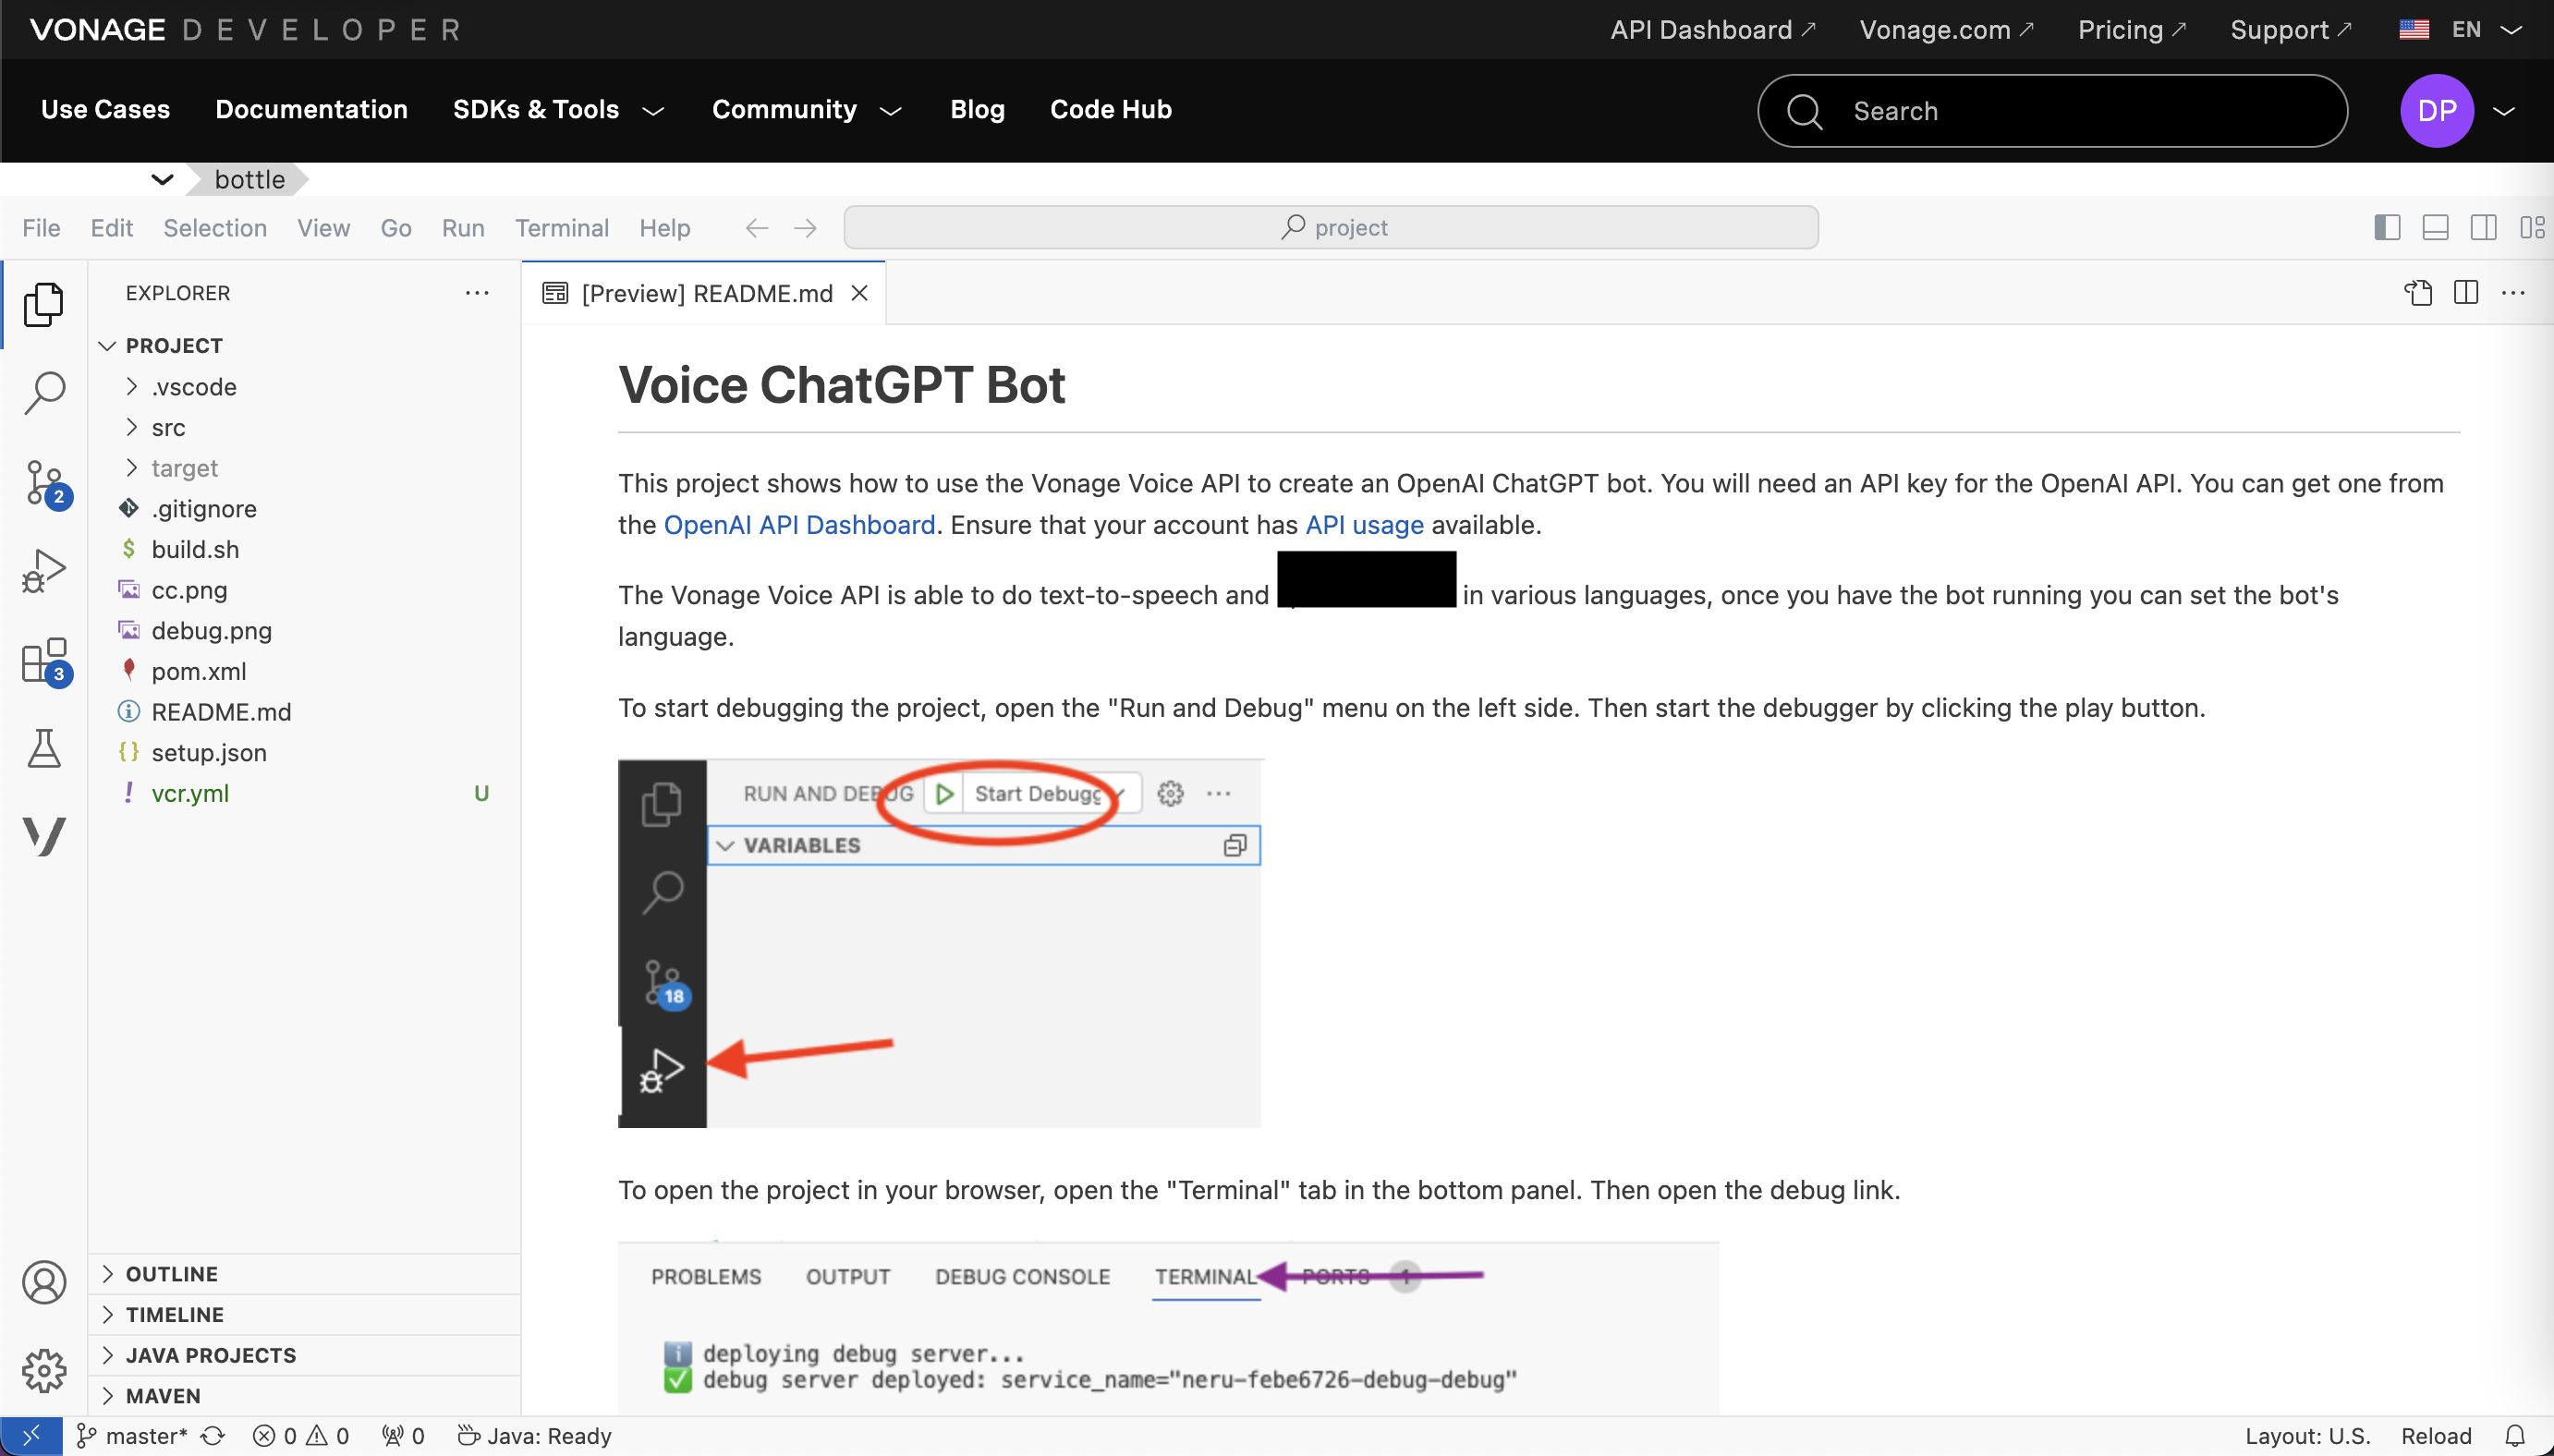 Cloud Runtime Once the workspace is open, you'll see that the sample app has already been deployed and is ready to go! Call the Vonage phone number, ask a question, and you should receive an answer.
The sample application you see in the Vonage Cloud Runtime workspace already has a working code you can include in your own application. This section will walk you through the flow of the application when a call is triggered, explaining how each Java file works within that process:
Call Arrives (
CallbackController.java): The call arrives at the Vonage phone number assigned to the application.CallbackController.javais the main entry point for the call that handles all incoming events.Greeting and Speech Recognition (
VoiceCallService.java):VoiceCallService.javaplays a greeting message using Vonage's Text-to-Speech (TTS) functionality. It then listens for user speech using Vonage's speech recognition feature. This is where the user would ask their question.Error Handling (
VoiceCallService.java): If speech recognition fails,VoiceCallService.javaplays an error message and repeats step 2.OpenAI Integration (
VoiceCallService.java): If the speech recognition succeeds, the user's question gets extracted from the recognized text.VoiceCallService.javainteracts withOpenAI.javato send the question to OpenAI's ChatGPT service using your API key stored inVCRConfig.java.Response Generation (External - OpenAI): OpenAI's ChatGPT generates a response to the user's question.
Response Delivery (
VoiceCallService.java):VoiceCallService.javareceives the response from OpenAI. It plays hold music while converting the text response to speech using Vonage's TTS functionality (likely configured in LanguageModel.java). Finally, the converted speech is played back to the user.
Additional Files:
Vonage.java: Provides access to Vonage APIs using credentials stored inVCRConfig.java.VCRConfig.java: Stores configuration details for Vonage and other services that are managed by Spring Boot.LanguageReader.java: Reads language configuration from a JSON file for TTS options and messages.ChatGptApplication.java: The main application class that runs the entire process as a Spring Boot application.
You've successfully created a Voice ChatGPT Bot using the Vonage Voice API and the OpenAI API on Vonage Cloud Runtime! You can level up the bot even further by adding your own features. Our developer community is growing on Slack, and we’d love for you to be a part of it. If you end up trying this tutorial out, I’d love to hear your thoughts. Feel free to tag me on X, formerly known as Twitter, and follow my team on there, too.