シェア:
エンリコはVonageの元チームメンバーです。ソリューション・エンジニアとして、技術的な専門知識で営業チームをサポートした。 クラウド、スタートアップ、新技術に情熱を注ぐ。イタリアのWebRTCスタートアップの共同設立者。仕事以外では、旅行とできるだけ多くの奇妙な食べ物を味わうのが好き。
ビデオ+AI:QRコードと電子透かしによるビデオストリームの強化
所要時間:1 分
この記事は2025年5月に更新されました。
今日のデジタル時代において、ビデオストリームを強化することは、ブランディング、広告、または押し付けがましくない方法での追加情報の提供など、ますます一般的になってきています。このブログ記事では、Vonage Video API を使用してビデオストリームに QR コードと透かしを追加する方法を説明します。
これを実現するために、Media Processor APIの機能を活用する。この革新的な API は、ストリームにトランスフォーマーを統合することで、オーディオ・ストリームとビデオ・ストリームの両方をパーソナライズする機能を提供する。このAPIとその潜在的な用途の詳細については、このブログ記事の後半で説明する。
TL;DR:このアプリのコードはすべて GitHub
Nodeとnpmをインストールする
をコピーします。 GitHub リポジトリ
走る
npm install走る
npm run serve
Vonage Media Processor ライブラリは npm 経由で入手可能で、Video や Audio トラックを変換するための Insertable Streams API の使用を簡素化する強力なツールである。このブログ記事では Video メソッドのみを使用する。
ライブラリーには2つの主要なクラスがある:
MediaProcessor:このクラスはトランスフォーマーを管理する。
setTransformers()メソッドが付属しています。MediaProcessorConnector:このクラスはコンストラクタに MediaProcessor オブジェクトを必要とし、入出力トラックの処理を担当します。トラックの実装はVonage Video JS Clientによって行われますが、MediaProcessorConnectorのインスタンスを提供するだけです。関連ドキュメントは https://developer.vonage.com/en/video/guides/media-processor/web
それでは、QRコードと透かし機能用のビデオプロセッサーの作成に入りましょう。
QRコードは、実世界のシナリオで数多くの用途が見つかっている。QRコードは、URLやテキストなどのデータを保持することができ、スマートフォンのカメラを使って読み取ることができる。ビデオストリームでは、ユーザーを特定のURLにリダイレクトしたり、ユーザー固有のテキストを表示するなど、さまざまな理由でQRコードを使用することができる。
視聴者と有益なリンクを共有するウェビナーを開催することを想像してみてください。ライブストリームにQRコードを組み込むことで、視聴者をこれらのリンクに簡単に誘導することができ、関連コンテンツに簡単にリアルタイムでアクセスできるようになります。
カスタムのトランスフォーマーを使ってQRコードを生成しています。QRコードを生成するために、私たちは QrCode.QRコードのURLはユーザー入力として受け取られます。私たちは qrCodeディレクトリから transformersディレクトリにあるトランスフォーマを使用してQRコードを作成し、Videoストリーム上に配置します。QRコードの位置とサイズはカスタマイズできます。
// file add-qr-code.js

 _createQrCodeWithBorder() {
    // --- Step 1: Generate the base QR code using the library ---


    // Create a temporary container DIV (required by qrcode.js)
    // This div is never added to the document.
    let tempQrContainer = document.createElement('div');


    // Generate the QR code *without* internal padding/border from the lib
    new QRCode(tempQrContainer, {
      text: this.text,
      width: this.qrWidth, // Use the data area width
      height: this.qrHeight, // Use the data area height
      colorDark: this.colorDark,
      colorLight: this.colorLight, // Background of QR code itself
      correctLevel: QRCode.CorrectLevel.H, // Or choose appropriate level
    });


    // qrcode.js generates either a <canvas> or an <img> inside the div.
    // Prefer canvas if available.
    const originalQrCanvas = tempQrContainer.querySelector('canvas');
    const originalQrImg = tempQrContainer.querySelector('img');


    if (!originalQrCanvas && !originalQrImg) {
      throw new Error('QRCode library did not generate canvas or img element.');
    }


    // --- Step 2: Create the final canvas with the border ---


    const finalCanvas = new OffscreenCanvas(this.finalWidth, this.finalHeight);
    const finalCtx = finalCanvas.getContext('2d');


    if (!finalCtx) {
      throw new Error('Unable to create final QR CanvasRenderingContext2D');
    }


    // --- Step 3: Draw the border (background) and the QR code ---


    // Fill the entire final canvas with the border color (usually white)
    finalCtx.fillStyle = this.colorLight; // Use colorLight for the border
    finalCtx.fillRect(0, 0, this.finalWidth, this.finalHeight);


    // Draw the generated QR code (canvas or img) onto the center of the final canvas
    const drawX = this.borderSize;
    const drawY = this.borderSize;


    if (originalQrCanvas) {
      finalCtx.drawImage(
        originalQrCanvas,
        drawX,
        drawY,
        this.qrWidth,
        this.qrHeight
      );
    } else {
      // If it generated an image, draw the image
      finalCtx.drawImage(
        originalQrImg,
        drawX,
        drawY,
        this.qrWidth,
        this.qrHeight
      );
    }


    // No need for the temporary div anymore
    tempQrContainer = null; // Let garbage collection handle it


    console.log('QR Code with border generated successfully.');
    return finalCanvas; // Return the canvas with the border
  }


  async transform(frame, controller) {
    // Ensure QR code generation was successful
    if (!this.qrCanvasWithBorder_) {
      // If QR code failed, just pass the frame through unmodified
      controller.enqueue(frame);
      return;
    }


    // Resize internal canvas only if needed (slight optimization)
    if (
      this.canvas_.width !== frame.displayWidth ||
      this.canvas_.height !== frame.displayHeight
    ) {
      this.canvas_.width = frame.displayWidth;
      this.canvas_.height = frame.displayHeight;
    }
    const timestamp = frame.timestamp;


    // Draw the incoming video frame
    this.ctx_.drawImage(frame, 0, 0);
    frame.close(); // Close the original frame


    // Draw the pre-generated QR code (with border) onto the video frame
    // Use the finalWidth and finalHeight for drawing
    this.ctx_.drawImage(
      this.qrCanvasWithBorder_,
      this.x, // Position defined in constructor
      this.y, // Position defined in constructor
      this.finalWidth, // Draw with full border width
      this.finalHeight // Draw with full border height
    );


    // Enqueue the modified frame
    controller.enqueue(
      new VideoFrame(this.canvas_, { timestamp, alpha: 'discard' })
    );
  }
ユーザーインターフェースから、QRコードのURL、サイズ、ビデオストリーム内のQRコードの位置を設定できます。
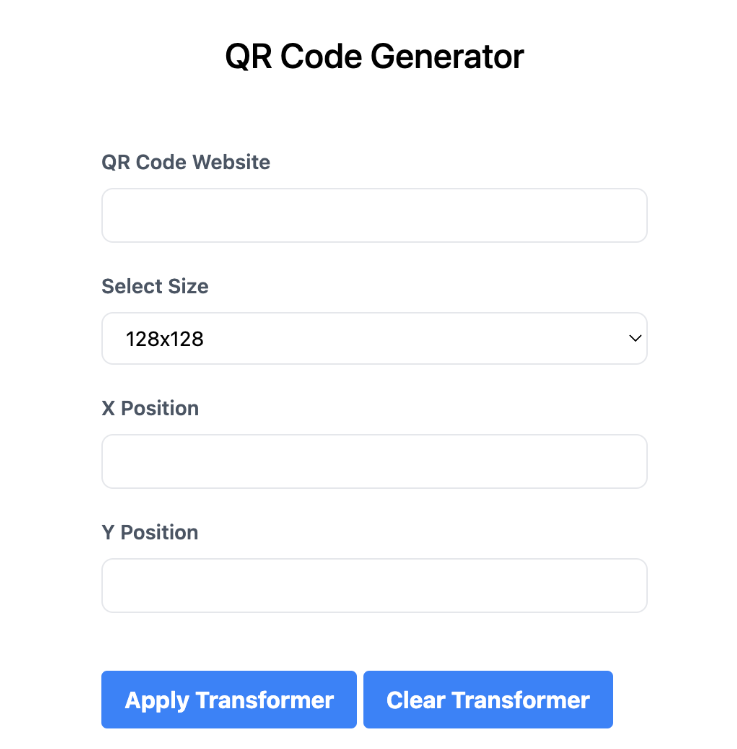 QR code transformer
電子透かしは、ブランディングやデジタルコンテンツの保護によく使われる。ビデオストリーミングの文脈では、ウォーターマークは複数の目的を果たすことができます。ブランディングのための企業ロゴであったり、コンテンツ保護のための著作権シンボルであったり、あるいはその他の画像であったりします。
透かしを入れるために、ユーザーから画像ファイルを入力として受け付ける。選択された画像は、ビデオストリームのミラーリング効果を打ち消すために水平方向に反転される。このとき watermarkディレクトリの transformersディレクトリのトランスフォーマがビデオストリーム上に透かしを配置します。あなたは透かしの位置をカスタマイズすることができます。
_computePosition(frame) {
    if (this._position === "top-left") {
      return { x: frame.displayWidth - 150, y: 0 };
    } else if (this._position === "top-right") {
      return { x: 0, y: 0 };
    } else if (this._position === "bottom-left") {
      return { x: frame.displayWidth - 150, y: frame.displayHeight - 150 };
    } else if (this._position === "bottom-right") {
      return { x: 0, y: frame.displayHeight - 150 };
    }
    return { x: 0, y: 0 };
  }

  async transform(frame, controller) {
    this.canvas_.width = frame.displayWidth;
    this.canvas_.height = frame.displayHeight;
    const timestamp = frame.timestamp;

    this.ctx_.drawImage(frame, 0, 0, frame.displayWidth, frame.displayHeight);

    const { x, y } = this._computePosition(frame);
    this.ctx_.drawImage(this._image, x, y, 100, 80);
    frame.close();
    controller.enqueue(
      new VideoFrame(this.canvas_, { timestamp, alpha: "discard" })
    );
}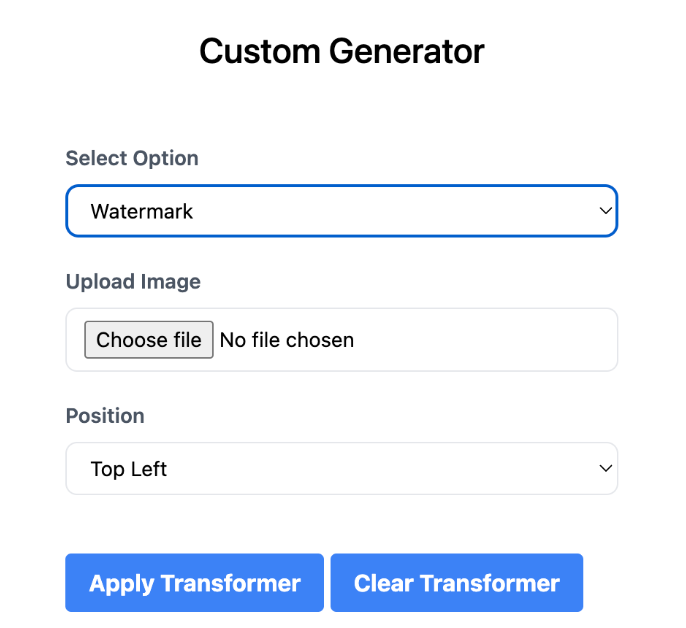 Watermark transformer
メインページでは、まず必要なパッケージをインポートし、Video stream publisher を初期化します。それぞれの機能 (QR コードと透かし) に対応した 2 つのフォームがあります。ユーザーの選択に応じて適切なフォームが表示されます。
この applyQrCode関数では、QRコードのユーザー入力(URL、サイズ、位置)を取得し、QRコード変換器を設定し、ビデオストリームに適用します。
同様に applyWatermark関数では、アップロードされた画像を取得し、必要に応じて調整(水平方向に反転)し、透かし変換を設定し、ビデオストリームに適用します。
Apply」ボタンは、選択したオプションに基づいて適切な関数を呼び出し、「Clear」ボタンは、ビデオストリームからすべての変換を削除するために使用することができます。
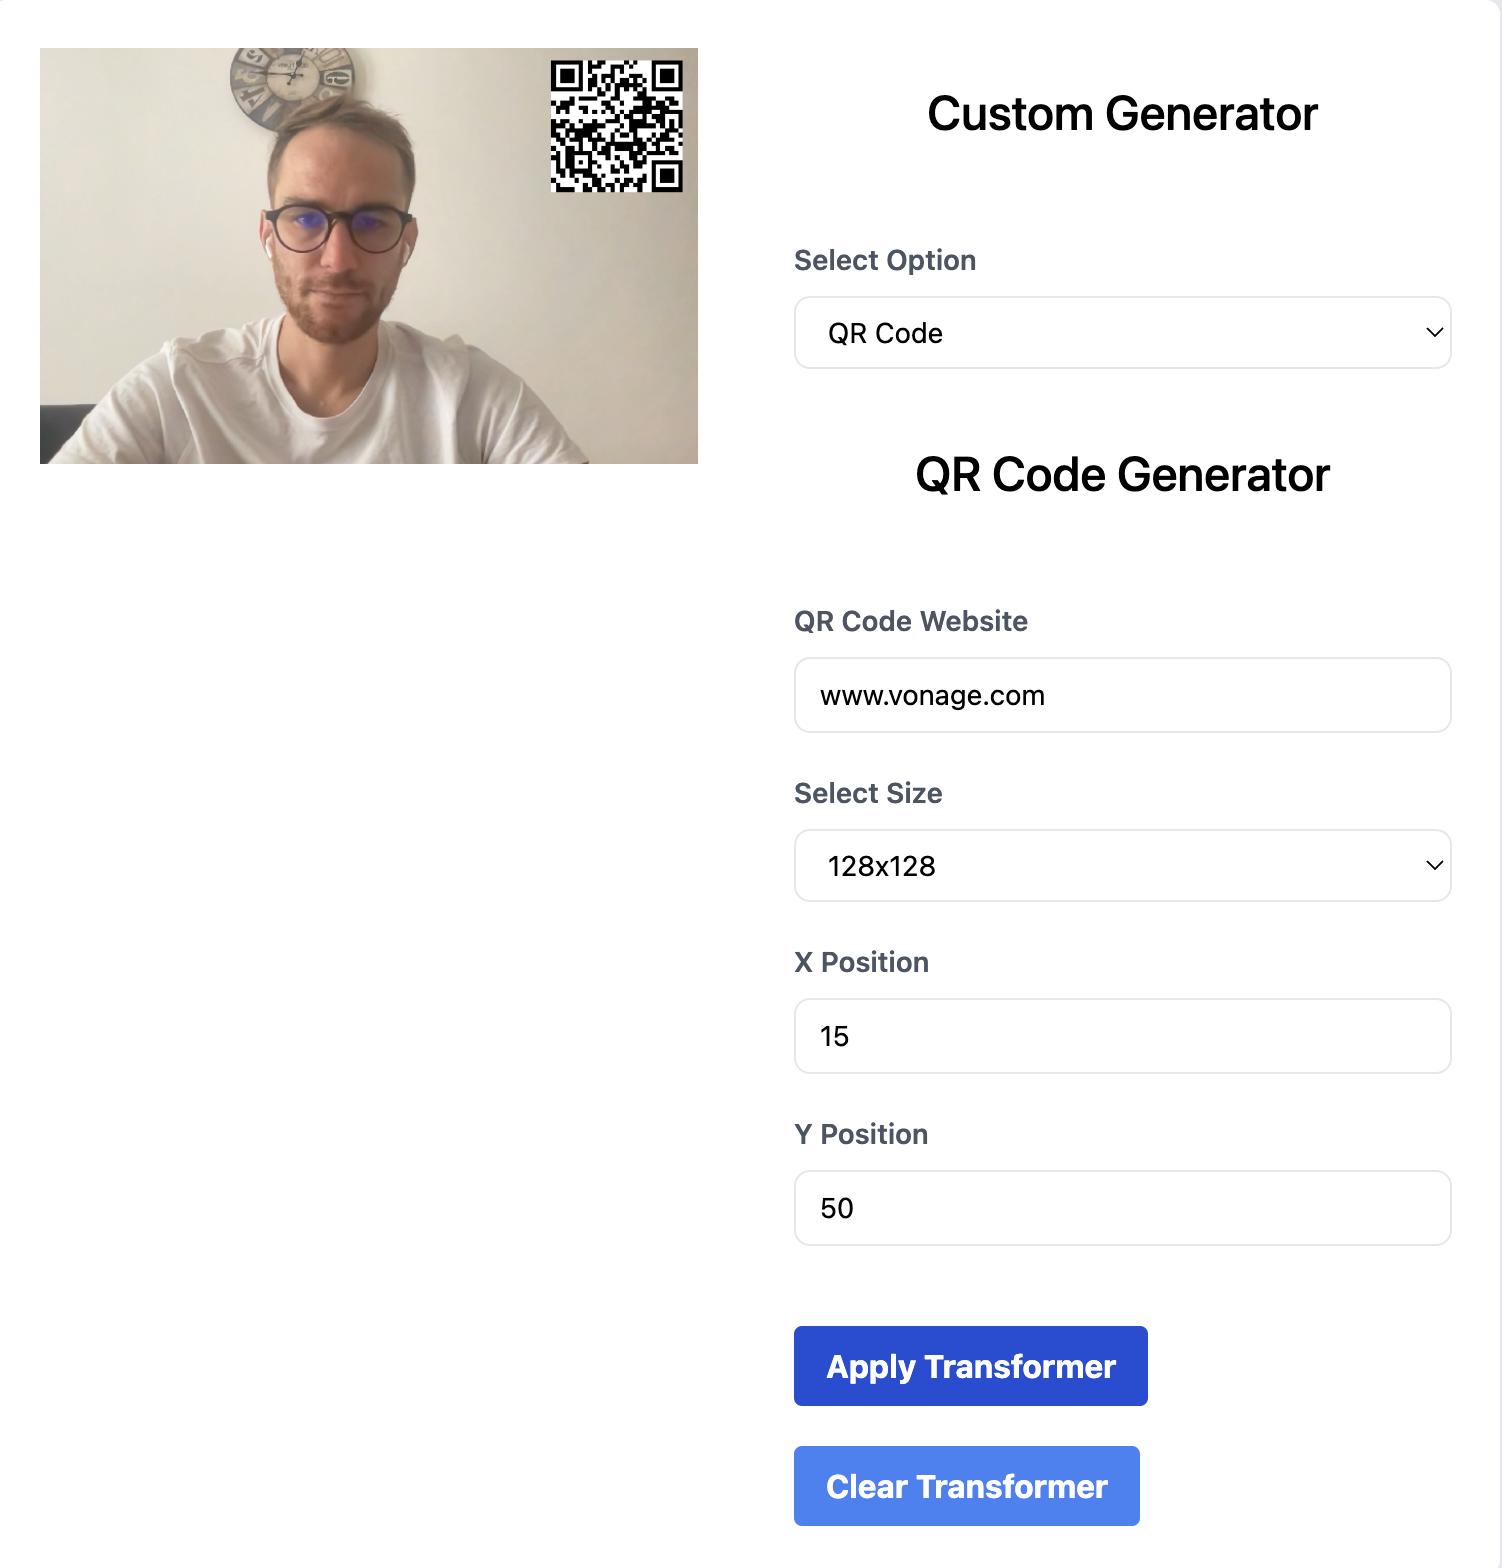 QR code generator example
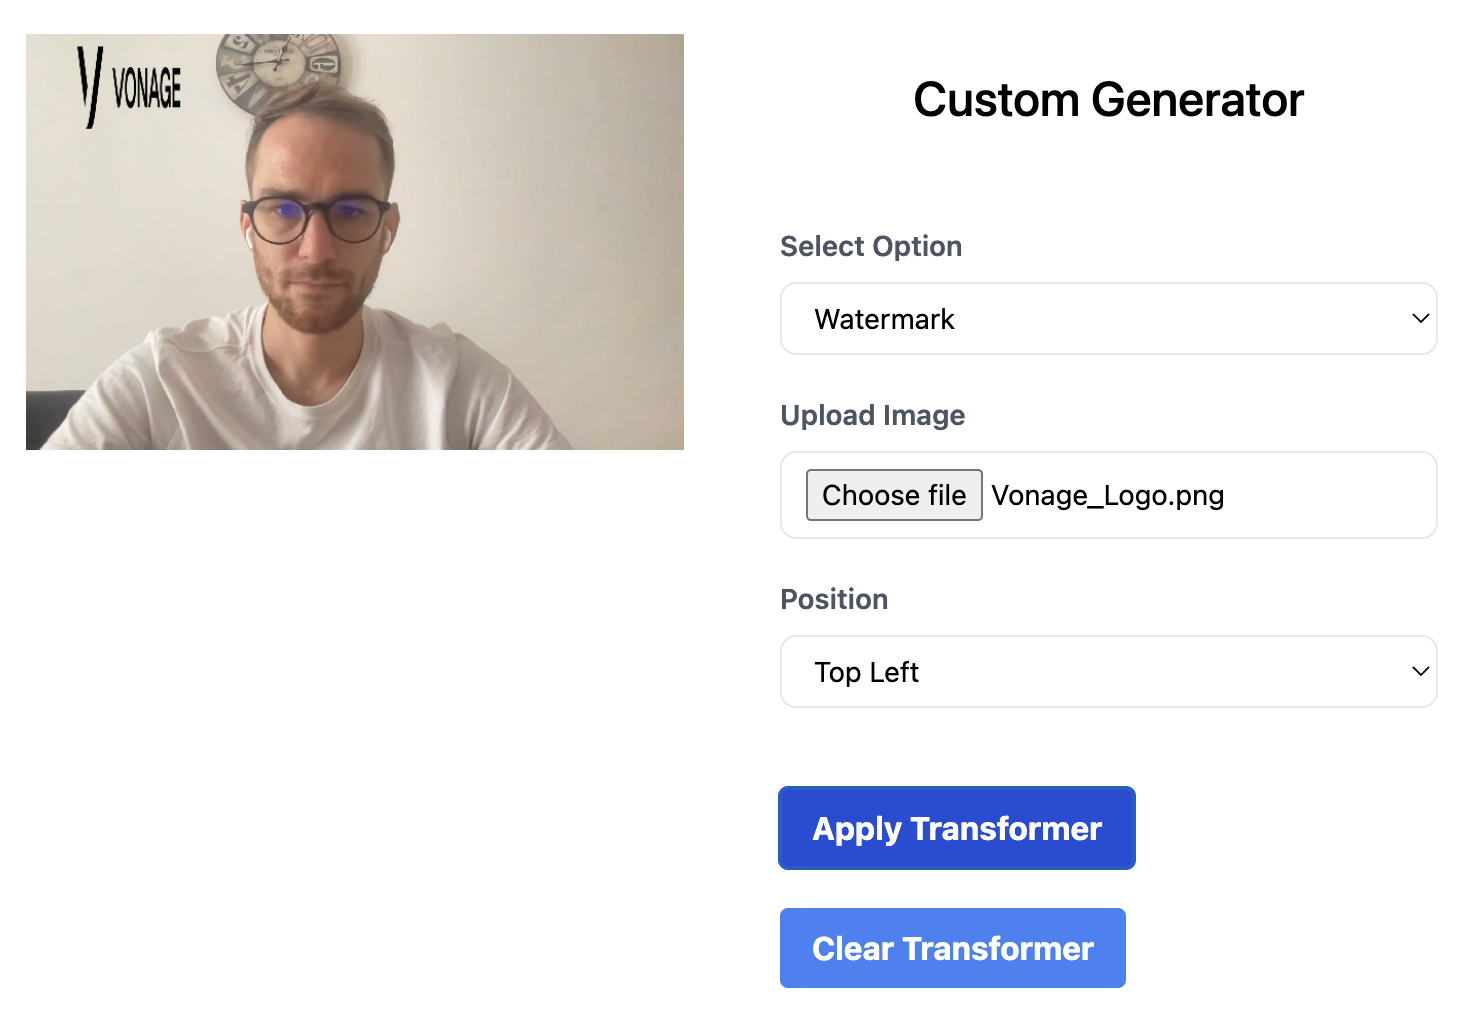 Watermark generator example
QRコードや電子透かしを追加してビデオストリームを強化することは、インタラクティブ性を高め、価値を付加し、コンテンツを保護する強力な方法です。Vonage Video API と JavaScript を少し使えば、ビデオストリームにこれらの機能を追加するのはとても簡単です。このブログ記事がお役に立てば幸いです。あなたのプロジェクトを強化するために、Video ストリームの変換を使用するさまざまな方法を試してみてください。
以下の GitHub コード・レポはこちら.ご質問やフィードバックがありましたら Vonage Developer Slackに参加するか Xにメッセージをお送りください!